Amigurumi Reno// Decorando el Árbol de Navidad Parte 7
Greetings dear community, happy #NeedleWorkMonday I hope you are having a wonderful time in these days before Christmas, here I come to share with you the seventh group of figures to decorate the Christmas tree, these are reindeer, although Rudolph the reindeer with a nose red is only one, as always I made three 😁 so I hope you like the tutorial and the result.
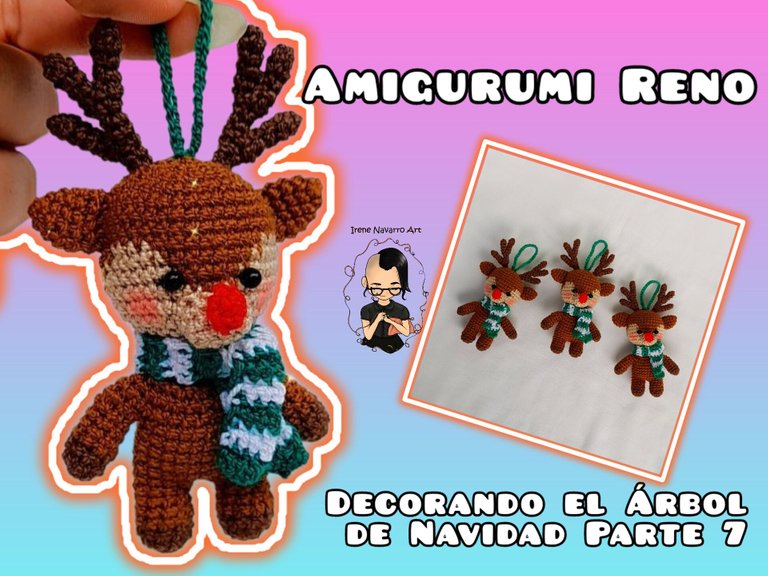

Materiales / Materials
- Hilo acrílico para crochet: marrón oscuro y marrón claro, beige, rojo, blanco y verde.
- Ganchillo # 4 (1.25mm)
- Relleno
- 2 perlas negras de plástico para los ojos
- Aguja de ojal grande
- Aguja e hilo negro de coser.
- Acrylic yarn for crochet: dark brown and light brown, beige, red, white and green.
- Hook # 4 (1.25mm)
- filler
- 2 black plastic beads for the eyes
- Large buttonhole needle
- Needle and black sewing thread.

Proceso / Process
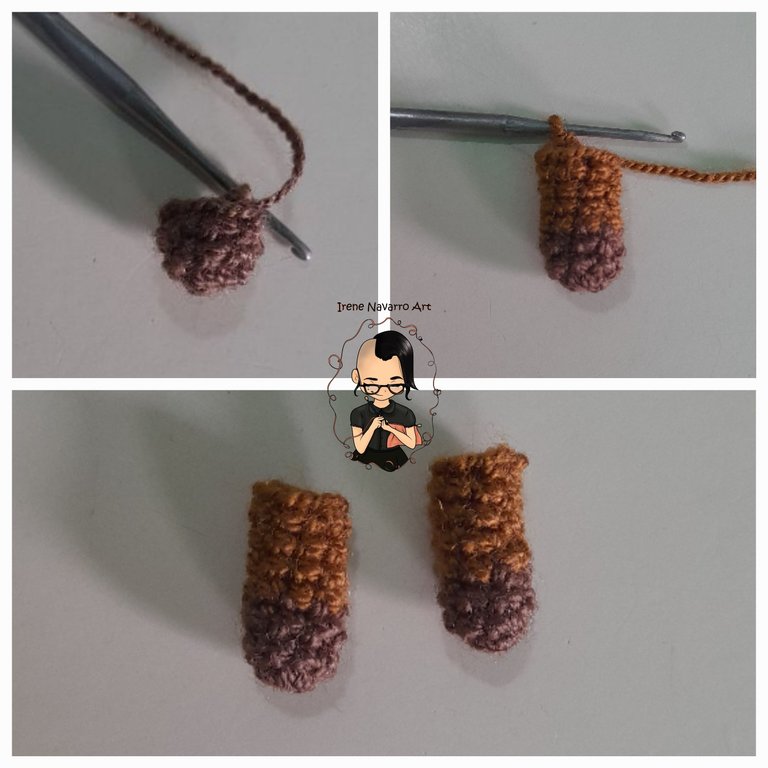
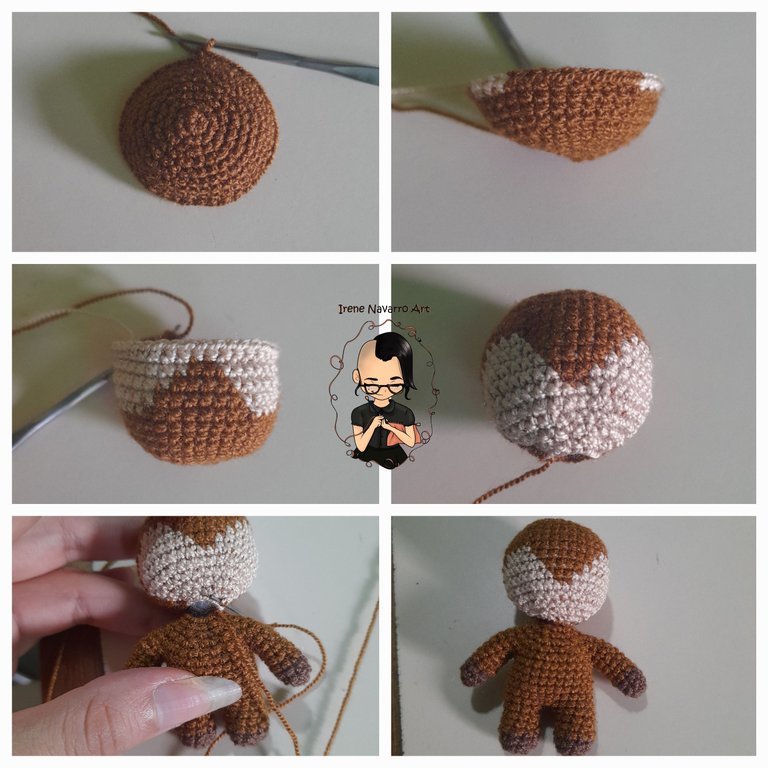
Para los brazos con hilo marrón oscuro hacer 8 puntos bajos en un anillo.
Hileras 1 y 2: 8 puntos bajos.
Hileras 3-6: Con hilo marrón claro 8 puntos bajos.
Hacer dos brazos iguales.
Rellenar.
For the arms with dark brown thread make 8 single crochets in a ring.
Rows 1 and 2: 8 single crochets.
Rows 3-6: With light brown thread 8 single crochets.
Make two equal arms.
Fill out.

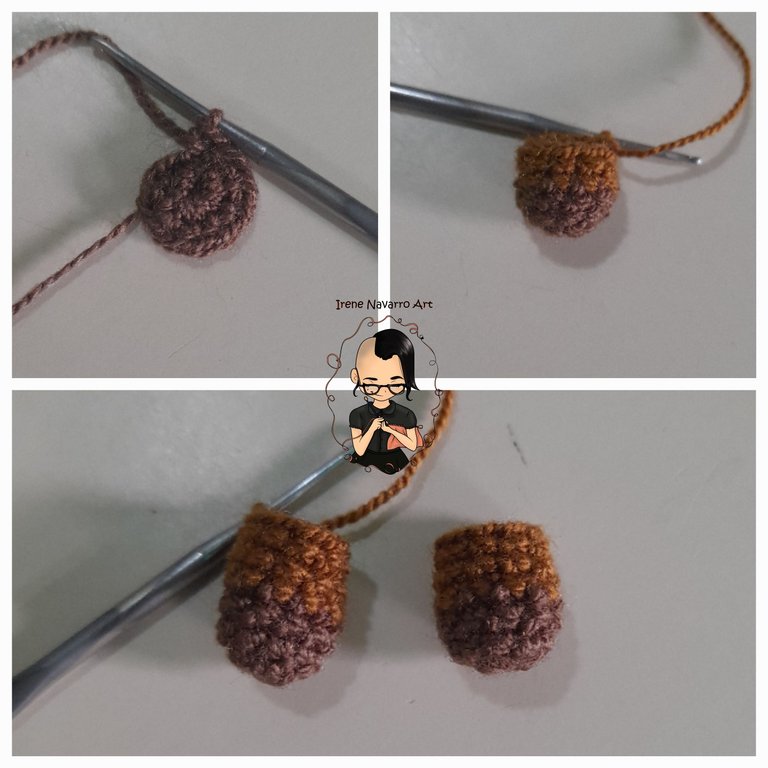
Para las piernas con hilo marrón oscuro hacer 10 puntos bajos en un anillo.
Hileras 1 y 2: 10 puntos bajos.
Hileras 3-5 Con hilo marrón claro hacer 10 puntos bajos.
Hacer dos piernas iguales.
Rellenar.
For the legs with dark brown yarn make 10 single crochets in a ring.
Rows 1 and 2: 10 single crochet.
Rows 3-5 With light brown yarn make 10 single crochets.
Make two equal legs.
Fill out.

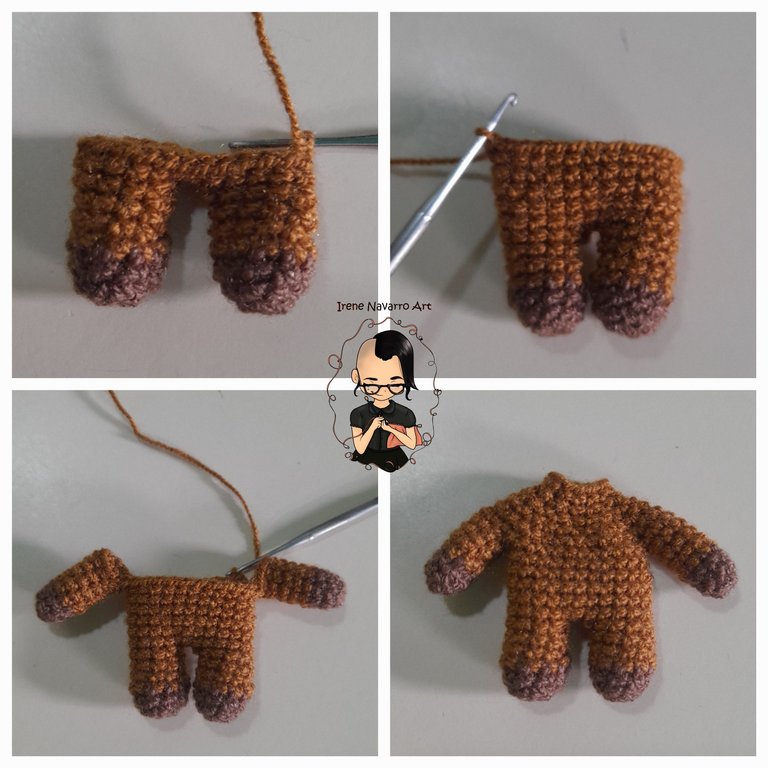
Para el cuerpo se deben unir las piernas.
Hilera 1: 5 puntos bajos en una pierna, 2 cadenas, 10 puntos bajos en la otra pierna, 2 puntos bajos en las cadenas, 5 puntos bajos en la primera pierna. Total de puntadas: 24
Hileras 2-6: 24 puntos bajos.
Hilera 7: 8 puntos bajos en un brazo, 12 puntos bajos en el cuerpo, 8 puntos bajos en el otro brazo, 12 puntos bajos en el cuerpo. Total de puntadas: 40
Hilera 8: (1 puntos bajo, 1 disminución, 1 punto bajo) X 10. Total de puntadas: 30
Hilera 9: (3 puntos bajos, 1 disminución) X 6. Total de puntadas: 24
Hilera 10: (1 punto bajo, 1 disminución, 1 punto bajo) X 6. Total de puntadas: 18
Hilera 11: (1 punto bajo, 1 disminución) X 6. Total de puntadas: 12
For the body, the legs must be joined.
Row 1: 5 single crochets on one leg, chain 2, 10 single crochets on the other leg, 2 single crochets on the chains, 5 single crochets on the first leg. Total stitches: 24
Rows 2-6: 24 single crochet.
Row 7: 8 single crochets on one arm, 12 single crochets on the body, 8 single crochets on the other arm, 12 single crochets on the body. Total stitches: 40
Row 8: (1 single crochet, 1 decrease, 1 single crochet) X 10. Total stitches: 30
Row 9: (3 single crochets, 1 decrease) X 6. Total stitches: 24
Row 10: (1 single crochet, 1 decrease, 1 single crochet) X 6. Total stitches: 18
Row 11: (1 single crochet, 1 decrease) X 6. Total stitches: 12

Para la cabeza con hilo marrón claro hacer 6 puntos bajos en un anillo.
Hilera 1: 6 aumentos. Total de puntadas: 12
Hilera 2: (1 punto bajo, 1 aumento) X 6. Total de puntadas: 18
Hilera 3: (1 punto bajo, 1 aumento, 1 punto bajo) X 6. Total de puntadas: 24
Hilera 4: (3 puntos bajos, 1 aumento) X 6. Total de puntadas: 30
Hilera 5: (2 puntos bajos, 1 aumento, 2 puntos bajos) X 6. Total de puntadas: 36
Hileras 6-8: 36 puntos bajos.
Hilera 9: 10 marrón, 4 beige, 8 marrón, 4 beige, 10 marrón.
Hilera 10: 9 marrón, 6 beige, 6 marrón, 6 beige, 9 marrón.
Hilera 11:8 marrón, 8 beige, 4 marrón, 8 beige, 8 marrón.
Hilera 12: 8 marrón, 9 beige, 2 marrón, 9 beige, 8 marrón.
Hilera 13: 8 marrón, 20 beige, 8 marrón.
Hilera 14: (2 puntos bajos, 1 disminución, 2 puntos) X 6. Total de puntadas: 30
Hilera 15: (3 puntos bajos, 1 disminución) X 6. Total de puntadas: 24
Hilera 16: (1 punto bajo, que disminución, 1 punto bajo) X 6. Total de puntadas: 18
Hilera 17: (1 punto bajo, 1 disminución) X 6. Total de puntadas: 12
Dejar una hebra larga para coser a la cabeza.
Rellenar y coser.
For the head with light brown thread make 6 single crochets in a ring.
Row 1: 6 increases. Total stitches: 12
Row 2: (1 single crochet, 1 increase) X 6. Total stitches: 18
Row 3: (1 single crochet, 1 increase, 1 single crochet) X 6. Total stitches: 24
Row 4: (3 single crochets, 1 increase) X 6. Total stitches: 30
Row 5: (2 single crochets, 1 increase, 2 single crochets) X 6. Total stitches: 36
Rows 6-8: 36 single crochet.
Row 9: 10 brown, 4 beige, 8 brown, 4 beige, 10 brown.
Row 10: 9 brown, 6 beige, 6 brown, 6 beige, 9 brown.
Row 11:8 brown, 8 beige, 4 brown, 8 beige, 8 brown.
Row 12: 8 brown, 9 beige, 2 brown, 9 beige, 8 brown.
Row 13: 8 brown, 20 beige, 8 brown.
Row 14: (2 single crochets, 1 decrease, 2 stitches) X 6. Total stitches: 30
Row 15: (3 single crochets, 1 decrease) X 6. Total stitches: 24
Row 16: (1 single crochet, which decrease, 1 single crochet) X 6. Total stitches: 18
Row 17: (1 single crochet, 1 decrease) X 6. Total stitches: 12
Leave a long tail to sew to the head.
Fill and sew.

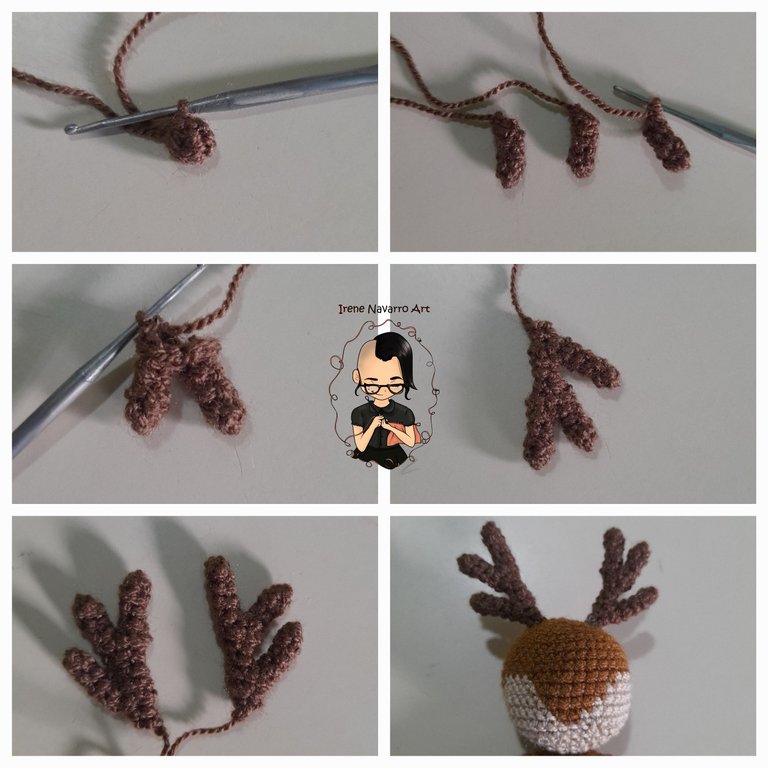
Para los cuernos con hilo marrón oscuro hacer 4 puntos bajos en un anillo, hacer 4 puntos bajos por tres hileras. Repetir tres veces. Es decir tres piezas por cada cuerno.
Unir dos piezas en una hilera de 8 puntos bajos.
Hacer 4 disminuciones y hacer 4 puntos bajos por dos hileras.
Unir la tercera pieza en una hilera de 8 puntos bajos.
Hacer 4 disminuciones y luego 4 puntos bajos. Dejar una hebra larga para coser a la cabeza.
For the horns with dark brown yarn make 4 single crochets in a ring, make 4 single crochets for three rows. Repeat three times. That is to say three pieces for each horn.
Join two pieces in a row of 8 single crochets.
Make 4 decreases and make 4 single crochets for two rows.
Join the third piece in a row of 8 single crochets.
Make 4 decreases and then 4 single crochets. Leave a long tail to sew to the head.

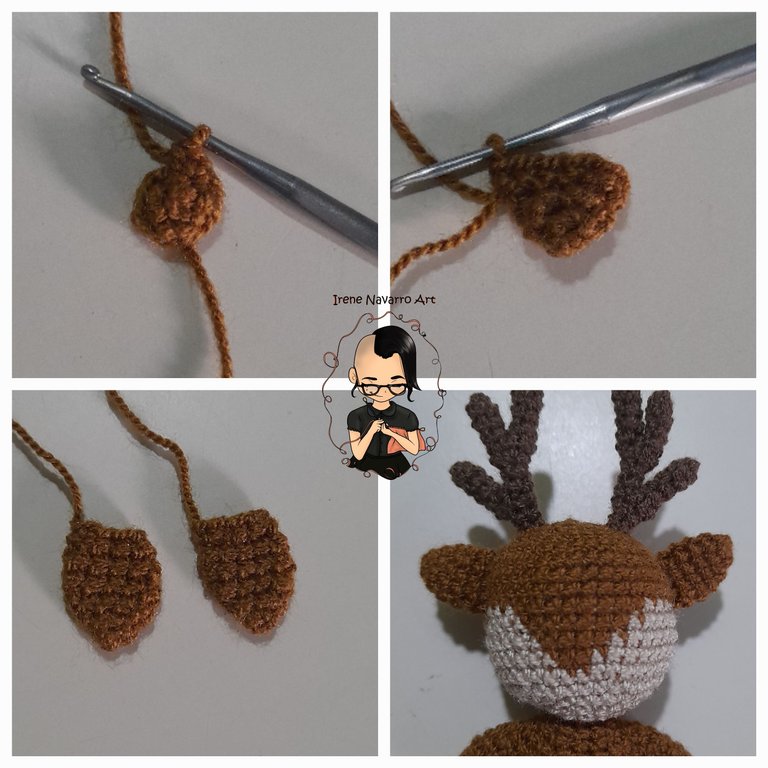
Para las orejas con hilo marrón claro hacer 4 puntos bajos en un anillo.
Hilera 1: 4 aumentos. Total de puntadas: 8
Hilera 2: (3 puntos bajos, 1 aumento) X 2. Total de puntadas: 10
Hileras 3 y 4: 10 puntos bajos.
Hilera 5: (3 puntos bajos, 1 disminución) X 2. Total de puntadas: 8
Cerrar con un punto deslizado y dejar una hebra larga para coser a la cabeza.
Hacer dos orejas iguales.
For the ears with light brown yarn make 4 single crochets in a ring.
Row 1: 4 increases. Total stitches: 8
Row 2: (3 single crochets, 1 increase) X 2. Total stitches: 10
Rows 3 and 4: 10 single crochet.
Row 5: (3 single crochets, 1 decrease) X 2. Total stitches: 8
Close with a slip stitch and leave a long tail to sew to the head.
Make two equal ears.

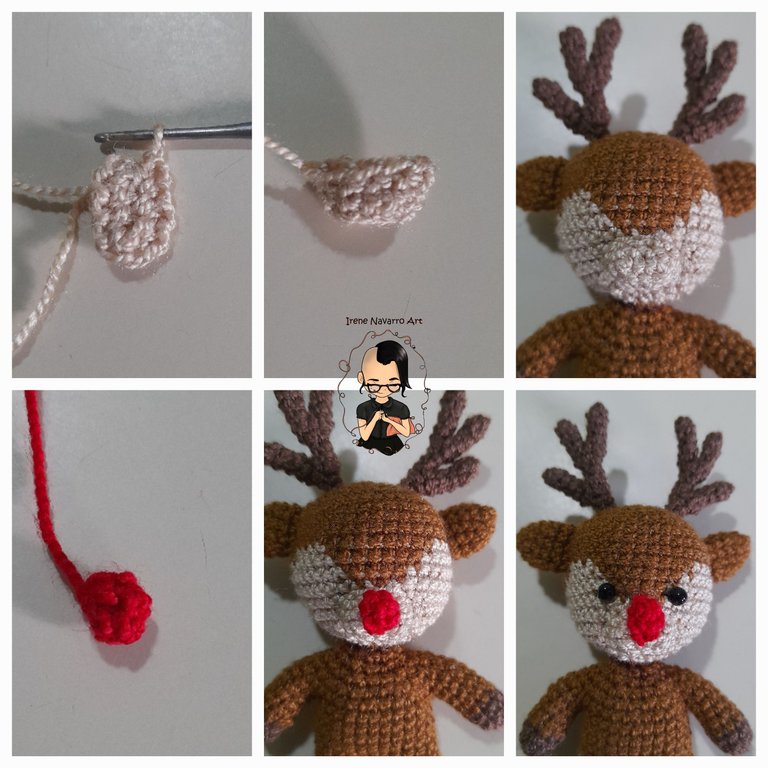
Para el hocico con hilo beige hacer 3 cadenas de base.
Hilera 1: (1 aumento, 1 punto bajo, 1 aumento) X 2. Total de puntadas: 10
Hileras 2 y 3: 10 puntos bajos.
Cerrar con un punto deslizado y dejar una hebra larga para coser.
Para la nariz con hilo rojo hacer 4 puntos bajos en un anillo y luego hacer 4 puntos bajos. Cerrar con un punto deslizado y dejar una hebra larga para coser.
Coser las perlas negras para los ojos.
For the muzzle with beige thread make 3 base chains.
Row 1: (1 increase, 1 single crochet, 1 increase) X 2. Total stitches: 10
Rows 2 and 3: 10 single crochet.
Close with a slip stitch and leave a long tail to sew.
For the nose with red thread make 4 single crochets in a ring and then make 4 single crochets. Close with a slip stitch and leave a long tail to sew.
Sew the black beads for the eyes.

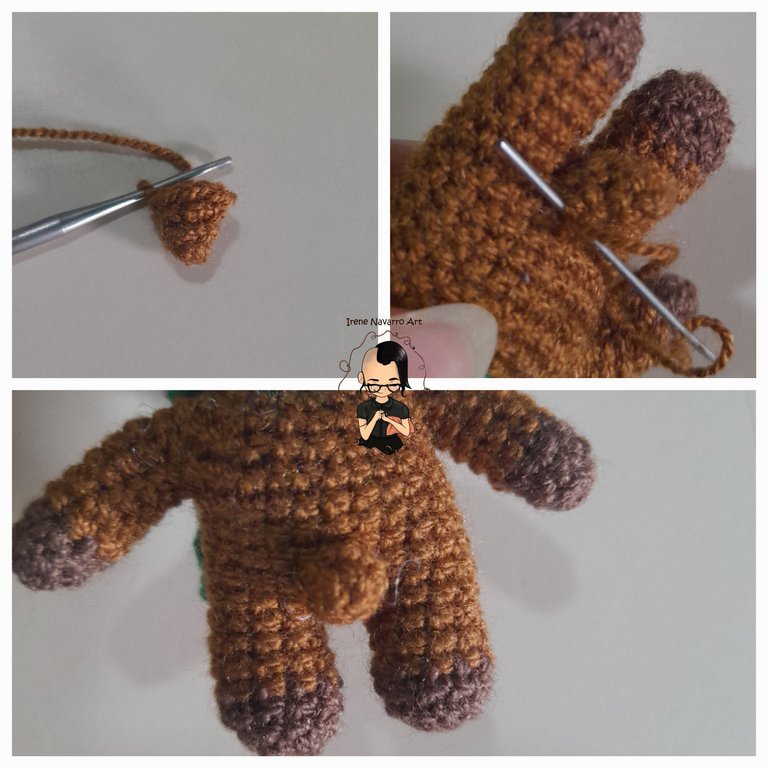
Para la cola con hilo marrón claro hacer 4 puntos bajos en un anillo.
Hilera 1: 2 aumentos, 2 puntos bajos. Total de puntadas: 6
Hilera 2: 1 punto bajo, 2 aumentos, 3 puntos bajos. Total de puntadas: 8
Cerrar con un punto deslizado y dejar una hebra larga para coser.
For the tail with light brown thread make 4 single crochets in a ring.
Row 1: 2 increases, 2 single crochets. Total stitches: 6
Row 2: 1 single crochet, 2 increases, 3 single crochet. Total stitches: 8
Close with a slip stitch and leave a long tail to sew.

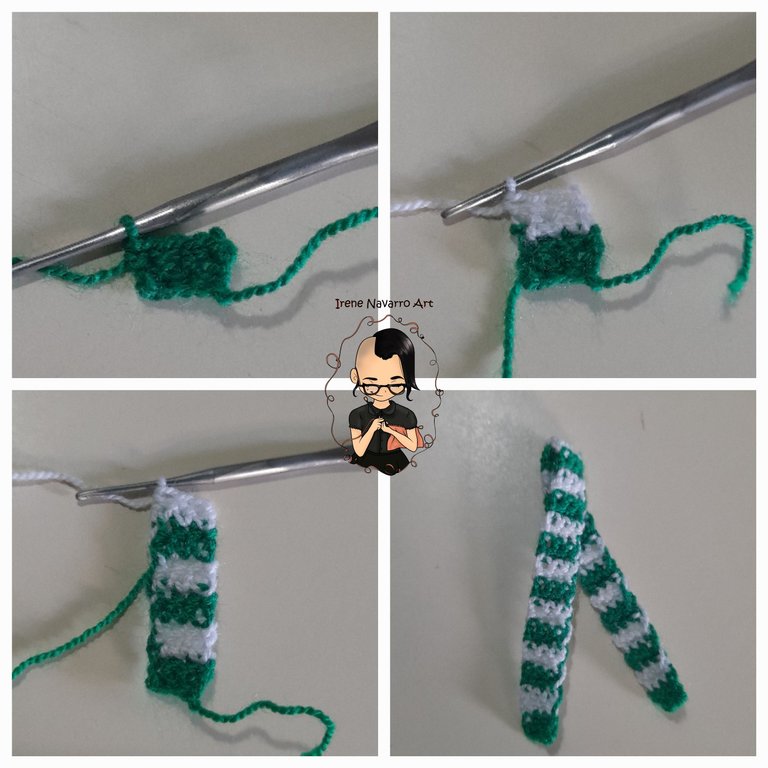
Para la bufanda hacer 3 cadenas de base con hilo verde, hacer dos hileras con hilo verde y luego cambiar a hilo blanco para hacer dos hileras más, repetir la secuencia hasta obtener 27 franjas.
For the scarf make 3 base chains with green yarn, make two rows with green yarn and then switch to white yarn to make two more rows, repeat the sequence until you have 27 stripes.

Resultado / Result
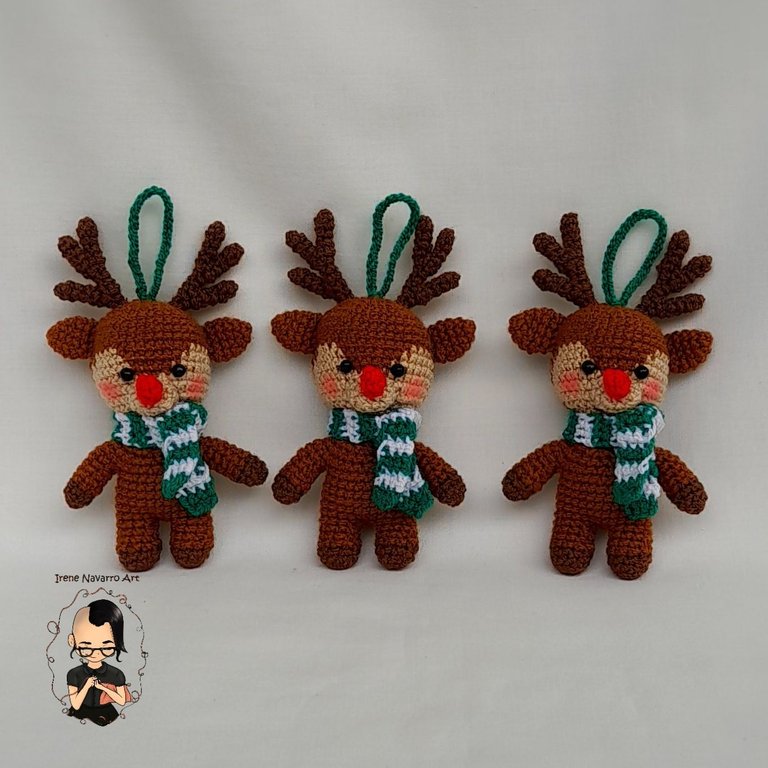
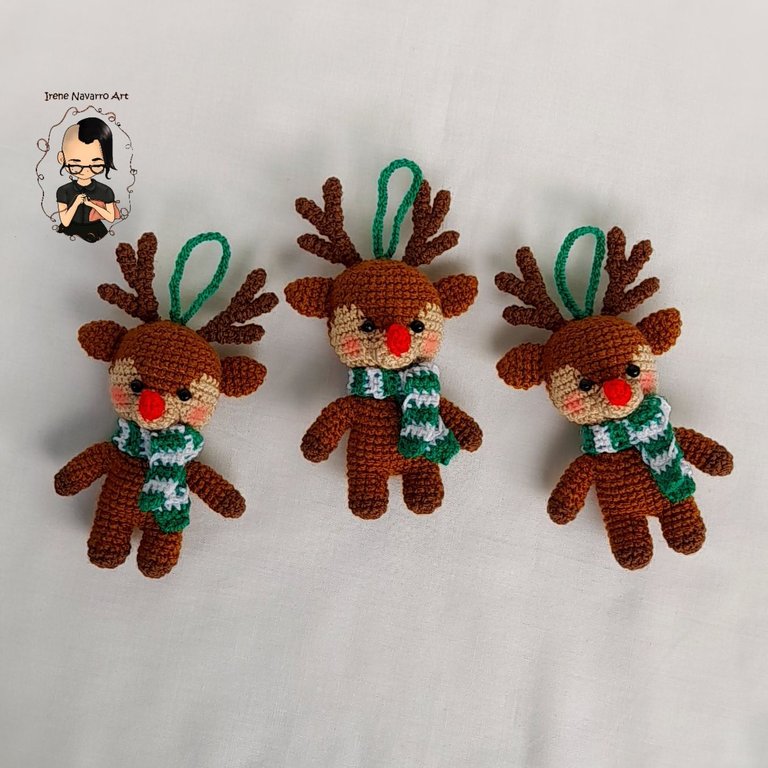
I think this is the figure that I liked the most, I don't know if it's because I really like to make animal amigurumis, for now I have 21 figures to decorate my Christmas tree and I think it's enough, however the star is still missing, like this I'll possibly finish with that next time so I can show you the final result, if you've been present in these seven posts I'm very grateful but if you haven't seen the others I'll leave you the link to the previous tutorials 🥰
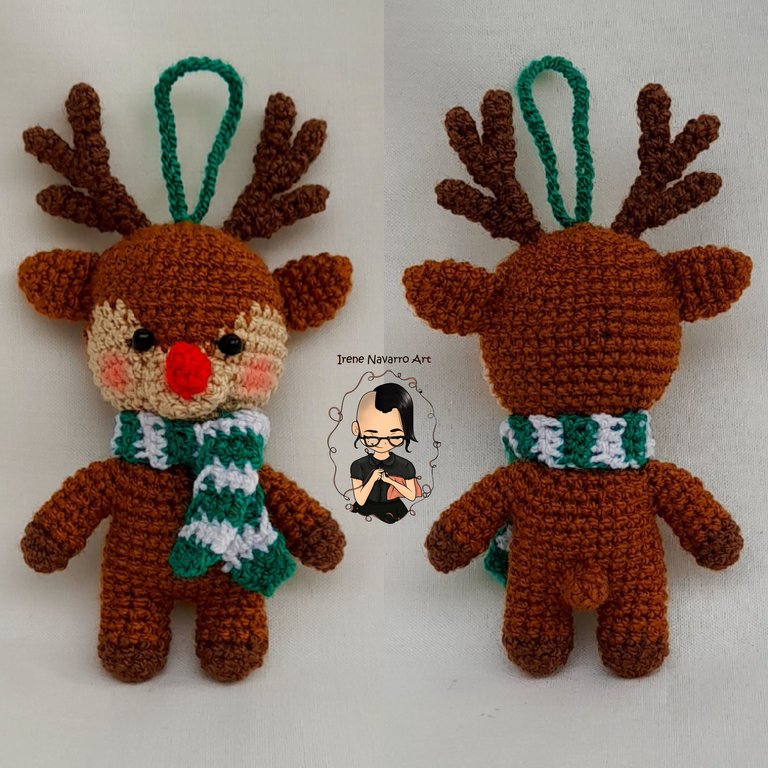
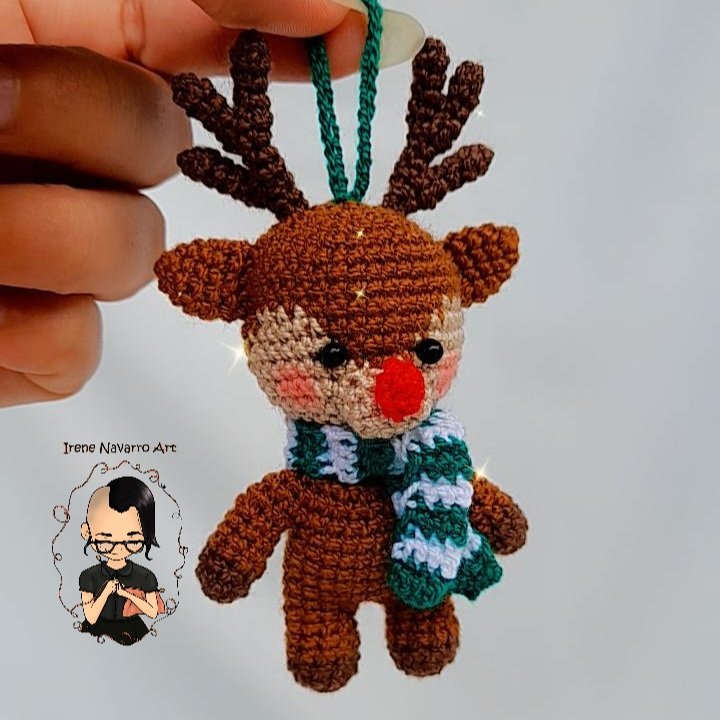
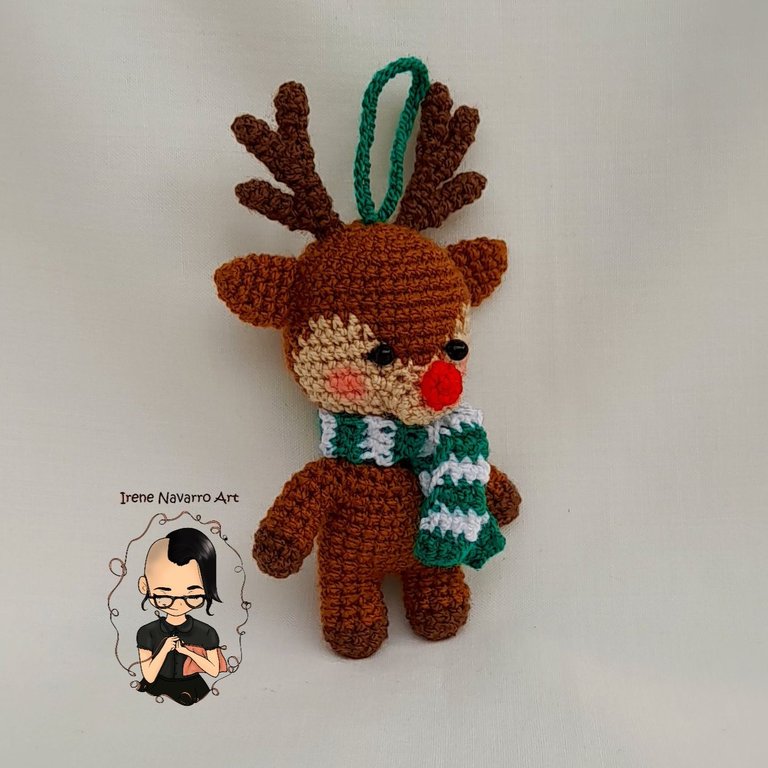

Imágenes tomadas con dispositivo Samsung A12. Portada editada en InShot
Pictures taken with Samsung A12 device. Cover edited in InShot
Espero les haya gustado. Les invito a leer mis próximas publicaciones y siempre estaré dispuesta a responder sus preguntas y comentarios, también pueden seguirme y contactarme en cualquiera de mis redes sociales. ¡Muchas gracias!
I hope you liked it. I invite you to read my next publications and I will always be willing to answer your questions and comments, you can also follow me and contact me on any of my social networks. Thank you!
https://twitter.com/2471487180/status/1602350523918815237
https://twitter.com/144659833/status/1602372133069459456
The rewards earned on this comment will go directly to the people( @irenenavarroart, @lisbethseijas ) sharing the post on Twitter as long as they are registered with @poshtoken. Sign up at https://hiveposh.com.
¡Que cuchitura tan hermosa, de verdad tienes un talento excepcional mi querida Irene!
Muchas gracias 🥰
Has sido votado por
PROYECTO ENLACE
'Conectando Ideas y Comunidades'
PROYECTO ENLACE es un proyecto de curación de habla hispana enfocado en recompensar contenido de calidad y apoyar autores en su proceso de crecimiento en HIVE.
Creemos y apostamos por el futuro de esta gran plataforma, y estamos muy emocionados de poder hacerla crecer junto a esta comunidad. Así que te invitamos a usar nuestra etiqueta ENLACE y estar atento a todas las actividades que tenemos preparadas y que estaremos publicando en breve.
¿QUIERES AUTOMATIZAR TUS GANANCIAS DE CURACIÓN? SE PARTE DEL PROYECTO ENLACE APOYANDO A NUESTRO TRAIL EN HIVE.VOTE INGRESA AQUÍ PARA CONOCER LOS DETALLES.
¿QUIERES INVERTIR ENLACE? DESCUBRE COMO HACERLO Y GENERAR INGRESOS DE FORMA SEMANAL MEDIANTE TU DELEGACIÓN DE HP AQUÍ TE EXPLICAMOS COMO.
Te invitamos a participar en nuestro servidor de Discord: https://discord.gg/3S9y7BbWfS
Atentamente
EQUIPO ENLACE 2022
Gracias por el apoyo 😊
Te quedó muy hermoso querida Irene, Dios bendiga tus manos amiga,
Feliz semana, te ando un fuerte abrazo ✨🌹🌹
Hola @gladymar1973 muchísimas gracias por tus buenos deseos 🤗 Abrazo
🌹✨❄️😚😚
Hola cara de perola! que increíble como haces tantos detalles en con algo tan pequeño (😏 se lee medio raro peeeero...) ya me imagine muchas cosas con esos peluches... tranquila como adornos 😝
Que gran talento! un abrazo peludo!
Jajajajaja bueno muchas gracias 😄 Abrazos
Waaoooo que precioso y que talento, espero un día tejer así de precioso por ahora solo se hacer gorritos y otras cosas pequeñas pero espero que con dedicación llegar a tejer así de hermoso 💖
Muchas gracias 🤗 si ya sabes hacer gorros seguro te va bien haciendo amigurumis, solo debes intentarlo
Hermoso y delicado este reno al igual que todas las demás decoraciones para el árbol.
Tienes un talento increíble para tejer piezas tan pequeñas y que te queden tan espectaculares.
Saludos @irenenavarroart.
Muchas gracias @kattycrochet 🤗 no te creas espero algún día poder conseguir lana de esa puff para hacer un super amigurumi, pero por ahora hacerlos pequeños me gusta mucho
Que hermosos quedaron esos renitos y en conjunto con los otros que has tejido se deben ver espectacular. 💕☺️🎅🏼
Muchas gracias 😁 siii juntos los 21 se ven lindos
Que lindo reno, cómo siempre excelente trabajo @irenenavarroart
Saludos y gracias por compartir este tutorial ☺️
Muchas gracias @hannymarchan 🤗
Saludos. Los amigurumis te están quedando geniales. Ese arbolito se verá muy lindo. Feliz tarde. 😘
Saludos @irenenavarroart, muy lindo el reno, me imagino que tu niño está muy feliz con los adornos del árbol de navidad, son muy originales y tiernos.
Feliz y bendecido lunes!
Thank you 🤗😁
Quiero ver como queda el árbol, con todas las cosas que has estado haciendo. No me canso de decirte que eres una gran artista y tienes un don. Un fuerte abrazo
Posdata: pronto voy a sacarme una foto en tu arbolito de amigurumis
Claro que si bienvenidos cuando quieran 🥰 ya solo me falta hacerle la estrella, aunque es pequeño el árbol
Congratulations, your post has been upvoted by @dsc-r2cornell, which is the curating account for @R2cornell's Discord Community.
Enhorabuena, su "post" ha sido "up-voted" por @dsc-r2cornell, que es la "cuenta curating" de la Comunidad de la Discordia de @R2cornell.
@irenenavarroart está tiernamente hermoso, excelente creación , gracias por compartir , un abrazote 🤗
yo solo puedo felicitarte una vez porque todos los trabajos que hiciste para decorar el arbol de navidad están hermosos. me dejas siempre con la boca abierta, quisiera tener tu paciencia para tejer cosas pequeñas.
hoy solo quise pasar a despedirme no sin antes desearte que pases una feliz navidad. Gracias por tu apoyo de todo el año, en verdad eres un ejemplo a seguir. cuídate mucho y disfruta cada momento con tu hijo y con Yole.
feliz navidad Irene.
Muchísimas gracias @carolinacardoza espero pases una bonita navidad y que recibas con mucha alegría el año nuevo 🥰🤗 Abrazo
No soy muy navideña y siempre he odiado los adornos de navidad, pero estoy totalmente derretida con estos muñequitos, te quedaron hermosos!! mis felicitaciones!!!
Muchas gracias 😁 a mi me ha tocado ceder por hacer feliz a mi hijo
Siempre disfruto de su habilidad para crear. Le deseo mucho ánimo y buena salud.
Muchas gracias 😊