[ENG-ESP] Toothbrush mockup. / Maqueta del cepillo dental.
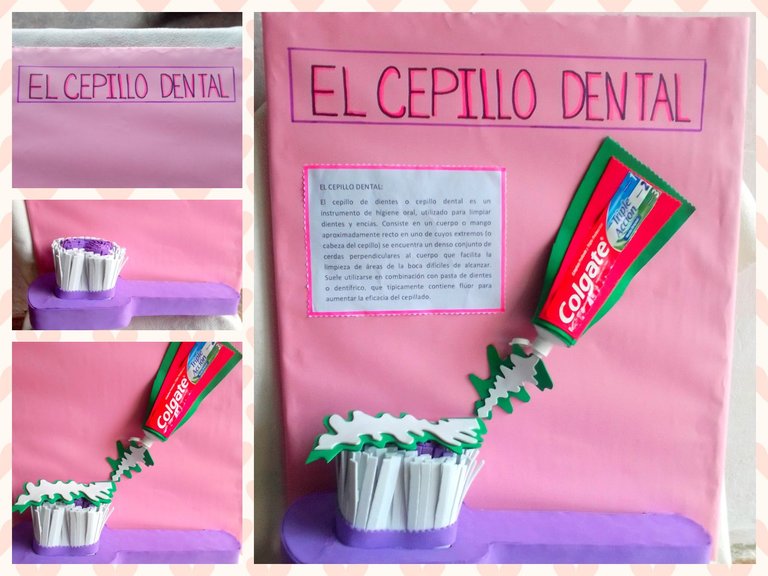
Hello, good morning my loves, it is a pleasure and pleasure for me to continue sharing with all of you. I bring you a new project here, it is a model of the toothbrush, it is for a princess who is going to develop this very important topic at her school, as a closing of the project. The toothbrush or toothbrush is an essential tool for all of us, as human beings, both for children and for ourselves. By brushing, we eliminate bacteria and take care of our teeth, which oral hygiene is one of the most important priorities that we must take care of. Here I leave you with the following steps, I have final result.
Hola muy buenos días mis amores, un gusto y placer para mí en seguir compartiendo con todos ustedes. Les traigo por aquí un nuevo proyecto, se trata de una maqueta del cepillo dental, es para una princesa que va a desarrollar este tema muy importante en su colegio, como cierre de proyecto. El cepillo dental o cepillo de diente, es una herramienta indispensable para todos nosotros, como seres humanos, tanto para los niños, como para uno. Al cepillarnos, eliminamos las bacterias y cuidamos nuestros dientes, las cual la higiene bucal es una de las prioridades más importantes que debemos cuidar. Aquí los dejo con los siguientes pasos, he resultado final.
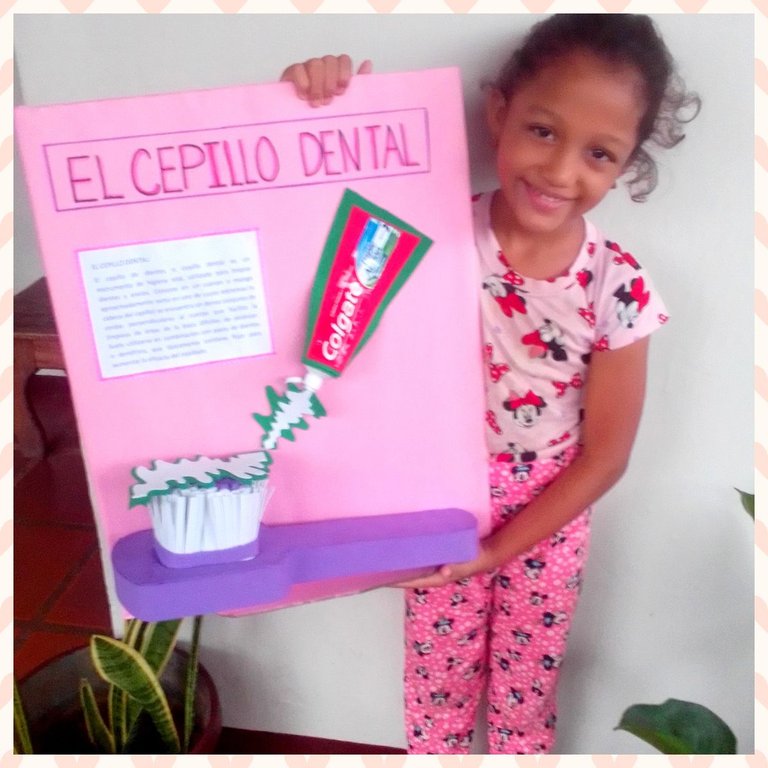
In this opportunity to make this model, I put a lot of creativity into it.
Step 1:
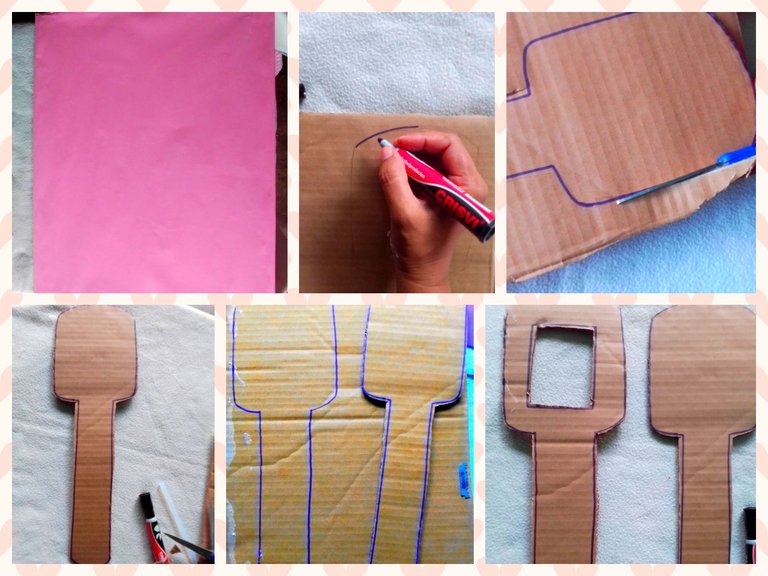
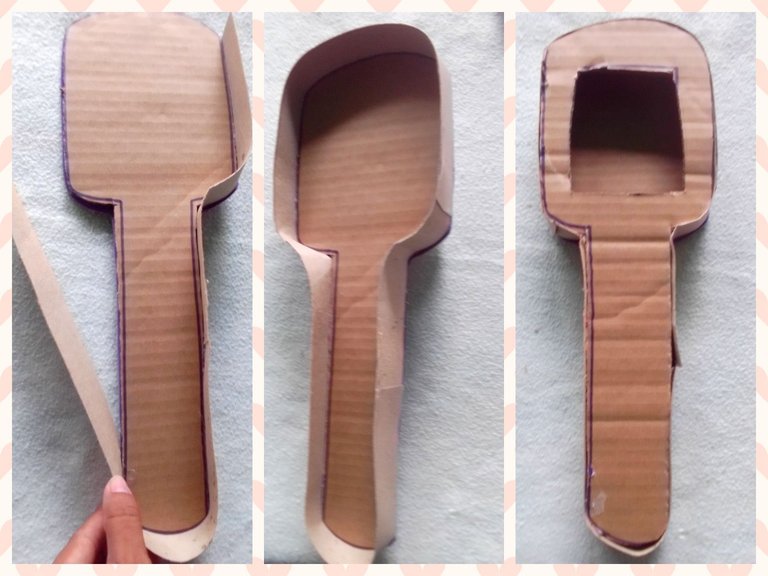
Line a cardboard, use pink cardboard, this cardboard will be the base of the model. Then draw the toothbrush on cardboard, cut out and draw the same base, cutting a rectangle in the center, forming these 2 pieces.
En esta oportunidad de elaborar esta maqueta, le coloqué mucha creatividad.
Paso 1:
Forre un cartón, use cartulina rosada, este cartón será la base de la maqueta. Luego dibuje el cepillo dental, en cartón, recorte y dibuje la misma base, cortándole en el centro un rectángulo, formando estas 2 piezas.
Step 2:
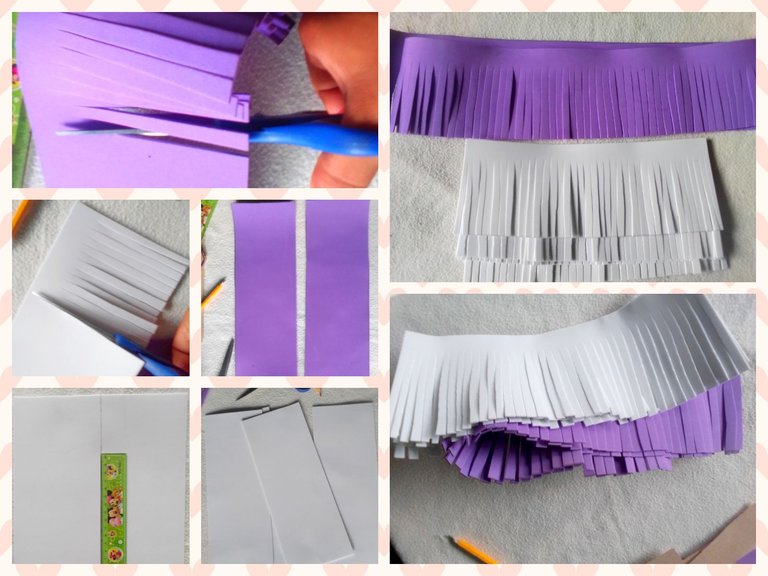
I measured the white foam in half, 11 cm wide x 28 cm long, cutting 4 equal pieces. Then 2 purple rectangles, 11 cm wide x 40 cm long, cut all these pieces into thin strips, which will be part of the brush, which are the bristles. Then I joined them with the same color.
Paso 2:
Medí el foami blanco a la mitad de 11 cm de ancho x 28 de largo cortando 4 piezas iguales. Luego 2 rectángulos morados, de 11 cm de ancho x 40 cm de largo, todas estas piezas, las corte en tiras finas, que van a formar parte del cepillo que son las cerdas. Luego las uní con su mismo color.
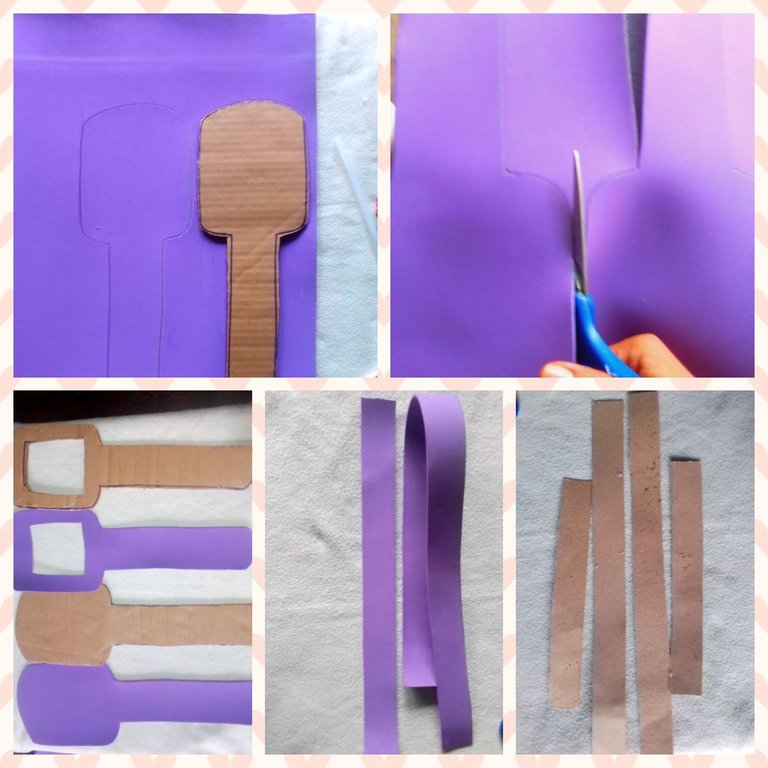
Here I mark the base of the toothbrush, cut, and here I have each piece for your foami. Then I cut some strips 3.5 cm wide x all length. I used a thinner cardboard to cut other strips of the same measurements as the purple strips.
Aquí marque, la base del cepillo dental, corte, y aquí tengo cada pieza para su foami. Luego corte unas tiras de 3.5 cm de ancho x todo de largo, hice uso de un cartón más fino, para cortar otras tiras de las mismas medidas de las tiras moradas.
Step 3:
I attached the strips to the base of the brush, in order to seal the entire contour, when closing the other part of the brush fits.
Paso 3:
Uní las tiras al la base del cepillo, para así sellar todo el contorno, al cerrar encaje la otra parte del cepillo.
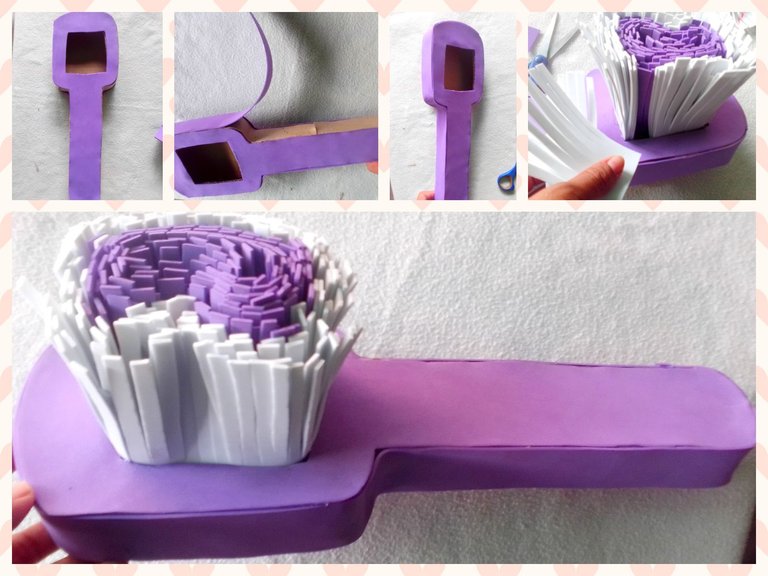
Glue the 2 pieces of foam to each of the bases, at the bottom and top, then line the cardboard joint with the purple strip. When I was ready, I introduced the bristles, and to finish covering this part, I cut more bristles and finished covering here, I finish the brush part.
Pegue las 2 piezas de foami a cada una de las bases, en la parte inferior y superior, luego forre la unión del cartón con la tira morada. Al estar listo introduje las cerdas, y para terminar de cubrir esta parte, corte más cerdas y termine de cubrir aquí termino la parte del cepillo.
Step 4:
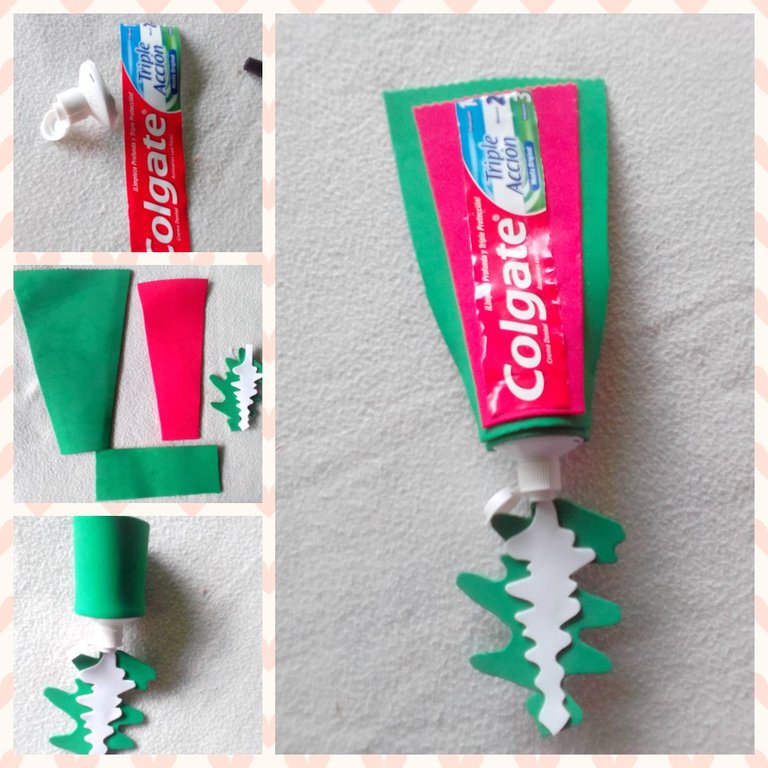
To make the toothpaste, I used the presentation on the label of a paste of the same, cut green and red foami to proceed to make it, as well as a type of paste case, I also made the green cream with white. First I glued the edge of the lid to cover a rectangle, plus the toothpaste at the outlet, then to finish, I covered it with the case.
Paso 4:
Para hacer la pasta de diente, use la presentación de la etiqueta de una pasta de la misma, corte foami verde, rojo para proceder a elaborar, así como un tipo estuche de pasta, también hice la crema verde con blanco. Primero pegué al borde de la tapa para cubrir un rectángulo, más en la salida la pasta dental, luego para finalizar, cubrí con el estuche.
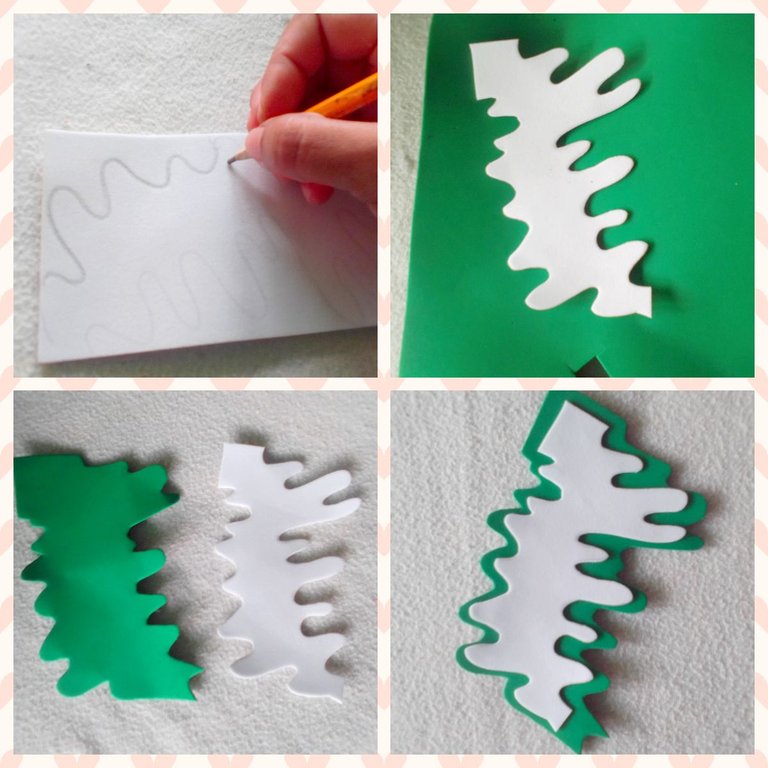
In this part I drew the white cream, cut it out, placed it on the green foam, I made the green cream larger, and when cutting it I glued it.
En esta parte dibuje la crema blanca, recorte, la lleve a colocar en el foami verde, la crema verde la hice más grande, al recortar las pegue.
Step 5:
I began to put together the model, I created a title for the toothbrush, with capital letters, using black marker, fine tip and fuchsia. Then at the bottom stick the toothbrush at an angle, then the toothpaste assembly and finally your information. I feel very pleased to have achieved this beautiful model, so that the girl can let all her classmates know the importance of the toothbrush.
Paso 5:
Comencé a armar la maqueta, elabore un título del cepillo dental, con letras mayúsculas, usando marcador negro, punta fina y fucsia. Luego en la parte inferior pegue el cepillo dental de manera inclinada, luego el armado de la crema dental y por último su información. Me siento muy complacida de haber logrado esta hermosa maqueta, para que así la niña pueda dar a conocer a todos sus compañeros de estudios, la importancia que tiene cepillo dental.
The photos were taken from a Xiaomi Mi A2.
Collage making program: Fotojet Link
Translated from google translator Link
Photo editing program: PhotoFiltre 7
Las fotos fueron tomadas desde un Xiaomi Mi A2.
Programa para hacer el collage: Fotojet Enlace
Traducido del traductor de Google Enlace
Programa para editar fotos: PhotoFiltre 7
I say goodbye until another opportunity.
Thanks for your support.
Me despido hasta otra oportunidad.
Gracias por su apoyo.
Copyright @imargasa. All rights reserved.
Congratulations, your post has been upvoted by @dsc-r2cornell, which is the curating account for @R2cornell's Discord Community.
Keep up the good work. 👏
You are loved. 🤗 + u deserve the best. 💪
Curated by Mystic artist Gudasol
Interested to to help me spread more positivity (musically) on Hive?.