Sketchbook BONUS (Step-by-step Tutorial) - Easy Roses & Vines
Greetings Hive
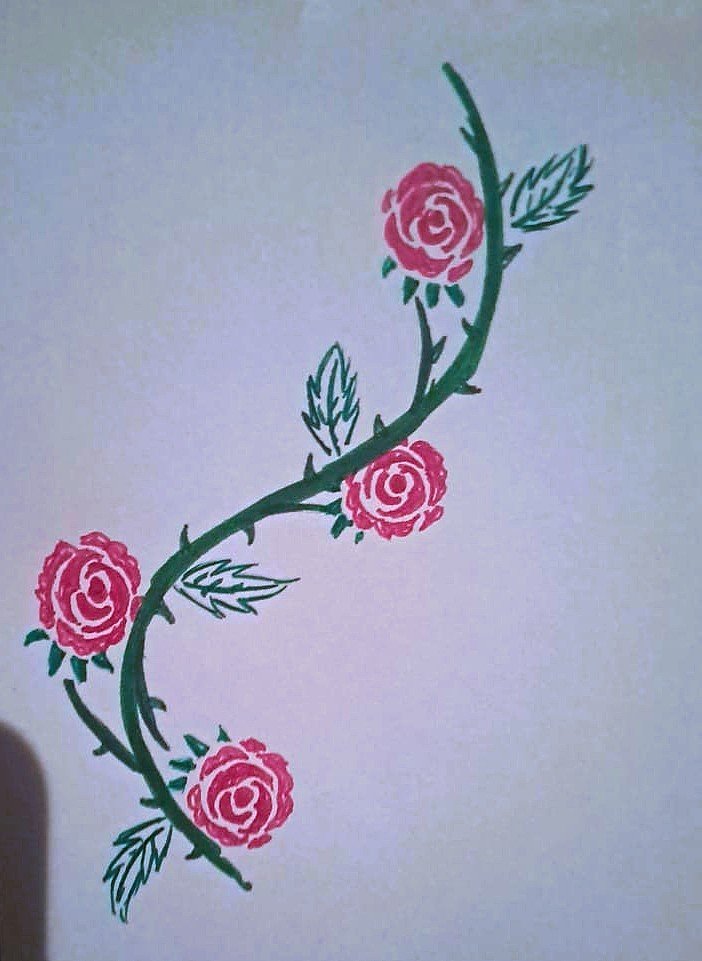
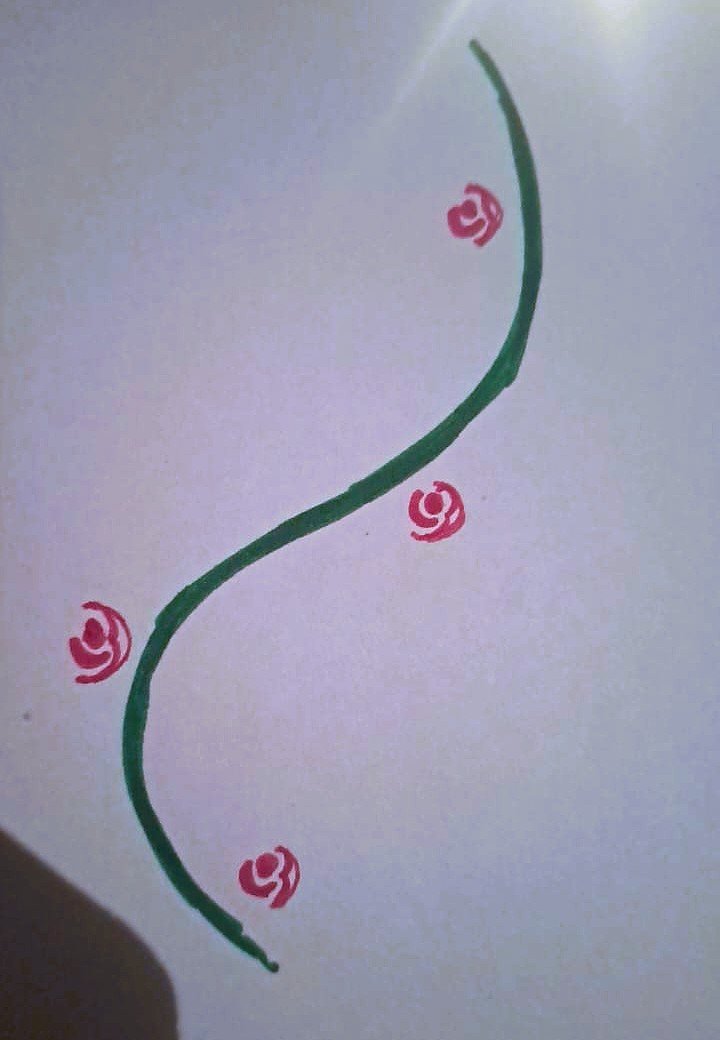
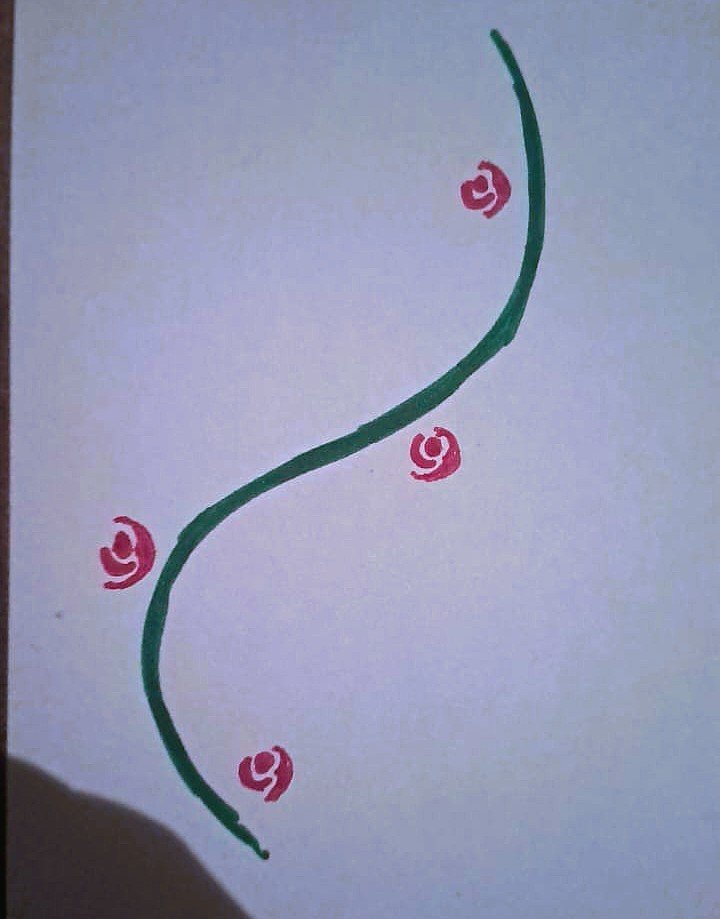
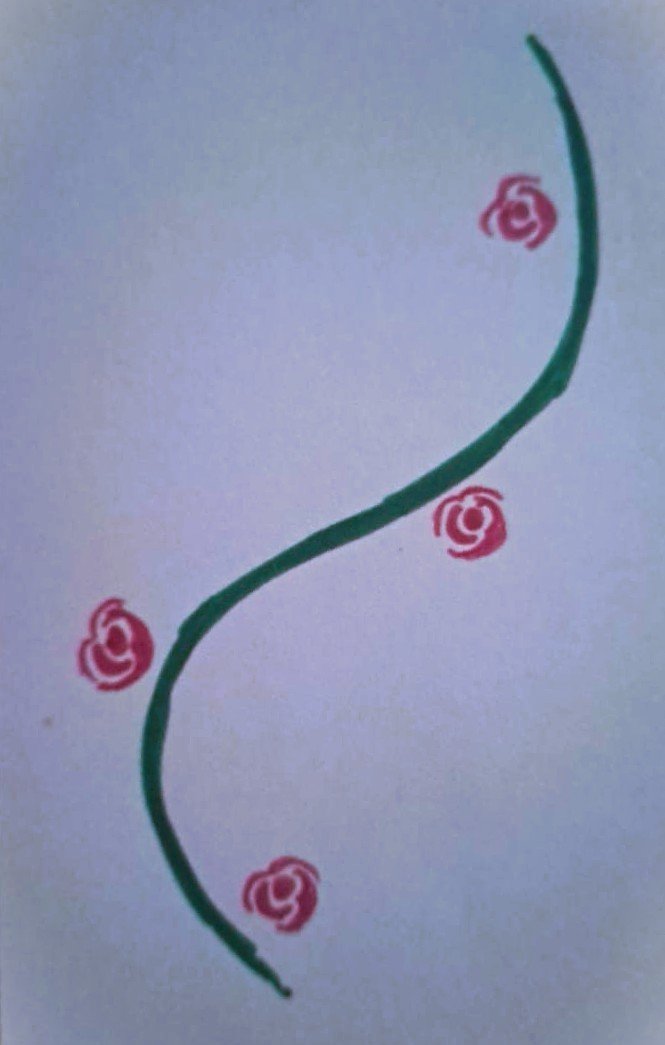
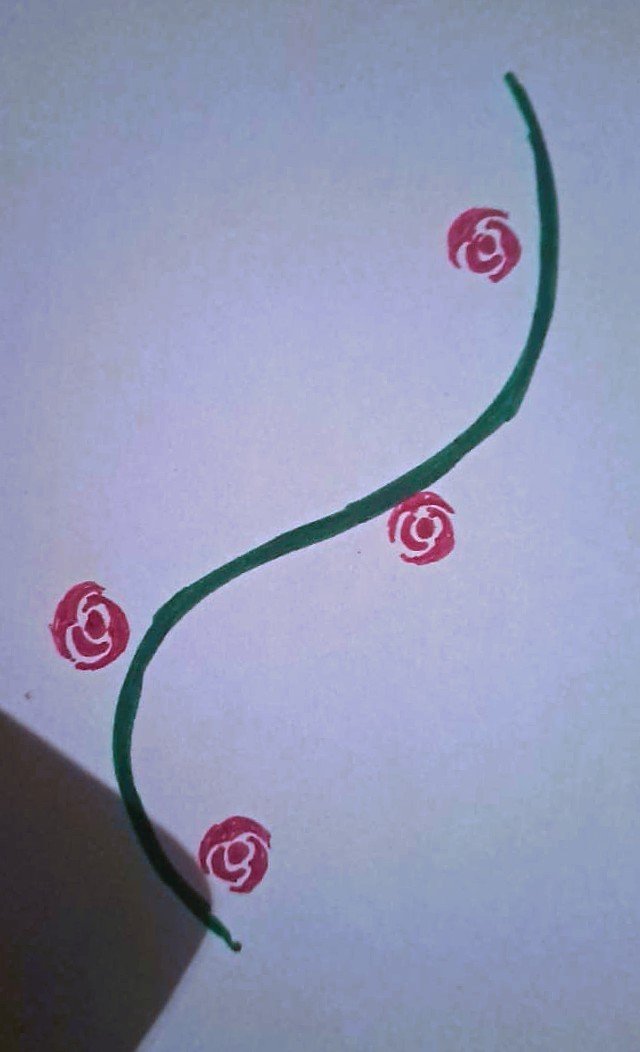
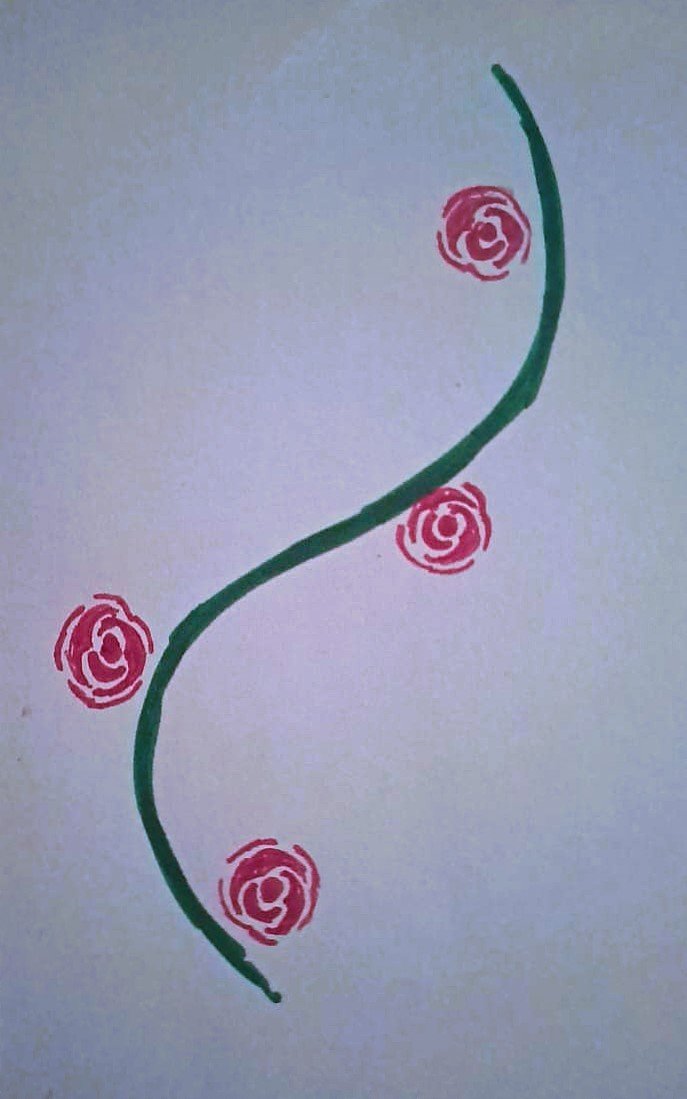
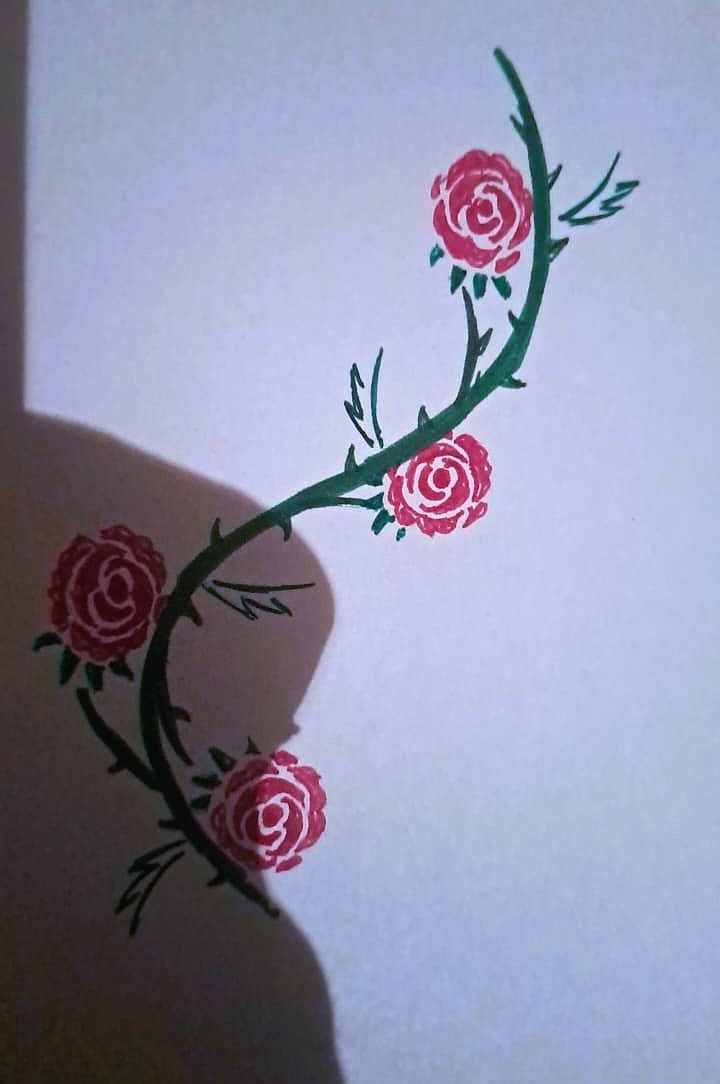
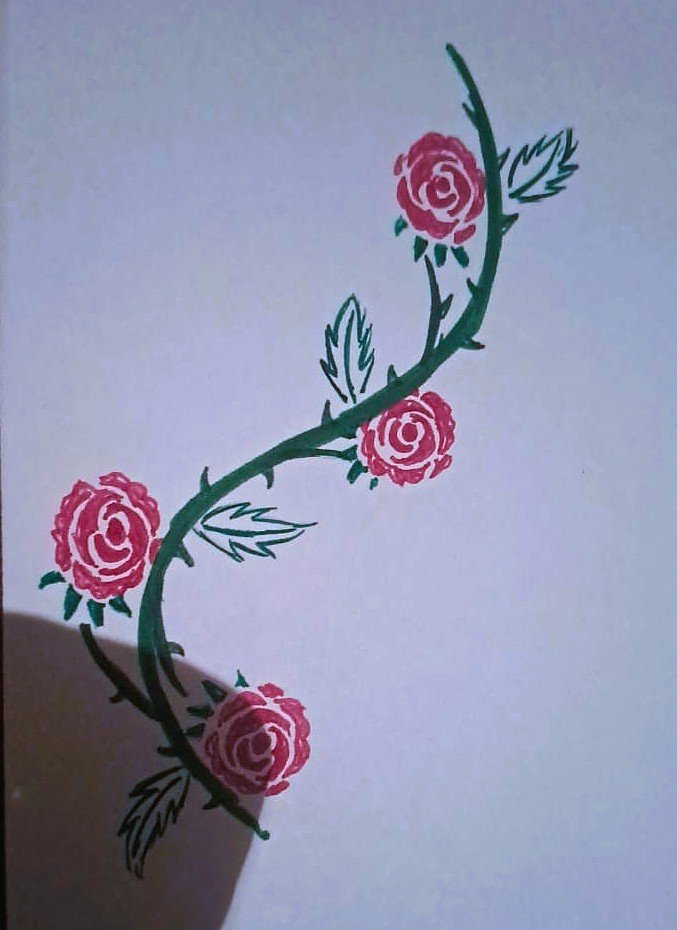
This simple rose vine drawing is perfect for anyone just starting out and learning to draw, it is easy to learn, infinitely useful, customizable and can be doodled over and over. Also, even though it is very easy to draw, it looks pretty cool once done.
Steps To Draw
1. Vine Line
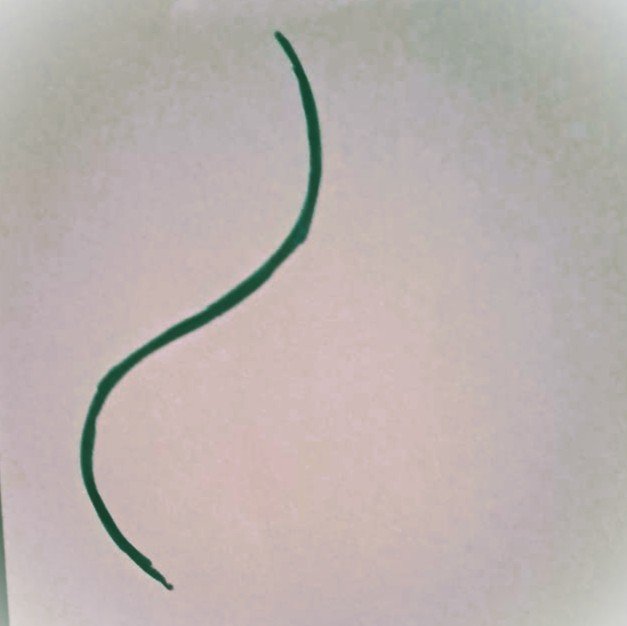
Start by drawing a line, which will be the vine part. This can be done in ANY shape and be as simple or intricate as preferred, get creative or keep it simple, doesn't matter.
2. Centre Of Roses
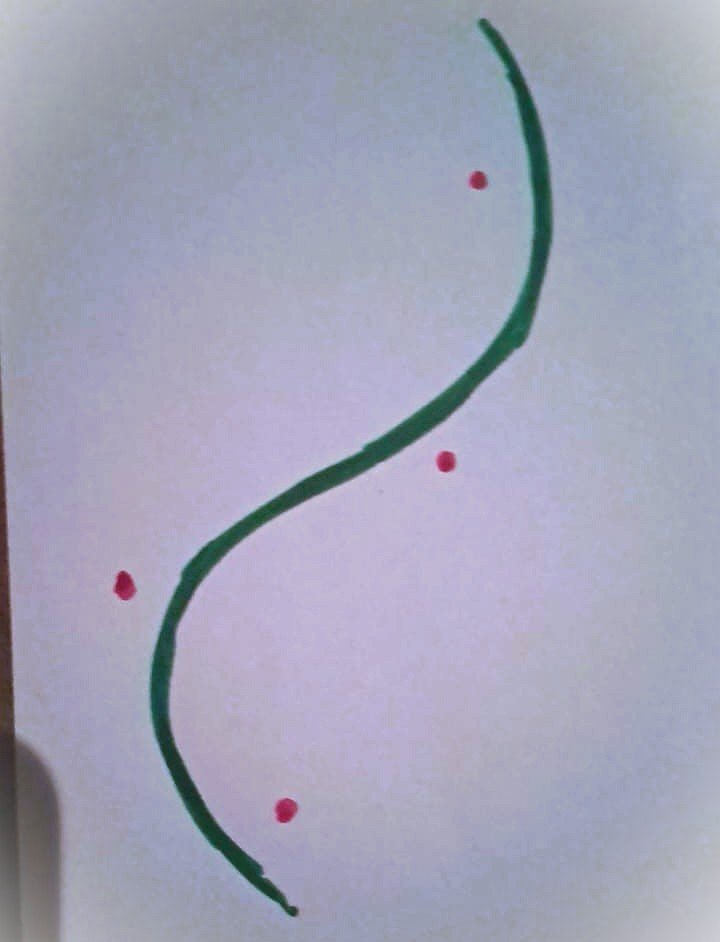
A small space apart from the vine, add dots wherever preferred. These will be the centre of the roses, so be sure to leave enough space for the full rose.
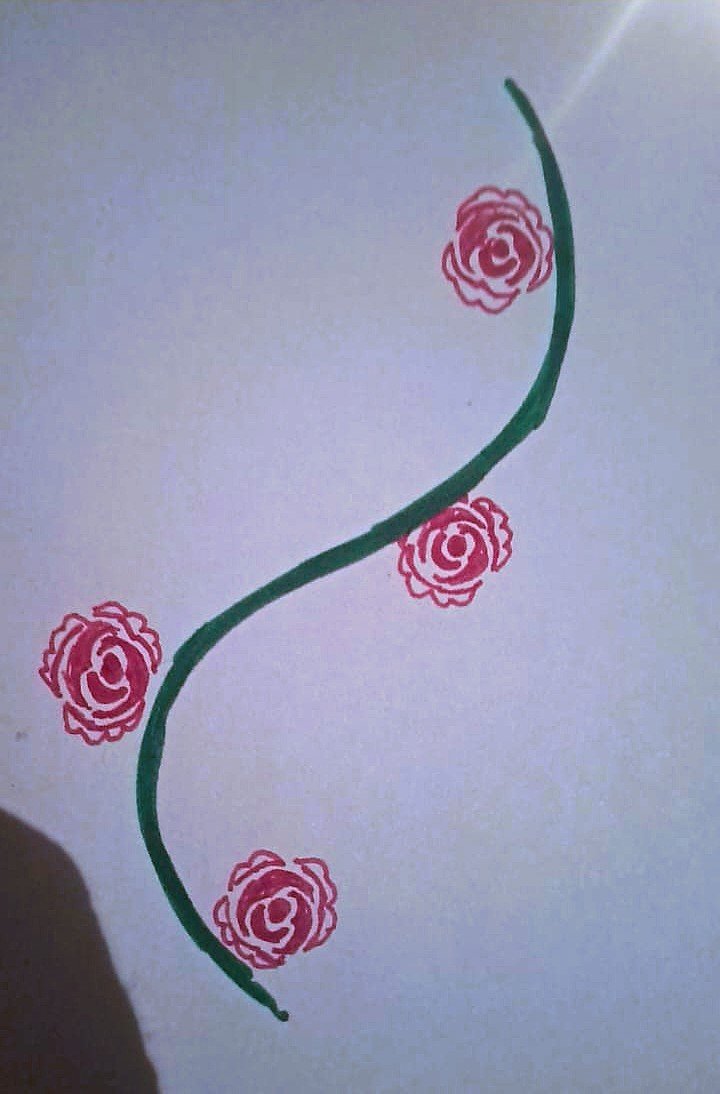
3. Halfmoons
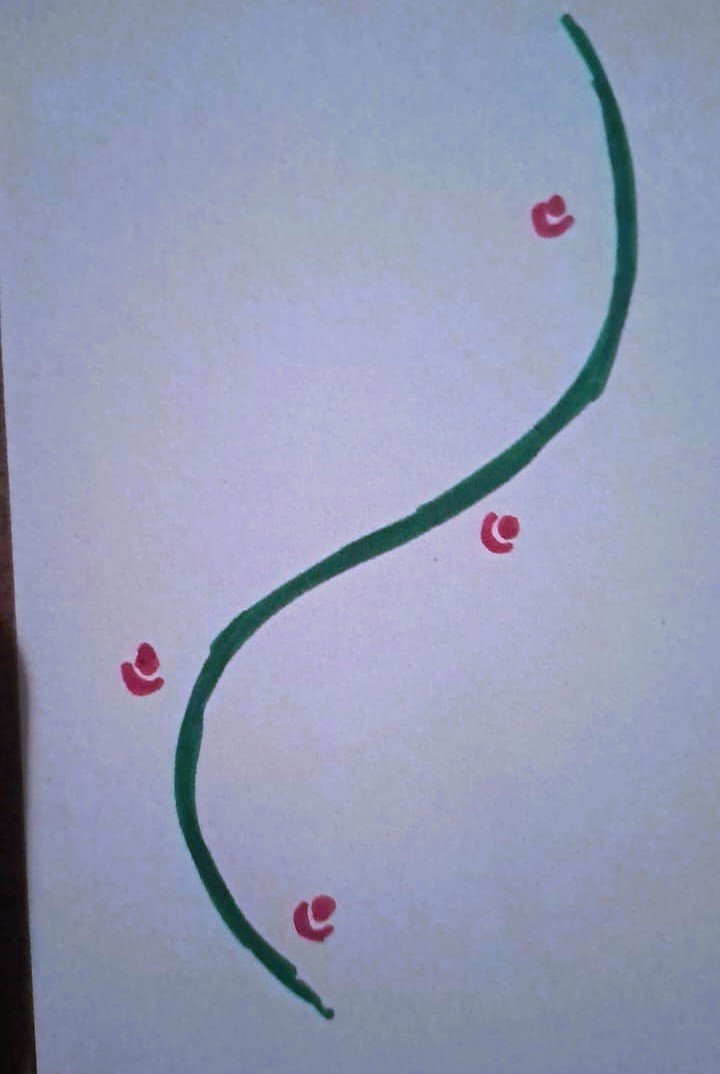
Draw in half moon shapes following the curve of the dots, wrapping about 1/3 around. These can be in any position around the dot.
4. Stretched '3' Shapes

Starting from the lower half or the halfmoon shape and still following the curve of both the dot and halfmoon draw in a stretched '3' type of shape, leaving a small gap open between the halfmoon and the '3' shape.
5. Complete & Fill '3' Shapes
Connect the outer edges of the '3' shapes with a round line, then fill.
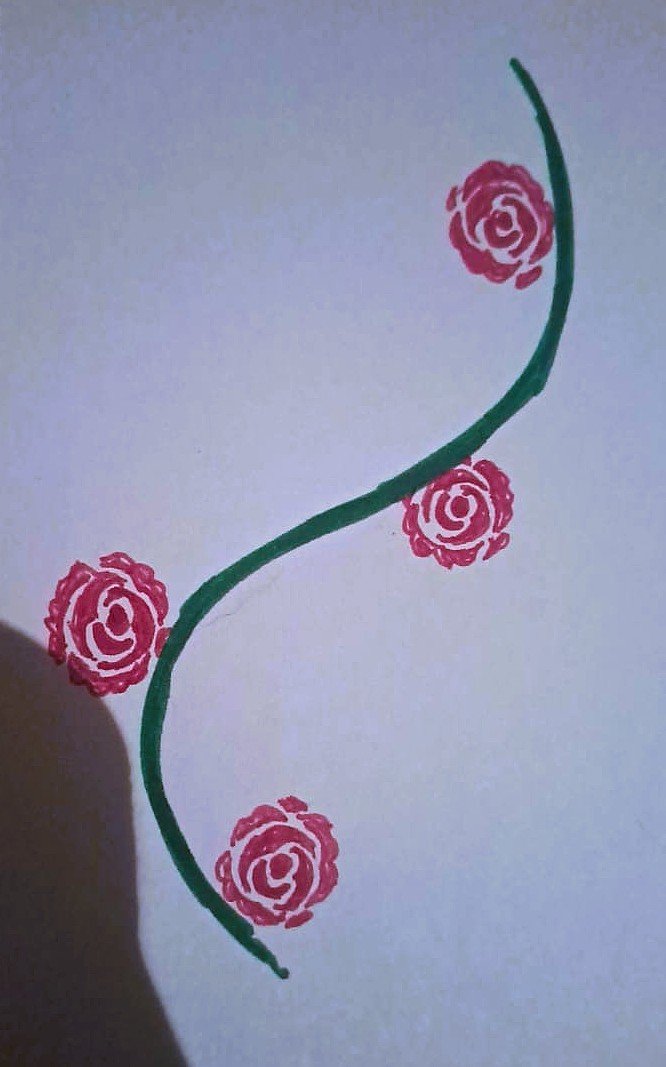
6. Reversed '3' Shapes
With the pointy part positioned in the space left after step 4, draw the stretched '3' shape again following the curve of the half moon and filled '3' shape.
7. Complete & Fill Reversed '3' Shapes

Repeat Step 5 with the reversed '3' shapes.
8. Adding Last Lines
Following the contour of the rose shape, add lines around the outer edges, 2-3 is ideal, try to work in thirds, leaving small spaces between the lines.
9. Round Out Lines with Scalloped Shapes

Round out the lines from the previous steps with scalloped edges, then fill shapes. The roses should start looking like roses now.
10 . Add Little Details (Optional)
If preferred fill out rose shapes by adding small shapes to round things out a little bit and make the roses look more complete. This step is optional.
11. Adding Rosehip Petals
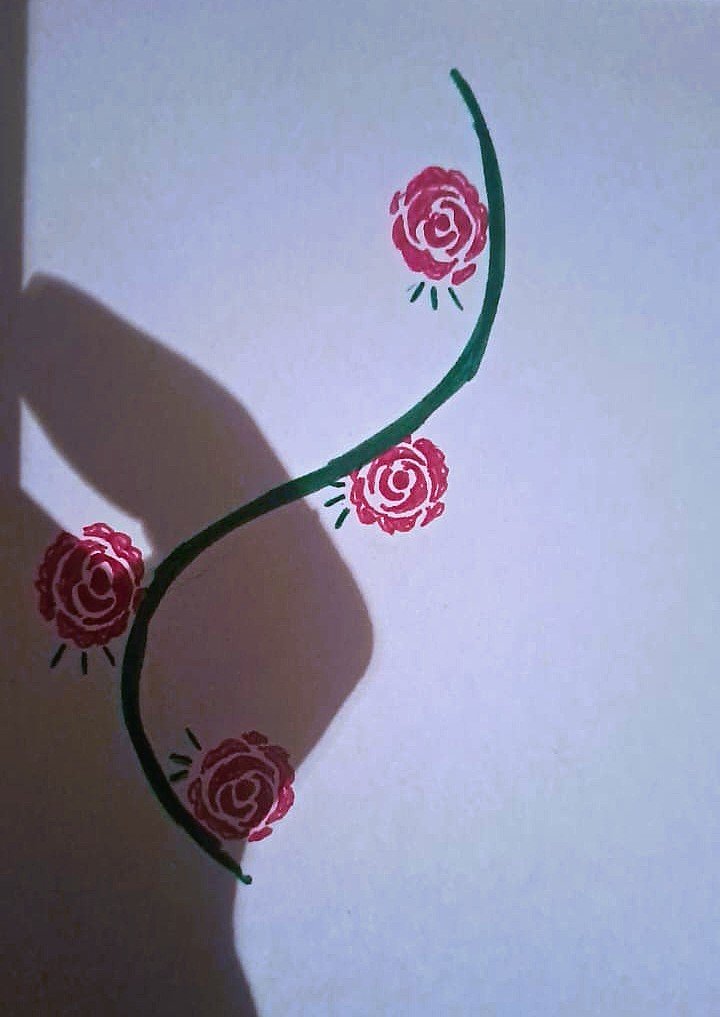
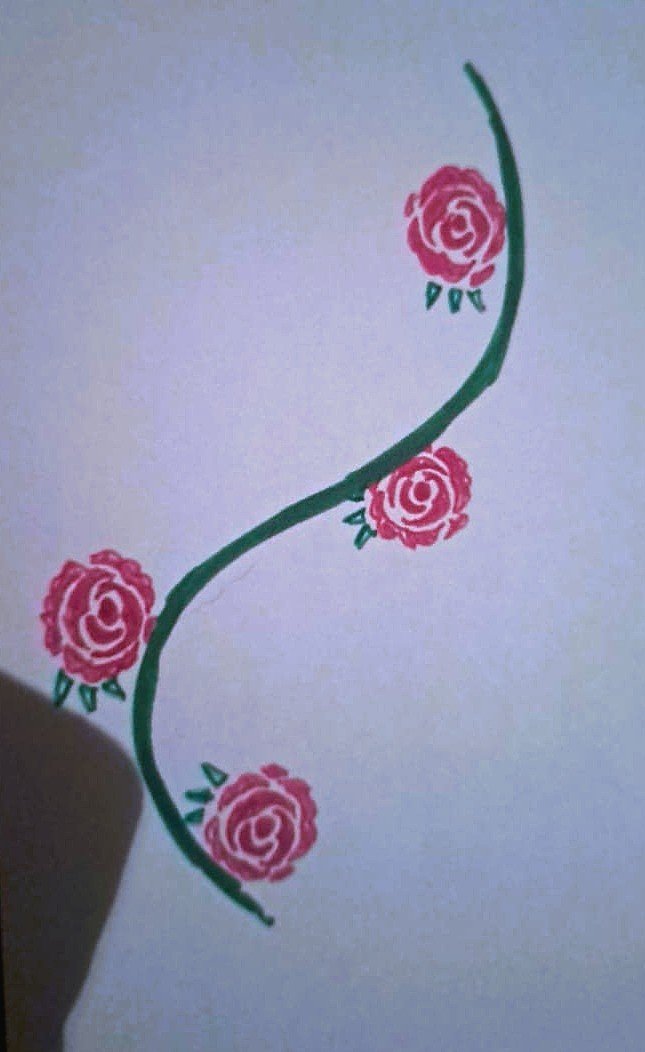
Facing towards the vines add 3-4 small V shapes.
12. Attach Roses To Vine
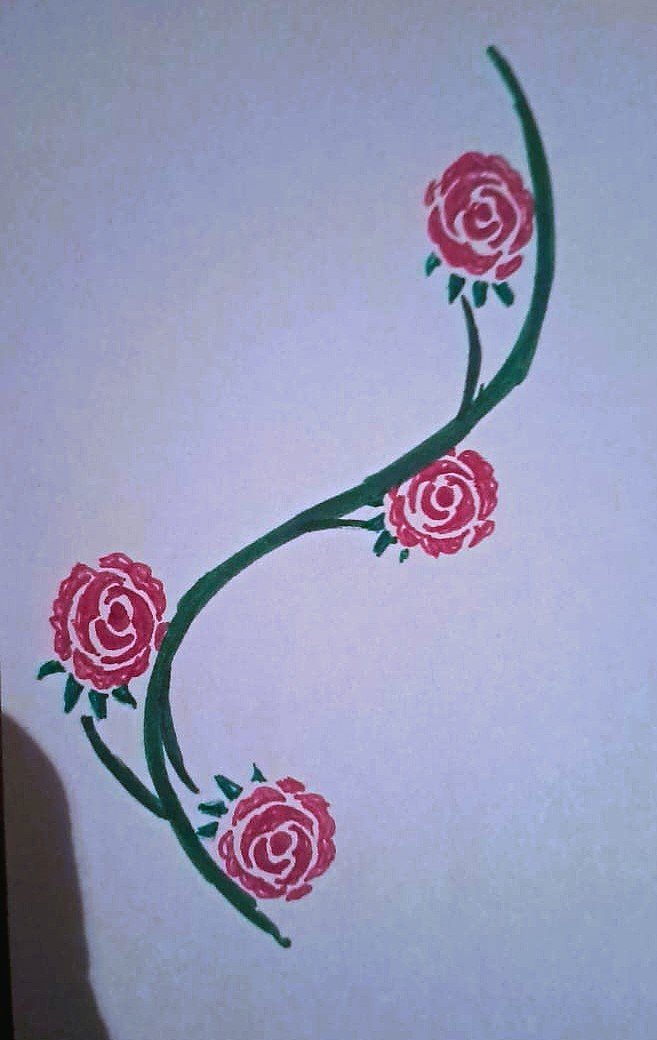
Draw a line connecting the V shapes to the vine, in any direction that looks balanced and aesthetically pleasing.
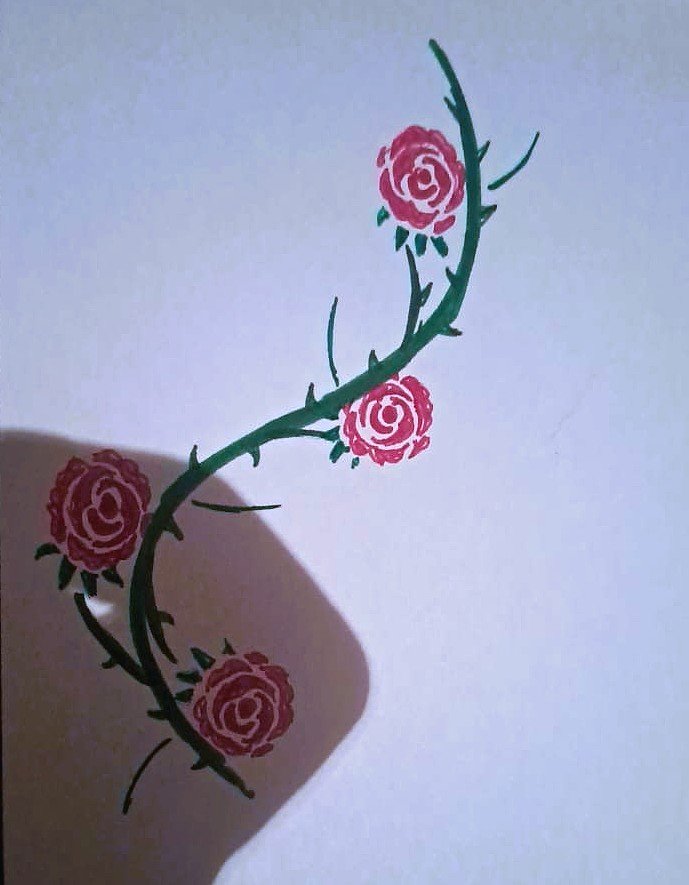
13. Add Thorns
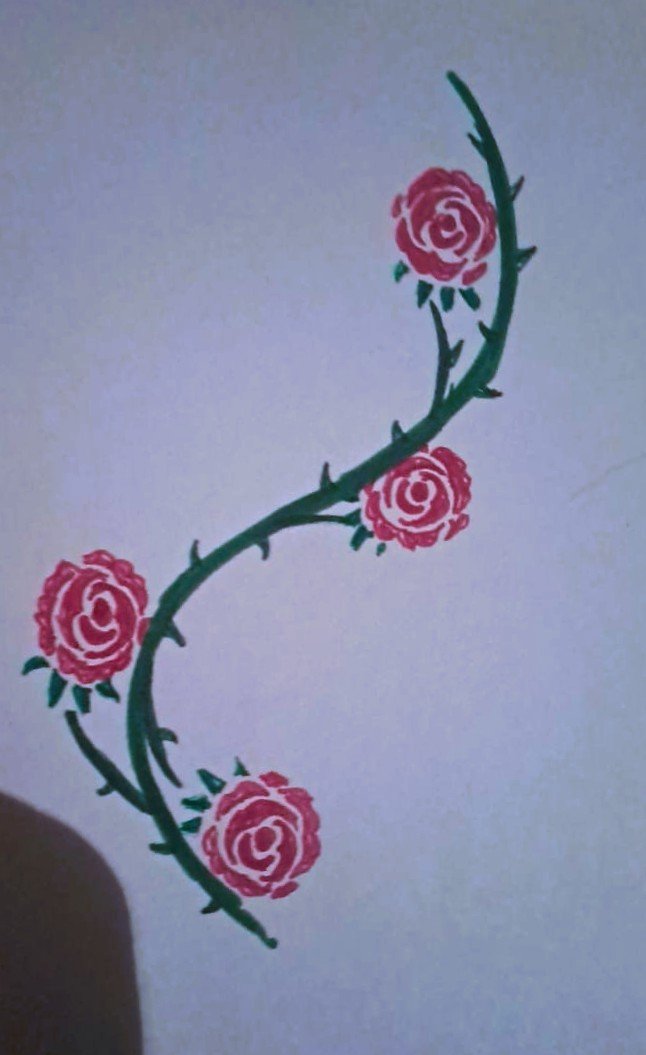
Add thorn shapes (slightly curved narrow V shapes with pointy tips) all over the vines, a little or a lot, depending on personal preference.
14. Adding the Leaves (Base)
Add lines, about the same size as the roses, with a slight curve. They will be the base for the leaves. Leaves look best close to the roses but can also be used to fill spaces and balance out the drawing. Go with what looks good and just have fun with it.
15. Zig Zag Shapes to Create Leaf


Along the edge of the leaves, add slanted zig zag shapes as shown. Do this on both sides of the leaf, with one side curving slightly outwards and the other with a slight inward curve.
16. Finish the Leaves
Draw a few small lines from the centre line of the leaf towards the spiked edges to create a leaf crease/vein effect. Then the drawing is done.
That is it for today, than you for reading. Till next time.

Credit - All content in this post has been created by and belongs to me.
Banner created using Adobe Express mobile app
Saludos, Hive
Este sencillo dibujo de una rosa es perfecto para quienes empiezan a dibujar. Es fácil de aprender, infinitamente útil, personalizable y se puede dibujar una y otra vez. Además, aunque es muy fácil de dibujar, queda genial una vez terminado.
Pasos para dibujar
1. Línea de la rosa
Comienza dibujando una línea, que será la parte de la rosa. Esto se puede hacer en CUALQUIER forma y ser tan simple o intrincado como se prefiera. Sea creativo o manténgalo simple, no importa.
2. Centro de las rosas
Deja un pequeño espacio aparte de la enredadera. Agrega puntos donde prefieras. Estos serán el centro de las rosas, así que asegúrate de dejar suficiente espacio para la rosa completa.
3. Medias lunas
Dibuja medias lunas siguiendo la curva de los puntos, envolviéndolas aproximadamente 1/3 del contorno. Estos pueden estar en cualquier posición alrededor del punto.
4. Formas de '3' estiradas
Comenzando por la mitad inferior o la forma de medialuna y siguiendo la curva del punto y la medialuna, dibuja una forma de '3' estirada, dejando un pequeño espacio entre la medialuna y la forma de '3'.
5. Completar y rellenar las figuras "3"
Conectar los bordes exteriores de las figuras "3" con una línea redonda y rellenar.
6. Figuras "3" invertidas
Con la parte puntiaguda Colocada en el espacio que quedó después del paso 4, dibuja de nuevo la forma "3" estirada siguiendo la curva de la media luna y la forma "3" rellena.
7. Completar y rellenar las formas "3" invertidas
Repite el paso 5 con las formas "3" invertidas.
8. Añadir el último Líneas
Siguiendo el contorno de la rosa, añade líneas alrededor de los bordes exteriores. Lo ideal son 2 o 3 líneas. Intenta trabajar en tercios, dejando pequeños espacios entre ellas.
9. Redondea las líneas con formas festoneadas
Redondea las líneas de los pasos anteriores con bordes festoneados y luego rellena las formas. Las rosas deberían empezar a verse como rosas.
10 . Añade pequeños detalles (opcional)
Si lo prefieres, rellena las rosas con pequeñas figuras para redondearlas un poco y que se vean más completas. Este paso es opcional.
11. Adición de pétalos de rosa mosqueta
De cara a las vides, añada 3 o 4 pequeñas formas de V.
12. Fije las rosas a Enredadera
Dibuja una línea que conecte las V con la enredadera, en cualquier dirección que se vea equilibrada y estéticamente agradable.
13. Agrega espinas
Agrega espinas (formas de V estrechas y ligeramente curvadas con puntas puntiagudas) por toda la enredadera, en pequeñas o grandes cantidades, según tus preferencias.
14. Agregando las hojas (Base)
Agrega líneas, aproximadamente del mismo tamaño que las rosas, con una ligera curva. Estas serán la base de las hojas. Las hojas lucen mejor cerca de las rosas, pero también se pueden usar para rellenar espacios y equilibrar el dibujo. Elige lo que te quede bien y diviértete.
15. Formas en zigzag para crear hojas
A lo largo del borde de las hojas, añade formas en zigzag inclinadas como se muestra. Haz esto en ambos lados de la hoja, con un lado ligeramente curvado hacia afuera y el otro hacia adentro.
16. Termina las hojas
Dibuja unas líneas pequeñas desde el centro de la hoja hacia los bordes puntiagudos para crear un efecto de pliegue/nervadura. El dibujo estará listo.
Eso es todo por hoy, gracias por leer. Hasta la próxima.
Crédito: Todo el contenido de esta publicación fue creado por mí y me pertenece.
Banner creado con la aplicación móvil Adobe Express.
Quedo hermoso para decorar una portada de cuaderno.
Gracias, es una muy buena idea. Quizás ahora pueda decorar mi cuaderno de dibujo así. Que tengas un buen día.
@tipu curate 4
Upvoted 👌 (Mana: 35/75) Liquid rewards.
Upvoted 👌 (Mana: 0/75) Liquid rewards.
Hola, muy bonito tu dibujo te invito a que leas las reglas de la comunidad 😁
Muchas gracias, los leeré enseguida. Que tengas un buen día.