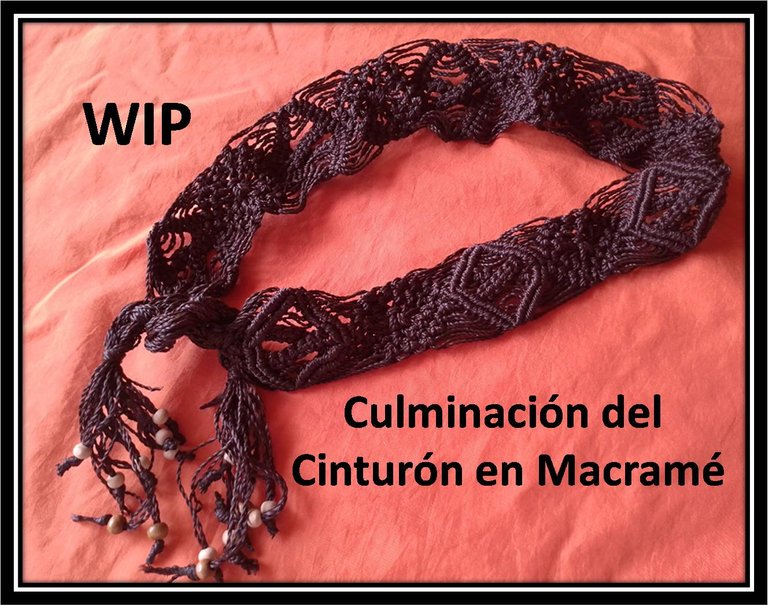
WIP, culminación del cinturón en Macramé. (Esp/Eng)
Feliz inicio de semana para todos, no quería dejar de pasar este día sin compartir con ustedes a sugerencia de @crosheille, la culminación del cinturón en macramé, comenzarlo fue una pequeña odisea, primero porque tenía mucho tiempo sin tejer macramé en diagrama y segundo porque no tenía a la mano el diagrama para tejerlo.
Happy beginning of the week to everyone, I did not want to let this day pass without sharing with you at the suggestion of @crosheille, the completion of the macramé belt, starting it was a little odyssey, first because I had a long time without weaving macramé in diagram and second because I did not have at hand the diagram to weave it.
Así que cuando me dispuse a proseguir con el tejido del cinturón, lo primero que hice fue con quemar la punta de cada hebra de nailon, con la ayuda de un yesquero y las dispuse por pares para agilizar el tejido.
So when I decided to continue weaving the belt, the first thing I did was to burn the tip of each strand of nylon, with the help of a tinder and I arranged them in pairs to speed up the weaving.

Comencé a tejer pero no me ajustaban los nudos, así que destejí y fijándome de los diagramas ya tejidos, plasmé el diagrama en papel.
I started to weave but the knots did not fit, so I unknitted and looking at the diagrams already woven, I put the diagram on paper.
Ya con el diagrama listo, ahora si podía tejer, en la primera vuelta del diagrama hice 2 nudos planos o básicos, con las 8 hebras centrales, para la segunda vuelta tejí 3 nudos, para ello utilicé dos hebras a cada lado de los nudos de la vuelta anterior, en la tercera vuelta nuevamente tomé dos hebras a cada lado y tejí 4 nudos.
With the diagram ready, now I could weave, in the first round of the diagram I made 2 flat or basic knots, with the 8 central strands, for the second round I wove 3 knots, for this I used two strands on each side of the knots of the previous round, in the third round again I took two strands on each side and wove 4 knots.
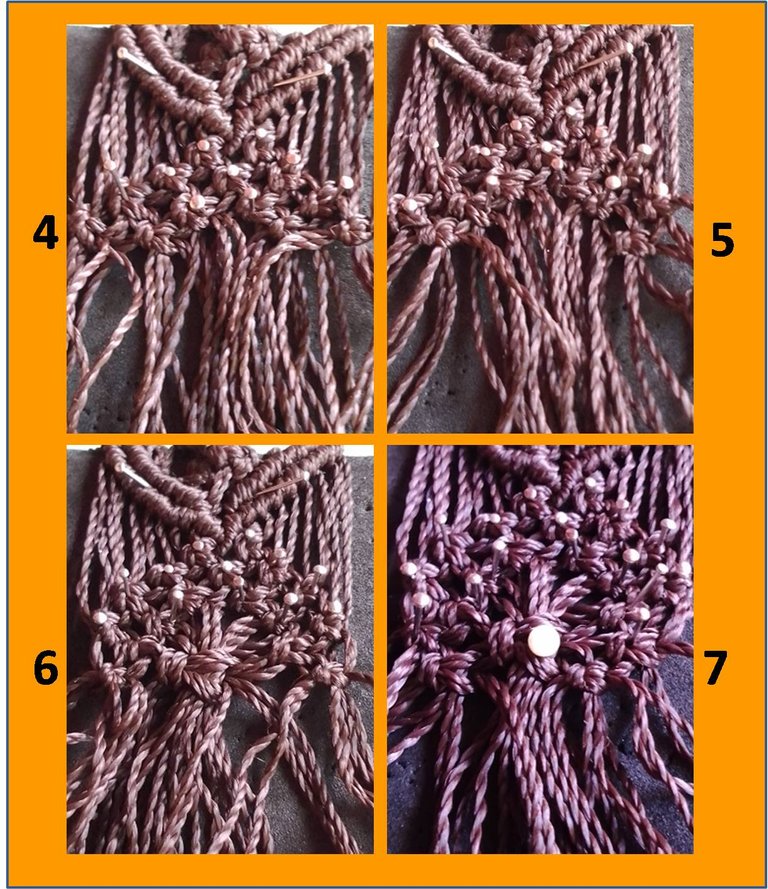
Para la cuarta vuelta baje las dos hebras restantes de cada lado, y solo tejí dos nudos en cada extremo, dejando libres las 4 hebras centrales, para la quinta vuelta solo tejí 1 nudo a cada lado, utilizando de la tercera a la sexta hebra de cada extremo, para la sexta vuelta hice tres nudos uno en cada extremo, con las primeras 4 hebras de cada extremo, luego hice un nudo central con las quinta y sexta hebra haciendo nudo y el resto de las hebras centrales como guía para ese nudo, para la séptima vuelta repetí el procedimiento de la vuelta quinta.
For the fourth row I lowered the two remaining strands on each side, and only wove two knots at each end, leaving free the 4 central strands, for the fifth row I only wove 1 knot on each side, using from the third to the sixth strand at each end, for the sixth row I made three knots, one in each end, with the first 4 strands of each end, then I made a central knot with the fifth and sixth strands making a knot and the rest of the central strands as a guide for that knot, for the seventh row I repeated the procedure of the fifth row.
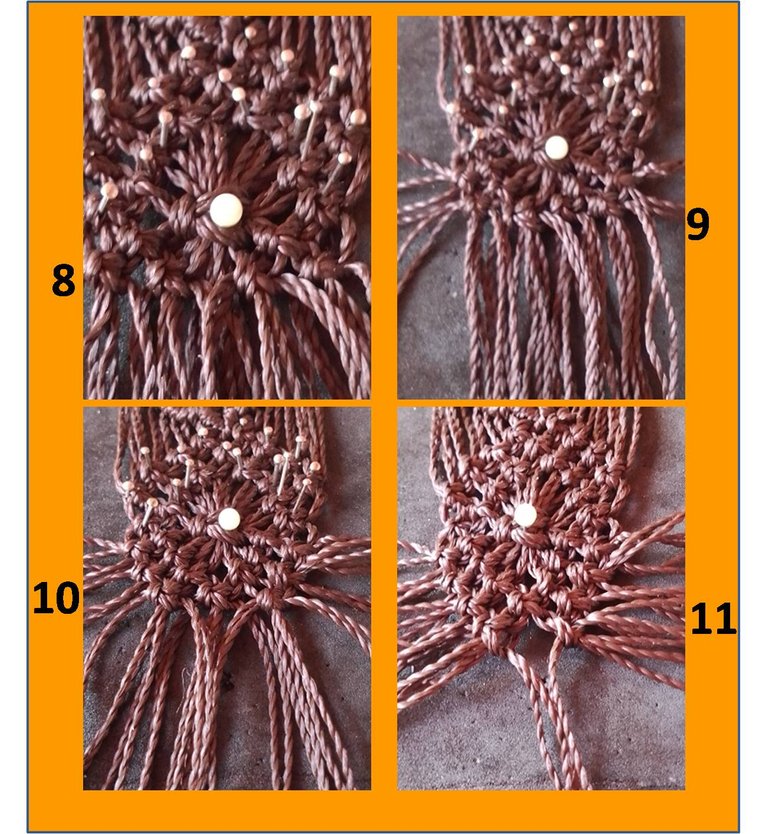
De la vuelta octava a la vuelta undécima repetí de manera regresiva desde la cuarta vuelta a la primera vuelta. Así culminé el primer diagrama.
From the eighth to the eleventh row I repeated backwards from the fourth row to the first row. Thus I completed the first diagram.
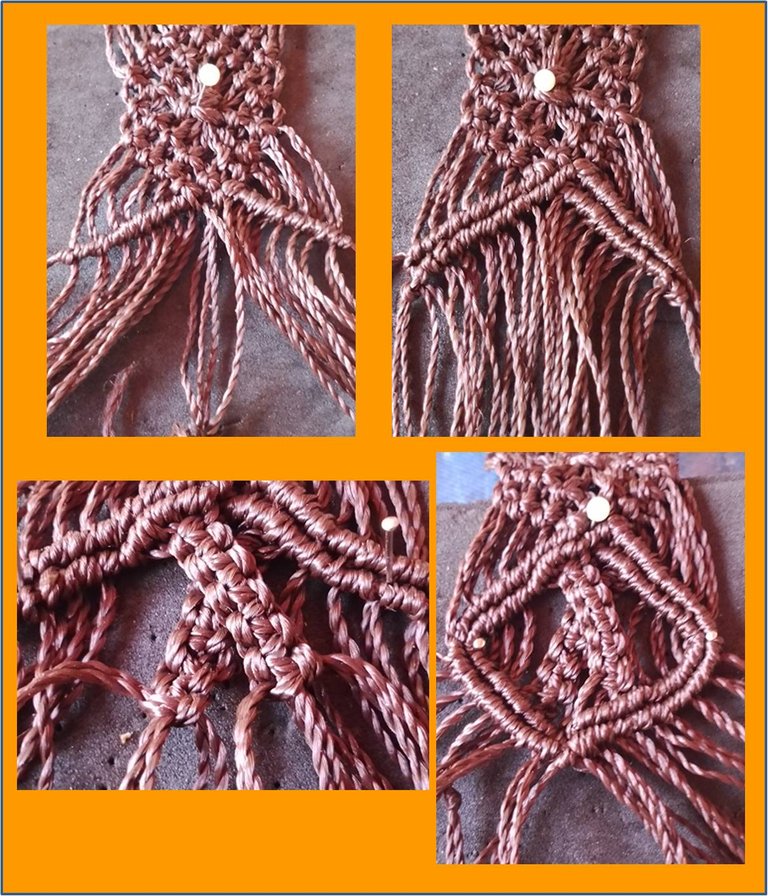
Para el otro diagrama con las hebras centrales como guía tejí en nudo festón, de forma diagonal tejí dos hileras, luego con las 8 hebras centrales tejí dos hileras de 6 nudos planos. Luego cerré el diagrama nuevamente en nudo festón, así culminé el tejido de los diagramas faltantes.
For the other diagram with the central strands as a guide I knit in a scallop knot, diagonally knit two rows, then with the 8 central strands I knit two rows of 6 flat knots. Then I closed the diagram again in a festoon knot, thus completing the weaving of the missing diagrams.
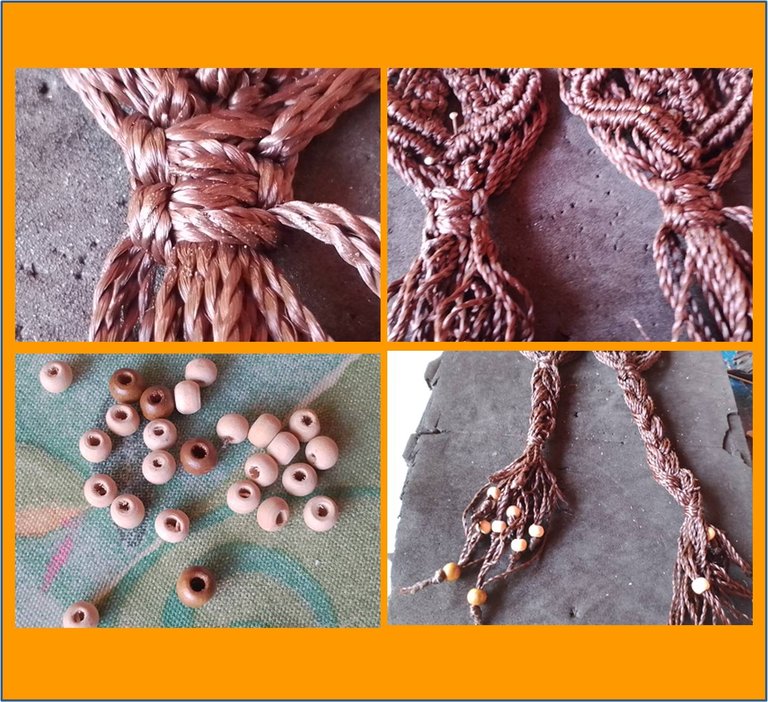
Luego para finalizar el cinturón, hice dos nudos planos a cada extremo del cinturón y lo ajusté con la ayuda del yesquero para fijar y pegar las hebras, seguido le coloque pequeñas cuencas de madera en los extremos y anudé quemando los extremos, y ya está terminado el cinturón.
Then to finish the belt, I made two flat knots at each end of the belt and adjusted it with the help of the tinder to fix and glue the strands, then I placed small wooden bowls at the ends and knotted burning the ends, and the belt is finished.
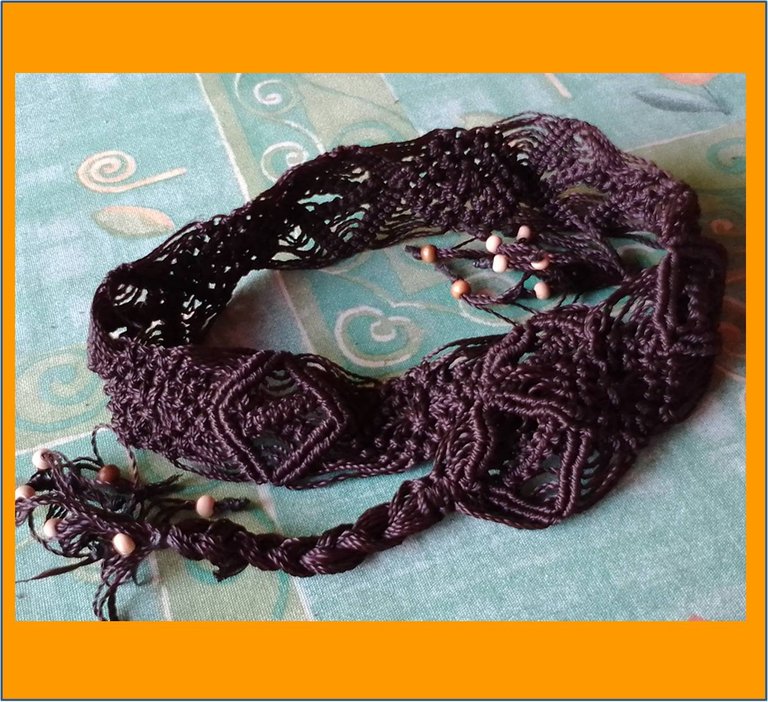
Para realizar este cinturón se necesita el siguiente material:
- 12 hebras de hilo de 5 veces el largo deseado.
- 8 hebras de hilo de 4 veces el largo deseado.
- Yesquero
- Cuencas para adornar o una hebilla si se quiere hacer estilo correa.
To make this belt you need the following material:
- 12 strands of thread of 5 times the desired length.
- 8 strands of thread of 4 times the desired length.
- Tinder
- Beads to decorate or a buckle if you want to make a belt style.
Espero les haya gustado, para alguna pregunta o sugerencia estoy a su disposición, agradeciendo su apoyo y valoración.
I hope you liked it, for any questions or suggestions I am at your disposal, thanking you for your support and appreciation.
Las fotos fueron tomadas con mi celular Moto E6I y fue traducido con www.DeepL.com,Translator (versión gratuita).
The photos were taken with my Moto E6I cell phone and the translation was thanks to www.DeepL.com,Translator (free version).

Felicidades amiga @gladymar1973 es un hermoso trabajo, se ve que le pusiste mucho amor y dedicación. saludos y Bendiciones 😊
Gracias así fue feliz dia
Felicidades por haber culminado tu proyecto.
El resultado es genial.
Saludos!
Muchas gracias querida
So much of work have given a nicely done belt 😍.
Thanks for your comment, certainly macramé is a little more laborious than crochet, greetings and thanks for reading.
Woohoo, un proyecto terminado ❣️✨. El diseño es muy hermoso. Había visto cinturones así pero nunca me había detenido a pensar en todo el trabajo que hay detrás. Gracias por compartirlo ❣️.
gracias querida @lauramica ciertamente el macramé, es un poquito complicado, que por ley hay que practicarlo, espero poder seguir prácticandolo y así poder perfeccionar la tecnica, gracias por leer y comentar feliz día
Luce complicado el diagrama. A veces pasa que hay que destejer para volver a agarrar el rumbo.
Me encanta el color del hilo, el hilo se ve tan sedoso y delicado. Me gusta el detalle de las cuencas le da un acabado precioso.
Buen trabajo, un proyecto completado.
Saludos
Muchas gracias por comentar querida, feliz tard
It is very nice work, I congratulate you