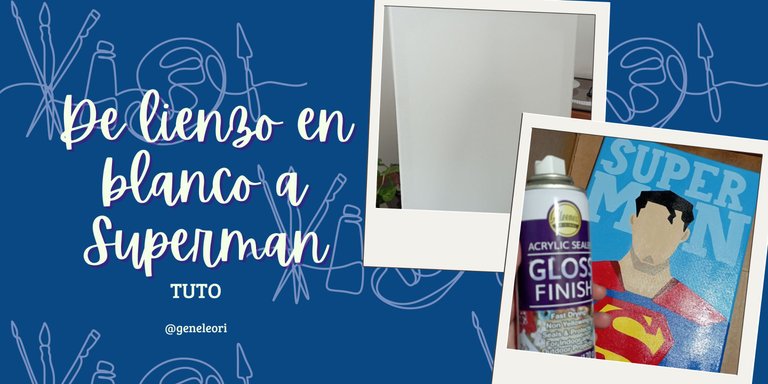
From blank canvas to Superman: #tuto #DIY / De lienzo en blanco a Superman (ESP-ENG)
¡Hola hivers!💜
Espero que se encuentren bien y felices. Amo dar regalos hechos a mano, considero que tiene mucho significado que alguien use sus manos para darte un regalo y se tome el tiempo de hacerlo. Eso es algo muy bonito y soy fan de ello. Finalizando febrero uno de mis tíos cumplía años y buscando como decorarle para su cumpleaños me encontré con un cuadro de Superman. Me encantó la idea y, aunque no soy excelente con la pintura, me atreví a intentarlo, porque si hay algo que siempre me ha gustado es jugar con la pintura aunque no sea diestra ni sepa mucho al respecto. Les cuento el proceso:

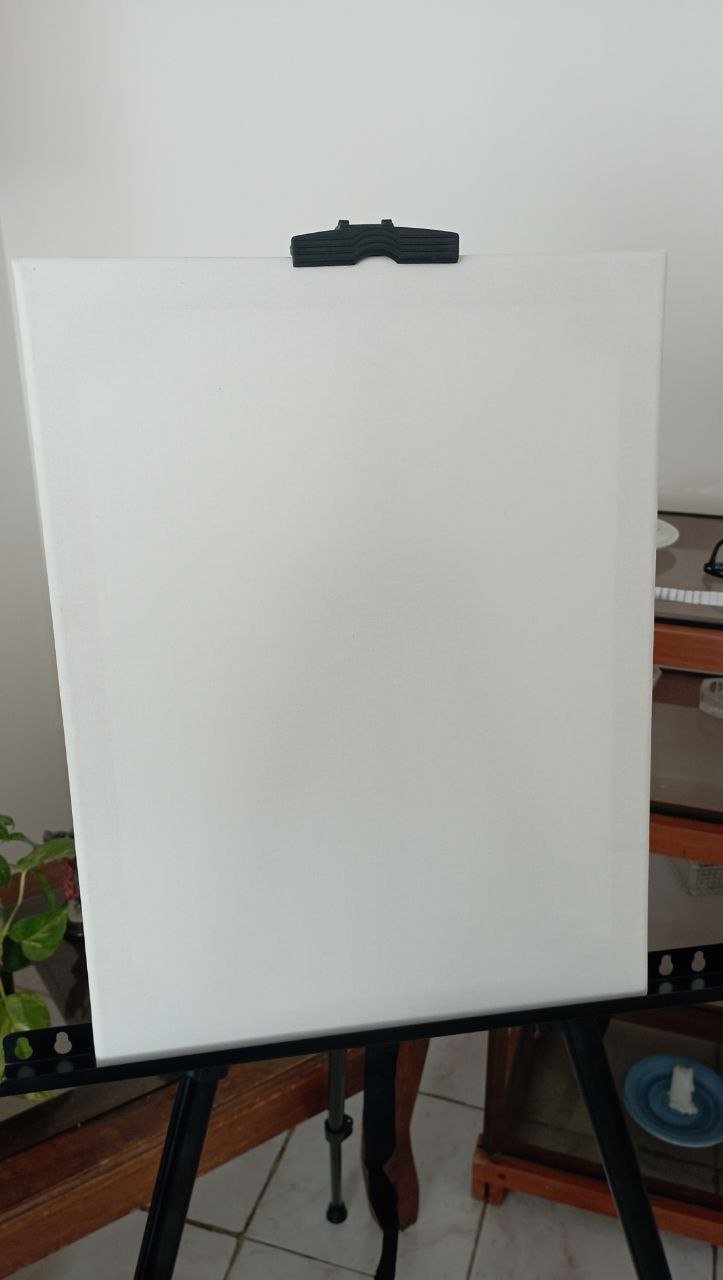
MATERIALES
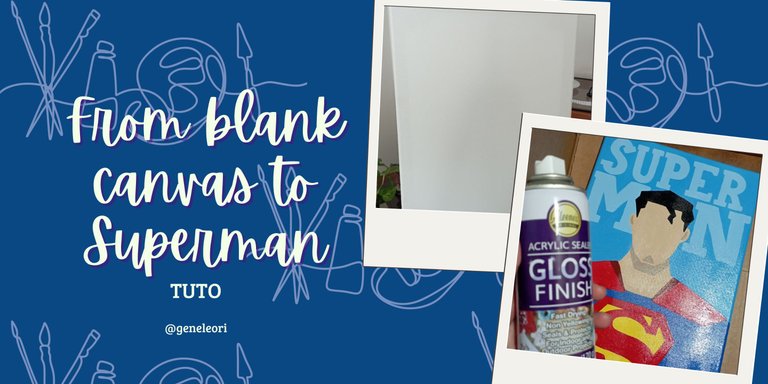
Lienzo (use uno de 40x30 cm)
Lápiz
Goma moldeable o algodón con alcohol
lápiz acuarelable
Pinceles
Pinturas acrílicas
Barniz en spray
PASO A PASO
 |  |
|---|
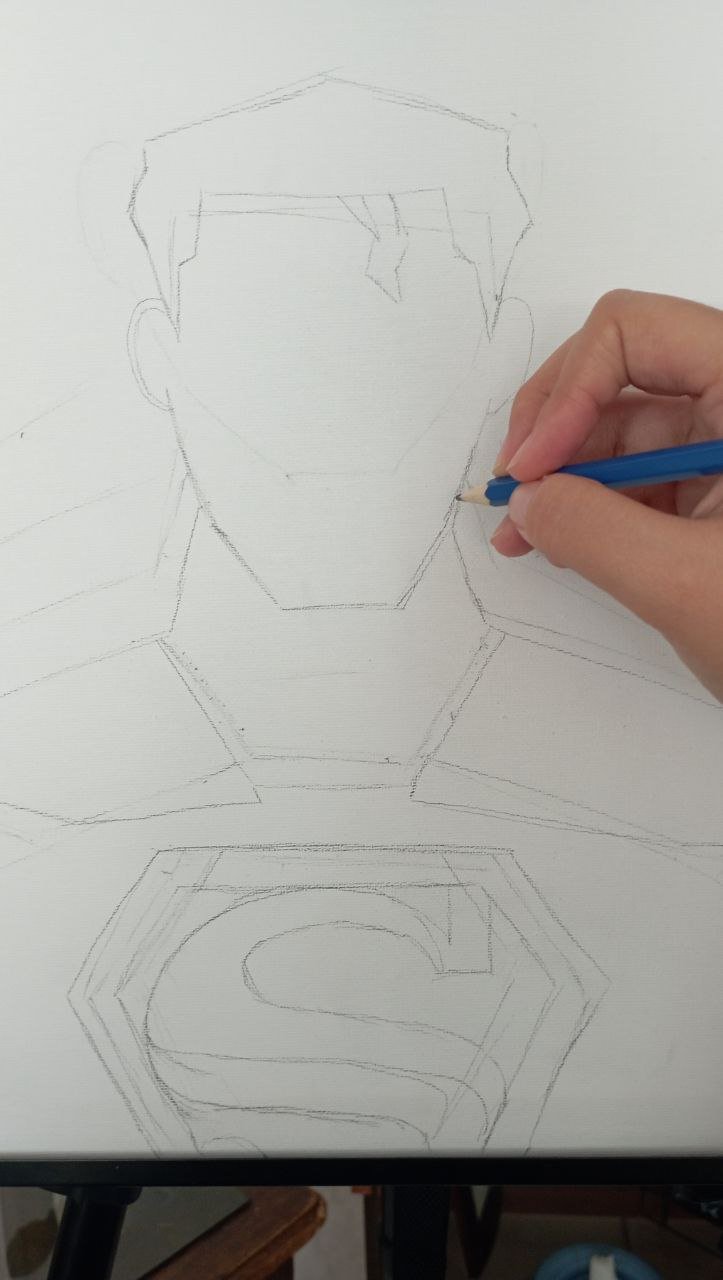
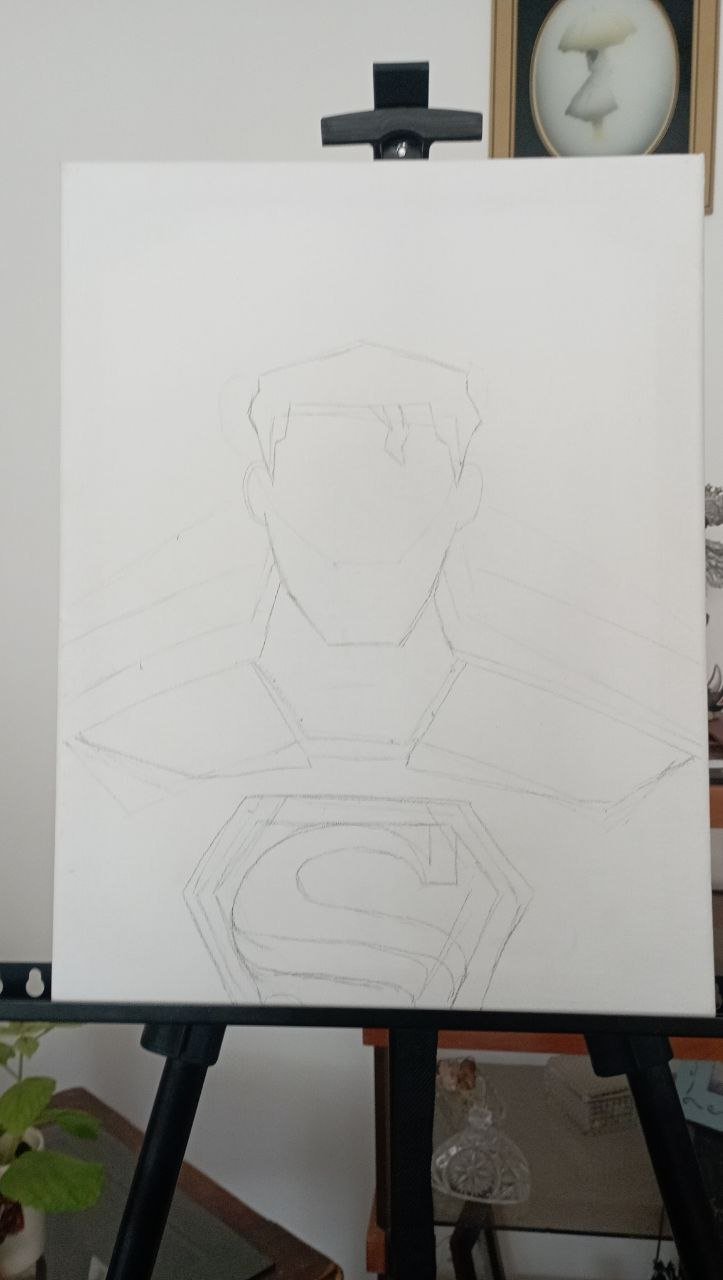
PASO 1
Lo primero: el boceto. Algo que me gustó del cuadro que vi es que eran puras líneas rectas y era abstracto. No tenía rostro, pero sí elementos muy particulares que al verlo te decían es superman. Con ayuda de un lápiz empecé a trazar los hombros de superman, cuello y cabeza. Luego fui con su escudo y la capa. Con ayuda de la goma moldeable y un algodón con alcohol fui borrando un poco el grafito para empezar a pintar.
PASO 2
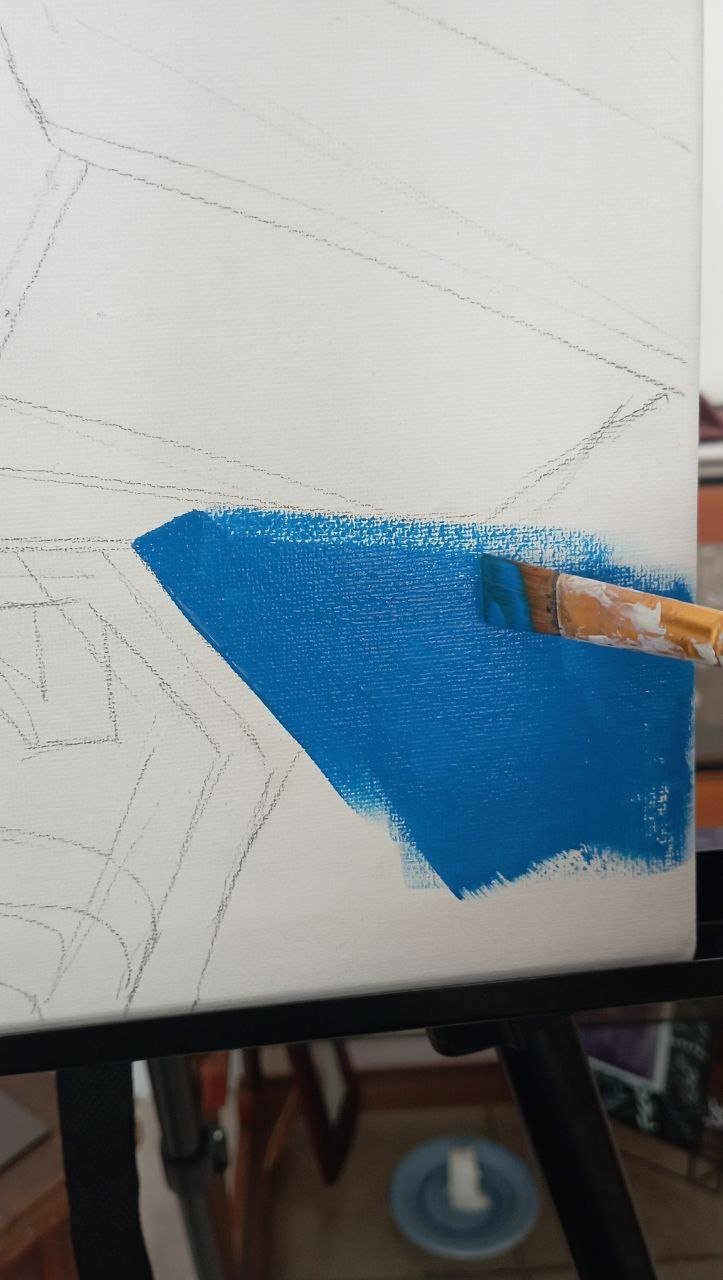
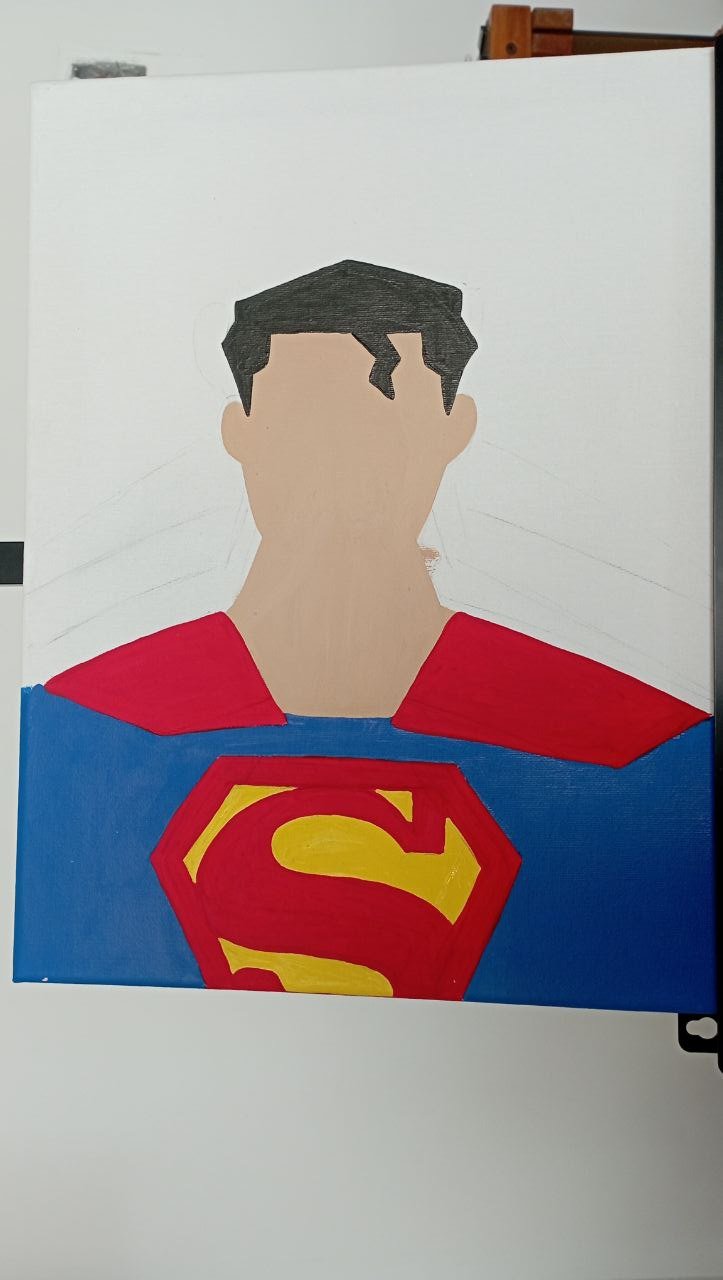
Empieza mi parte favorita: pintar. Use un caballete de aluminio que tengo (y rara vez uso, aunque admito que fue muy útil) para sostener el lienzo. Con ayuda de los pinceles y paleta fui usando los colores básicos de Superman. El primero fue el azul de su traje. Use un azul marino. Tuve que darle unas 2 capas para que quedara uniforme e intenso.
El siguiente color fue el rojo de la capa y del logo de Superman. Usé un rojo primario (así decía la etiqueta) y tuve que darle unas 3 capas de pintura. La capa de superman llevaba un detalle de una sombra de un tono rojo más oscuro pero decidí dejarlo para el final.
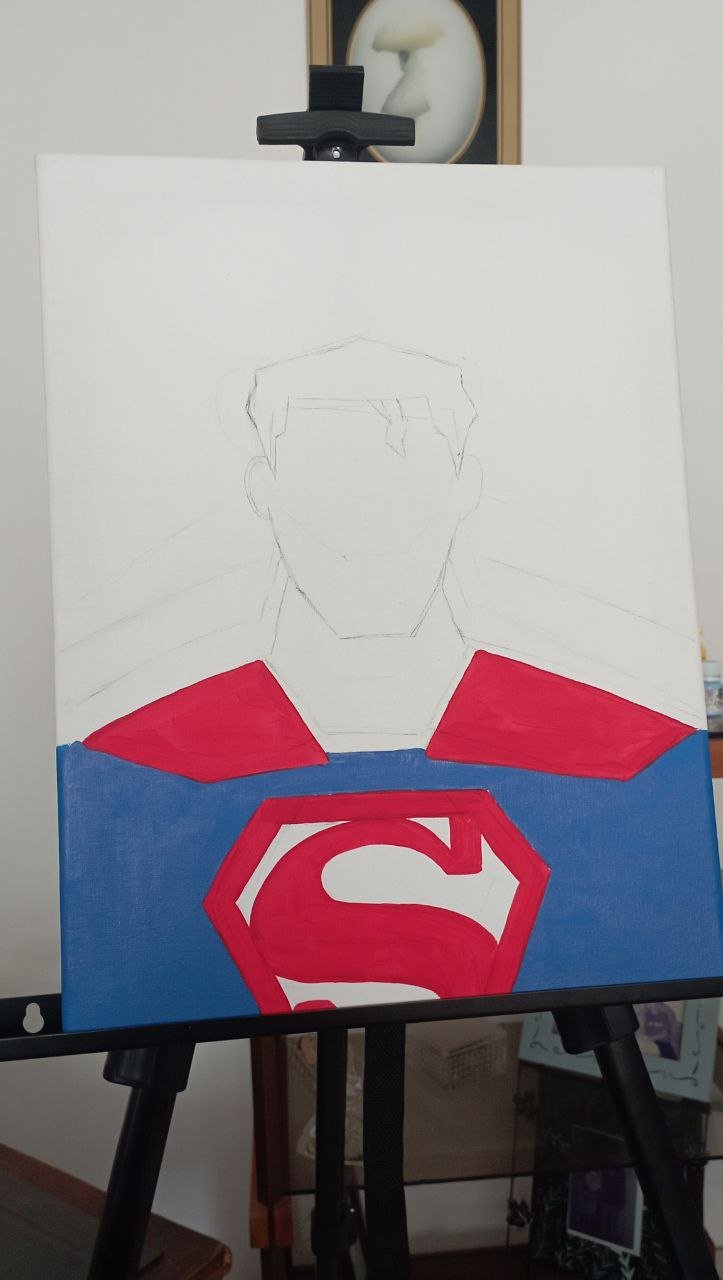
Empezamos con el amarillo. Estas fueron 4 capas para que cubriera la parte interna del logo.
Entre cada capa deje secar por al menos una hora, para estar segura de que no haría un desastre.
 |  |
|---|
PASO 3
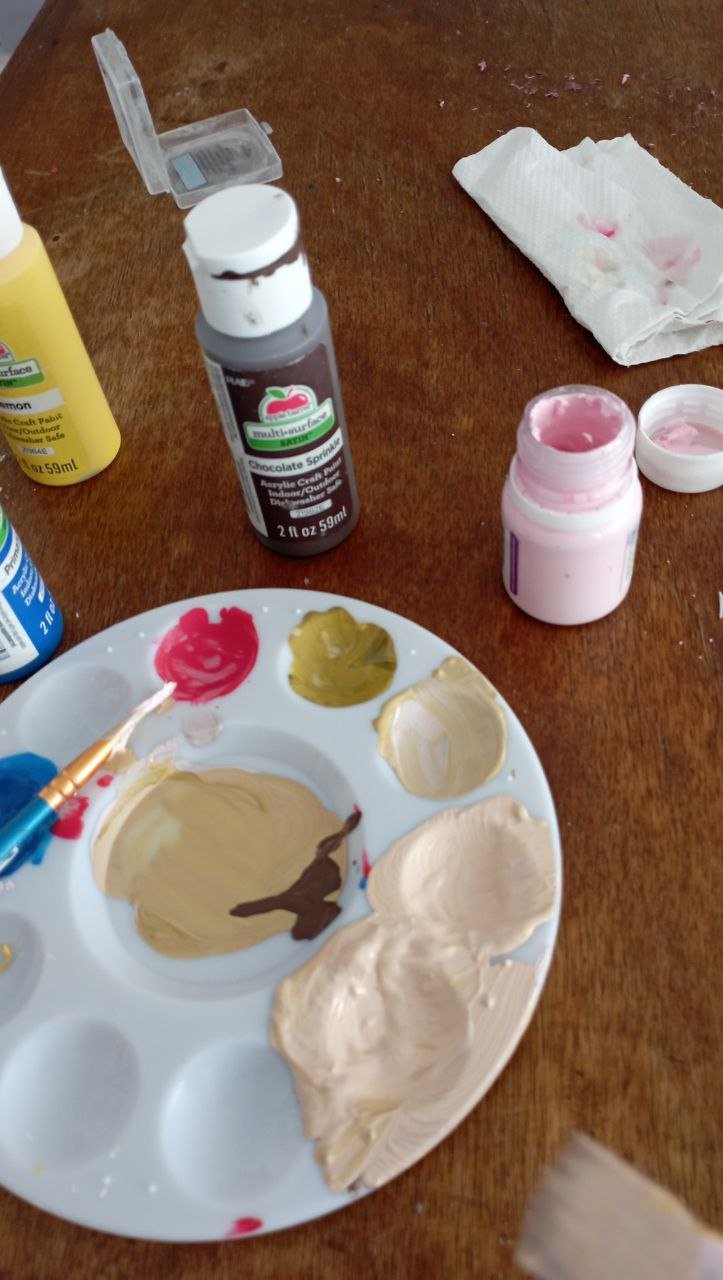
Detalle pequeño: no tenía color “piel”. Pero como todo tiene solucion investigue un poco y segun si mezclas marron, blanco, amarillo y un toquecito de rojo podia llegar al tono exacto de superman. Siendo honesta mi fe era nula y me veía corriendo a comprar la pintura, pero igual lo intente. Tuve que confiar en el proceso pero se logró. El truco esta en usar mayor cantidad de blanco y amarillo que de marron, e ir dandole “calor” con un toquecito de rojo. Fue genial ver cómo logré llegar a ese color.
Prepare la cantidad suficiente de pintura para darle 2 capas a la piel.
 |  |
|---|
Luego tocaba el cabello, que fue una parte sencilla y con 2 capas estuvo lista.
 |  |
|---|
PASO 4
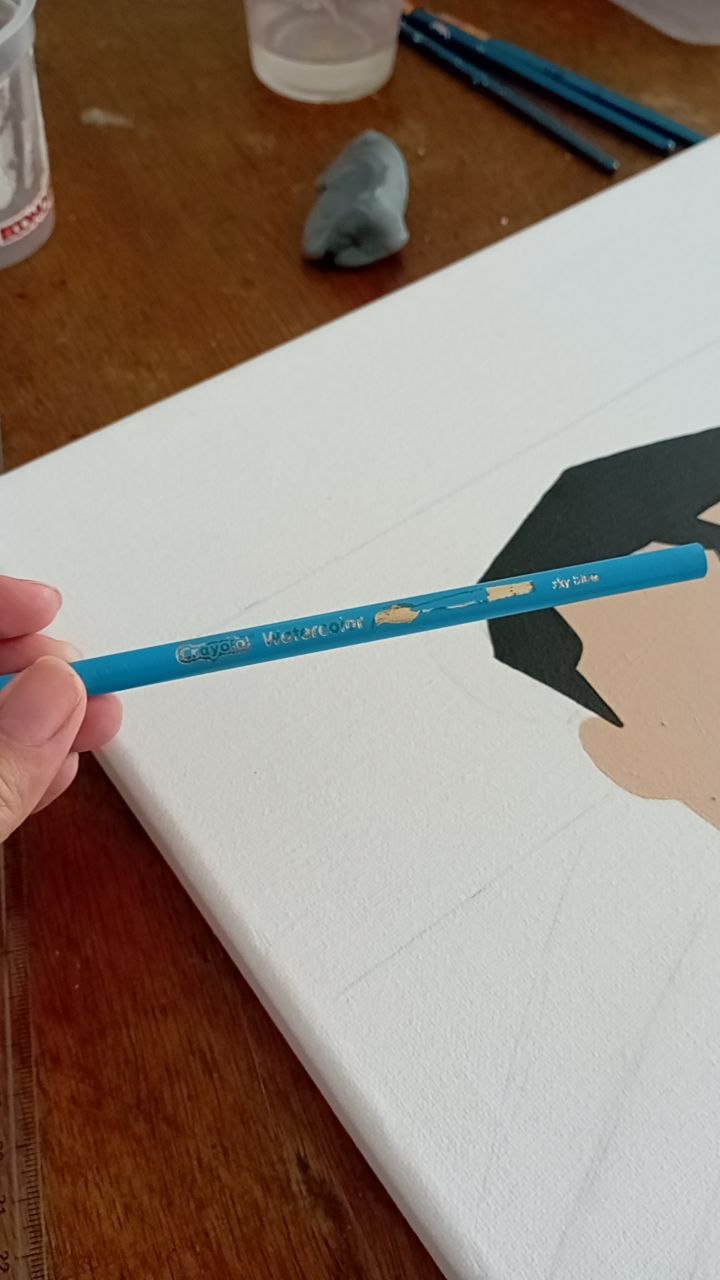
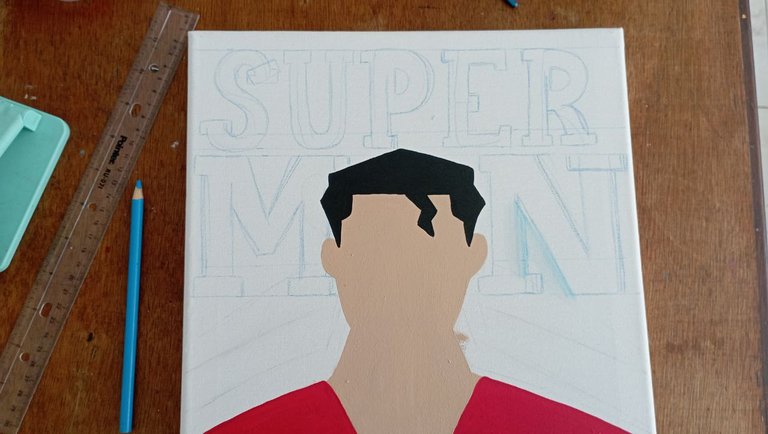
El siguiente paso es el fondo. Entre varias versiones que vi, algunas tenían un fondo azul medio y las letras que decían Superman y otras tenían el fondo solo y ya. Yo soy una chica de lettering, así que dibujar letras es mi pasión, así que me lance con eso.
Para esto recordé que tenían lápices acuarelables. Use uno azul claro para dibujar las letras con un estilo serif sencillo, todas en mayúsculas. Me gustó mucho como quedaron y no podía esperar a pintarlas.
 |  |
|---|
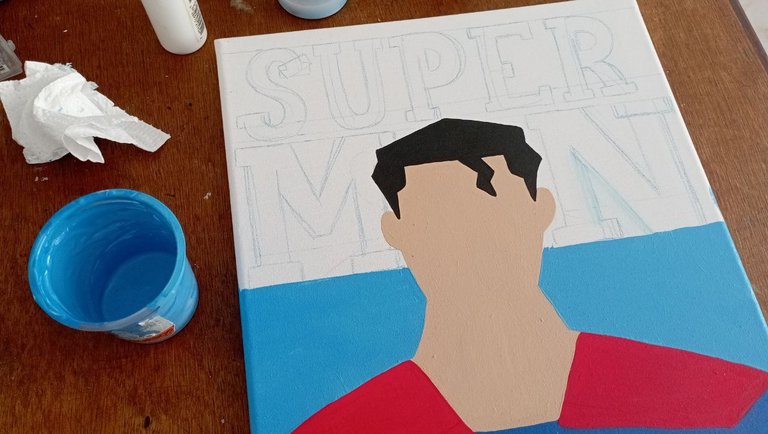
PASO 5
Pero primero: el fondo. Para esto mezcle el azul marino que tenía con blanco para aclararlo hasta un azul cielo. Preparé bastante pintura ya que el fondo era más o menos amplio. Con ayuda de dos pinceles: uno cuadrado y otro fino logré pintarlo. Me tomó bastante tiempo dado que debía delinear la silueta de superman con mucho cuidado y también las letras una por una.
Le di 2 capas y deje secar toda la tarde.
 |  |
|---|
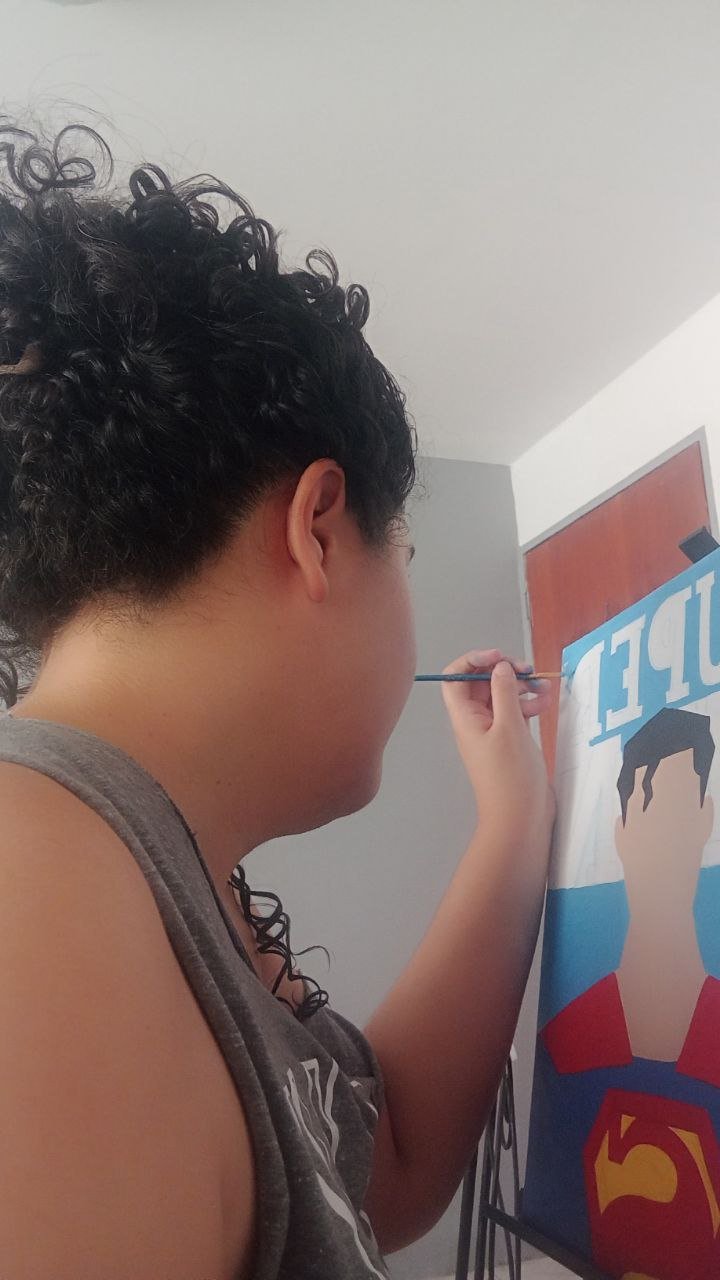
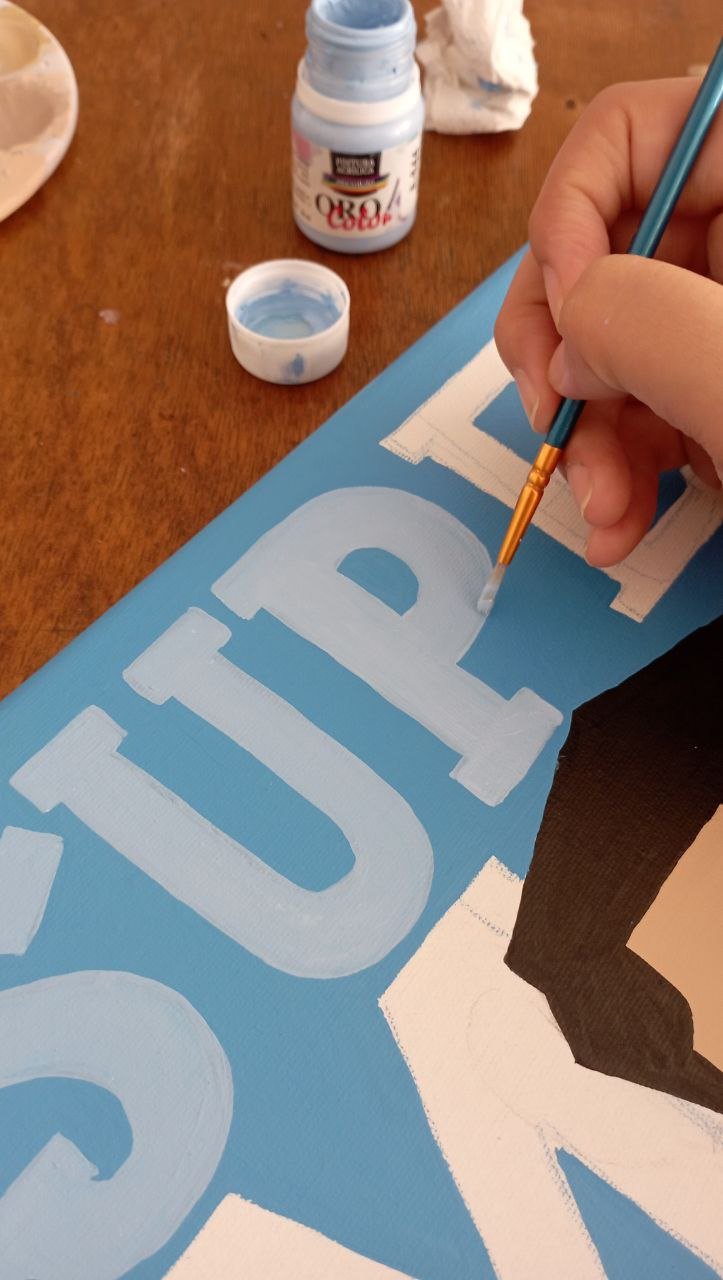
PASO 6
Llegó la hora de las letras. Para estas tenía un azul bebe que generaba un contraste perfecto con el fondo. Las pinte con un pincel punta fina ya que tenía delinearlas bien.
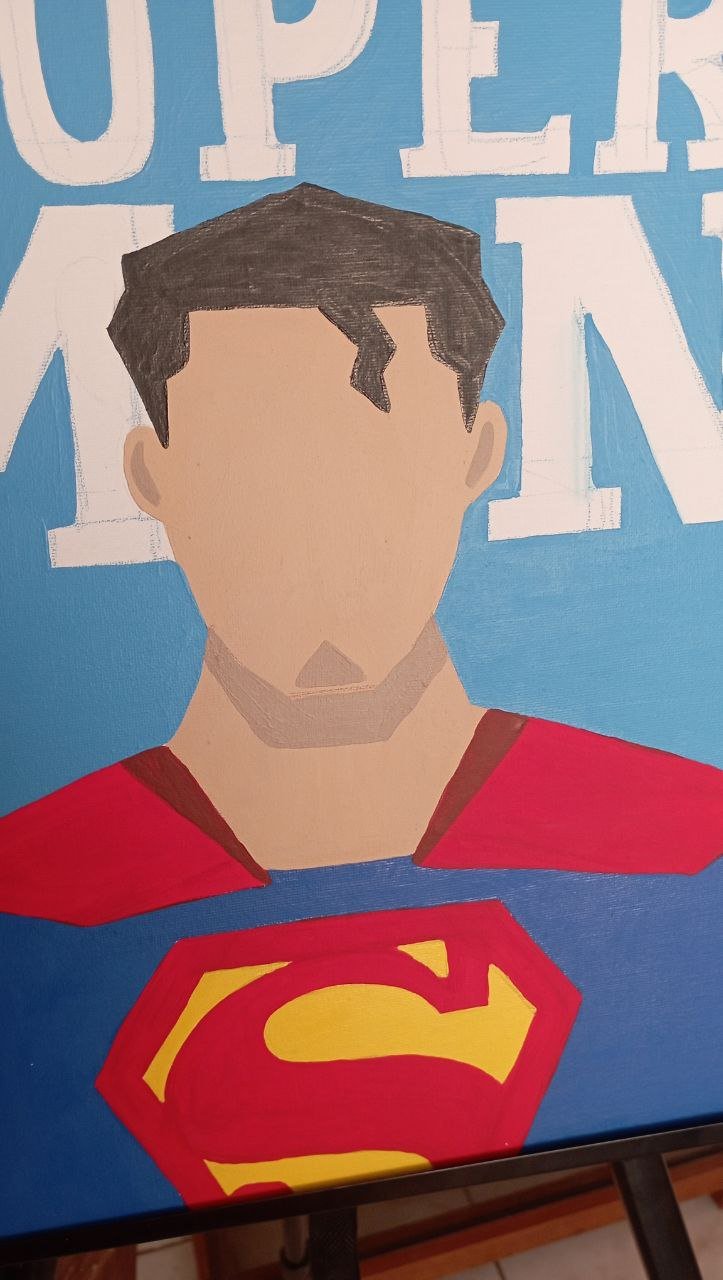
PASO 7
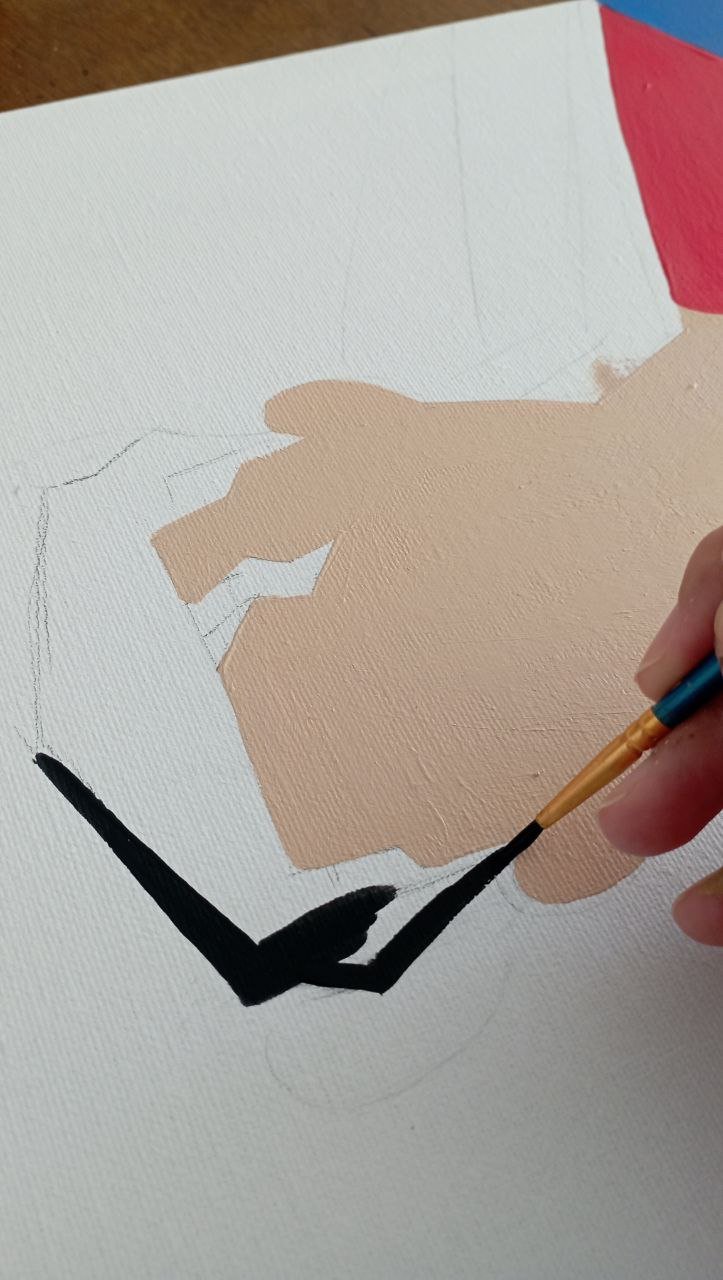
Tocaba hacer las sombras de la capa y la piel. Para la capa tuve que oscurecer el rojo, asi que use su color complementario que es el verde y con un toquecito logre dar con un rojo vino perfecto.
Para el color piel tuve que preparar nuevamente el tono piel, solo que como esta vez necesitaba que fuera más oscuro agregue un poco más de marrón y logre dar con el tono perfecto.
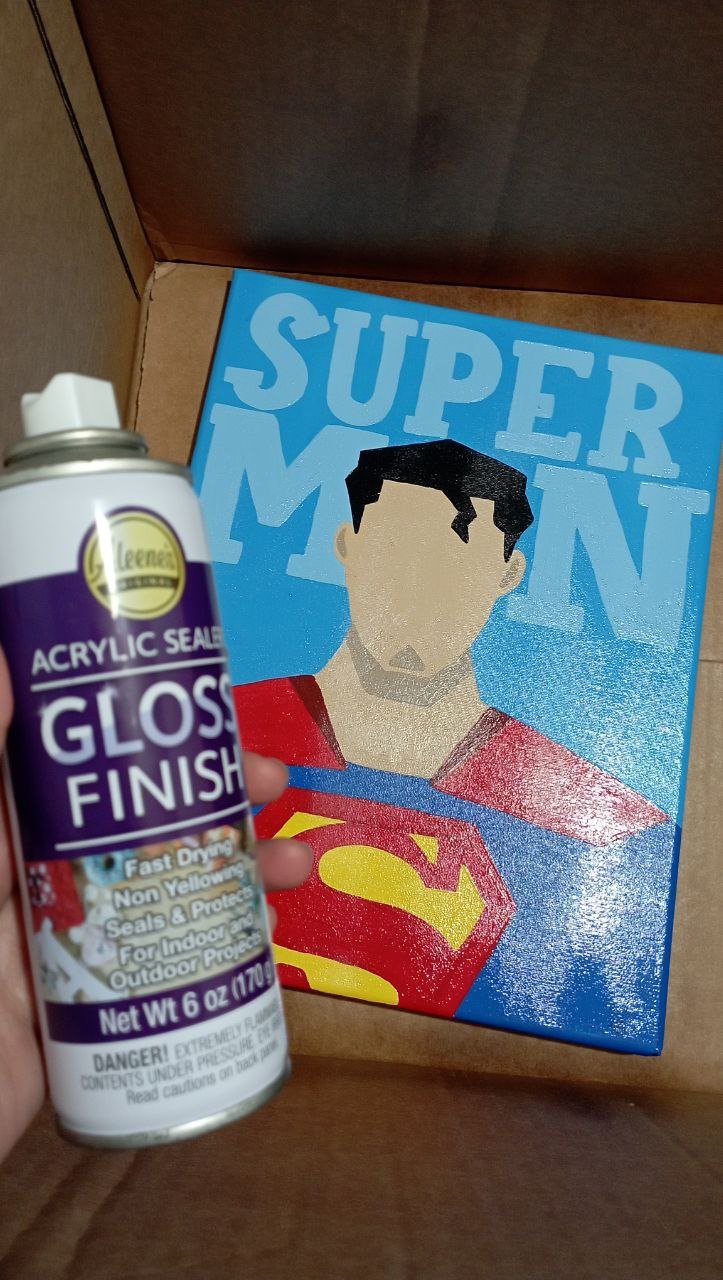
PASO 8
Luego de que estuviera completamente seca la pintura, le aplique un barniz brillante en spray que la protegerá y también le dará brillo.
PASO 9
¡Pintura de Superman lista para ser entregada!
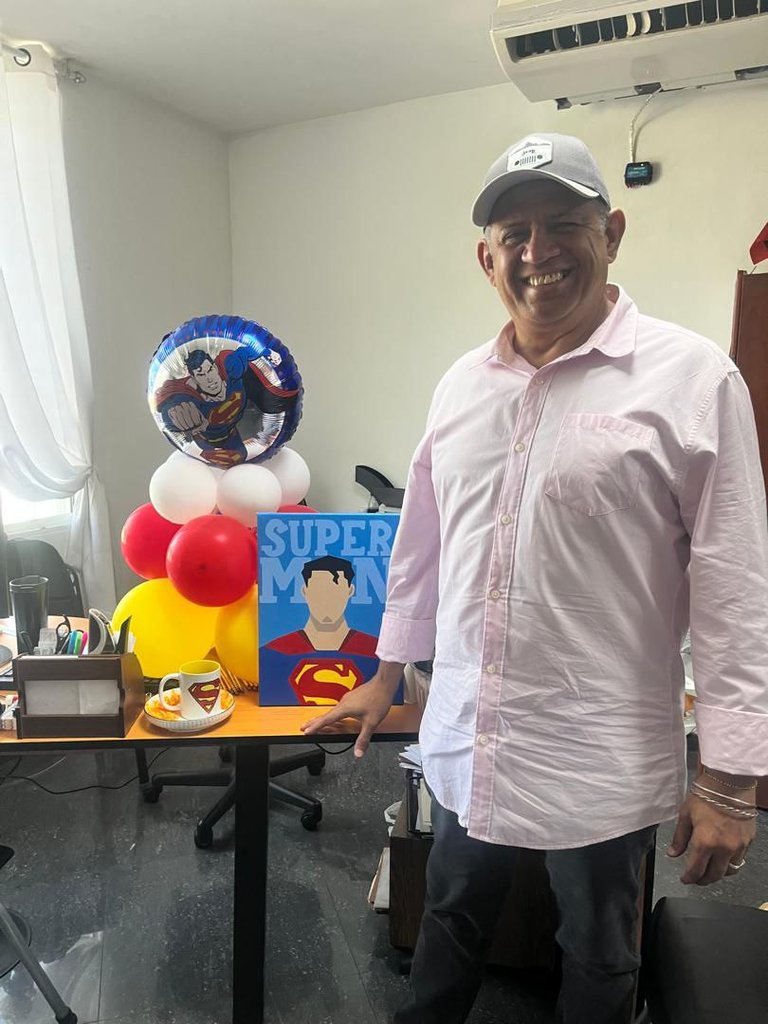
Siendo honesta no me tenía mucha fe en este proyecto, pero a medida que fui pintando y confiando en el proceso, me fue encantando el resultado. Para entregarlo lo envolví en papel kraft y mi tío se puso muy contento cuando lo vio. Será el cuadro perfecto para su oficina y su colección.
Gracias por leerme
Con cariño, G.
Hi hivers! 💜
I hope you are well and happy. I love giving handmade gifts, I consider it very meaningful that someone uses their hands to give you a gift and takes the time to do it. That is a very nice thing and I am a fan of it. At the end of February one of my uncles had a birthday and while looking for a way to decorate him for his birthday I came across a Superman picture. I loved the idea and, although I am not excellent at painting, I dared to try it, because if there is something I have always liked is to play with paint even though I am not skilled and I don't know much about it. I will tell you about the process:
MATERIALS
Canvas (use a 40x30 cm canvas)
Pencil
Moldable rubber or cotton with alcohol
Watercolor pencil
Brushes
Acrylic paints
Spray varnish
STEP BY STEP
| |
|---|
STEP 1
The first thing: the sketch. Something I liked about the painting I saw was that it was pure straight lines and it was abstract. It didn't have a face, but it had very particular elements that when you saw it, you could tell it was Superman. With the help of a pencil I started to draw Superman's shoulders, neck and head. Then I went with his shield and cape. With the help of the moldable eraser and a cotton ball with alcohol I erased a little of the graphite to start painting.
STEP 2
My favorite part begins: painting. I used an aluminum easel that I have (and rarely use, although I admit it was very useful) to hold the canvas. With the help of the brushes and palette I used Superman's basic colors. The first was the blue of his costume. I used a navy blue. I had to apply about 2 coats to make it uniform and intense.
The next color was the red of the cape and the Superman logo. I used a primary red (it said so on the label) and had to apply about 3 coats of paint. The superman cape had a detail of a darker shade of red but I decided to leave it for the end.
We started with the yellow. These were 4 coats to cover the inside of the logo.
Between each coat I let it dry for at least an hour, to be sure I wouldn't make a mess.
| |
|---|
STEP 3
Small detail: it had no “skin” color. But as everything has a solution I did a little research and if you mix brown, white, yellow and a touch of red I could get the exact tone of superman. To be honest my faith was null and I was running to buy the paint, but I still tried. I had to trust the process but it worked. The trick is to use more white and yellow than brown, and give it “warmth” with a touch of red. It was great to see how I managed to get to that color.
I prepared enough paint to give 2 coats to the skin.
| |
|---|
Then I did the hair, which was a simple part and with 2 coats it was ready.
| |
|---|
STEP 4
The next step is the background. Among several versions I saw, some had a medium blue background and letters that said Superman and others had the background just and that was it. I'm a lettering girl, so drawing letters is my passion, so I went for it.
For this I remembered they had watercolor pencils. I used a light blue one to draw the letters in a simple serif style, all caps. I really liked how they turned out and couldn't wait to paint them.
| |
|---|
STEP 5
But first: the background. For this I mixed the navy blue I had with white to lighten it to a sky blue. I prepared enough paint since the background was more or less wide. With the help of two brushes: one square and one thin, I managed to paint it. It took me quite a long time since I had to outline the silhouette of superman very carefully and also the letters one by one.
I gave it 2 coats and let it dry all afternoon.
| |
|---|
STEP 6
It was time for the letters. For these I had a baby blue that generated a perfect contrast with the background. I painted them with a fine tip brush since I had to outline them well.
STEP 7
It was time to make the shadows of the cape and the skin. For the layer I had to darken the red, so I used its complementary color which is green and with a little touch I managed to get a perfect wine red.
For the skin color I had to prepare again the skin tone, but this time I needed it to be darker, so I added a little more brown and I managed to get the perfect tone.
STEP 8
After the paint was completely dry, I applied a glossy spray varnish that will protect it and also give it shine.
STEP 9
Superman paint ready to be delivered!
To be honest I didn't have much faith in this project, but as I started painting and trusting the process, I loved the result. To deliver it I wrapped it in kraft paper and my uncle was very happy when he saw it. It will be the perfect painting for his office and his collection.
Thank you for reading me
With love, G..
FUENTE
Fotos: tomadas por mi desde mi redmi 10
Traducción: Deepl
SOURCE
Photos: taken by me from my redmi 10
Translation: Deepl

¿ᴺᵉᶜᵉˢᶦᵗᵃˢ ᴴᴮᴰ? ᵀᵉ ˡᵒ ᵖʳᵉˢᵗᵃᵐᵒˢ ᶜᵒⁿ @ruta.loans
Very impressive and beautiful, well done