Splinterlands Art Contest Week 255: Vampiric Blossom
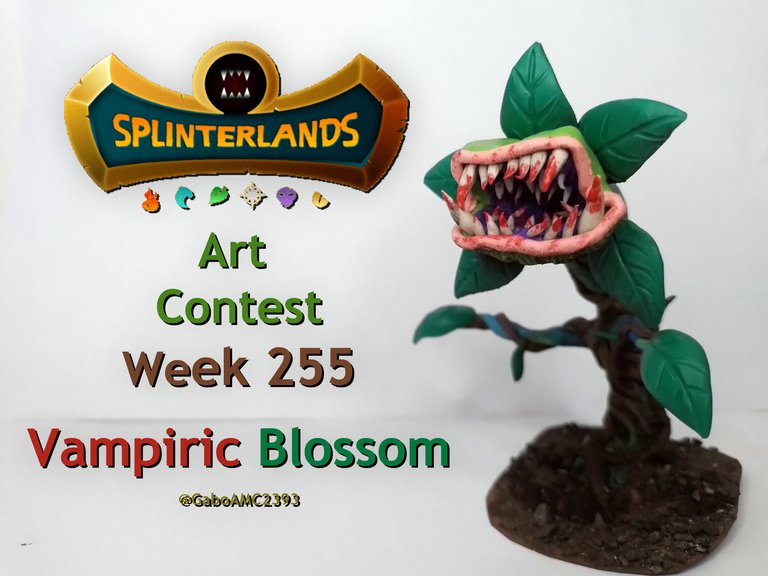
Greetings Splinterlants and art lovers. Today I bring for you my participation in the Splinterlands art contest in its 255th week. In this contest we can make an art inspired by the game or one of its many cards.
I have been working these last few days in my garden, so I wanted to make something that had some relation to that, so I selected a rather interesting card to be inspired by it. It's called Vampiric Blossom.
Saludos amantes del arte y Splinterlants. Hoy traigo para ustedes mi participación en el concurso de arte de Splinterlands en su semana 255. En este concurso podemos hacer un arte inspirado en el juego o en una de sus tantas cartas.
Yo he estado trabajando en estos últimos días en mi jardín, así que quise hacer algo que guardara cierta relación con eso, así que seleccioné una carta bastante interesante para inspirarme en ella. Se llama Vampiric Blossom.
Source / Fuente
https://next.splinterlands.com/card-detail/456/regular/3?tab=cards
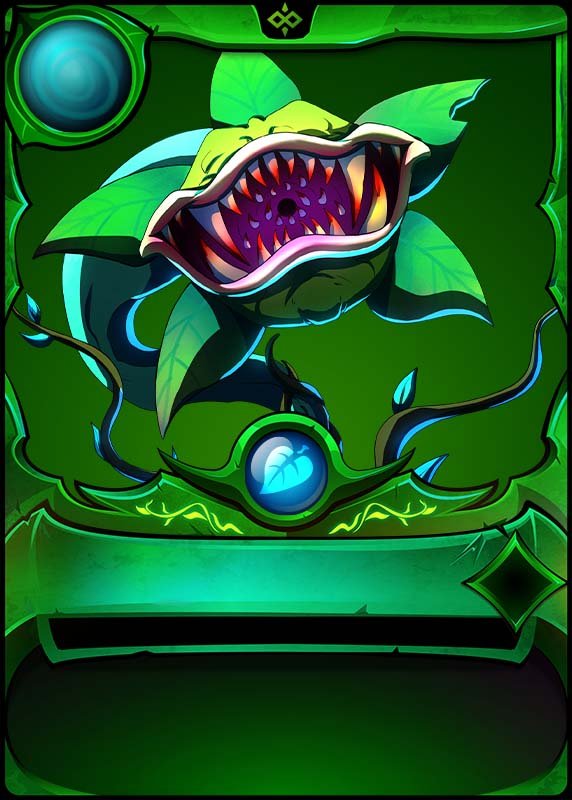
It is a vampire plant, eats blood and throws paralyzing darts at its victims. Just with this description one can get an idea of how scary the plant can be.
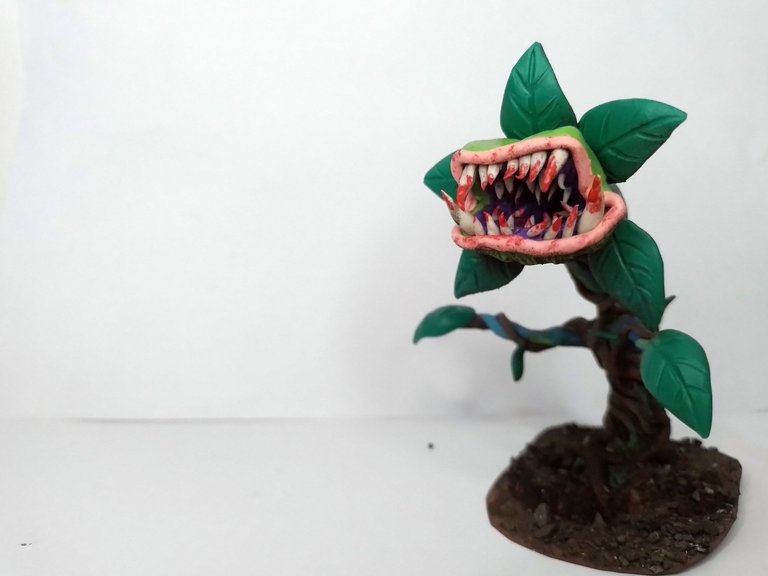
It wasn't easy to make either, but I had the wit to finish the figure and that's great for me. Below you can see a comparison between the drawing of the original letter and my sculpture.
Es una planta vampírica, come sangre y lanza dardos paralizantes a sus victimas. Solo con esta descripción uno puede hacerse una idea de lo aterradora que puede ser la planta.
No fue tampoco nada fácil de hacer, pero tuve el ingenio para terminar la figura y eso está genial para mi. A continuación pueden ver una comparación entre el dibujo de la carta original y mi escultura.
 |  |
|---|
Source / Fuente
https://next.splinterlands.com/card-detail/456/regular/3?tab=lore
Step by step
Well friends, let's go with the step by step of the sculpture. To begin with, the materials I used were the following:
- Plasticine
- Wire
- Thread and tape
- Hot glue
- Paint
- Sand/Earth
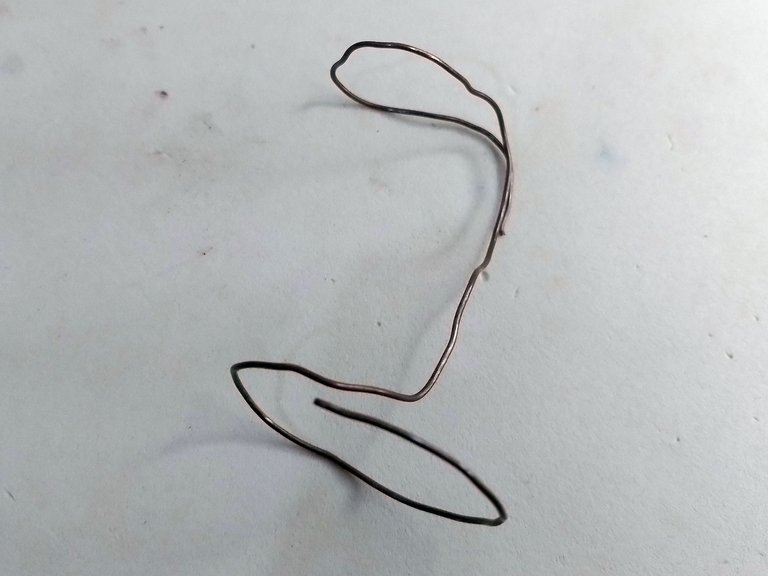
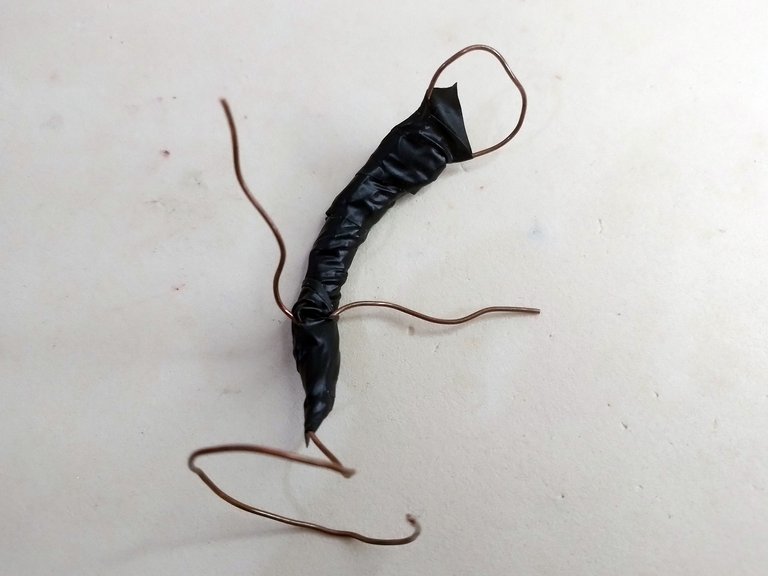
The first thing I always do when I create these sculptures is the skeleton.
It was a basic shaped piece, so it wasn't that hard to create a skeleton that could support the whole piece. I just made a long wire, with a wide base and wide area on top.
I gave this skeleton a little more strength with tape and glue.
Paso a paso
Bien amigos, vamos con el paso a paso de la escultura. Para empezar los materiales que utilicé fueron los siguientes:
- Plastilina
- Alambre
- Hilo y cinta adhesiva
- Silicón caliente
- Pintura
- Arena/Tierra
Lo primero que siempre suelo hacer cuando creo estas esculturas es el esqueleto.
Era una pieza con una forma básica, así que no fue tan difícil crear un esqueleto que pudiera sostener toda la pieza. Solo hice un alambre largo, con una base ancha y área amplia en la parte superior.
Este esqueleto le di un poco más de fuerza con cinta adhesiva y pegamento.
 |  |
|---|
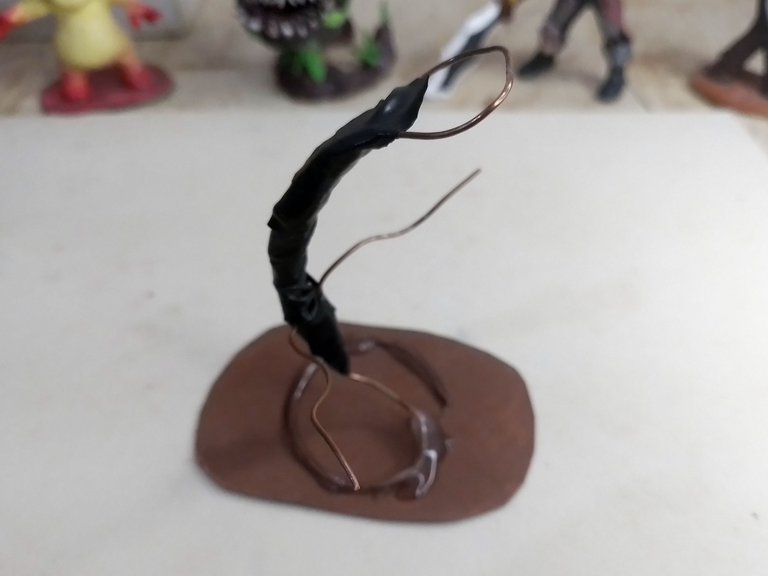
On the other side I placed the cardboard base, which I painted with brown paint. I glued it with hot silicone on the wire, so that the skeleton would be fixed on the cardboard.
On the other hand, I also placed two lines of wire on the sides for the branches of the plant.
Por otra parte le coloqué la base de cartón, la cual pinté con pintura marrón. La pegué con silicón caliente sobre el alambre, para que el esqueleto quedara fijo en el cartón.
Por otra parte, también coloqué dos líneas de alambre a los lados para las ramas de la planta.
 |  |
|---|
For the body of the plant I used various plasticine to give the plant a very interesting color.
I used two shades of blue and two shades of green. I mixed all the colors but not completely, so that all the shades of colors I was using could be seen.
With this plasticine I started to cover the skeleton of the figure.
Para el cuerpo de la planta usé varias plastilinas para darle un color bastante interesante a la planta.
Usé dos tonalidades de azul y dos tonalidades de verde. Todos los colores los mezclé pero no por completo, para que se vieran todas las tonalidades de colores que estaba usando.
Con esta plastilina comencé a cubrir el esqueleto de la figura.
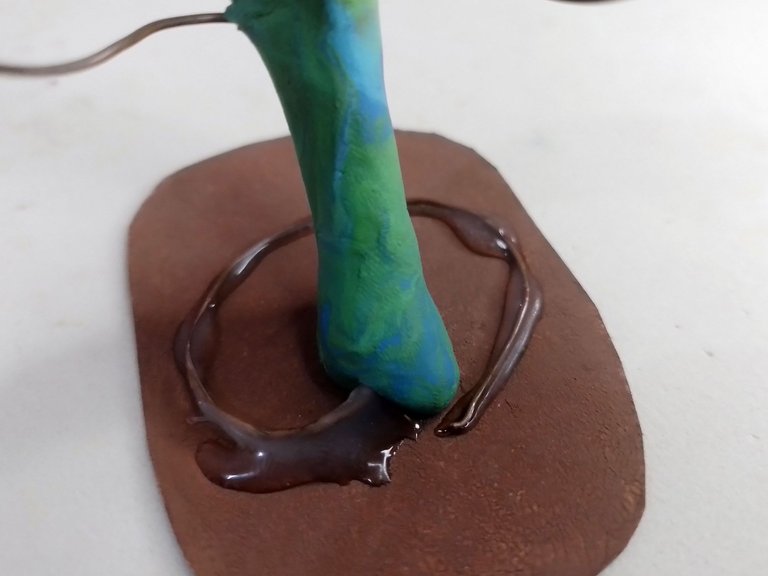
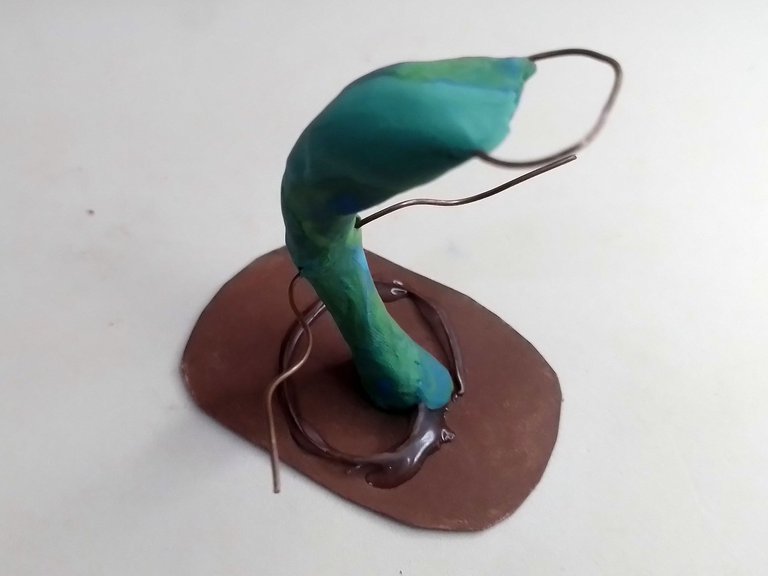
Then I continued with the upper part, adding more plasticine up there than at the base of the plant.
After adding all the plasticine I began to smooth the surface of the stem, to eliminate lines and imperfections that look bad in the figure.
Luego continué con la parte superior, agregando más plastilina allí arriba que en la base de la planta.
Luego de agregar toda la plastilina comencé a alisar la superficie del tallo, para eliminar líneas e imperfecciones que se ven mal en la figura.
 |  |
|---|
I used the same unmixed plasticine for the arms, adding small lines and rolled them up as if they were vines, only at the end of the arms I added pieces of brown plasticine.
La misma plastilina sin mezclar la usé para los brazos, agregando pequeñas líneas y las enrollé como si fuesen lianas, solo que en la punta de los brazos agregué trozos de plastilina marrón.
 |  |
|---|
Again, with the brown plasticine I made more lines along the body of the figure, rolling it in a non-random fashion to simulate growing vines.
De nuevo, con la plastilina marrón hice más líneas a lo largo del cuerpo de la figura, enrollándola sin manera aleatoria para simular enredaderas que van creciendo.
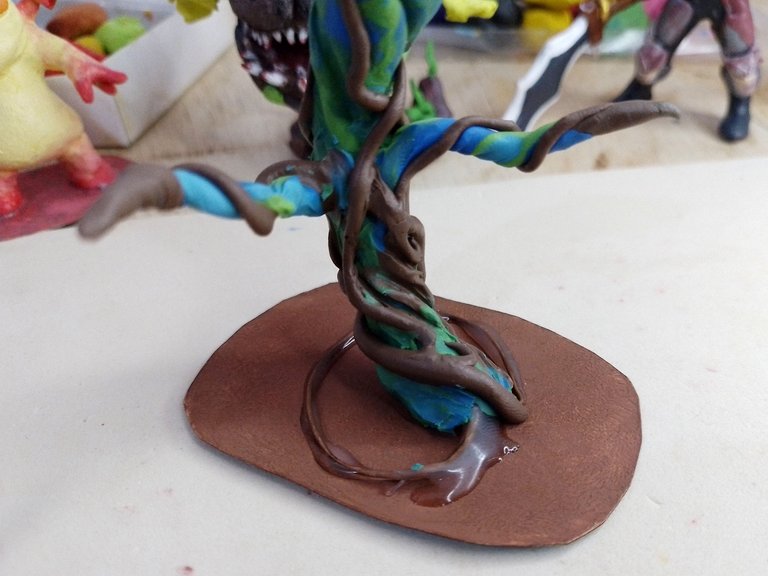
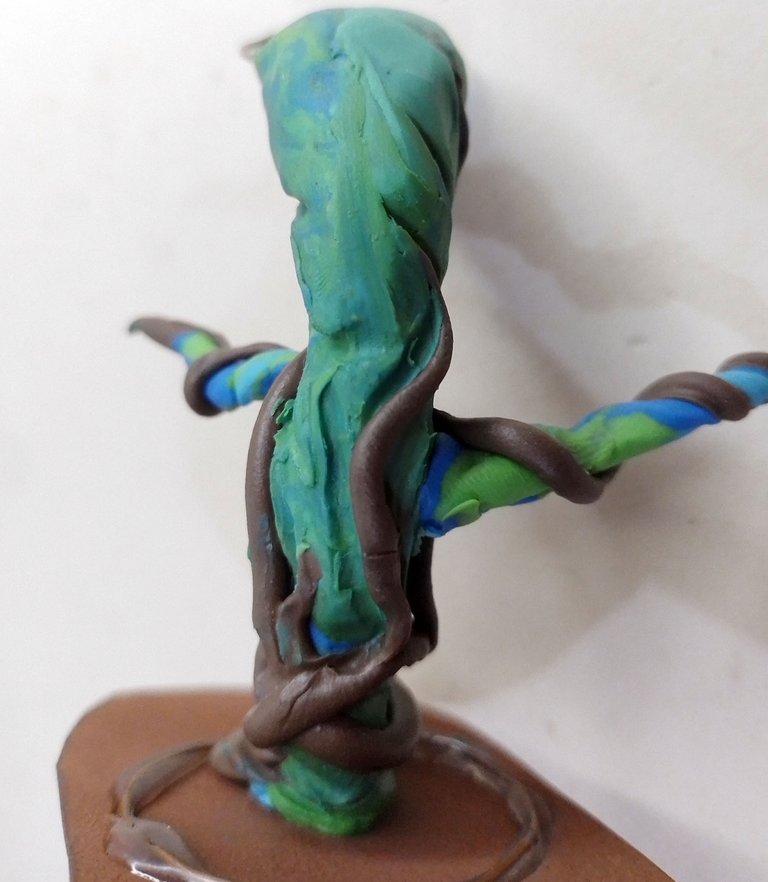
After defining the spaces where these brown vines would be, I began to make lines or trenches along the body of the plant.
All the trenches follow the same sequence upwards, as if they were following the same pattern. This way the body was ready, without defining too many details because it is not a perfect stem but with many imperfections.
Después de definir los espacios en donde quedarían estas lianas marrones, comencé a hacer líneas o zanjas a lo largo del cuerpo de la planta.
Todas las zanjas siguen la misma secuencia hacia arriba, como si estuviesen siguiendo el mismo patrón. De este modo quedó listo el cuerpo, sin definir demasiados detalles pues no es un tallo perfecto sino con muchas imperfecciones.
 |  |
|---|
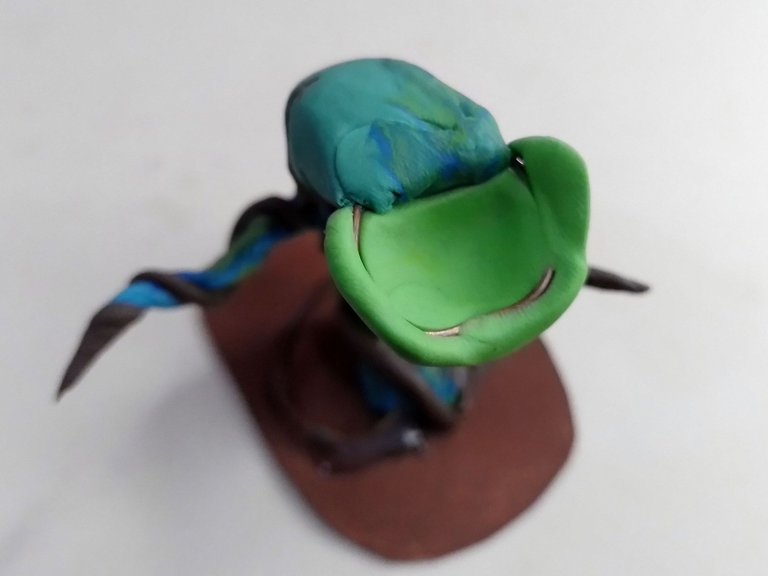
Finally it was time to make the head of the plant, the most striking part of the figure.
I started by selecting a piece of green plasticine. With this color I made the lower part of the mouth, using as support the rest of the wire that I had left uncovered from the beginning, then on this base I made the upper part of the head.
Finalmente llegó la hora de hacer la cabeza de la planta, lo más llamativo de la figura.
Comencé seleccionando un trozo de plastilina verde. Con este color hice la parte inferior de la boca, usando como soporte el resto del alambre que había dejado al descubierto desde el comienzo, luego sobre esta base hice la parte superior de la cabeza.
 |  |
|---|
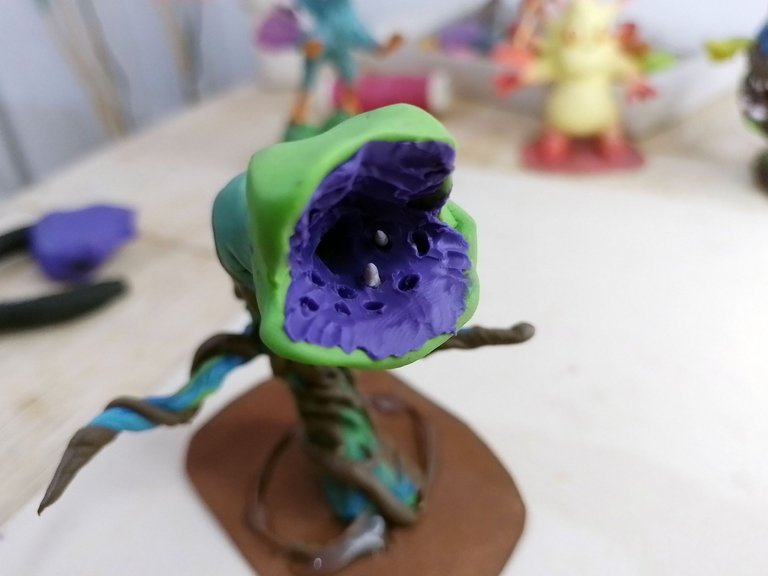
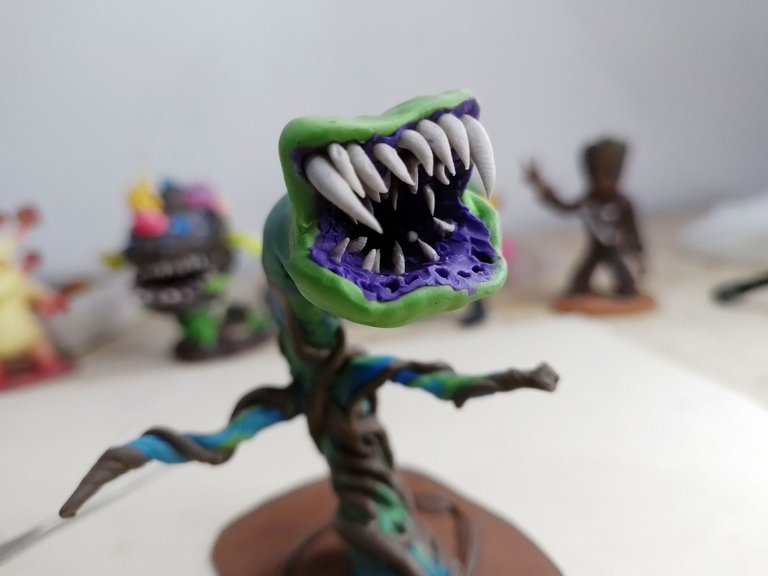
The inside of the mouth I wanted to make it quite contrasting like the letter, so I used a quite strong purple color, which was totally different from the green on the outside.
La parte interior de la boca quise hacerlo con bastante contraste como la carta, así que usé un color morado bastante fuerte, que era totalmente distinto al verde del exterior.
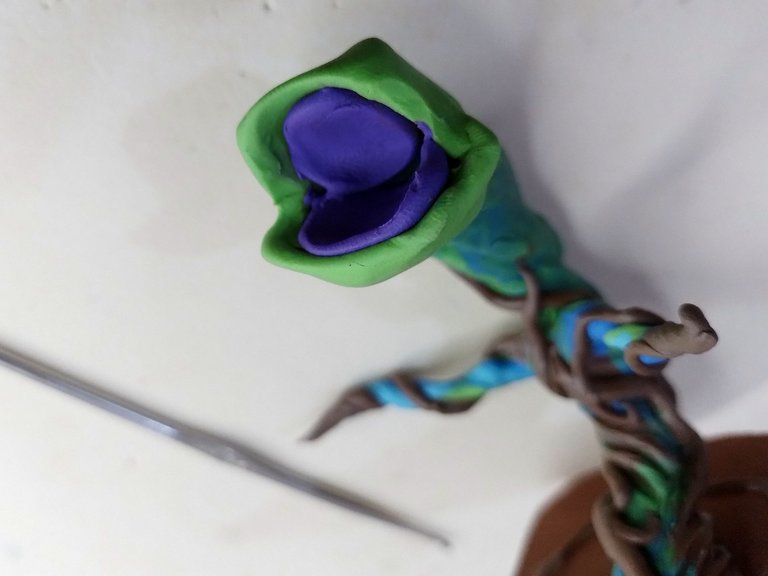
Already inside the mouth I made lines similar to those of a palate and then I started to place each tooth one by one, making the hole of the tooth and then placing each one in its place, using white plasticine.
Ya dentro de la boca hice líneas similares a las de un paladar y entonces comencé a colocar cada diente uno por uno, haciendo el agujero del diente y colocando luego cada uno en su lugar, usando plastilina blanca.
 |  |
|---|

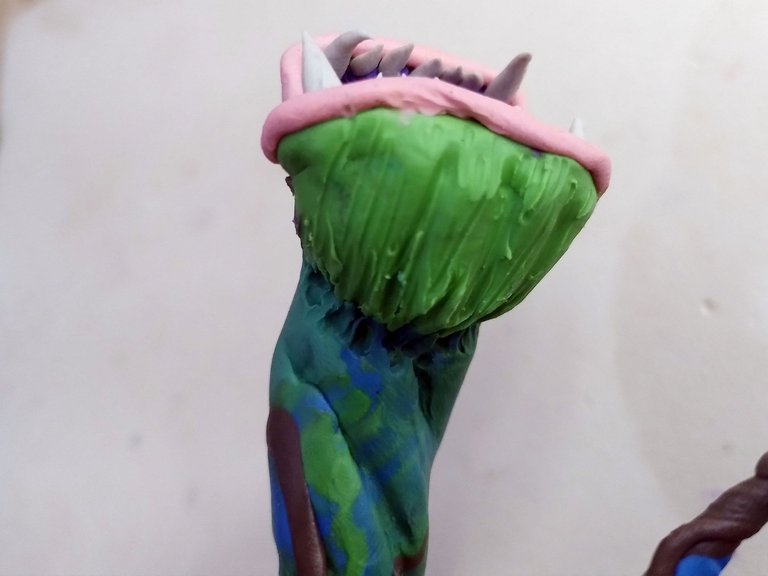
Then I added the lips to the plant with a much lighter color, almost pink.
I also made lines to give texture to the head of the plant, mostly on the lower part because on the upper part it looks completely smooth, according to the chart.
Ya luego le coloqué los labios a la planta con un color mucho más claro, casi rosado.
También hice líneas para dar textura a la cabeza de la planta, más que todo en la parte inferior porque en la parte superior se ve completamente lisa, según la carta.
After finishing the above I started to make the huge leaves that this plant has on the back of its head.
I made them with a pretty intense green color, I also drew the lines that these leaves usually have and put them in place, as seen in the images below.
Después de terminar lo anterior comencé a hacer las hojas enormes que tiene esta planta en la parte de atrás de la cabeza.
Las hice con un color verde bastante intenso, también le dibujé las líneas que suelen tener estas hojas y las coloqué en su lugar, tal como se observa en las imágenes de abajo.
 |  |
|---|
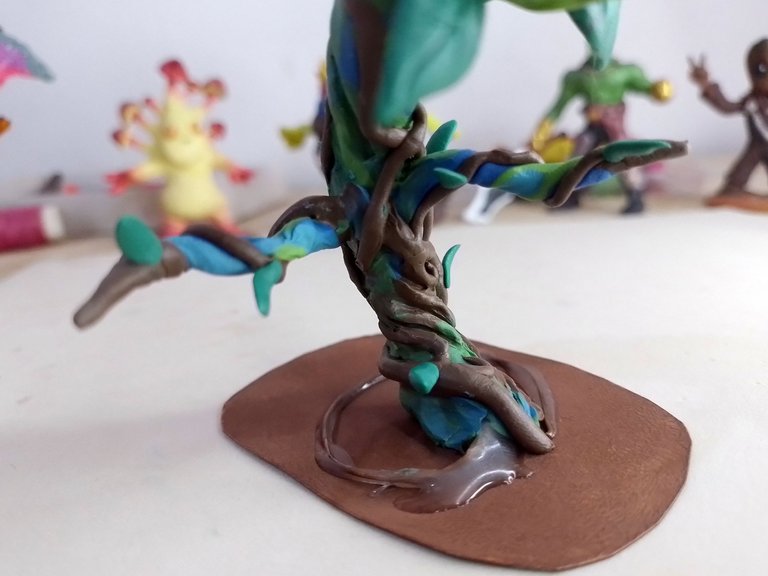
I must admit that already with these leaves the plant took a lot of shape and looked just great. At least I really liked the way it looked, as it looked very much like the plant on the card.
It is worth noting that I also glued small leaves along the body of the plant and larger ones on the edge of the larger branches.
Debo admitir que ya con estas hojas la planta tomó mucha forma y se veía simplemente genial. Al menos a mi me gustó mucho cómo se veía, pues parecía mucho la planta de la carta.
Cabe destacar que también pegué pequeñas hojas a lo largo del cuerpo de la planta y unas más grandes en el borde de las ramas más grandes.
 |  |
|---|
The last thing I did was to add more paint on the base of the figure and while it was still dry, I dropped a lot of soil, so that the soil would stick to the brown paint and create that effect as if the plant was coming out of the ground.
Below you can see some pictures of this process.
Ya lo último que hice fue agregar más pintura en la base de la figura y mientras aún estaba seca, le dejé caer un montón de tierra, para que la tierra se pegara a la pintura marrón y creara ese efecto como si la planta estuviese saliendo de la tierra.
A continuación pueden ver unas fotos de este proceso.
 |  |
|---|
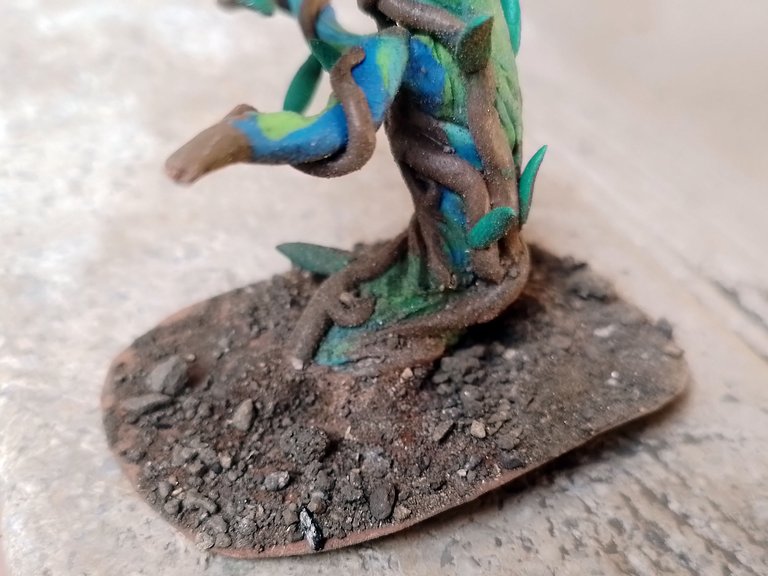
This way the figure was finished. I share with you some pictures of the final result. I hope you liked it:
De esta manera la figura quedó terminada. Comparto con ustedes unas fotografías del resultado final. Espero que les haya gustado:
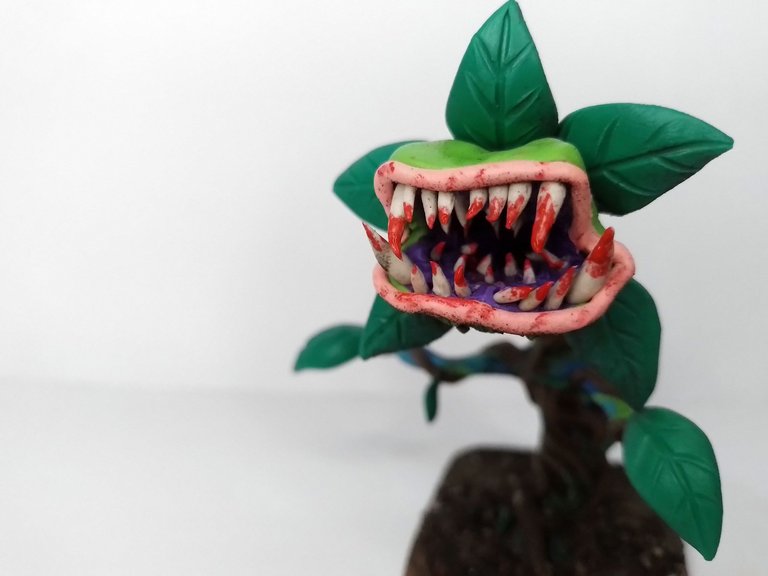
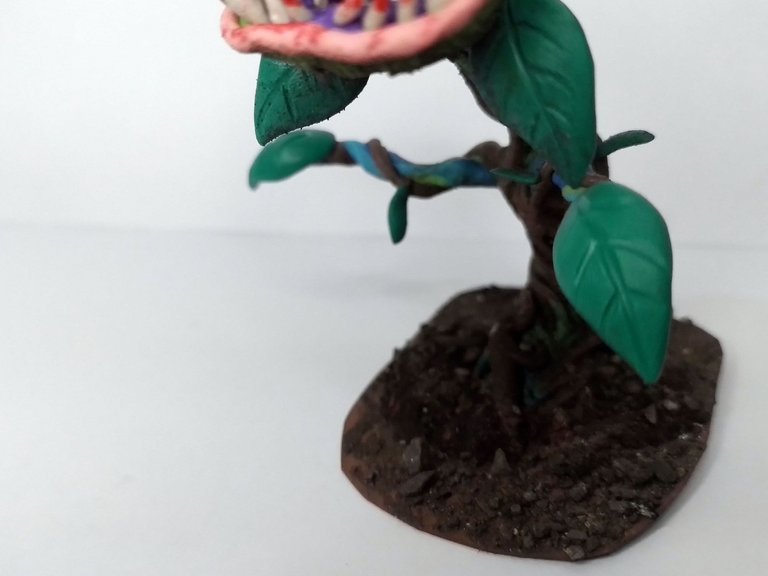
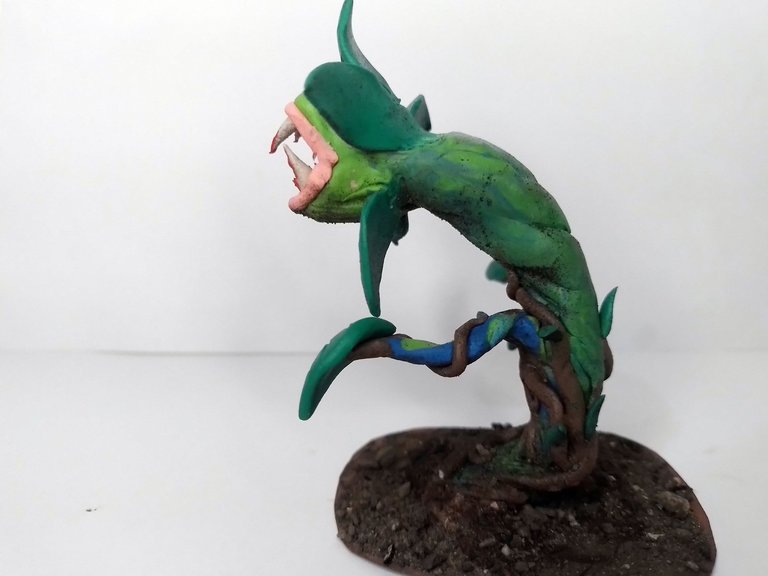
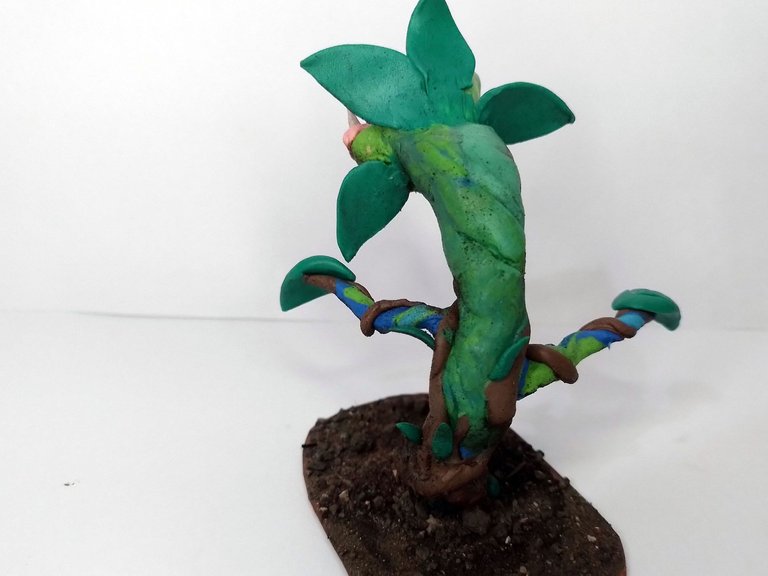
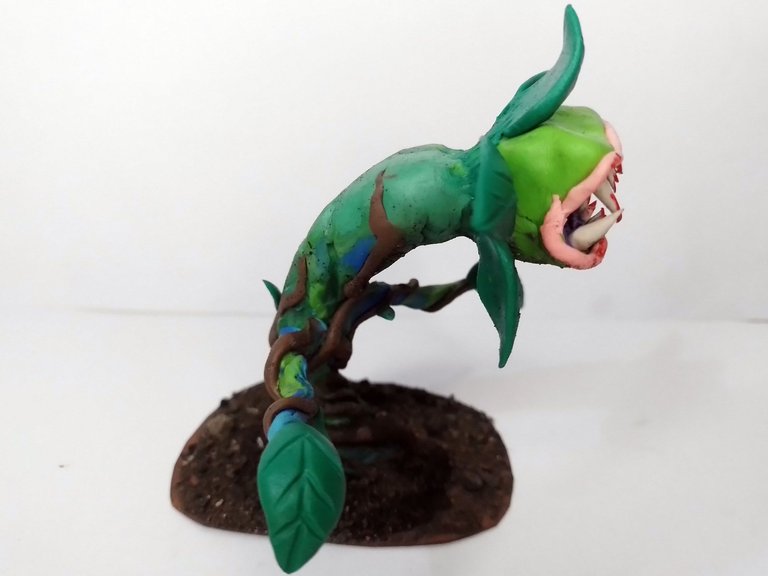

Well folks, that's all for now. I hope you liked the post. I invite you to leave your opinions below in the comments, as always I'll be happy to read them.
If you would like to know more about the contest, please follow this link
https://peakd.com/hive-13323/@splinterlands/splinterlands-art-contest-week-255
I appreciate very much that you took the time to read me. With nothing more to add, I'll say goodbye then...
See you next time!
Bien amigos, esto ha sido todo por ahora. Espero que mi post les haya gustado. Los invito a dejar sus opiniones abajo en los comentarios, como siempre estaré encantado de leerlos.
Si gustan saber más del concurso pueden seguir este enlace
https://peakd.com/hive-13323/@splinterlands/splinterlands-art-contest-week-255
Agradezco mucho que se tomaran el tiempo de leerme. Sin más que agregar, me despido entonces...
¡Hasta la próxima!

Quedó muy linda y aterradora esta planta carnívora...me gustan mucho 😊.
Éxito en el concurso
!VSC
@chacald.dcymt has sent VSC to @gaboamc2393
This post was rewarded with 0.1 VSC to support your work.
Join our photography communityVisual Shots
Check here to view or trade VSC Tokens
Be part of our Curation Trail
@chacald.dcymt ha enviado VSC a @gaboamc2393
Éste post fue recompensado con 0.1 VSC para apoyar tu trabajo.
Únete a nuestra comunidad de fotografía Visual Shots
Consulte aquí para ver o intercambiar VSC Tokens
Se parte de nuestro Trail de Curación
Gracias Diana, me alegra que te haya gustado!
https://leofinance.io/threads/gaboamc2393/re-gaboamc2393-wr1kfqas
The rewards earned on this comment will go directly to the people ( gaboamc2393 ) sharing the post on LeoThreads,LikeTu,dBuzz.
Te quedó bestial, esos dientes filosos amenazadores 😱😱
Jajaja son lo más interesante de la plantita, le da otro toque interesante!
Como tantos detalles que la hacen aterradora por más, grandiosos trabajo. ☺️✨
!discovery 38
Gracias! Jejeje la magia está en los detalles dicen por ahí 😊
Gracias por el apoyo!
This post was shared and voted inside the discord by the curators team of discovery-it
Join our Community and follow our Curation Trail
Discovery-it is also a Witness, vote for us here
Delegate to us for passive income. Check our 80% fee-back Program
Thanks for sharing! - castleberry#6859

Thanks for the support!
Un magnífico trabajo. Me encanta el modelado de figuras y cada detalle en ésta figura es admirable.
Saludos
Bueno se trata se hacer lo mejor que se pueda amiga, muchas gracias por pasar a comentar.
What a fantastic creation! It definitely looks better than the original character art. Good luck with the contest.
Simplemente espectaculñar amigo! Felicidades.
This is a fantastic work.
Keep it up. @tipu curate 8
Upvoted 👌 (Mana: 0/75) Liquid rewards.
Que nivel de detalle, muy bonito la verdad