Beaded Alphabets || Letter R For A Special Hiver
Hello There!😊
Welcome again to our little adventure of the beading alphabet; this time, we are making the letter R for a special Hiver. A while ago, @reggiesart said he would love to see us bead the letter R, so here we are dedicating this letter to him.
If you tell me your favorite letter in the comment section, you will get a mention from me when I make the letter, provided I haven't beaded it yet. Also it's going to be on a first come first serve basis. 😊
So now let's get to beading.
Material used:
✓Sky blue seed beads
✓Size 0.35 Fishline and
✓A scissor
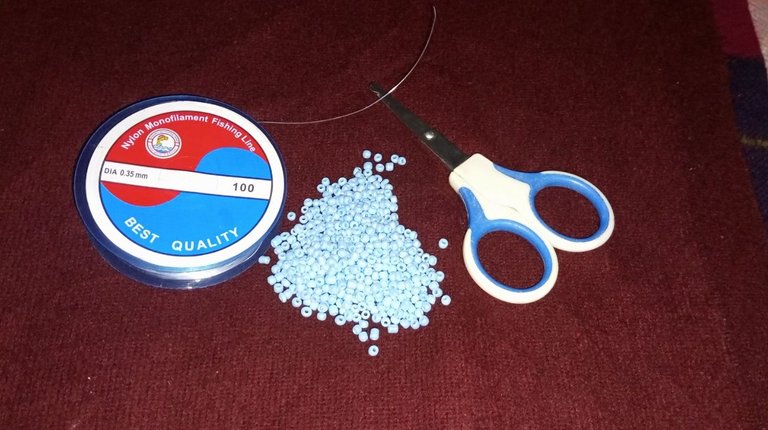
Step-by-step process
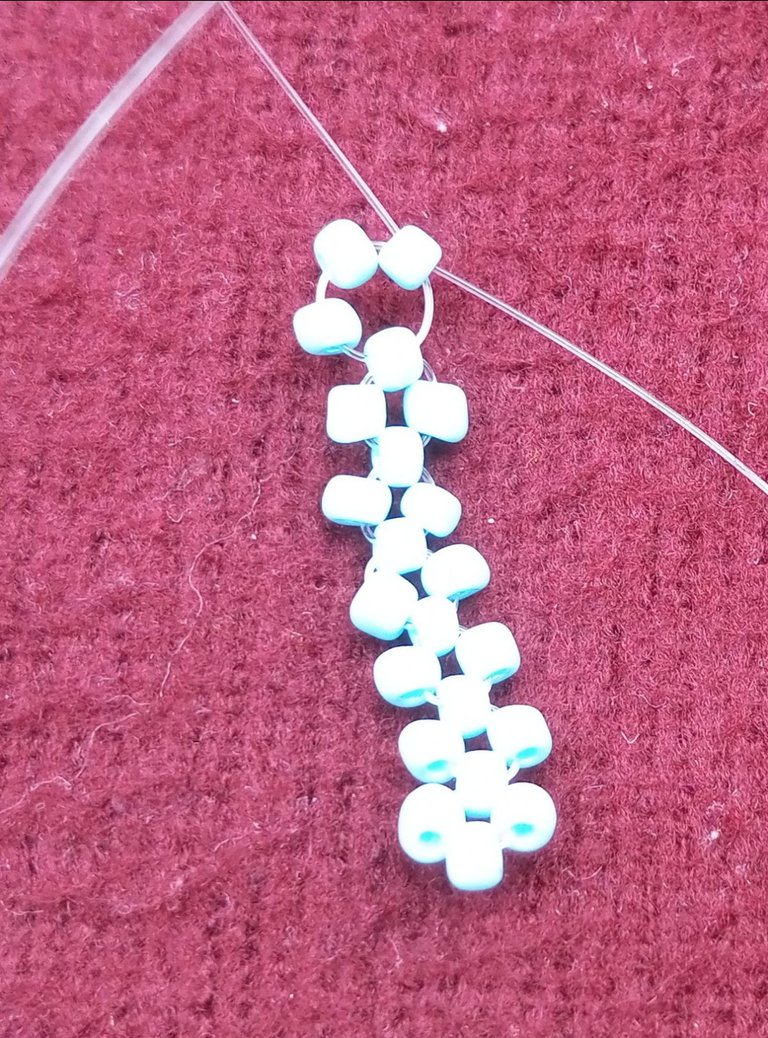
Step 1:
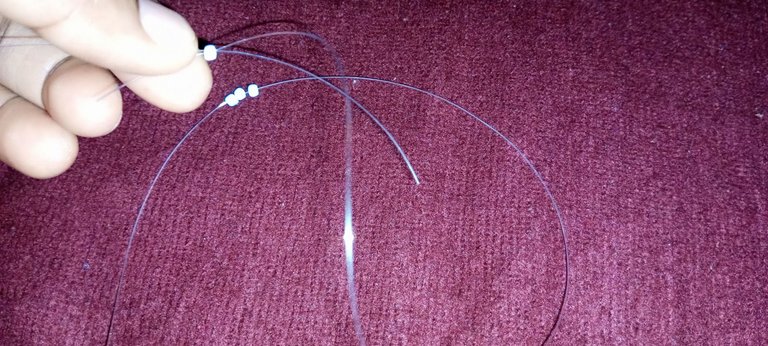
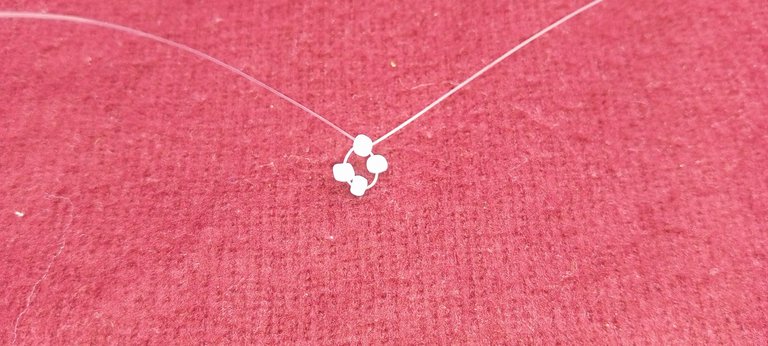
I cut a 5 cm long fishline, put 4 beads in the fishline, and then crossed both lines with the 4th bead.
Step 2:
I put 1 bead to the left fishline,
1 bead to the right fishline and then cross both lines with 1 bead.
Step 3:
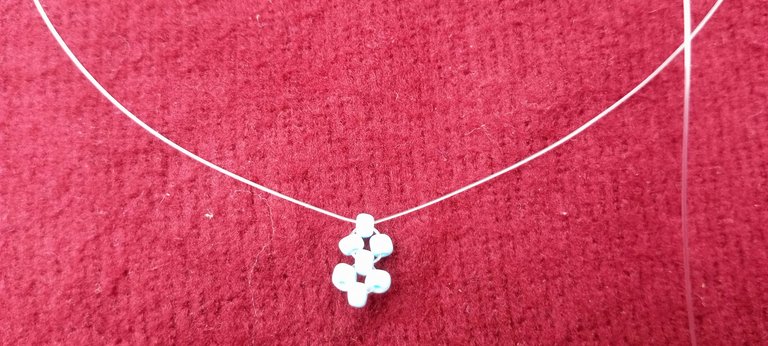
I put 1 bead to the left fishline, 1 bead to the right fishline, and then crossed both lines with 1 bead. Continue this process until we have 6 rings of beads.
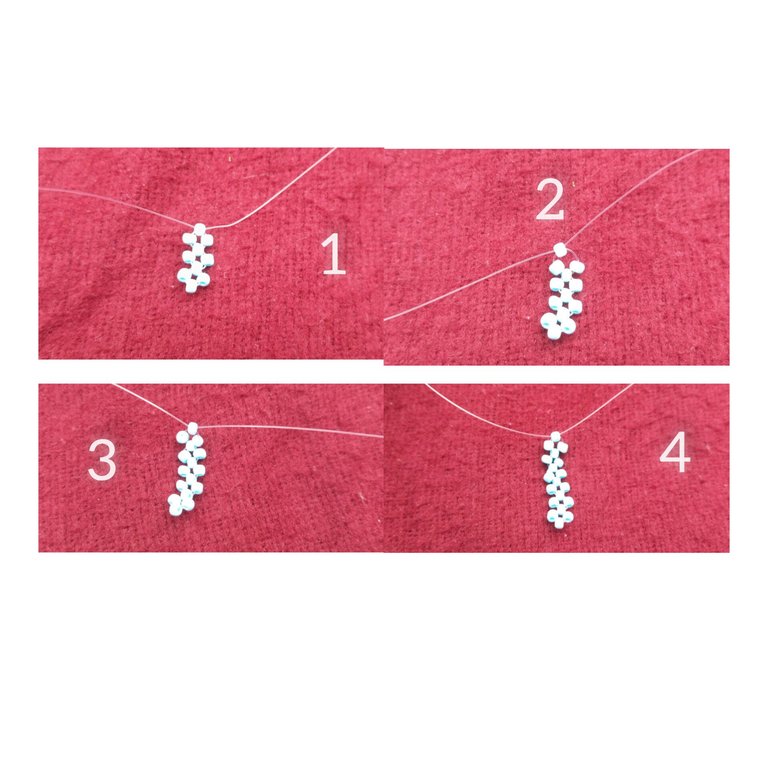
Step 4:
I put 2 beads to the left line and I bead to cross both lines.
Step 5:
I put 1 bead to the left fishline, 1 bead to the right fishline, and then crossed both lines with 1 bead.
Step 6:
I put 1 bead to the left fishline, 1 bead to the right fishline, and then crossed both lines with 1 bead.
Step 7:
I put 1 bead to the left fishline and then crossed both lines with 1 bead.
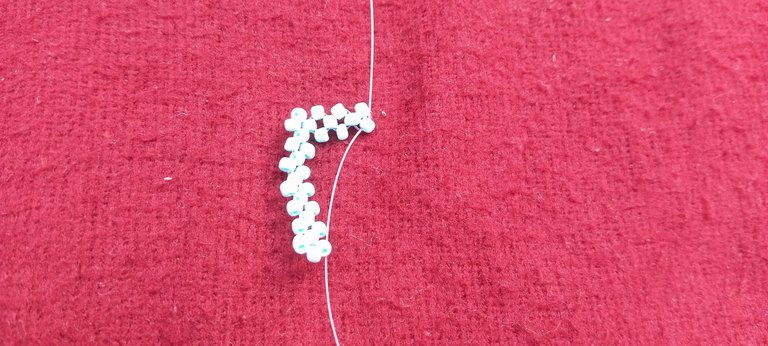
Step 8:
I put 1 bead to the left fishline, 1 bead to the right fishline, and then crossed both lines with 1 bead.
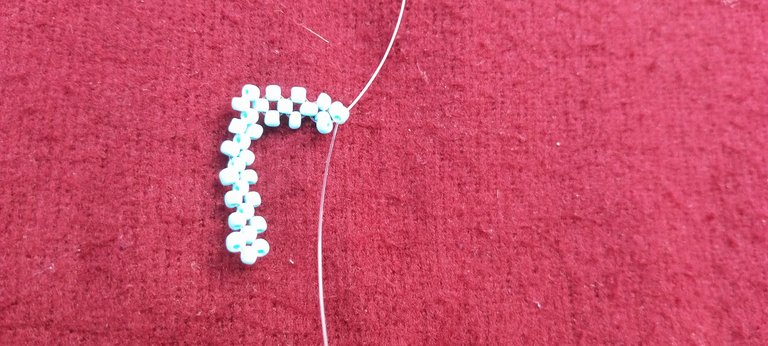
Step 9:
I put 1 bead to the left fishline, and then 1 bead to cross both lines.
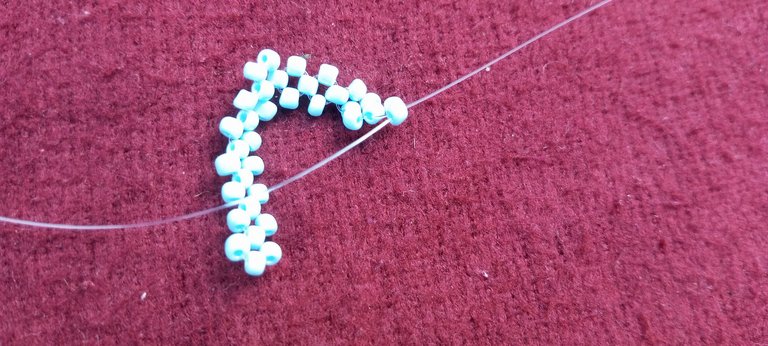
Step 10:
I put 1 bead to the left fishline, 1 bead to the right fishline, and then crossed both lines with 1 bead.
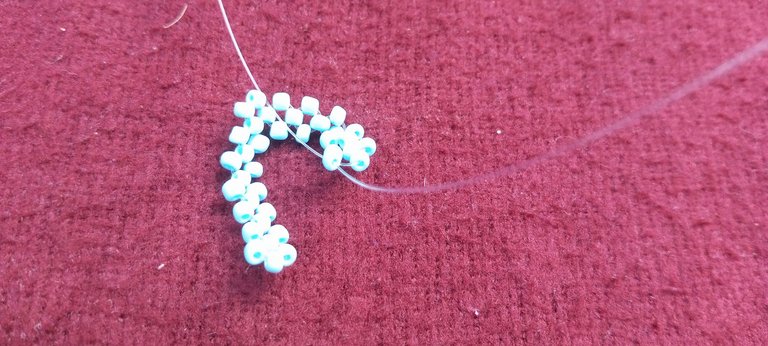
Step 11:
I put 1 bead to the left fishline and then crossed both lines with 1 bead.
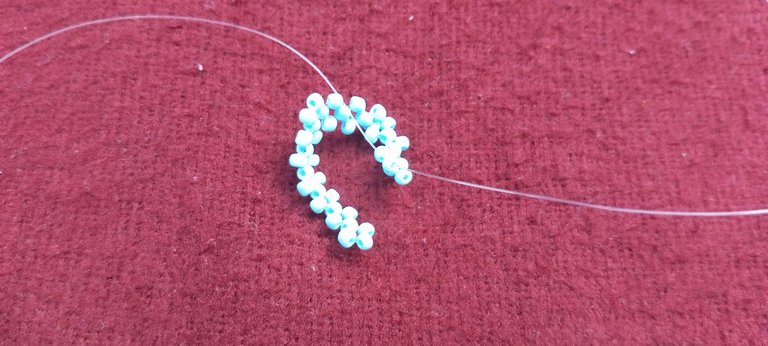
Step 12:
I put 1 bead to the left fishline, one bead to the right fishline, and then passed both lines through the 5th bead as marked below.
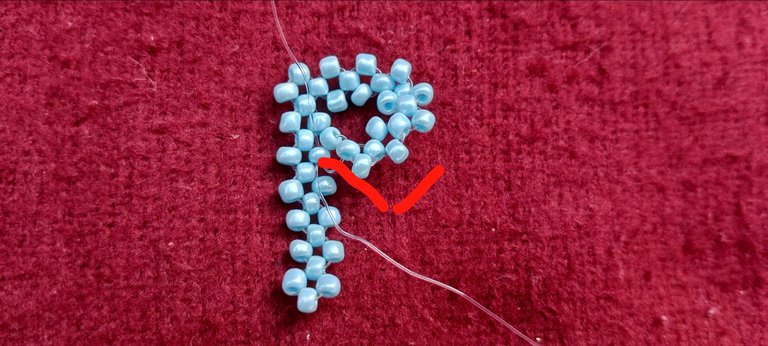
Step 13:
Then pass both, lines to come out through this bead as marked below.
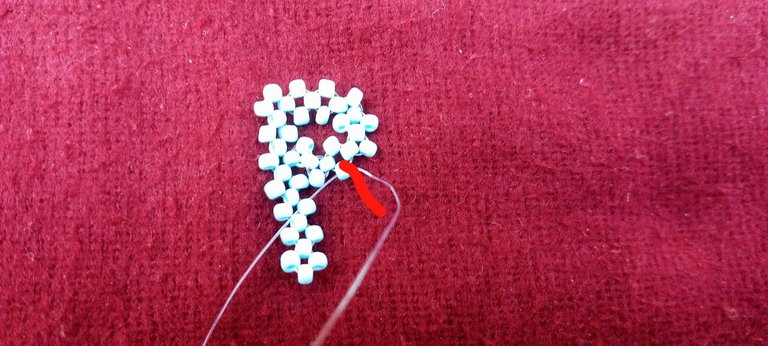
Step 14:
I put 1 bead to the left fishline, 1 bead to the right fishline, and then crossed both lines with 1 bead.
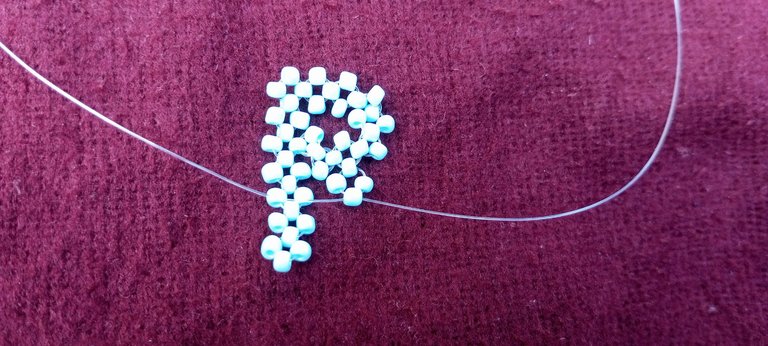
Step 15:
I put 1 bead to the left fishline, 1 bead to the right fishline, and then crossed both lines with 1 bead.
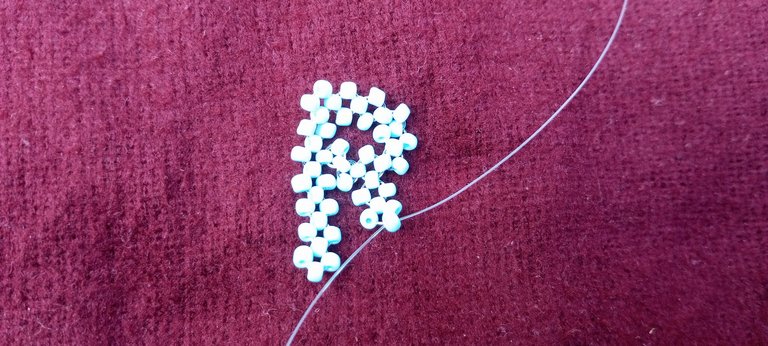
Step 16:
I put 1 bead to the left fishline, 1 bead to the right fishline, and then 1 bead to cross both lines.
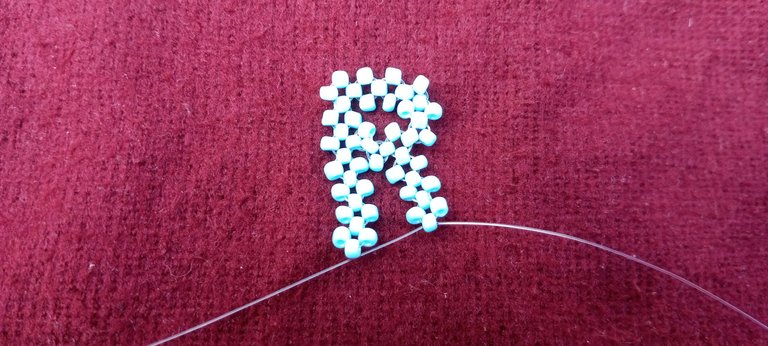
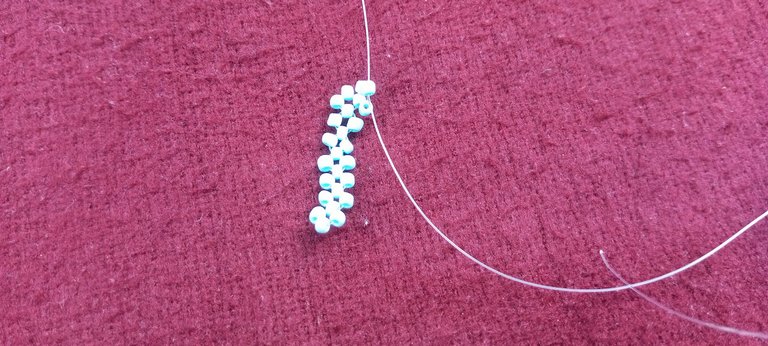
Step 17:
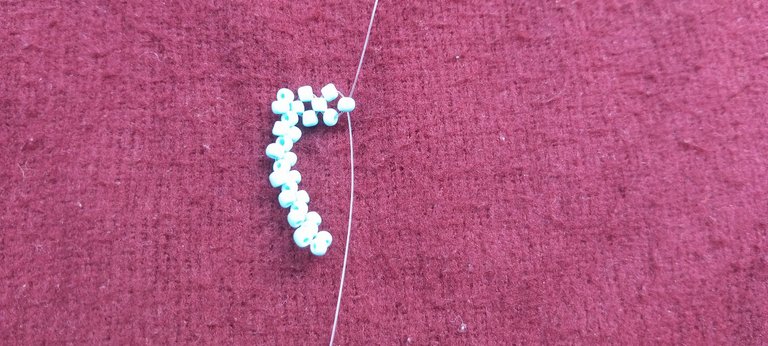
I put 1 bead to the left fishline, 1 bead to the right fishline, and then crossed both lines with 1 bead. This gives us the desired length of the design. Pass both lines to be close to each other, tie the knots, and trim off the excess wire. We now have our half part of the R.
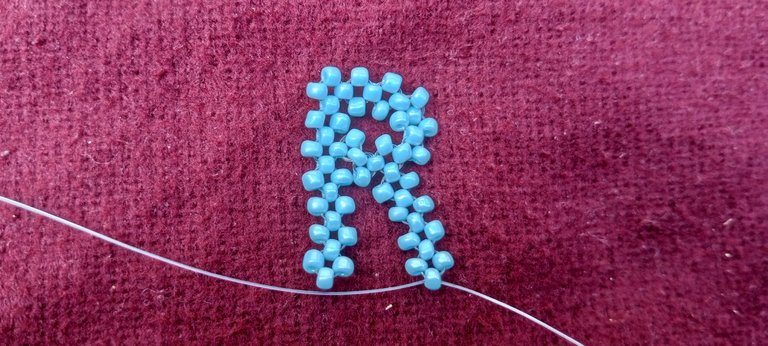
Step 18:
Repeat steps 1-17 above to make the other half of the R.
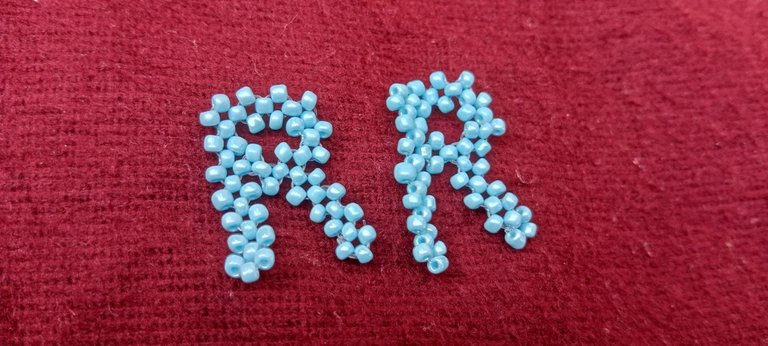
Step 19:
We simply go ahead and join the two half parts of the R. By cutting a new fishline of 5 cm, put one bead into it, and use it to join both sides of the R.
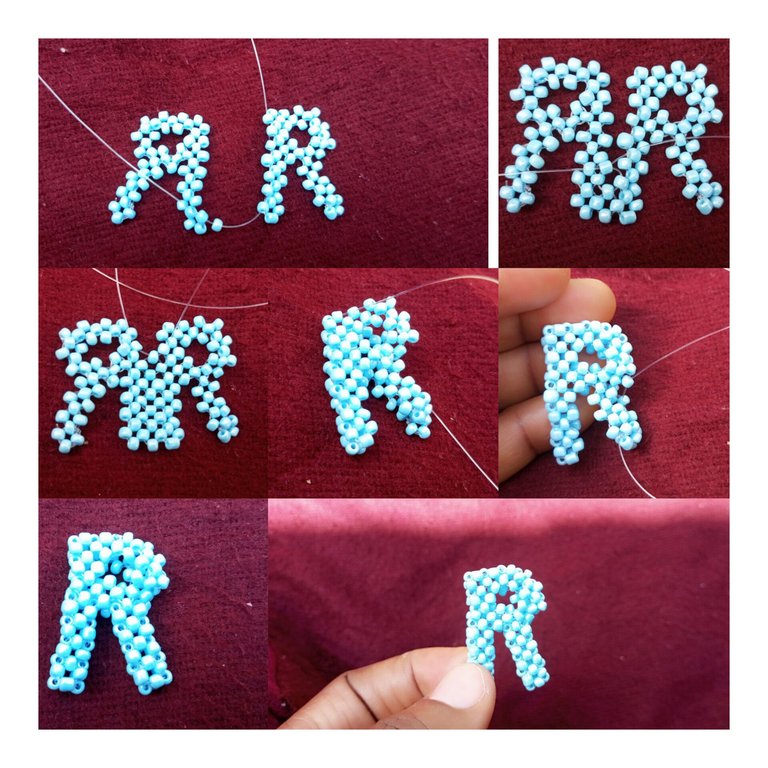
And we have our letter "R"
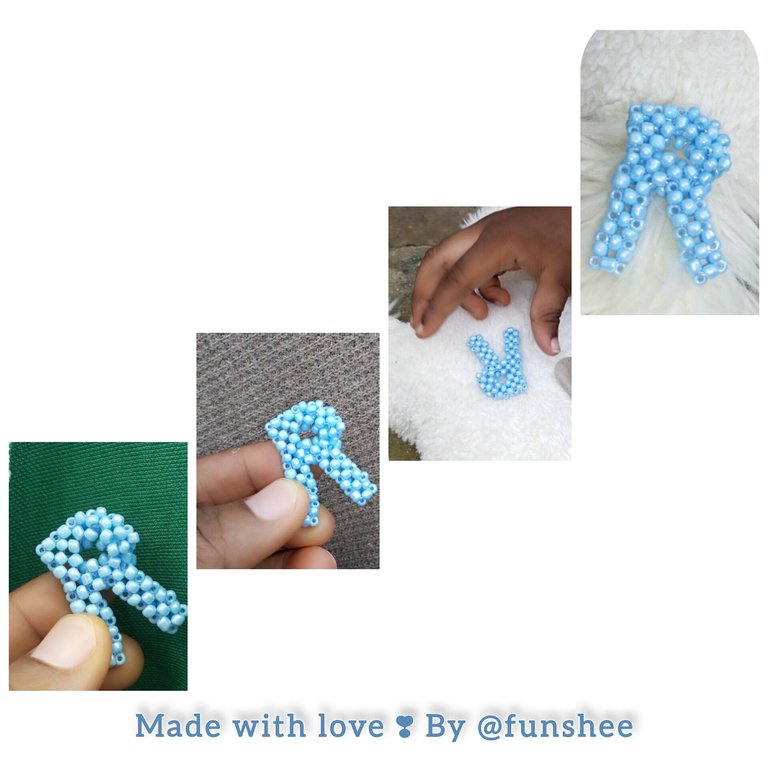
My son loved it so much he won't let go and allows me to take photos. But well, Mama always has her way, so here are some shots to your pleasure view 🥰
I started beading the 26 Alphabets for my son's education material a while ago, and if you missed those letters I have beaded so far, you can simply check them out here
All Images are Mine
Thank you so much for your time, have a blissful time at your end.🙏✍️❣️
OMG.. This is sooo cool and amazing
you make it look so easy but I know I'll have a hard time making it but I gotta try.
Thank you very much. I would be a cool pendant for a beaded necklace.
You are very much welcome; I'm super glad you like it.
I made a few mistakes before I got the shape, but I tried to simplify the process as much as I could.
Yes, it will make a cool pendant, I wish you luck in making it.
!LUV
Your dedication is inspiring. You convey how passionate you are in each of the Sky blue seed beads you add to the letter R. Thank you for sharing such a detailed step by step, I'm glad I agreed with your post today...
Thank you so much, @jesuslnrs, your comment means a lot to me. !LUV
@jesuslnrs, @funshee(2/4) sent you LUV. | tools | discord | community | HiveWiki | <>< daily
This is really neat and quite detailed in how you're doing it. I noticed you're even choosing the harder letters like S, B, and now R. 💫
Please kindly tag me when you get to the letter "H." And you can't convince me otherwise—I strongly believe those cute little fingers in the pictures are doing most of the work. 😅
I will gladly do that.🥰 May I know your favorite color? Let's see if I have it among my beads.
Haha, he is doing a lot by not letting me take the photos !lol🤣 !LUV
Thank you very much for your comment and I apologize for the late reply, I had an usual day.
@humbe, @funshee(3/4) sent you LUV. | tools | discord | community | HiveWiki | <>< daily
lolztoken.com
Remains to be seen.
Credit: reddit
@humbe, I sent you an $LOLZ on behalf of funshee
(1/4)
NEW: Join LOLZ's Daily Earn and Burn Contest and win $LOLZ
That's sweet. Thank you. 💕🌺☺️
Blue looks great, I will be happy with any colour you see fit. I trust your judgement..
Haha...that hand looks like it's well behaving in the picture though...
No worries... I'm guilty of that too, sometimes...☺️
@funshee, @humbe(1/1) sent you LUV. | tools | discord | community | HiveWiki | <>< daily
lolztoken.com
I understand they're really marking headlines.
Credit: reddit
@funshee, I sent you an $LOLZ on behalf of humbe
(1/1)
Awwwww really nice, Funshee can you please dedicate the letter I to me?🫣plzzzzzzzzzz
I will gladly do that, my sweet 🥰 Ibb.
May I know your favorite color? Let's see if I have it available among my beads. !LUV
@ibbtammy, @funshee(4/4) sent you LUV. | tools | discord | community | HiveWiki | <>< daily
esta hermoso, un detalle perfecto
this is beautiful, a perfect detail
Thank you very much Yasmarit 😊 !LUV
@yasmarit, @funshee(1/4) sent you LUV. | tools | discord | community | HiveWiki | <>< daily
thanks!
This beaded letter R is such a thoughtful and beautiful project, especially with the dedication to Hive another nice work. A creative and meaningful way to combine art with learning. Thanks for sharing your amazing work with the community. We look forward to your next letter.
Thank you so much, dear DIY team; your comment is always very inspiring.
I can't wait to share my next letter.
Cheers 🥂 and have an amazing day.
wow.. they are so cute ❤ like my son's initials.. lov it
Wow, it's my initial too.
Say hello 👋🤗 to your son for me. !LUV
@funshee, I paid out 0.454 HIVE and 0.088 HBD to reward 7 comments in this discussion thread.