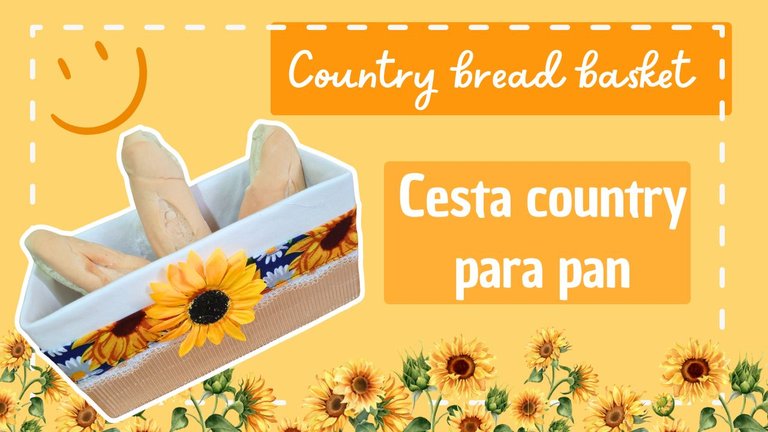
DIY: Country bread basquet / Cesta country para pan (Esp/Esp)


[Esp]
Saludos comunidad DIY
Hoy me inspiré en una cesta para presentar los panes en la mesa. Hace muchos años en reuniones especiales, mi madres solía decorar la mesa con cestas donde servía pan como acompañamiento de la comida, colocaba dos de cada lado de la mesa, uno cuyos panes estaban tostados al horno con ajo y mantequilla y otros sin nada.Me gustaba las cestas que mi madre escogía, algunas veces las decoraba con telas hermosas a cuadros.
Con este recuerdo quise hacer una para tenerla con el mismo objetivo, pronto mi casa se llenará de visitas y tener algo especial hecho por ti mismo sobre la mesa como objeto de decoración, será el centro de las miradas mientras degustan de una rica comida y un momento agradable.
Me gusta mucho la decoración country y vintage, bajo ese estilo siempre personalizo mi casa, me gustan las decoraciones modernas, pero tendría que invertir mucho dinero en cambiar todo. El estilo moderno es mas elegante y sofisticado es verdad, sin embargo el estilo country lo siento mas de hogar.
Con materiales reciclados he realizado esta cesta para panes, que espero les guste.
! [English version]
Greetings DIY community
Today I was inspired by a basket to present breads on the table. Many years ago at special gatherings, my mothers used to decorate the table with baskets where she served bread as an accompaniment to the meal, she placed two on each side of the table, one whose breads were toasted in the oven with garlic and butter and others with nothing.I liked the baskets my mother chose, sometimes she decorated them with beautiful plaid fabrics.
With this memory I wanted to make one to have with the same purpose, soon my house will be full of visitors and having something special made by yourself on the table as a decorative object, will be the center of attention while tasting a nice meal and a pleasant moment.
I like country and vintage decorations, under that style I always customize my house, I like modern decorations, but I would have to invest a lot of money to change everything. The modern style is more elegant and sophisticated it is true, however the country style I feel more at home.
With recycled materials I have made this bread basket, I hope you like it.
Para los amantes del café con pan
For coffee and bread lovers
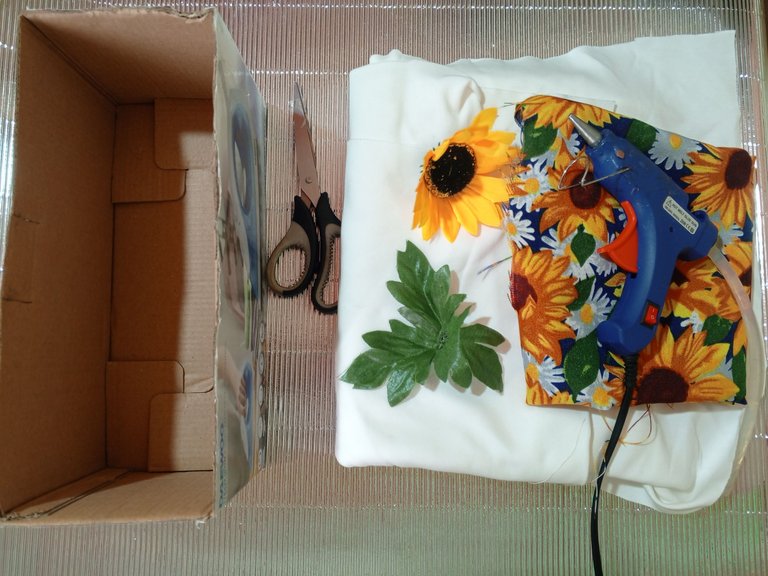
Materials / Materiales
| Spanish | English |
|---|---|
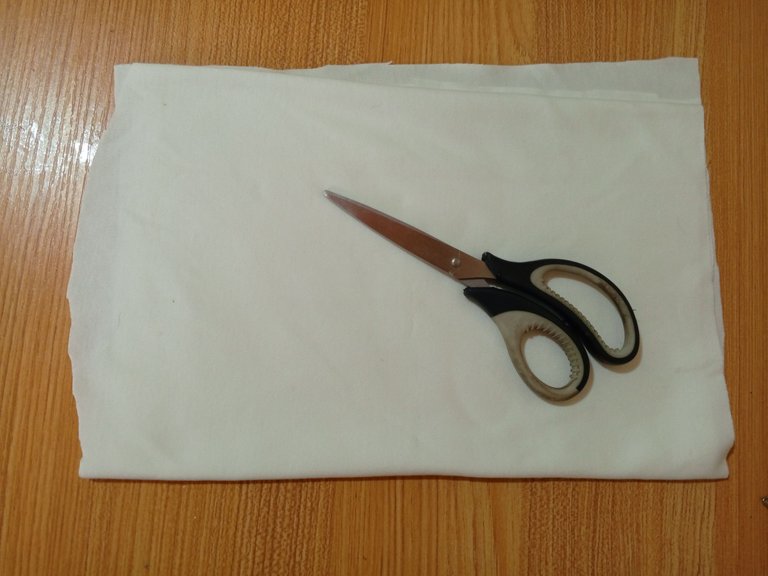
| Tela unicolor y tela estampada | One-color and printed fabrics |
| Tijera, pistola de silicón caliente | Scissors, hot silicone gun |
| Accesorios para decoración (girasol, encaje) | Accessories for decoration as desired (sunflower, lace) |
| aguja, hilo de coser | needle, sewing thread |
| Caja reciclada | Recycled box |
| Cartulina corrugada | Corrugated cardboard |
Paso a paso / Step by Step
Step 1️⃣/ Paso 1️⃣
 |  | |
 |  |
[Esp]
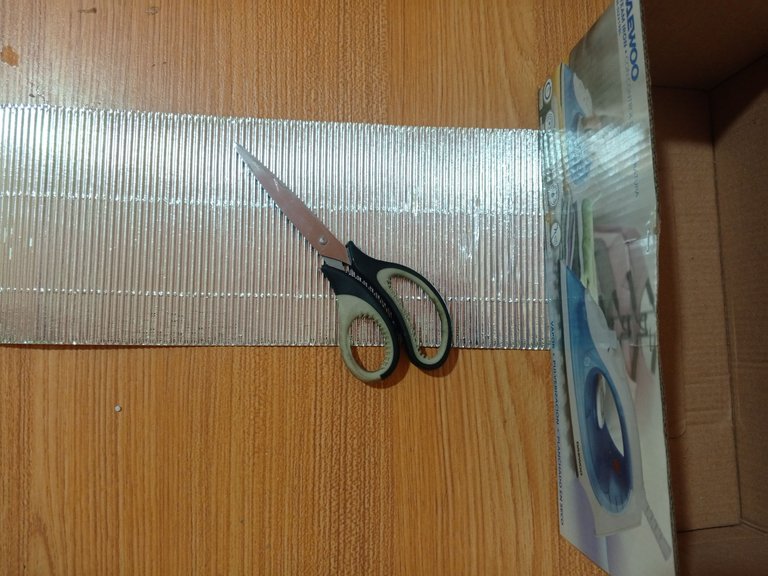
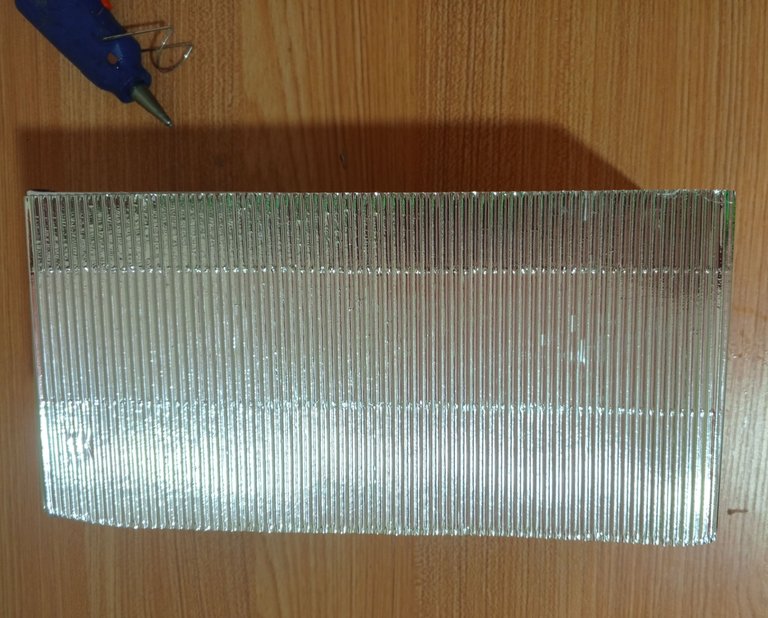
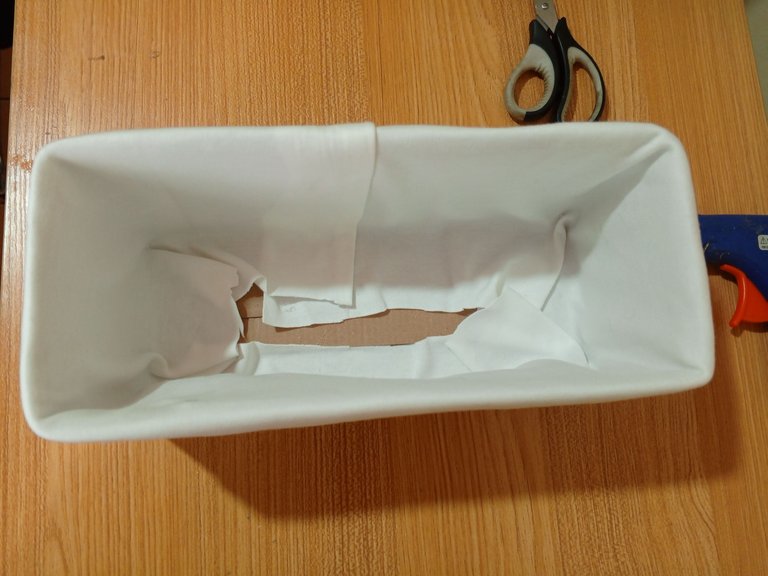
🌻 Recorta la cartulina corrugada del ancho y alto de la caja.
🌻 usa pegamento para fijar la cartulina a la caja de esta manera queda forrada.
🌻 Recorta un trozo de tela unicolor del tamaño de la caja en alto y largo, dando toda la vuelta.
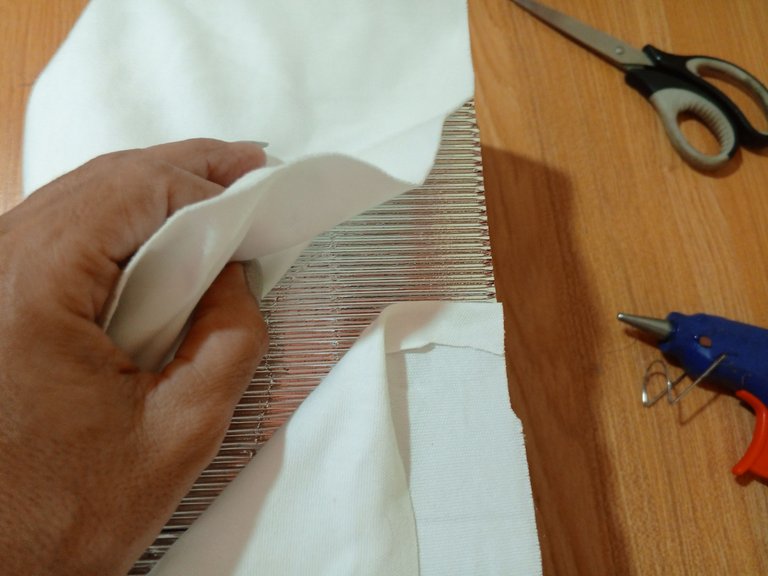
🌻 Coloca pegamento en la parte superior de la caja y ve pegando la tela al rededor, esta pieza debes colocarla al derecho sobre la caja, pues luego de pegarla hay que voltear la tela hacia adentro.
🌻 En la parte de las orillas, en una de ellas debes hacer un dobladillo que puedes pegar con pegamento o coserlo.
🌻 Pega la tela por todo el borde al menos unos 2 centímetros de ancho.
! [English version]
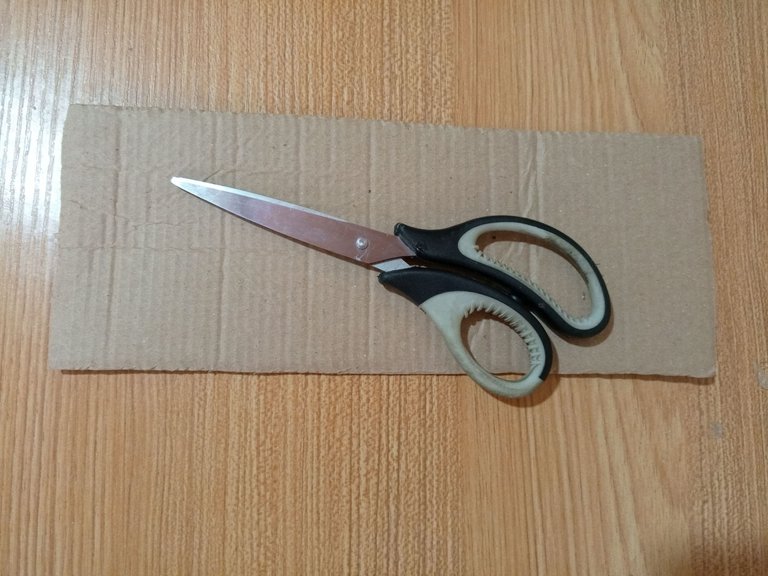
🌻 Cut the corrugated cardboard to the width and height of the box.
🌻 use glue to attach the cardboard to the box so it is lined.
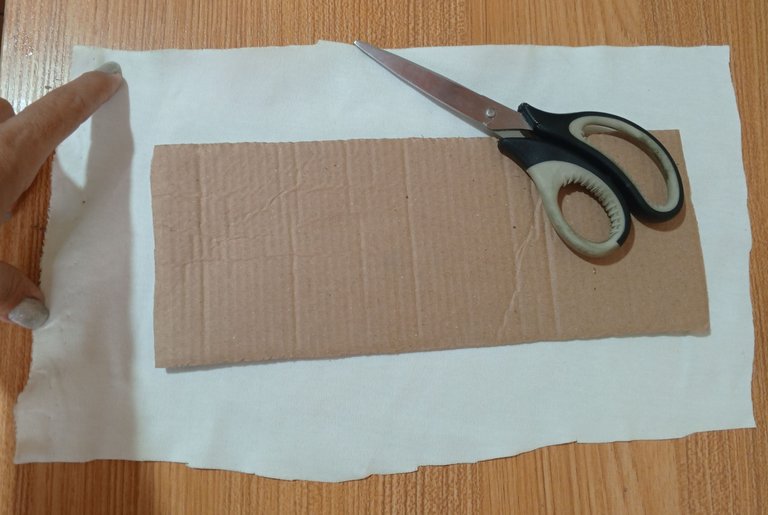
🌻 Cut out a piece of unicolor fabric the size of the box in height and length, going all the way around.
🌻 Place glue on the top of the box and glue the fabric around it, this piece should be placed right side up on the box, because after gluing it you have to turn the fabric inside out.
🌻 In the part of the edges, in one of them you must make a hem that you can glue with glue or sew it.
🌻 Glue the fabric all around the edge at least about 2 centimeters wide.
Step 2️⃣/ paso 2️⃣
 |  | |
 |  |
[Esp]
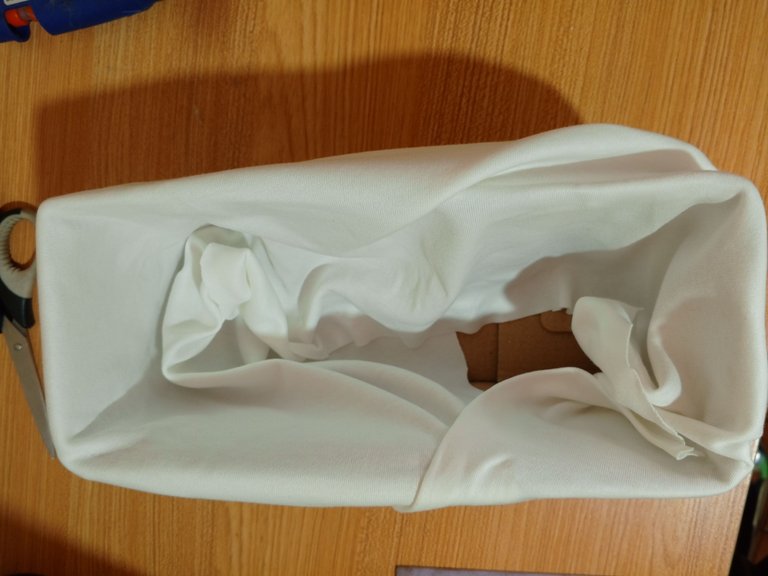
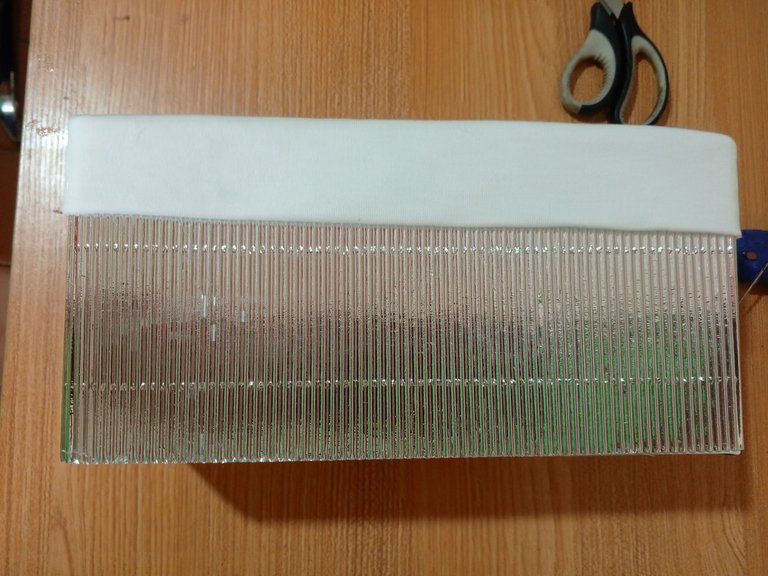
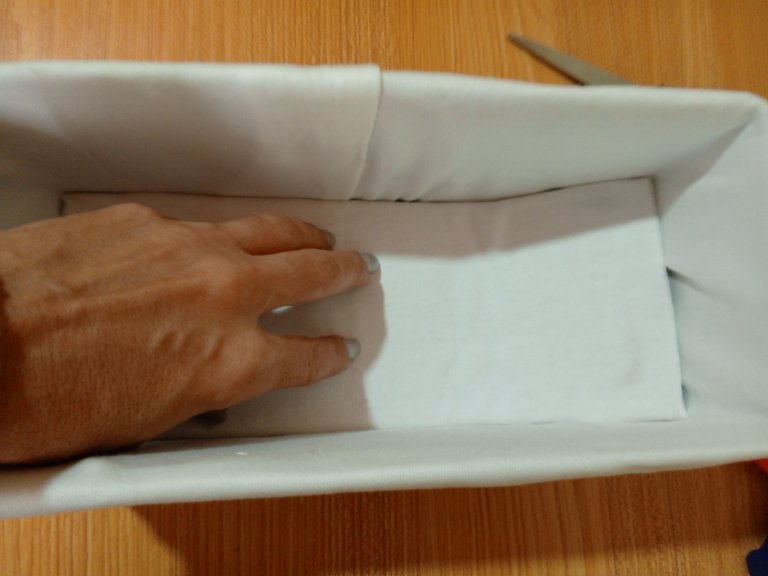
🌻 Pega los extremos de la tela para que no queden sueltos, comienza a voltear la tela con mucho cuidado hacia adentro, si es necesario aplica un poco de pegamento.
🌻 Procura que la tela de la parte de afuera quede recta y prolija.
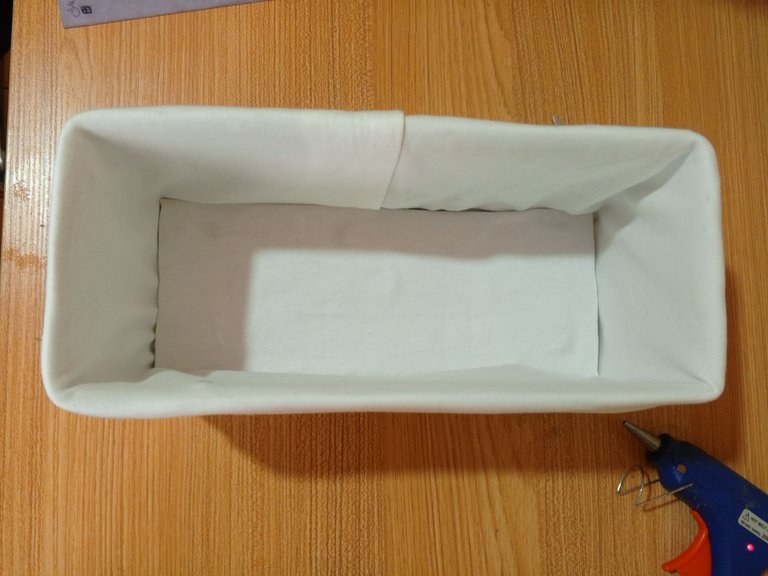
🌻 He usado la misma tapa de la caja para elaborar un fondo forrado, para que entre sin problemas tan solo recorta un poco de las orillas.
🌻 Recorta la tela unicolor para forrar el cartón del fondo dejando unos 2 centímetros hacia a fuera para poder doblar los bordes.
! [English version]
🌻 Glue the ends of the fabric so that they are not loose, start turning the fabric very carefully inwards, if necessary apply a little glue.
🌻 Make sure the fabric on the outside is straight and neat.
🌻 I used the same box lid to make a lined bottom, to make it fit smoothly just trim a little bit of the edges.
🌻 Cut out the one-color fabric to line the cardboard bottom, leaving about 2 centimeters on the outside to be able to fold the edges.
Step 3️⃣/ paso 3️⃣
 |  | |
 |  |
[Esp]
🌻 Forra la tapa del fondo, aplica pegamento. Ahora colócalo al final de la caja aplicando algo de pegamento en el fondo, procura que la tela quede bien estirada.
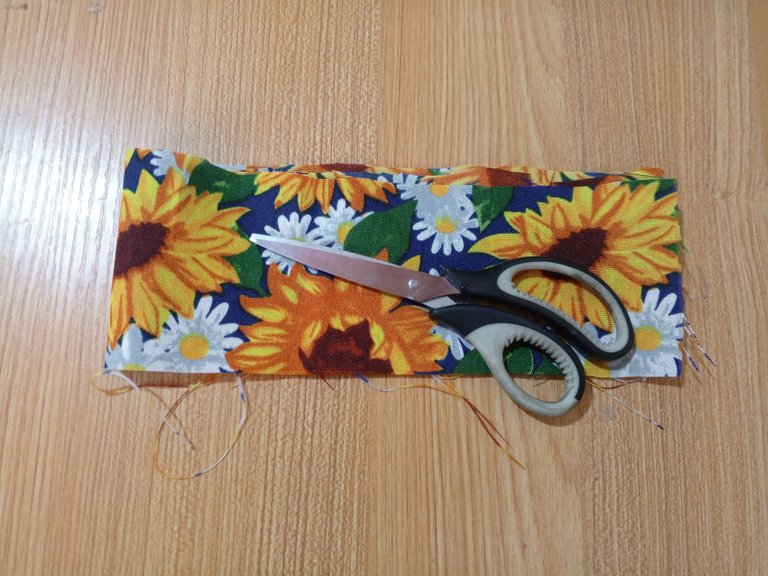
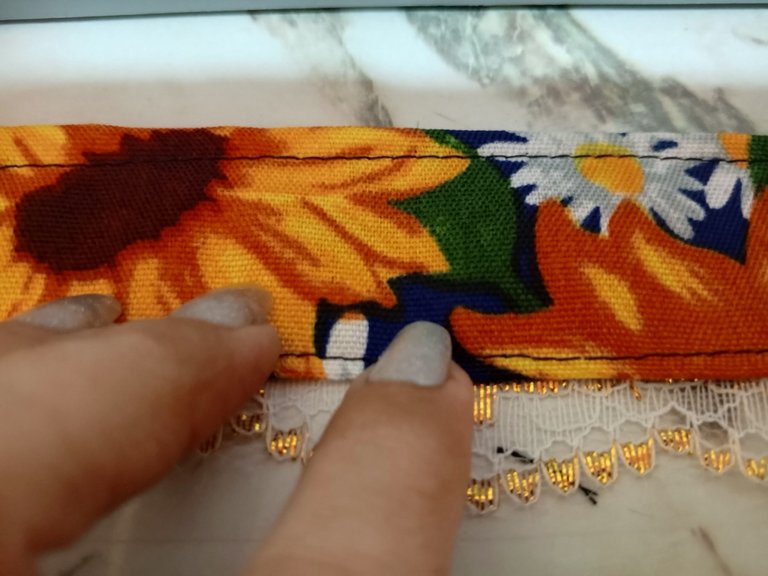
🌻 Recorta una tira de la tela estampada, las medidas tendrás que hacerlas dependiendo del tamaño de tu caja, yo corté una tira de 7 centímetros de ancho por el largo de la caja.
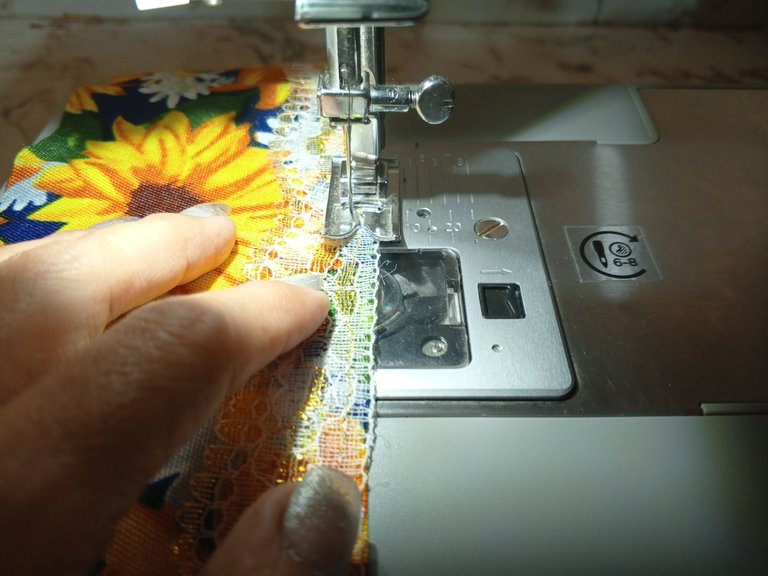
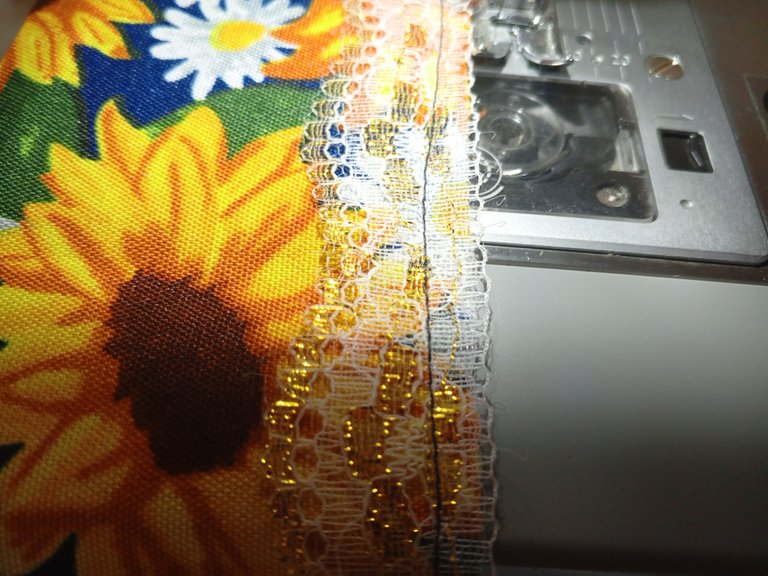
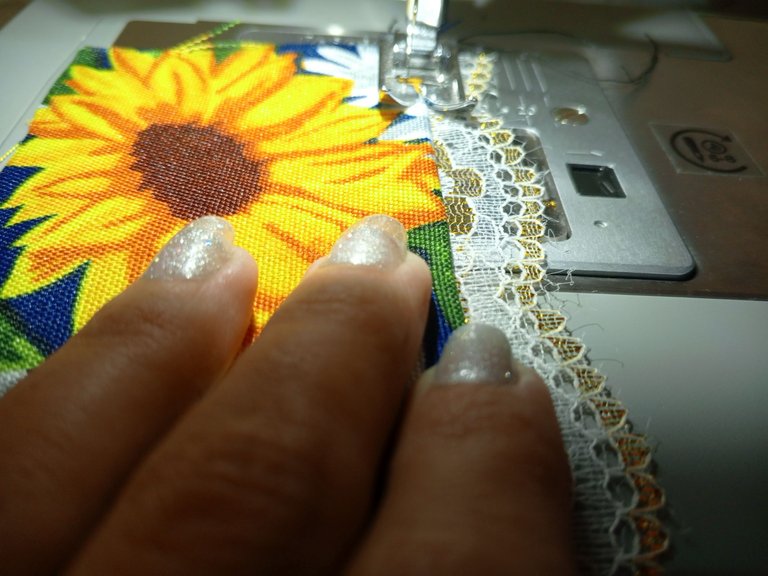
🌻 Esta parte puedes hacerla con pegamento o coser a mano o a máquina,a mí me pareció más especial hacer esta parte en costura a máquina, cosí el encaje por la orilla de la tela como muestra la imagen.
! [English version]
🌻 Line the bottom lid, apply glue. Now place it at the end of the box applying some glue on the bottom, make sure the fabric is well stretched.
🌻 Cut a strip of the printed fabric, the measurements will have to be made depending on the size of your box, I cut a strip of 7 centimeters wide by the length of the box.
🌻 This part you can do it with glue or sewing by hand or machine, I found it more special to do this part with machine sewing, I sewed the lace along the edge of the fabric as shown in the image.
Step 4️⃣/ paso 4️⃣
 |  |  |
 |  |  |

[Esp]
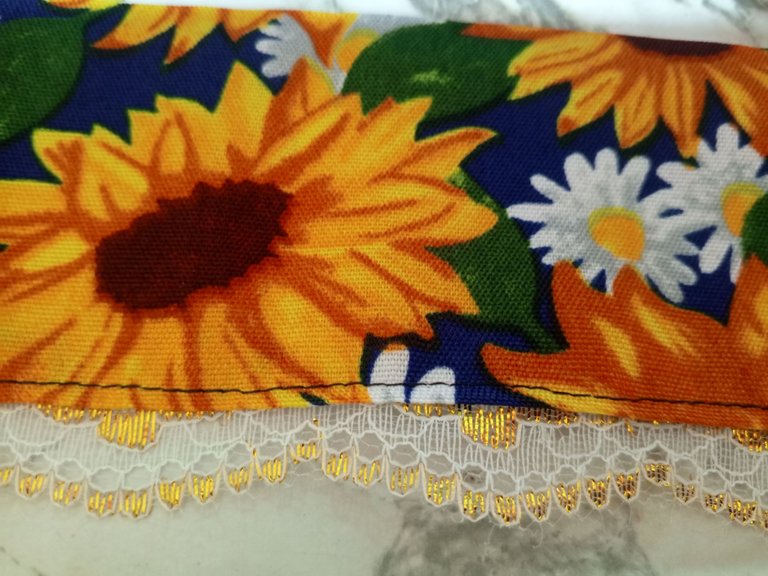
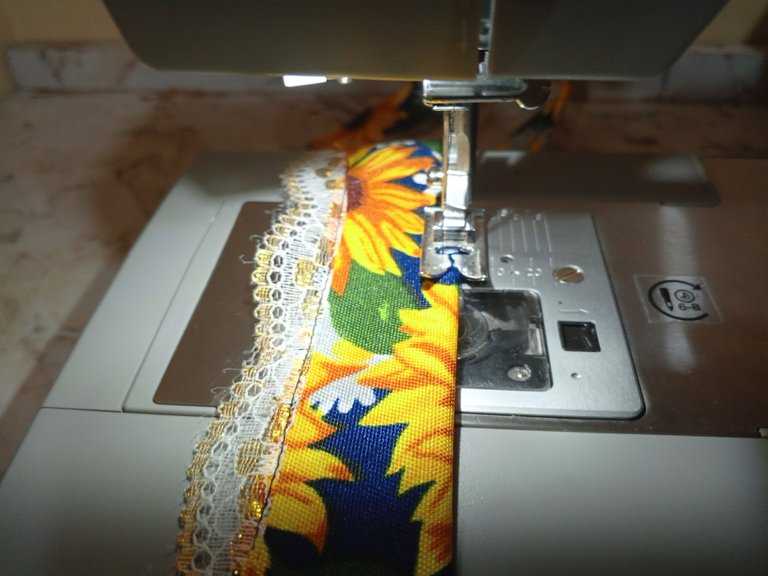
🌻 Voltea el encaje y vuelve a coser una recta por la orilla.
🌻 Dobla la tela y cose el otro extremo.
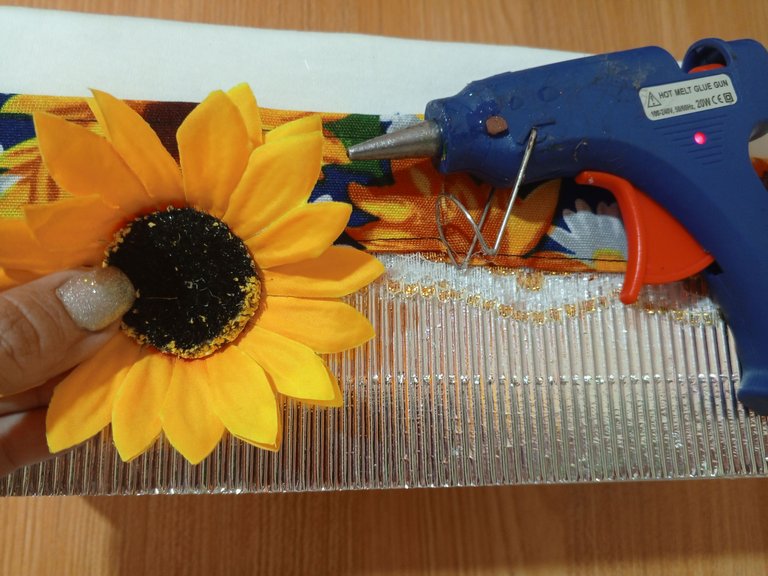
Aplica pegamento en la caja y pega la cinta que acabas de coser, será la decoración entre la tela y la cartulina corrugada.
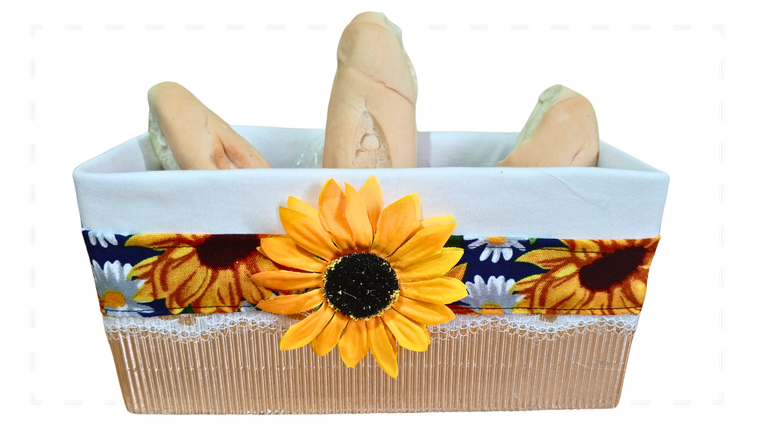
🌻 Una vez pegues la cinta hecha por ti mismo por toda la caja, pega la flor en el centro.
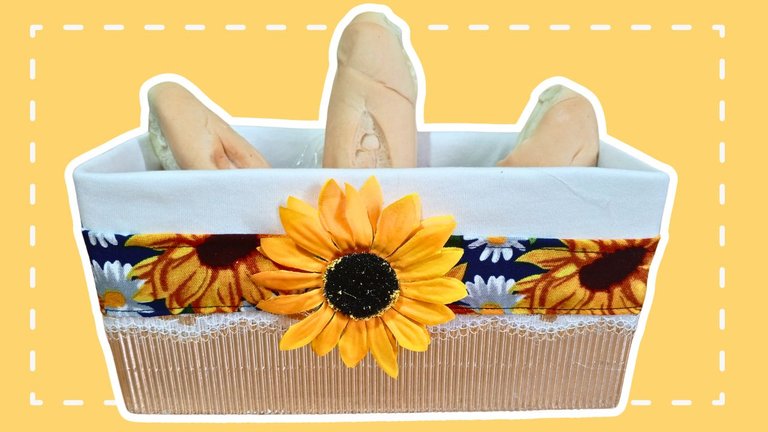
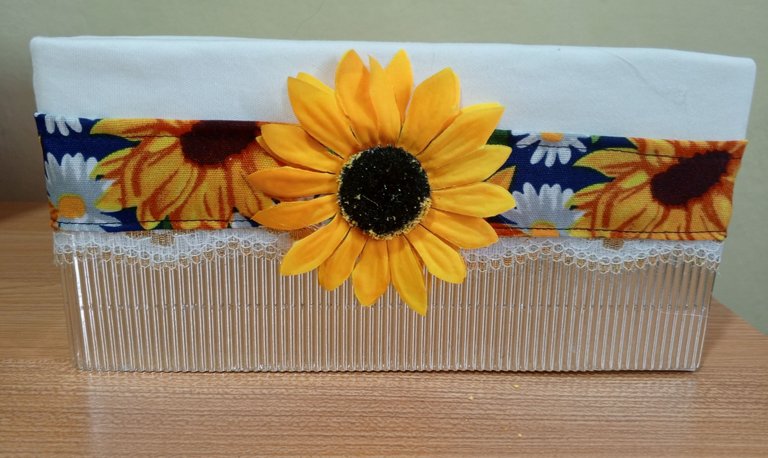
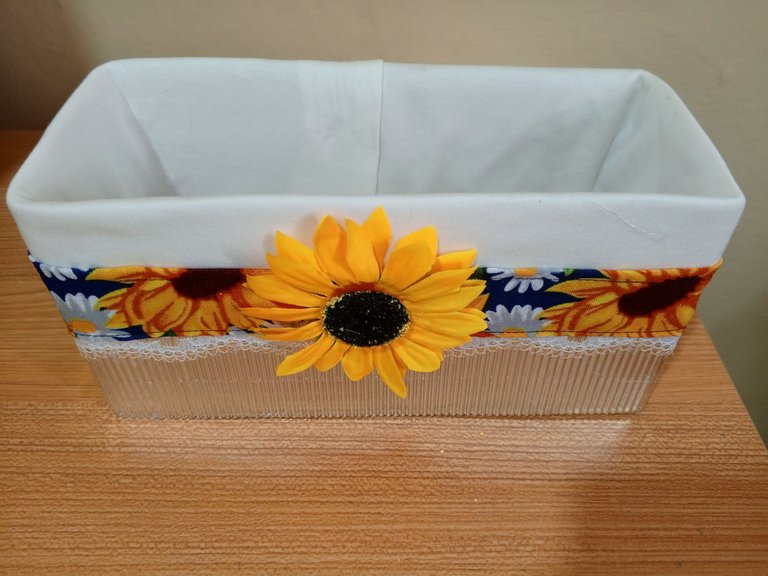
Con ello terminamos el proyecto y ha quedado una hermosa caja personalizada, puede ser multiuso, sin embargo el uso que le daré será para servir los panes en mi mesa de una forma original y bonita.
Espero te guste la idea. Nos vemos en mi siguiente publicación.
! [English version]
🌻 Turn the lace over and sew a straight edge again.
🌻 Fold the fabric and sew the other end.
Apply glue on the box and glue the ribbon you just sewed, it will be the decoration between the fabric and the corrugated cardboard.
🌻 Once you glue the self-made ribbon all over the box, glue the flower in the center.
With that we finished the project and has been a beautiful personalized box, it can be multipurpose, however the use I will give it will be to serve the breads on my table in an original and beautiful way.
I hope you like the idea. See you in my next post.
 |  |
Créditos / Credits

👇Support the Hive DIY community as a witness 👇

![]() 👉
👉  👉
👉 ![]() 👉
👉 ![]() 👉
👉 
Here / Bríndame un café

Que bonito y que lindos recuerdos con las cestas tienes 😍 presentar los panes en una cesta hecha por ti dice mucho de lo importante que son esas visitas ❤️
Te quedo muy cuchis y con esos girasoles mas lindo 😘 los panes se ven felices jeje los mios no porque yo solo los coloco sobre la mesa y ya 😂
Me encanta decorar con esas cosas y con mecate, mecatillo, yute, por fin conseguí, ahora vienen más creaciones de ese estilo, me alegra que te gustara. Creo que estas cositas de las cestitas, son muy comunes en la gente europea.
A beautifully decorated basket to place on your table. The fact that you have used flowers in its decoration looks better on it. The manner in which basket making is explained in detail in your post is truly appreciated. @equipodelta
I'm glad you like it, I already have new materials to continue creating baskets of other models.
Bueno en mi época la panera era de Tupperware, pero creo que la tuya es súper más linda. Me encantó el estilo country que le das con las telas y el producto final es hermoso.
Si supieras amiga que a mi madre le desagradaba las cosas de plastico, no le gustaba esa linea mucho menos, mejor no digo lo que decia jajajaj es demasiado hate. ella siempre andaba buscando cestas, ahora que recuerdo ella tenia una fijación con ellas.
Jajaja... Nosotros teníamos una vecina que vendía Tupperware y mi mamá estaba casi obligada a comprarle, tenía un montón de cosas, lo que más recuerdo era la panera y la jarra de agua grandísima.
En los 80"s estaba muy activa esa marca, incluso hacían reuniones. Na'guará hace 40 años...
https://x.com/hivediy47901/status/1798419263323271559
Eres muy creativa @equipodelta te quedo muy bonita la esta y un paso a paso muy detallado.
Saludos
Amiga muchas gracias, no tanto como tú, jajajaj! Me ha encantado el bolsito que hiciste para el thermo. Demasiado estupendo, quiero uno.
Estoy pendiente de hacerte un bolsito
Que increíble lo que podemos crear un un trozo de cartón, un trozo de tela un poco de pegamento y nuestra imaginación me encanto amiga en realidad me encanta todo lo que tenga estilo contry
Ya no boto las cajitas, jajajaja! y si veo cajitas por ahí bonitas pues las compro o las pido regaladas. Se pueden hacer cosas lindas con ellas y lo mejor es organizar todo en ellas.
Que hermosa canasta, el color amarillo del Girasol le dio ese aire a lo campestre y denota lo puro y sano del contenido dentro de la misma, una muy buena combinación de elementos vitales como flora y pan en un mismo conjunto. Felicitaciones quedo fue bella!
Hola amiga me alegra que te guste, es que soy muy fan de estos estilos, seguro hago más cositas asi
Qué belleza, el estilo country siempre será muy apreciado y decorativo para hacer esa diferencia de lo sofisticado. Te quedo hermosa esta cesta para esos ricos panes, qué bueno es recordar y copiar las bonitas costumbres de nuestra madre.❣️🌻
This is so creative to decorate such a beautiful basket ....Serving bread in such a beautiful basket increases the fun of eating.
Preciosa manualidades linda.. me encanta el detalle del girasol! 😍 Gracias por compartir con nosostros su creación!