Tutorial: Colgante de Flor Doble 💮(ESP - ING)
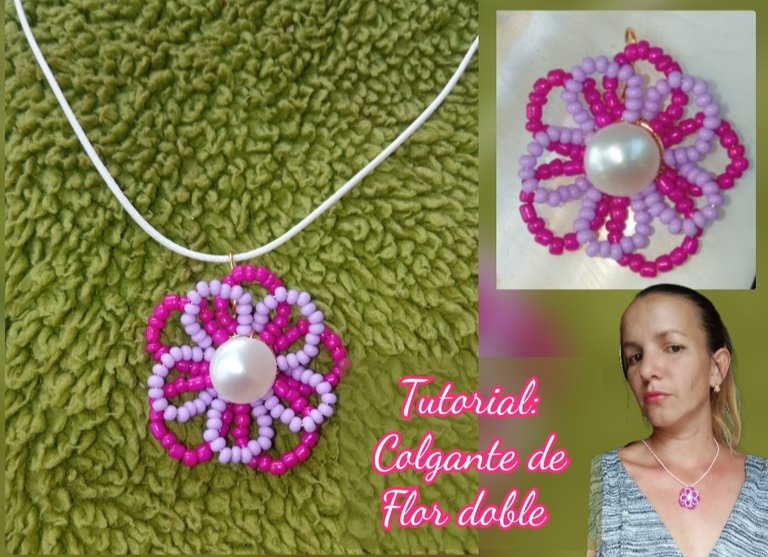
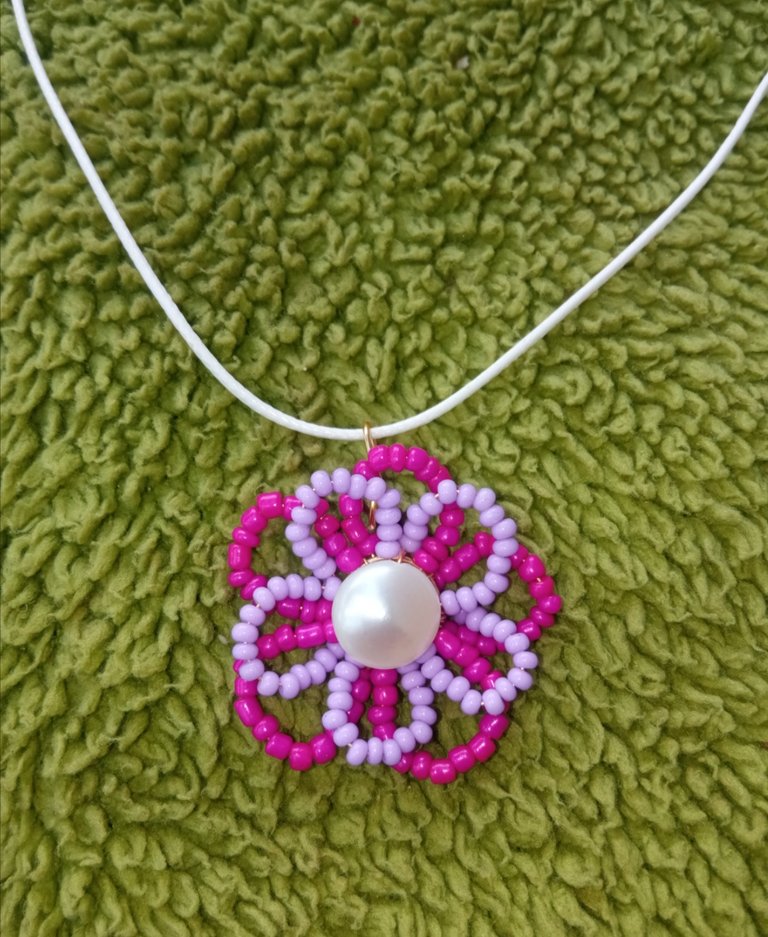
feliz y bendecido día tengan todos ustedes, feliz inicio del fin de semana para todos ustedes, hoy es un gran placer para mí el pasar por esta creativa comunidad compartiendo con todos ustedes mi mas reciente elaboración, en esta oportunidad les traigo un muy sencillo tutorial donde los invito a acompañarme en la elaboración de un muy hermoso colgante para nuestras cadenas, este es un muy lindo diseño con forma de flor de petalos dobles. Esta elaboracion la realizaremos con la técnica del alambrismo y apoyándonos en piedras de mostacillas y perla.
happy and blessed day have all of you, happy start to the weekend for all of you, today is a great pleasure for me to go through this creative community sharing with all of you my most recent creation, on this occasion I bring you a very simple tutorial where I invite you to join me in making a very beautiful pendant for our chains, this is a very pretty design in the shape of a flower with double petals.
We will carry out this elaboration with the wire technique and relying on beads and pearl stones.
I invite you to join me in this simple tutorial and make your own accessories from home.
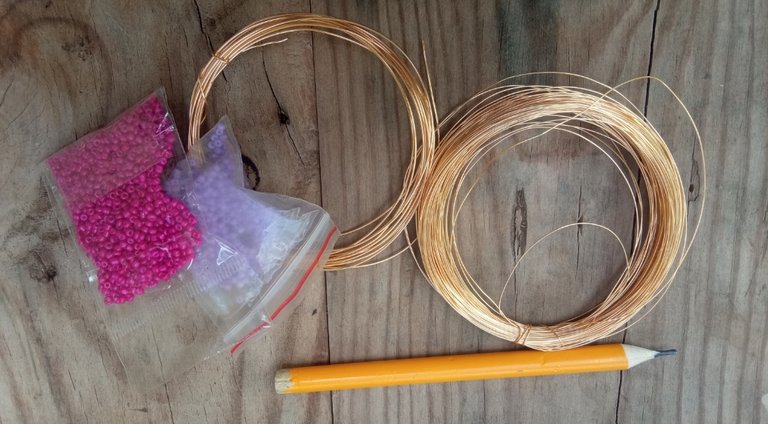
alambre de bisutería calibre 20.
alambre de bisutería calibre 26.
Mostacillas color fucsia.
Mostacillas color morado claro.
una perla natural.
Pinza de bisutería.
What we need
- 20 gauge jewelry wire.
- 26 gauge jewelry wire.
- Fuchsia colored beads.
- Light purple beads.
- a natural pearl.
- Jewelry clamp.
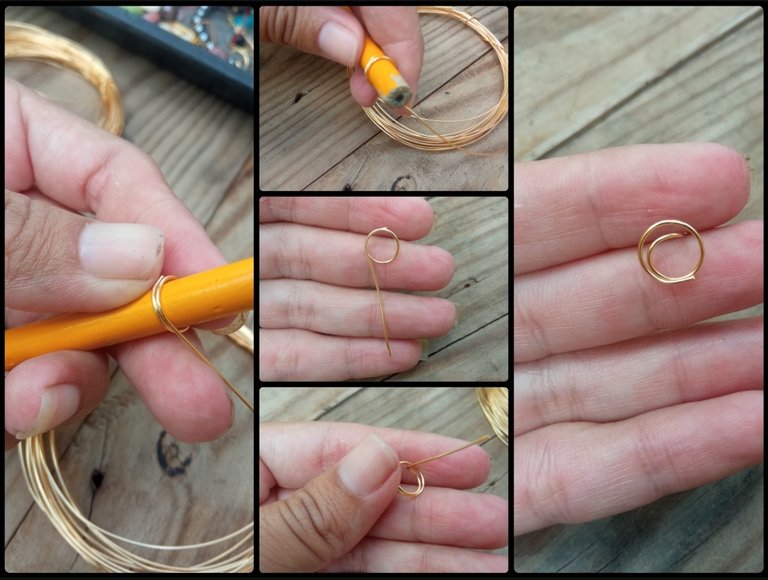
⭐ Paso 1: para iniciar la elaboración de este hermoso diseño primeramente tomaremos el alambre de bisutería calibre 20 y apoyandonos con la pinza de realizar formas circulares o simplemente con un objeto de uso cotidiano como un lápiz moldearemos el alambre y elaboraremos una vuelta y media en forma circular y cortaremos el alambre dejado 4 cm luego de el círculo y luego este lo bajaremos a la mitad del círculo y lo doblaremos hacia atrás, tal cual pueden ver a continuación en las siguientes imágenes.
⭐ Step 1: to begin the elaboration of this beautiful design, we will first take the 20 gauge jewelry wire and using the tweezers to make circular shapes or simply with an everyday object such as a pencil, we will shape the wire and make a loop and a half in a circular shape and we will cut the wire left 4 cm after the circle and then we will lower it to the middle of the circle and bend it back, as you can see in the following images.
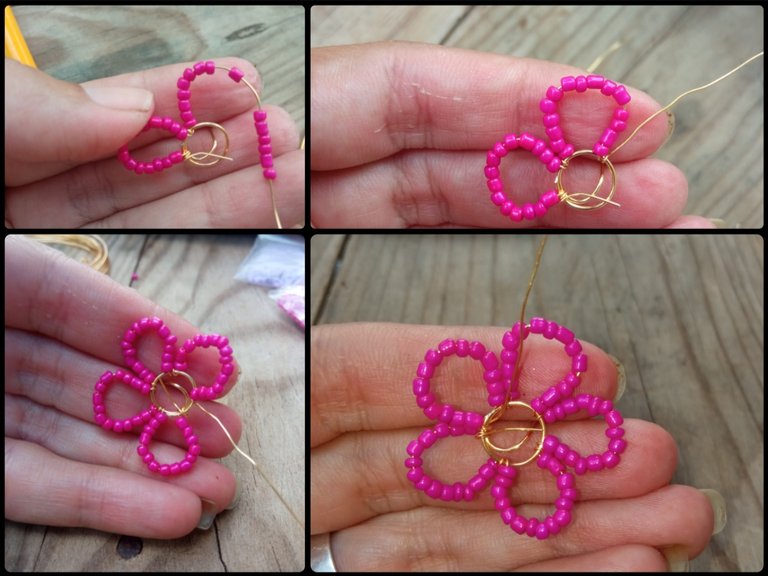
⭐ Paso 2: para continuar tomaremos un pedazo de alambre de bisutería calibre 26 muy largo, de 40 cm aproximadamente y este lo vamos a unir a nuestra base circular enrollando la primera punta en el círculo, luego por el otro extremo iniciaremos a introducir las mostacillas, yo inicié con las mostacillas color fucsia, introduje un total de 15 mostacillas pequeñas y con ayuda del lápiz moldearemos el alambre con las mostacillas dando forma de pétalo y enrrollamos el alambre en la base circular para sostener la forma.
⭐ Step 2: to continue we will take a very long piece of 26 gauge jewelry wire, approximately 40 cm and we will attach this to our circular base by winding the first end in the circle, then at the other end we will begin to Introduce the beads, I started with the fuchsia beads, I introduced a total of 15 small beads and with the help of the pencil we will shape the wire with the beads into a petal shape and roll the wire around the circular base to hold the shape.
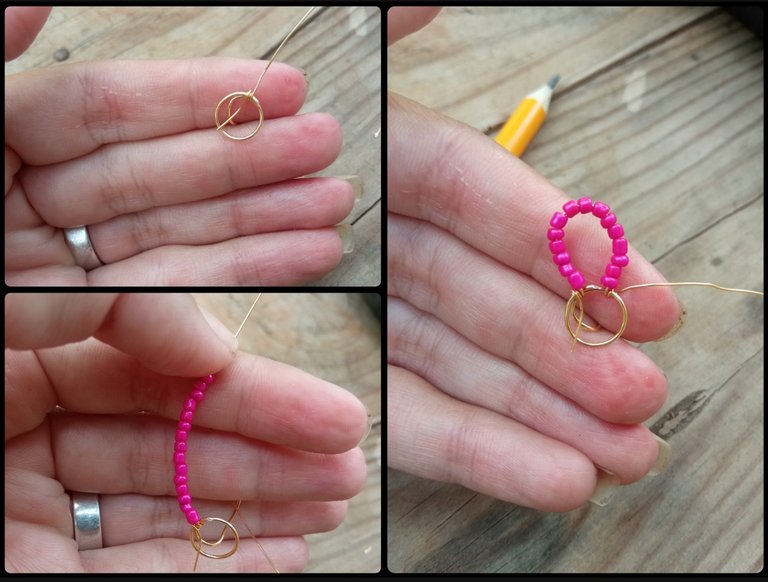
⭐ Paso 3: repetimos nuevamente el procedimiento de introducir 15 mostacillas fucsia , moldeamos el alambre dando forma de pétalo y lo unimos a la base. Esto lo repetiremos hasta tener un total de 5 pétalos color fucsia.
⭐ Step 3: we repeat the procedure of introducing 15 fuchsia beads again, we shape the wire into a petal shape and we attach it to the base. We will repeat this until we have a total of 5 fuchsia petals.
⭐ Paso 4: una vez ya tenemos nuestra linda flor con 5 pétalos color fucsia procedemos a elaborar otros pétalos de color lila, para ello con el mismo alambre que nos sobra calibre 26 lo pasaremos por la parte central de uno de los pétalos fucsia, y por este mismo alambre introduciremos 15 mostacillas color lila y de igual manera molderaemos la forma de un pétalo y sujetaremos el alambre en la parte central del siguiente pétalo. Cómo pueden observar este pétalo quedó un poco más pequeño debido a que las mostacillas son de menor tamaño y además estos pétalos color lila quedarán intercalados entre los fucsia.
⭐ Step 4: once we have our beautiful flower with 5 fuchsia-colored petals, we proceed to make other lilac-colored petals. To do this, with the same 26-gauge wire that we have left over, we will pass it through the central part of one of the petals fuchsia, and through this same wire we will introduce 15 lilac beads and in the same way we will shape the shape of a petal and we will hold the wire in the central part of the next petal. As you can see, this petal was a little smaller because the beads are smaller and also these lilac petals will be sandwiched between the fuchsia ones.
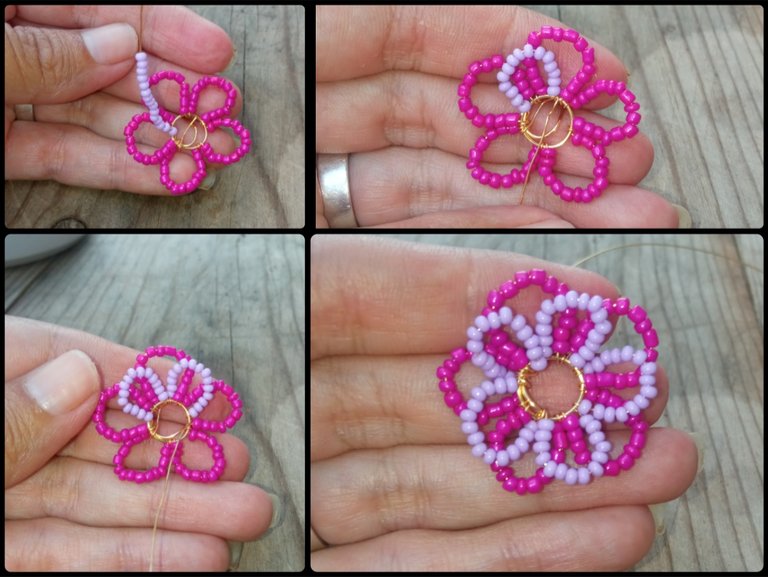
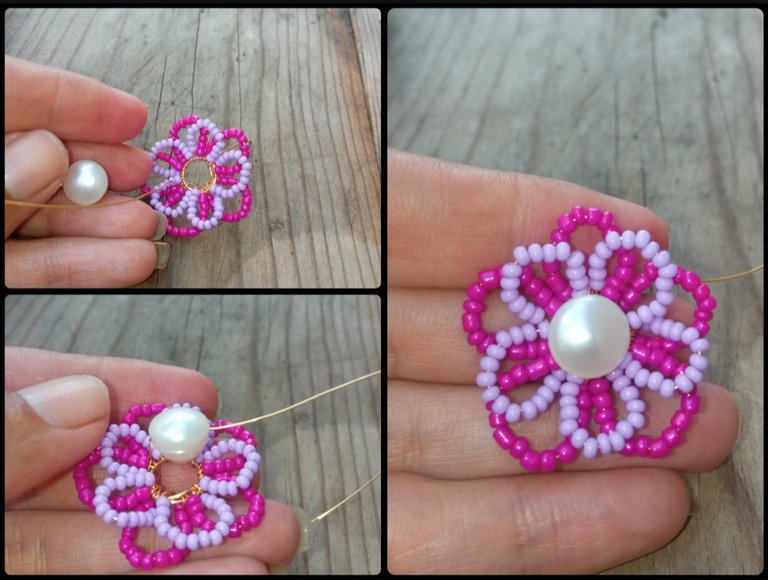
⭐ Paso 5 : repetimos el procedimiento anterior hasta logra la elaboración de 5 pequeños pétalos , y como verán la flor doble se verá espectacular. Y para embellecer aún más nuestra bella flor tomaremos el exceso de alambre de bisutería calibre 26 con el que venimos trabajando e introduciremos una linda perla blanca y la llevaremos a la parte central de la flor y la sujetamos del otro extremo de la base y cortamos el exceso de alambre.
⭐ Step 5: we repeat the previous procedure until we achieve the creation of 5 small petals, and as you will see the double flower will look spectacular.
And to further embellish our beautiful flower we will take the excess 26 gauge jewelry wire that we have been working with and insert a beautiful white pearl and we will take it to the central part of the flower and hold it at the other end of the base and cut the excess wire.
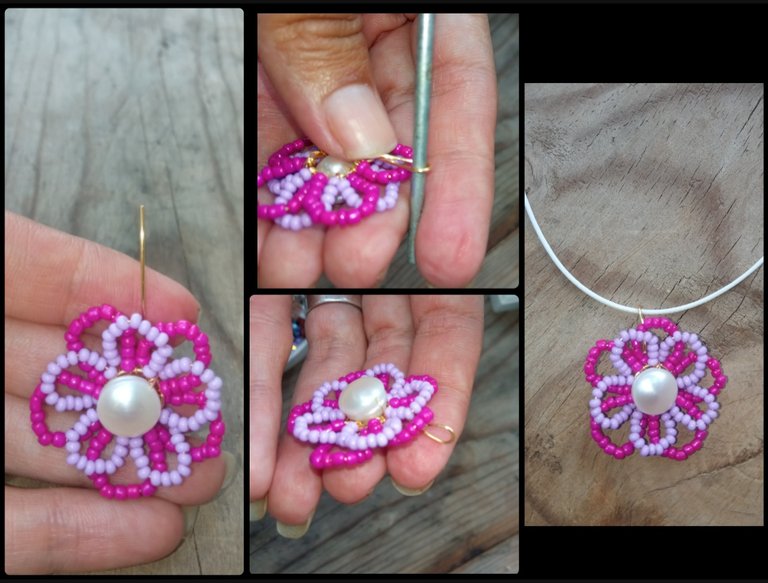
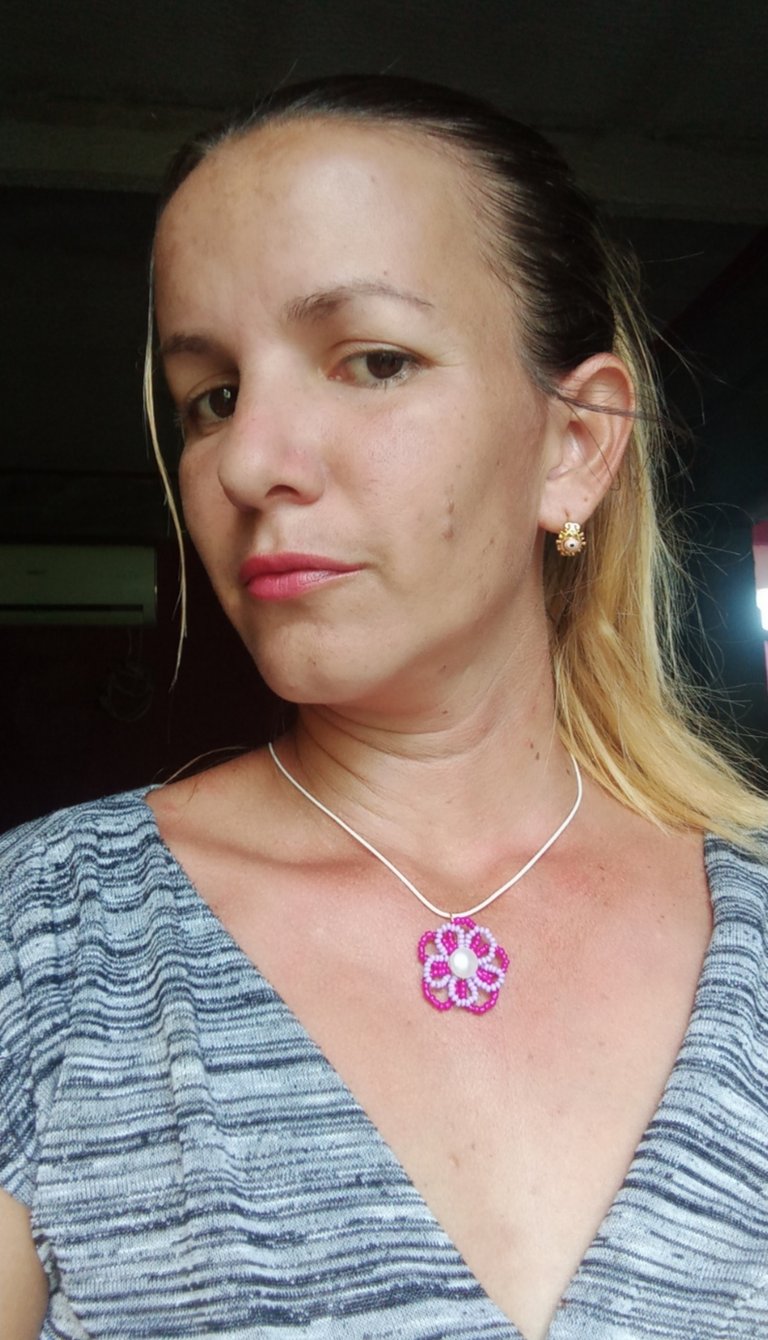
⭐ Paso 6: por último tomaremos el alambre de bisutería calibre 20 que dejamos por la parte de atrás de la linda flor y lo doblaremos hacia arriba y con ayuda de un pequeño palillo moldearemos un argolla semi circular y este nos servirá para colocar e introducir la cadena o cuerina para colgar nuestro bello dije y crear un bellísimo collar
⭐ Step 6: finally we will take the 20 gauge jewelry wire that we left on the back of the pretty flower and we will bend it upwards and with the help of a small toothpick we will shape a semi-circular ring and this will serve to place and insert the chain or leatherette to hang our beautiful pendant and create a beautiful necklace.
Todas las Fotos son de mi autoría y fueron tomadas con mi Celular Redmi 9.I wanted to make this beautiful design by combining these two colors that I had at home on hand, but if you prefer, you can make them all in one color or combine the colors of your preference.
My dear friends, I hope that you all like this design and that this tutorial is useful to you. I say goodbye until a new opportunity. Happy weekend everyone.
All Photos are my authorship and were taken with my Redmi 9 Cellphone
Posted Using InLeo Alpha
Wow, the pendant look so beautiful and unique, the color combination make the pendant looks so precious, you really have a good eyes for for a beautiful combination, I love the pendant shape of flower, nice work ma'am, well done.
Wow, wow wow....... 🥱🥱🥱🥱👍👍👍
What a beautiful pendant with a nice design, you did a beautiful work, I love it, keep it up dear.
This is really lovely
Está muy hermoso, bello diseño 👍
Beautiful pendant,I love the combinations of color
¡Felicitaciones!
Estás participando para optar a la mención especial que se efectuará el domingo 1 de septiembre del 2024 a las 8:00 pm (hora de Venezuela), gracias a la cual el autor del artículo seleccionado recibirá la cantidad de 1 HIVE transferida a su cuenta.
¡También has recibido 1 ENTROKEN! El token del PROYECTO ENTROPÍA impulsado por la plataforma Steem-Engine.
1. Invierte en el PROYECTO ENTROPÍA y recibe ganancias semanalmente. Entra aquí para más información.
2. Contáctanos en Discord: https://discord.gg/hkCjFeb
3. Suscríbete a nuestra COMUNIDAD y apoya al trail de @Entropia y así podrás ganar recompensas de curación de forma automática. Entra aquí para más información sobre nuestro trail.
4. Visita nuestro canal de Youtube.
Atentamente
El equipo de curación del PROYECTO ENTROPÍA
Muy hermoso trabajo, te felicito @emmaris