(ESP - ING) Te enseño a crear estos hermosos zarcillos / I teach you how to create these beautiful tendrils
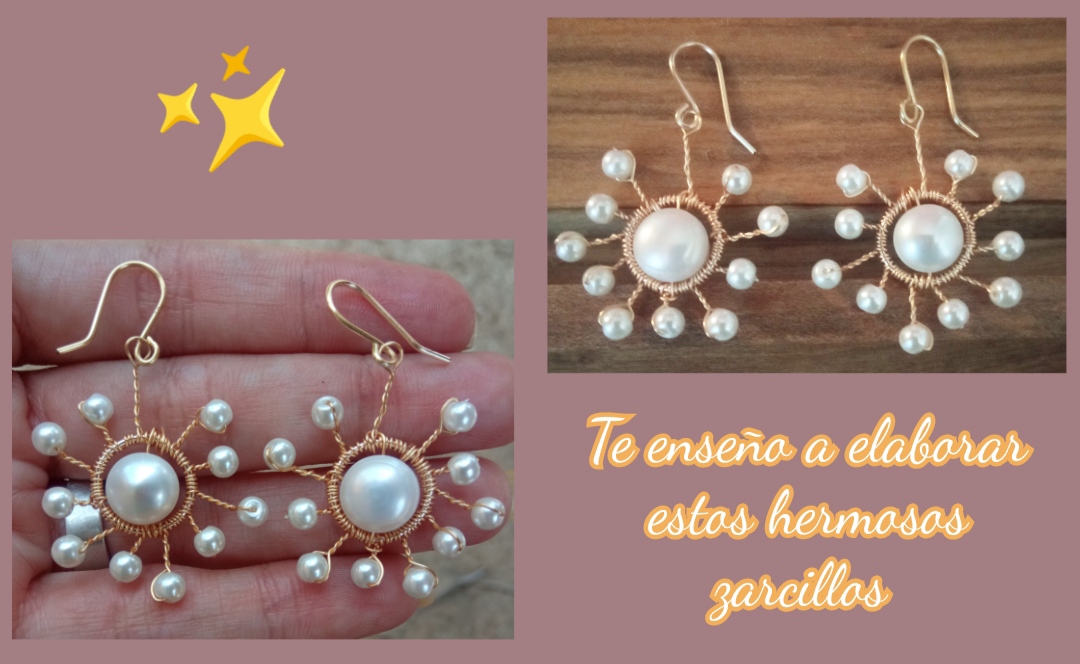
Feliz y bendecido día tengan todos ustedes es un gran placer para mí el poder compartir con todos ustedes en esta nueva oportunidad, vamos en este hermoso comunidad tratamos demostrar y enseñar a los demás cómo elaborar algo por nosotros mismos Yo quiero compartir con ustedes como en otras ocasiones un pequeño y sencillo tutorial donde les muestro paso a paso cómo podemos elaborar nosotros mismos nuestros hermosos accesorios en casa. En esta oportunidad les comparto un hermoso diseño de zarcillos elaborados en alambrismo súper fáciles, delicados y muy sencillos de elaborar.
Have a happy and blessed day all of you. It is a great pleasure for me to be able to share with all of you in this new opportunity. In this beautiful community we try to demonstrate and teach others how to make something for ourselves. I want to share with you. As on other occasions, a small and simple tutorial where I show you step by step how we can make our beautiful accessories ourselves at home.
On this occasion I share with you a beautiful design of tendrils made of wire, super easy, delicate and very simple to make.
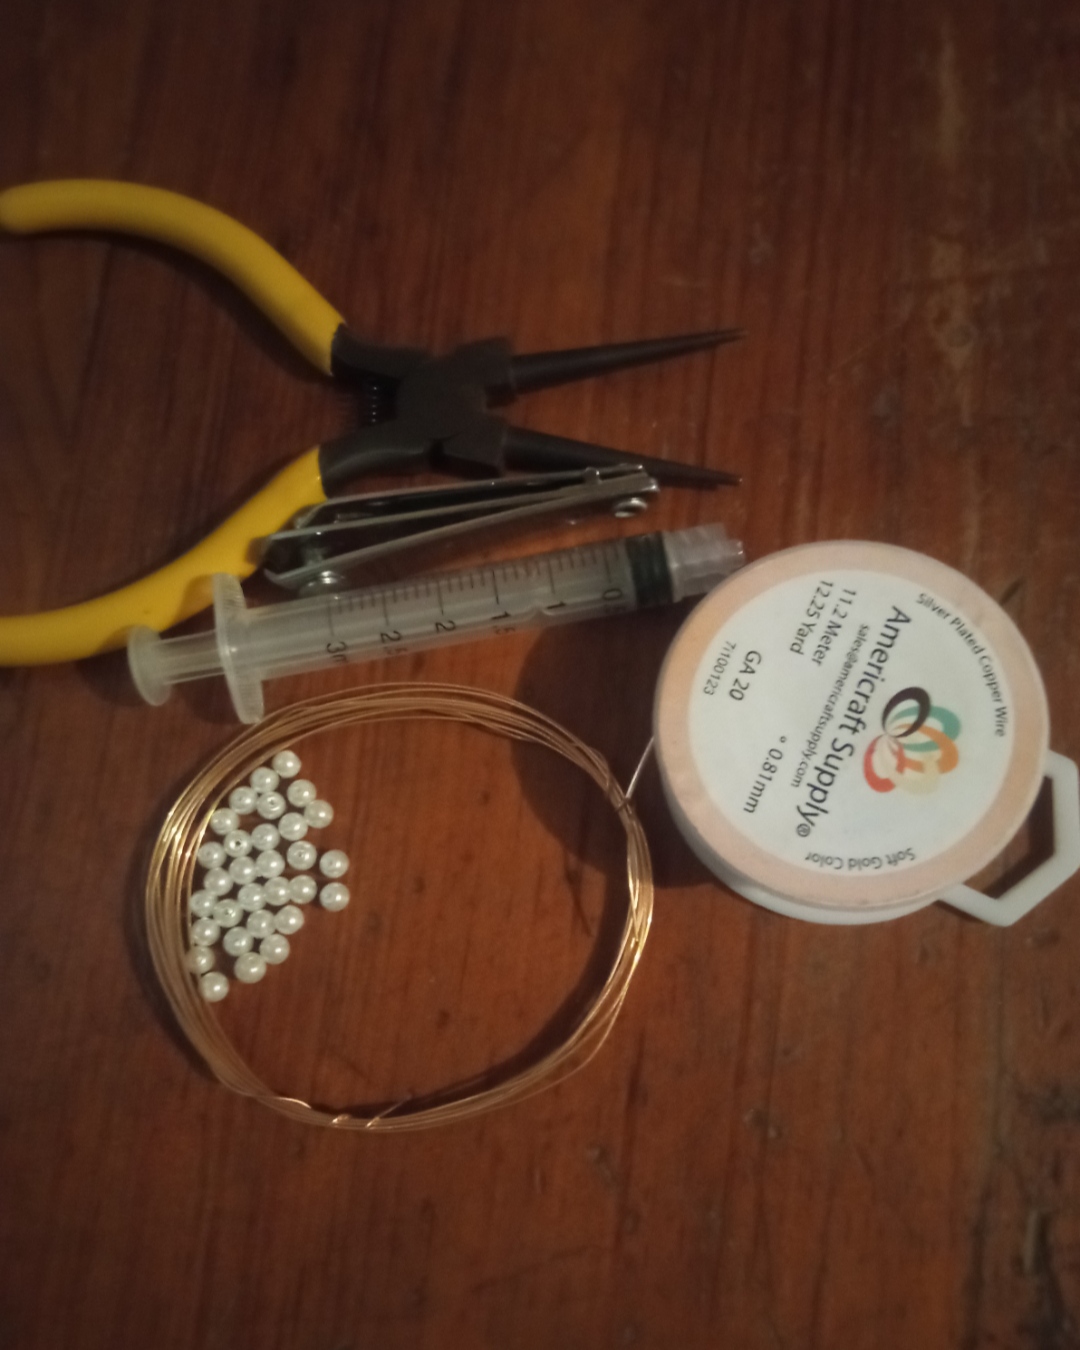
- Alambre de bisutería calibre 20.
- Alambre de bisutería calibre 26.
- 2 perlas blancas.
- Piedras perladas pequeñas.
- pinza de bisutería.
- 20 gauge jewelry wire.
- 26 gauge jewelry wire.
- 2 white pearls.
- Small pearl stones.
- jewelry clamp.
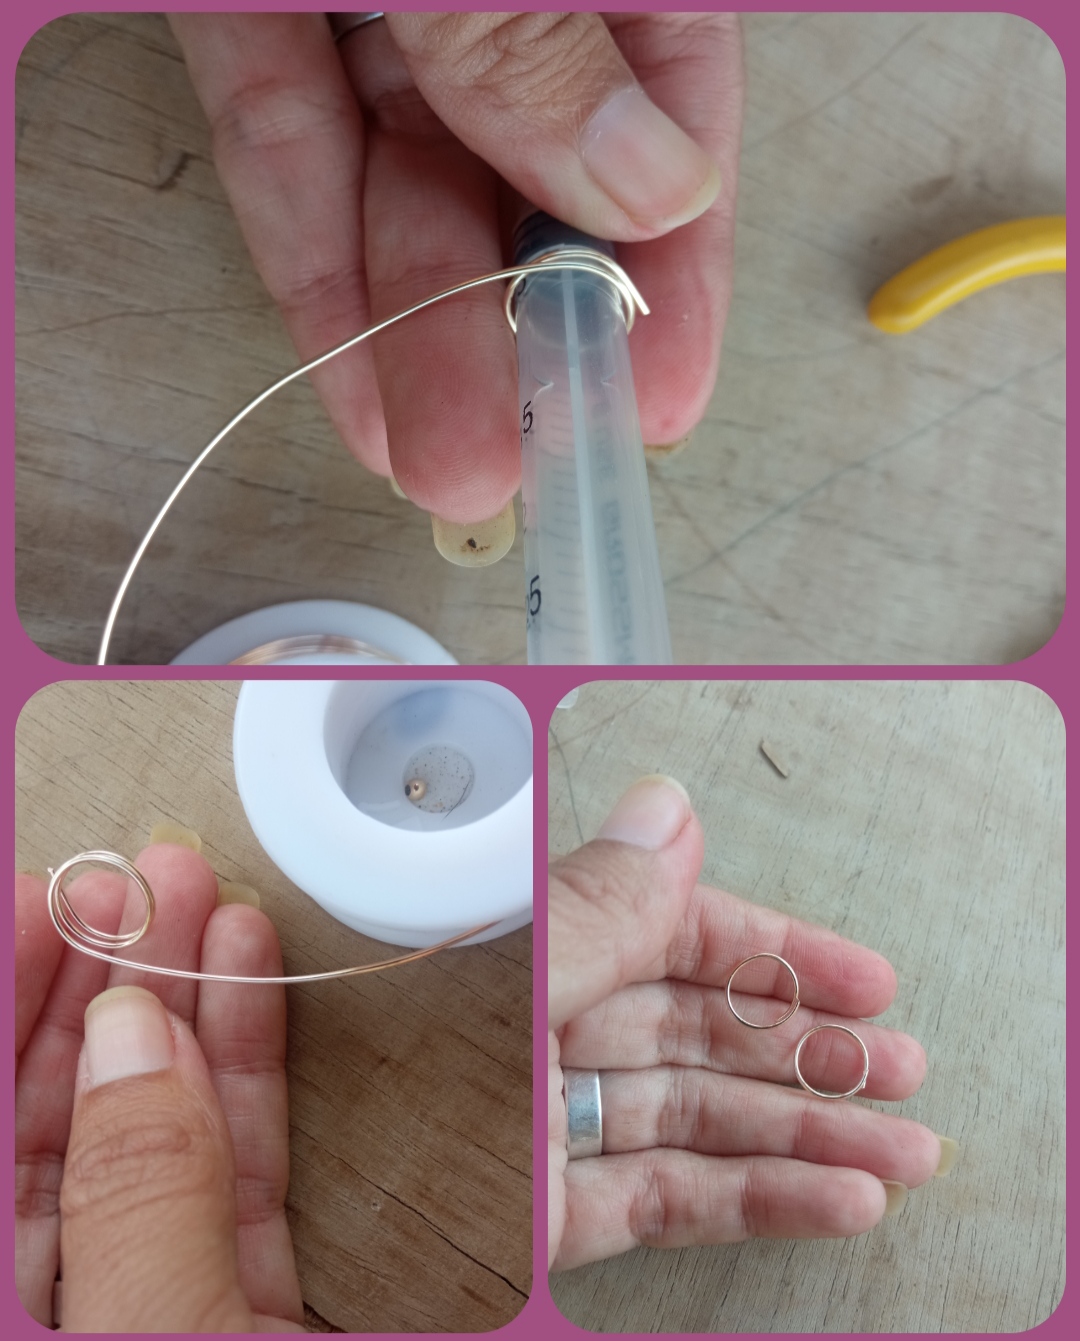
✴️ Paso 1: para iniciar la elaboración de este muy sencillo pero hermoso diseño tomaremos el alambre calibre 20 y con ayuda de un pequeño tubo objeto circular moldearemos el alambre realizando dos formas circulares pequeñas como pueden observarlas En las siguientes imágenes.
✴️ Step 1: to start making this very simple but beautiful design we will take the 20 gauge wire and with the help of a small circular object tube we will mold the wire making two small circular shapes as you can see in the following images.
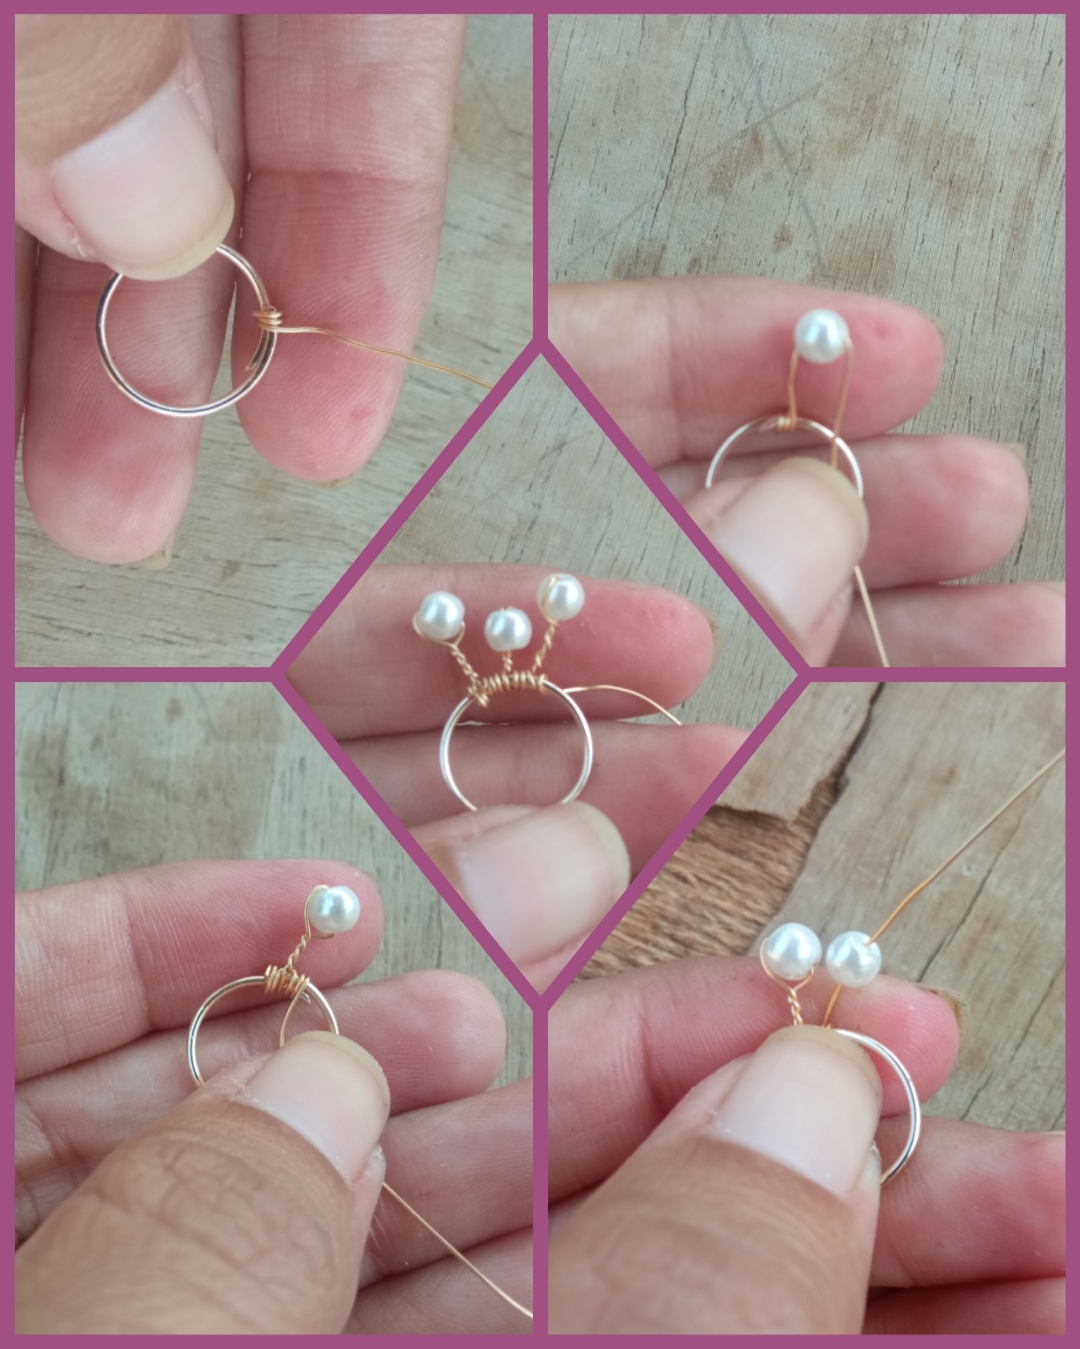
✴️ Paso 2: seguidamente procederemos a tomar el alambre calibre 26 y cortaremos un pedazo bastante largo y con este iniciaremos a enrollarlo en la base circular para ello iniciaremos en el empate del círculo para así tapar esta pequeña imperfección enrollaremos el alambre dando varias vueltas alrededor de la base luego introduciremos una pequeña piedra perlada la cual colocaremos un poco alejada de la base doblaremos el alambre hacia abajo y dejando un espacio entre la base y la piedra pelada incluyaremos el alambre para sujetar la piedra en la parte superior de este seguidamente enrollamos nuevamente alambre en la base y volvemos a introducir una pequeña piedra perlada pero esta reduciremos el tamaño de separación es decir debe quedar un poco más baja que la anterior al enrollarla para sujetar la piedra en su parte superior.
✴️ Step 2: Next we will proceed to take the 26 gauge wire and cut a fairly long piece and with this we will begin to roll it on the circular base. To do this, we will start at the circle tie in order to cover this small imperfection. We will roll the wire several times. turns around the base then we will introduce a small pearl stone which we will place a little away from the base we will bend the wire down and leaving a space between the base and the peeled stone we will include the wire to hold the stone on top of it next We wind the wire again at the base and reintroduce a small pearl stone, but this will reduce the size of the separation, that is, it should be a little lower than the previous one when rolling it to hold the stone in its upper part.
✴️ Paso 3: el paso número 2 lo repetiremos En diversas oportunidades elaborando pequeños destellos perlados salidos de la base circular siempre tomando en cuenta que debemos elaborar uno más alto que el otro separados por una mínima distancia, en total yo elaboré 10 destellos y al recubrir todas las formas circular ya casi para terminar el último destello lo elaboraremos sin colocarle piedra pelada dejando una pequeña forma circular en su parte superior pues esta no servirá para sujetar nuestra elaboración al anzuelo para zarcillo.
✴️ Step 3: We will repeat step number 2 on several occasions, making small pearly sparkles coming out of the circular base, always taking into account that we must make one higher than the other separated by a minimum distance, in total I made 10 sparkles. And when covering all the circular shapes, almost to finish the last sparkle, we will make it without placing peeled stone, leaving a small circular shape in its upper part since this will not serve to attach our creation to the tendril hook.
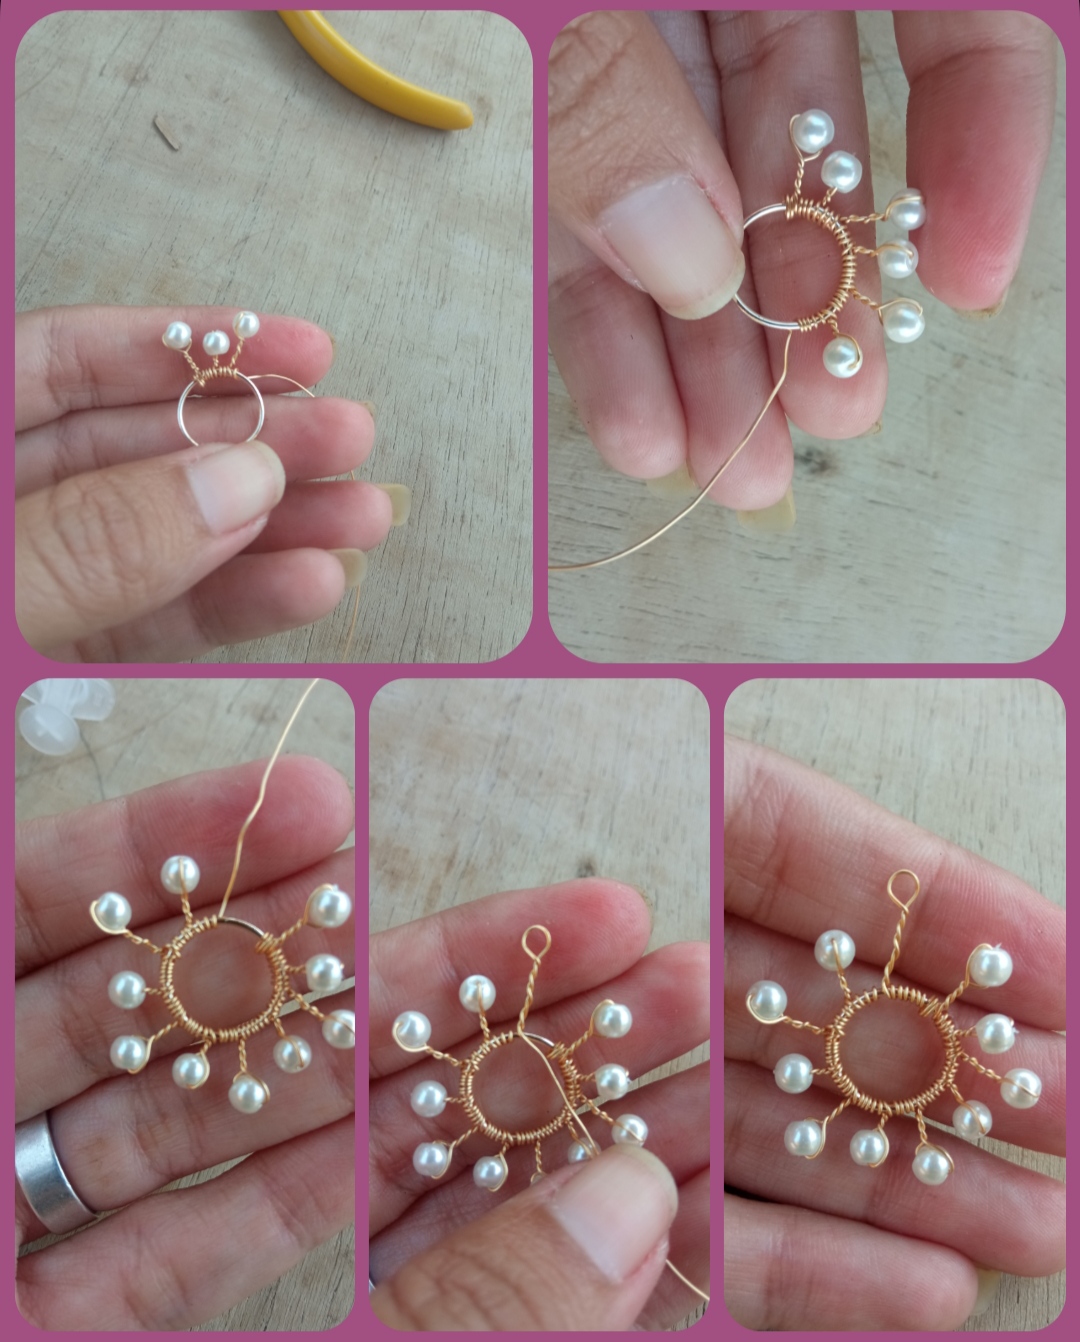
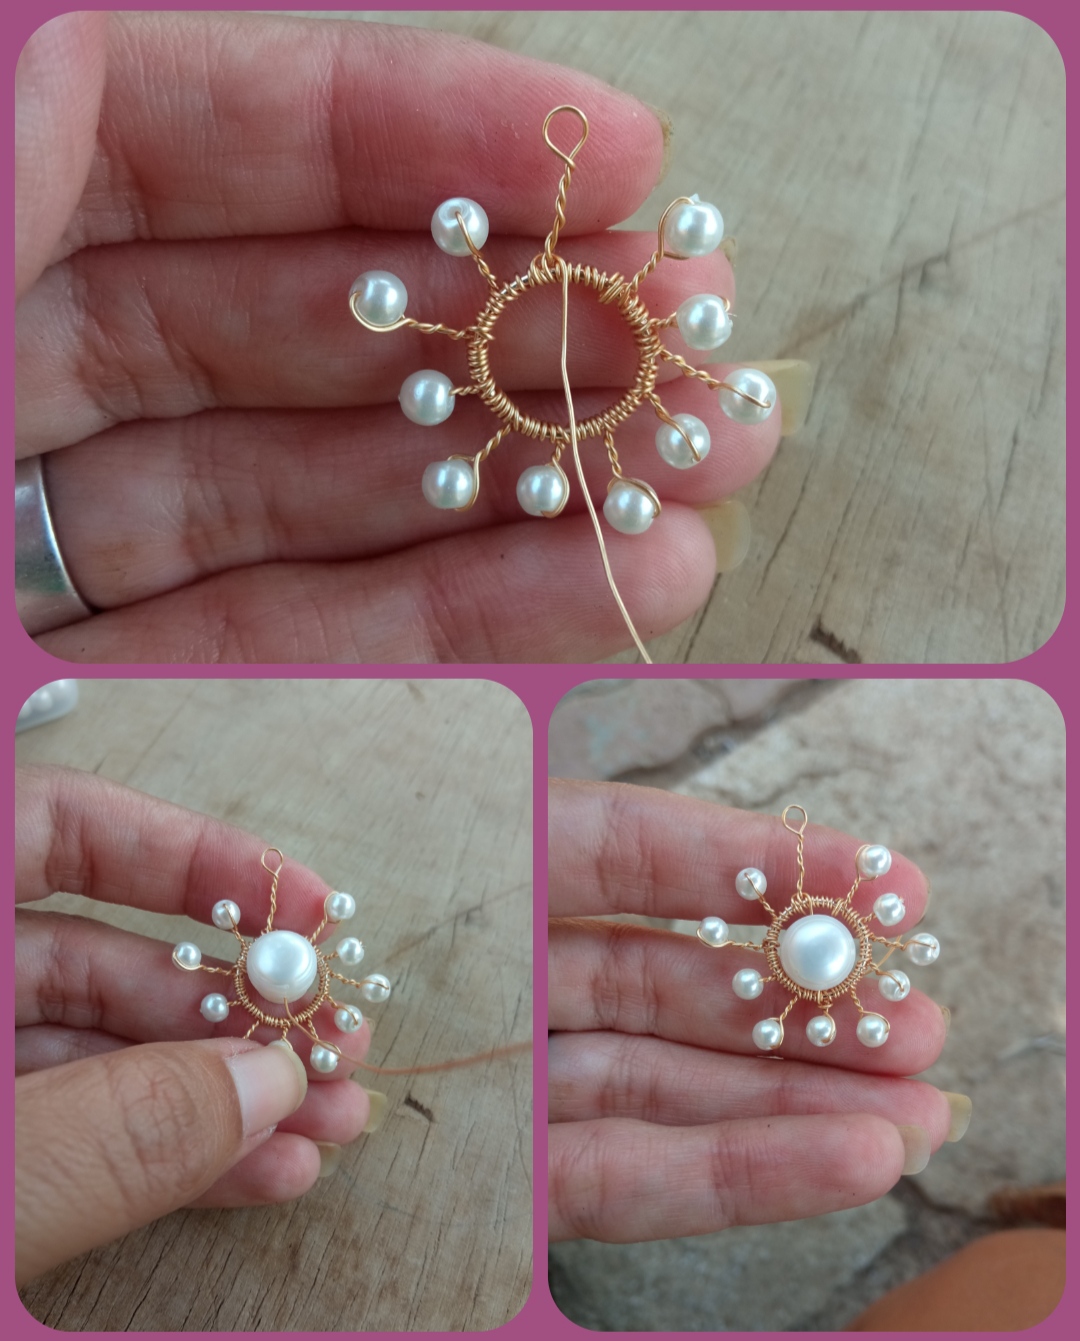
✴️ Paso 4: ahora tomaremos otro pedazo de alambre de bisutería calibre 26 y lo sujetaremos de la base circular exactamente en su parte central superior luego introduciremos la perla que hemos seleccionado para este hermoso diseño y volvemos a sujetar el alambre de la parte posterior de la base circular colocando la perla exactamente en el centro de nuestra elaboración.
✴️ Step 4: now we will take another piece of 26 gauge jewelry wire and we will hold it from the circular base exactly in its upper central part then we will introduce the pearl that we have selected for this beautiful design and we will hold the wire again. rear of the circular base placing the pearl exactly in the center of our work.
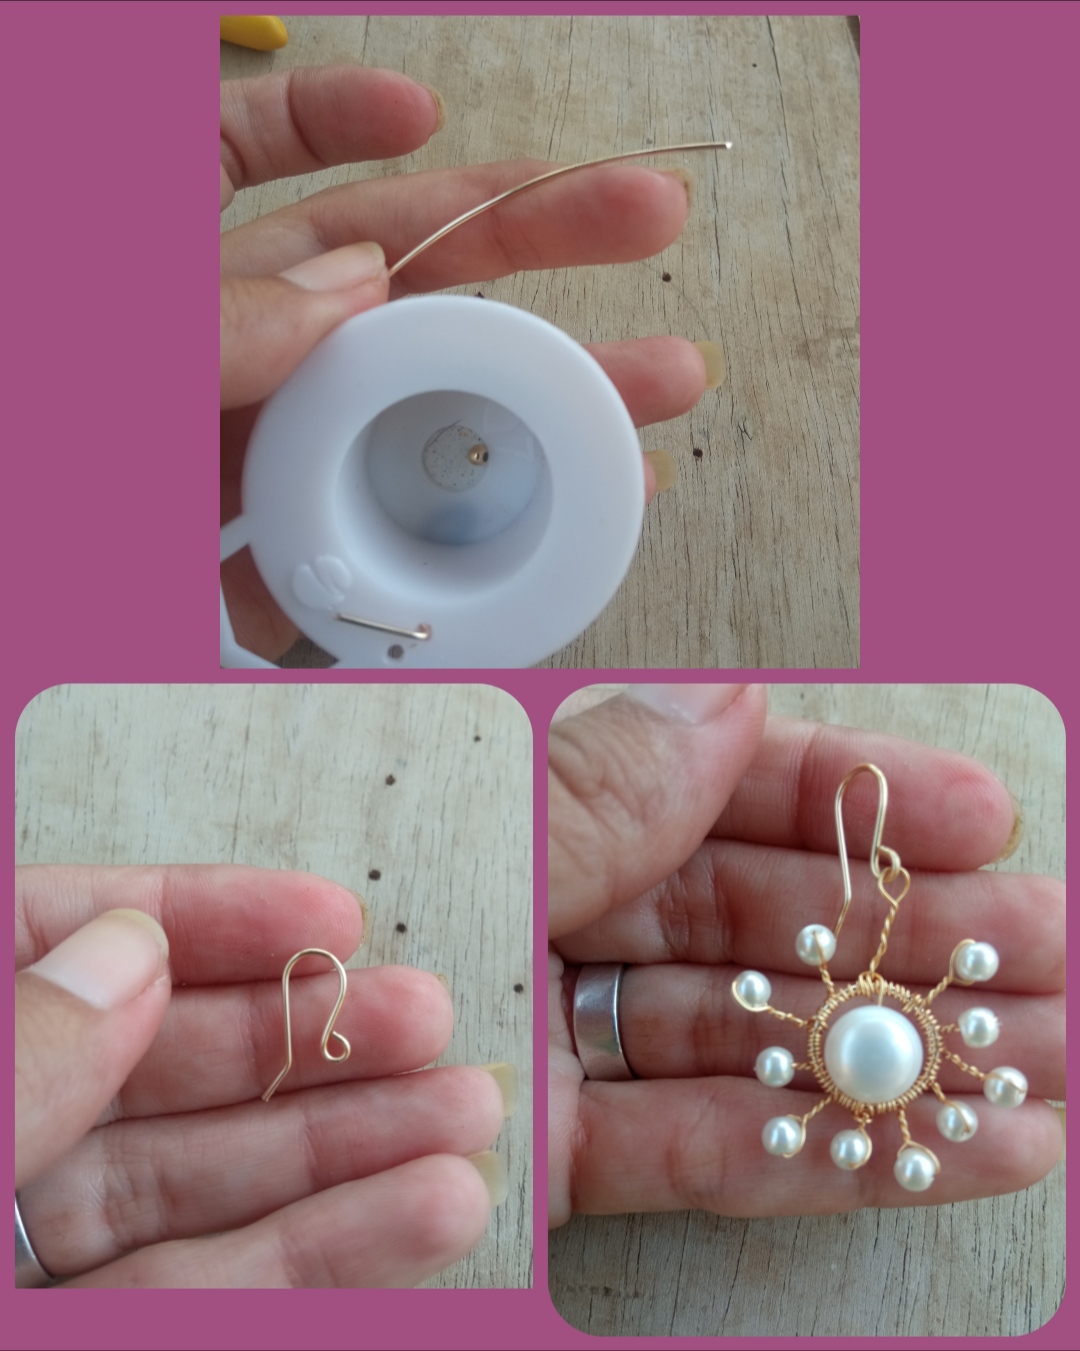
✴️ Paso 5: por último tomaremos un pedazo de alambre de bisutería calibre 20 de aproximadamente 4 cm y con ayuda de nuestra pinza de bisutería moldearemos y daremos forma a nuestros pequeños anzuelos para zarcillo Y estos los uniremos a nuestra elaboración enganchándolo en la pequeña forma circular que dejamos en el destello que elaboramos sin piedra perlada y así culminamos la elaboración de nuestra primera pieza.
✴️ Step 5: finally we will take a piece of 20 gauge jewelry wire of approximately 4 cm and with the help of our jewelry clamp we will mold and shape our small earring hooks. And we will attach these to our creation by hooking it on the small circular shape that we left in the sparkle that we made without pearl stone and thus we completed the making of our first piece.
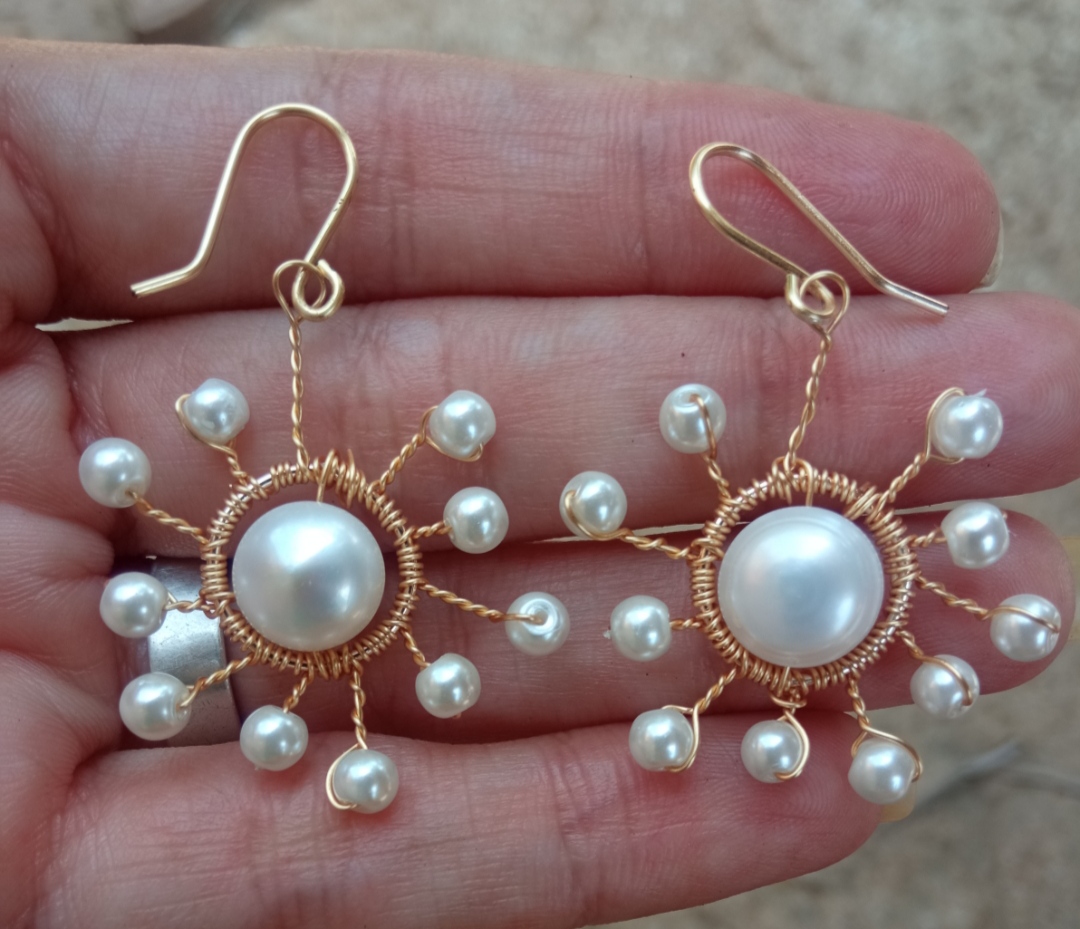
Todas las Fotos son de mi autoría y fueron tomadas con mi Celular Redmi 9And so, my dear friends, we can very easily make our own accessories without having to incur large expenses.
And this has been my contribution today for all of you, which I hope has been to the liking of all of you and this tutorial is useful and beneficial to you. I say goodbye but not before thanking you for your visit.
All Photos are my authorship and were taken with my Redmi 9 Cellphone
Those are really nice tendrils, and they are simple to make too.
Thank you for sharing.
I'm very glad you liked it 😊
Lovely, i really thank you for posting this diy post, because i have now gotten a new skill, i love it
It's good to know that it will be useful to you.
thank you.
Beautiful earrings I love the design.
!Diy
You can query your personal balance by
!DIYSTATSWow, this is lovely and just loke this I can make an earring for myself. I believe that jewelry wire aren't heavy too, I don't like all those heavy metal earring but this looks lovely.
Thanks for sharing dear
Muy lindos y originales
Gracias, me alegra que te haya gustado ☺️
I love the earrings that have white pearls, excellent post, I really liked it and you make it look so easy. thanks for sharing
Muy bonito amiga!