(ESP - ING) hermosa y Creativas pulseras / beautiful and Creative bracelets
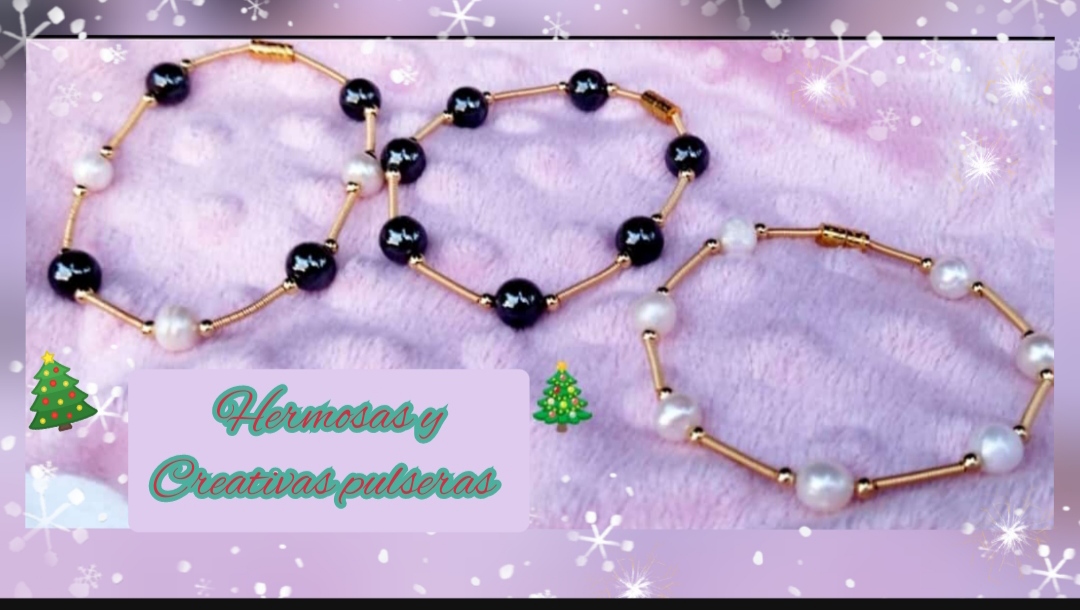
Feliz y bendecido día tengan todos ustedes es un gran placer para mí el poder compartir con ustedes en esta nueva oportunidad cuándo quiero regalarles un muy sencillo tutorial para la elaboración de una hermosa pulsera elaborada con la técnica del alambre azul súper elegante delicadas y muy hermosa las cuales podemos lucir y combinar en cualquiera ocasión. Los pasos de elaboración son súper fáciles no que nos permite con gran facilidad esta hermosa pulseras a nuestro gusto y conveniencia como pueden observar en las imágenes yo elabore diferentes tipos pero con el mismo procedimiento acá les comparto mi proceso de elaboración.
Happy and blessed day to all of you, it is a great pleasure for me to be able to share with you in this new opportunity when I want to give you a very simple tutorial for the making of a beautiful bracelet made with the super elegant blue wire technique, delicate and very beautiful which we can wear and combine on any occasion.
The manufacturing steps are super easy, which allows us to easily create these beautiful bracelets to our liking and convenience, as you can see in the images, I made different types, but with the same procedure, here I share my manufacturing process.
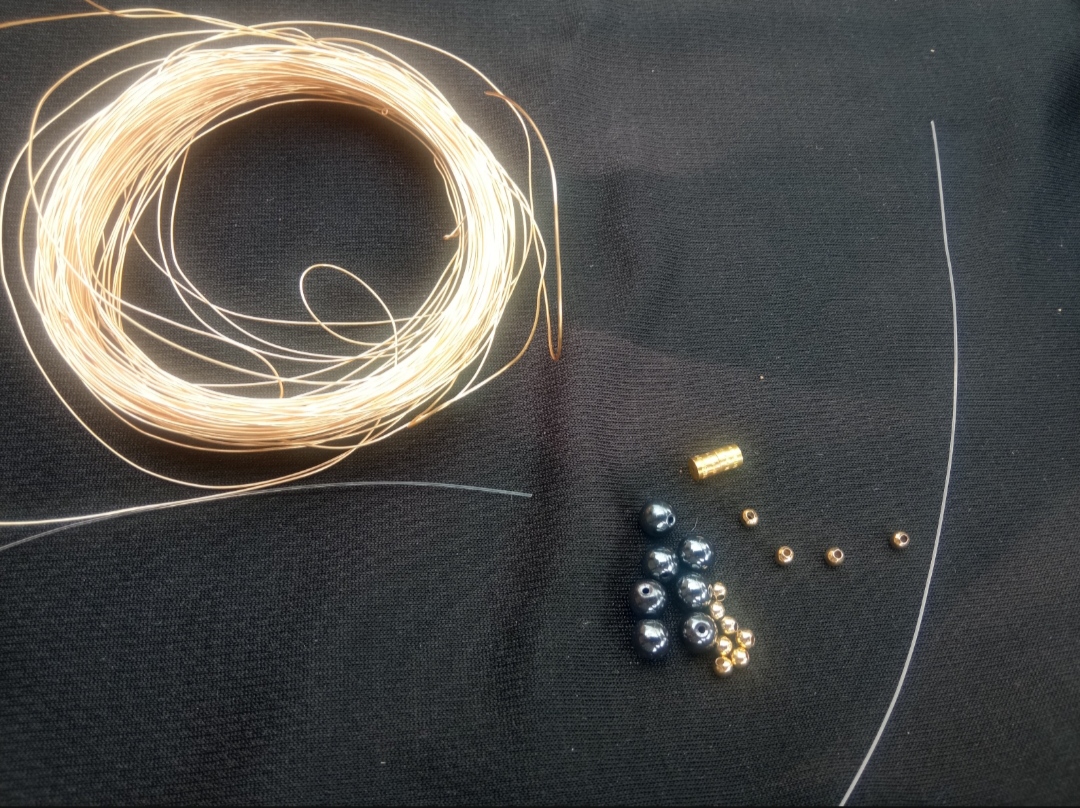
- Nylon delgado
- Alambre de bisutería calibre 26.
- piedras negras brillantes
- balines dorados
- pinza de bisutería.
- terminar de pulseras
- Thin nylon
- 26 gauge jewelry wire.
- shiny black stones
- golden pellets
- jewelry clamp.
- finish bracelets
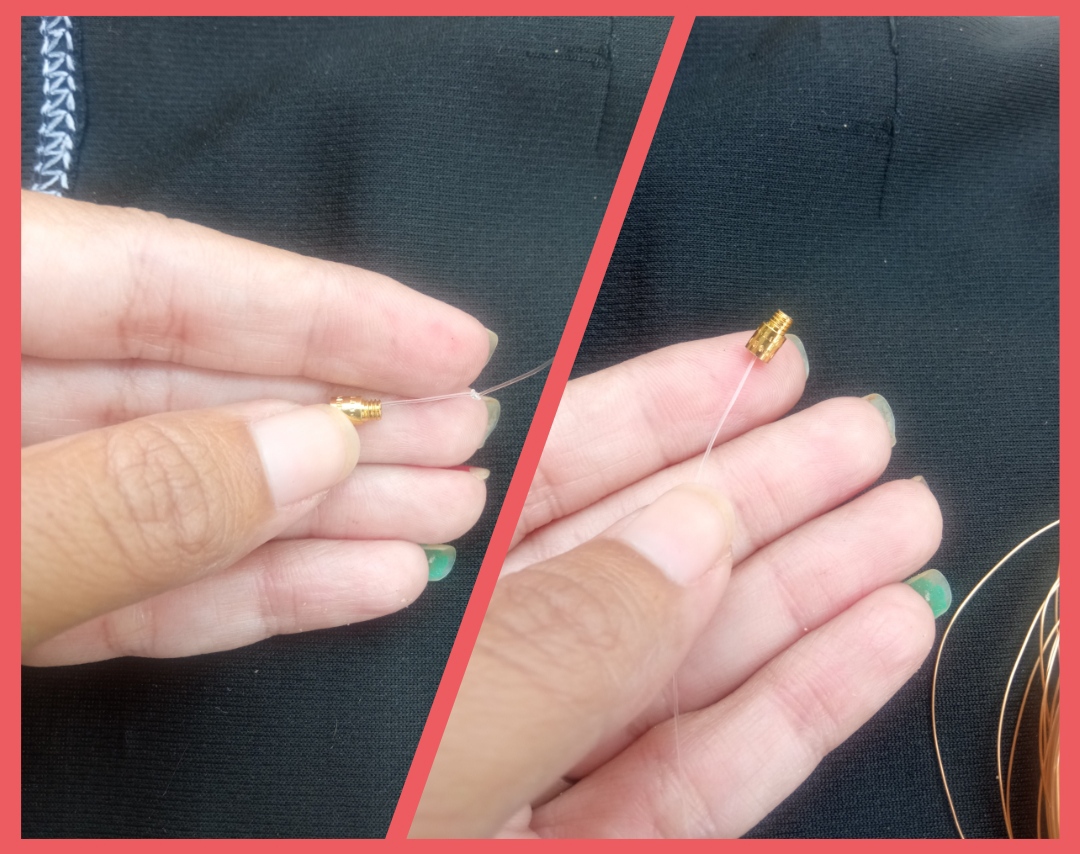
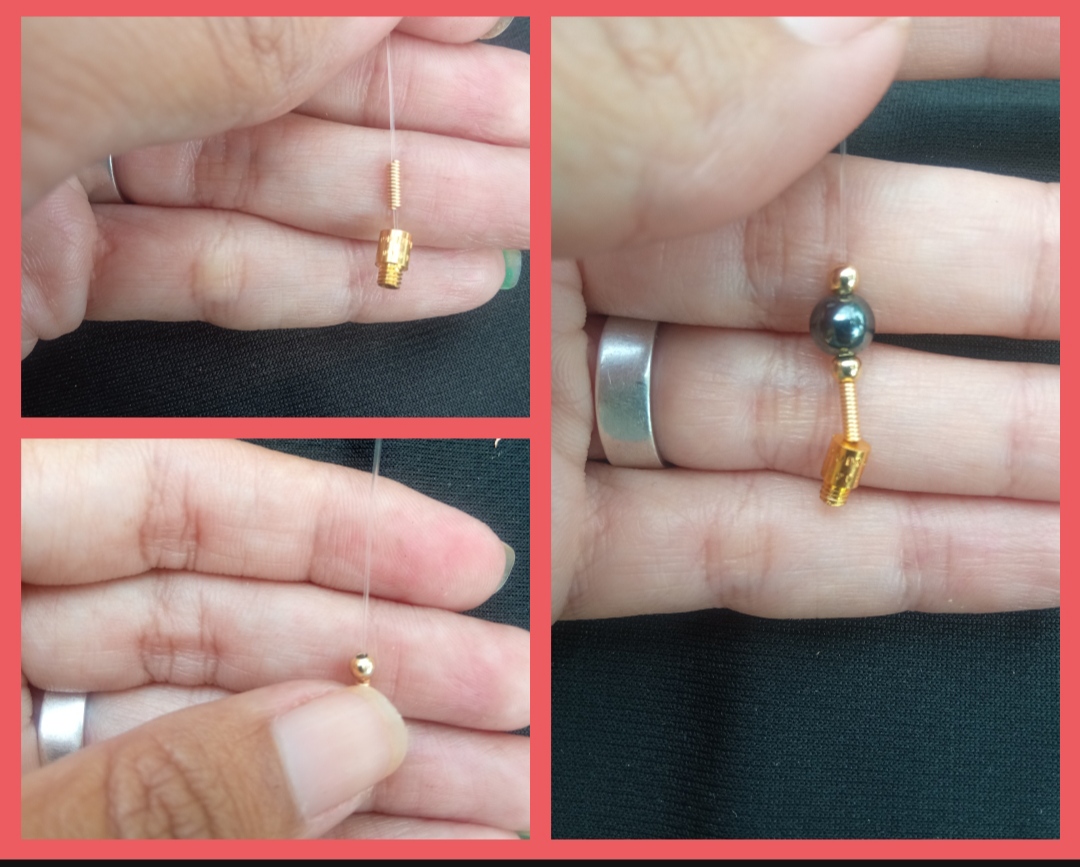
⭐ Paso 1: para iniciar la elaboración de este hermoso diseño lo primero que debemos hacer es tomar el nylon y cortaremos un pedazo suficientemente largo que nos permita trabajar con comodidad entre 15 o 20 cm según sea el tamaño del que sea elaborar esta hermosa pulsera. Seguidamente tomaremos la tranquita o terminar de cadena y separaremos en sus dos partes la primera de ella la introduciremos por el nylon y recordando que debemos realizar un pequeño nudo en la punta del aire llevamos esta pieza hasta la punta de nylon.
⭐ Step 1: to start making this beautiful design, the first thing we must do is take the nylon and we will cut a piece long enough to allow us to work comfortably between 15 or 20 cm depending on the size of which we are making this beautiful bracelet.
Next we will take the chain or end chain and separate it into two parts, the first of which we will insert through the nylon and remembering that we must make a small knot at the end of the air, we take this piece to the nylon end.
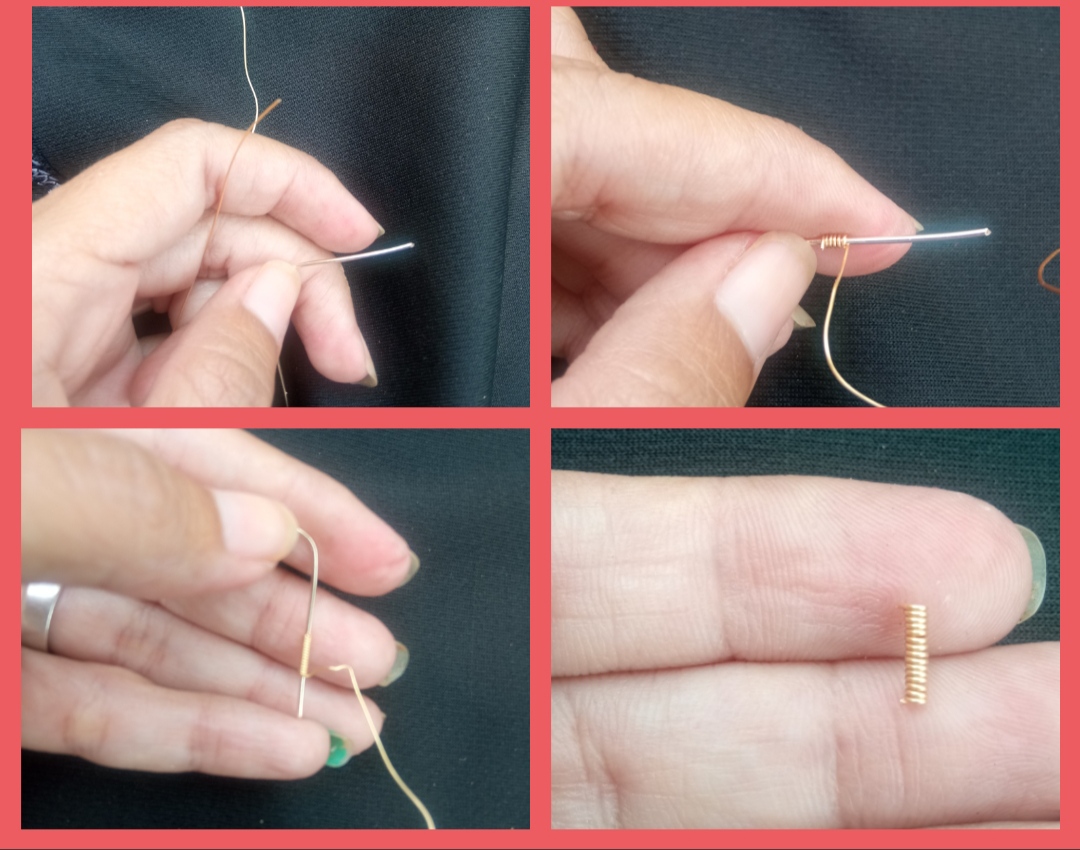
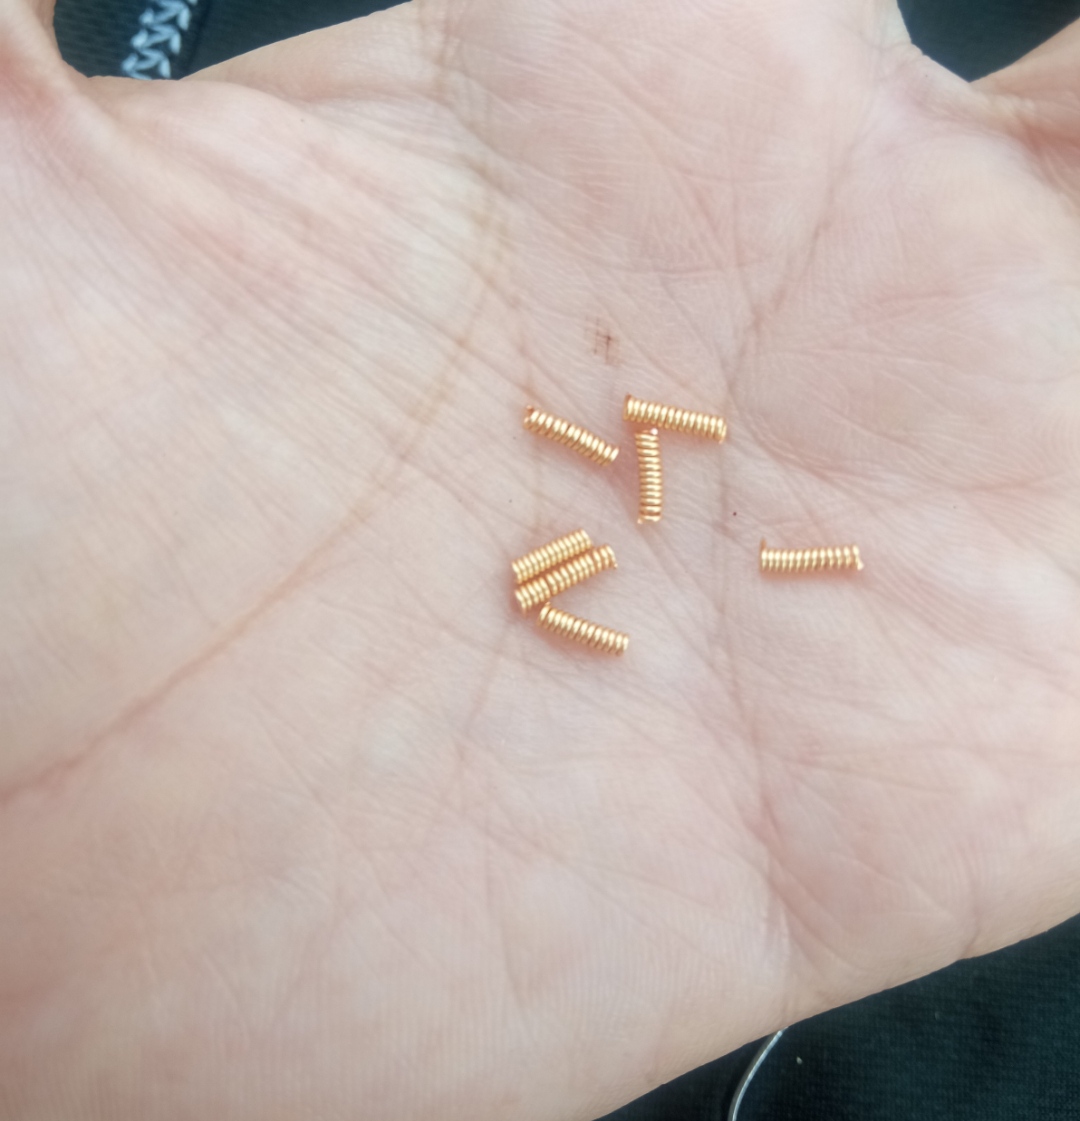
⭐ Paso 2: para proseguir tomamos un pedazo de alambre de bistería calibre 26 y nos apoyaremos en un pedazo de alambre de bisutería un poco más grueso calibre 18 fue con el que trabajé en esta ocasión y con ellos elaboraremos unas pequeñas piezas en forma de resorte. Para ello tomaremos el alambre 18 como base y encima de enrollaremos dando vueltas al alambre calibre 26 realizando esta pequeña piezas que pueden observar a continuación trataremos de no realizarlas de un tamaño muy largo de uno o 1,5 cm es mi medida para trabajar, a tener el tamaño deseado con ayuda de la pinza cortaremos el exceso de alambre y sacaremos la pieza obteniendo esta rienda piececita pequeña.
⭐ Step 2: to continue, we take a piece of 26 gauge jewelry wire and we will rely on a piece of slightly thicker jewelry wire. 18 gauge was the one I worked with on this occasion and with them we will make some small pieces in spring form.
To do this we will take the 18 wire as a base and on top of it we will roll the 26 gauge wire around, making these small pieces that you can see below. We will try not to make them too long, one or 1.5 cm, which is my measurement to work with, Having the desired size, with the help of the tweezers we will cut the excess wire and remove the piece, obtaining this small piece rein.
⭐ Paso 3: el procedimiento número 2 lo vamos a repetir las veces que sea necesario para mi elaboración realicé ocho pequeñas piezas del mismo tamaño y forma.
⭐ Step 3: We will repeat procedure number 2 as many times as necessary for my preparation. I made eight small pieces of the same size and shape.
⭐ Paso 4: una vez lista nuestra pequeñas formas tomamos el nylon del primer paso e introduciremos la primera de estas piezas elaboradas y seguidamente introduciremos un balín dorado una piedra negra brillante y cerraremos con un segundo balín dorado.
⭐ Step 4: once our small shapes are ready, we take the nylon from the first step and we will introduce the first of these elaborate pieces and then we will introduce a golden ball, a shiny black stone and we will close with a second golden ball.
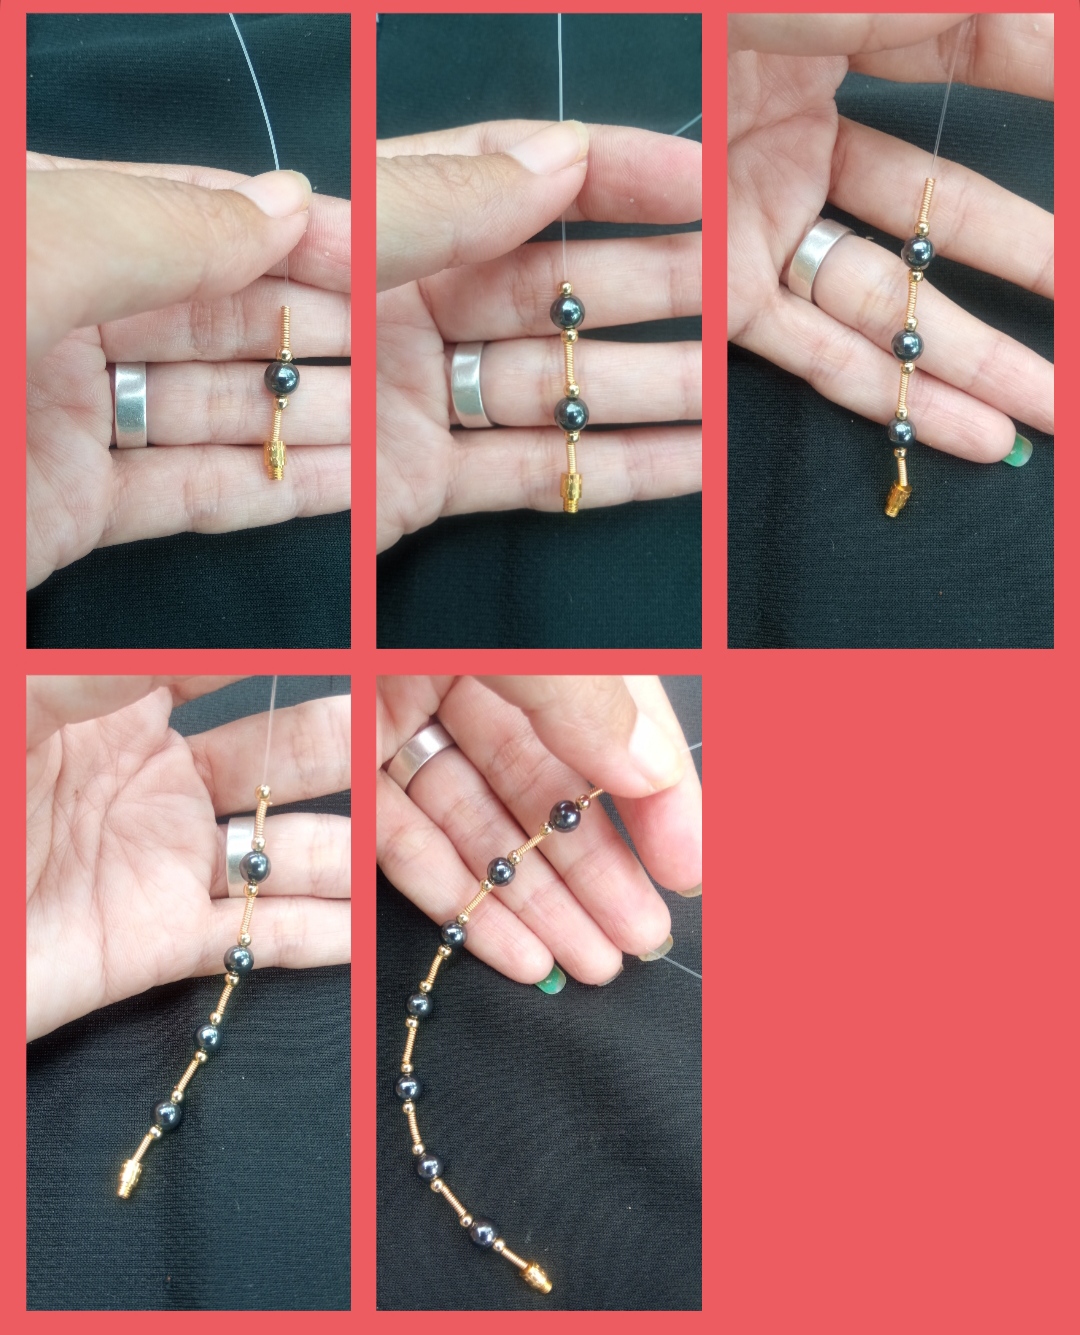
⭐ Paso 5: seguidamente repetiremos el paso número 4 es decir introduciremos una pequeña pieza de resorte de alambre luego un balín dorado una piedra negra brillante y otro balín dorado y este procedimiento lo repetiremos por 6 veces más, hasta lograr el tamaño deseado de nuestra hermosa pulsera y para culminar está linda elaboración introduciremos la última pieza del secador de cadena y lo sujetaremos en el nylon luego cortamos el exceso de nylon y así terminamos esta hermosa elaboración.
⭐ Step 5: Next we will repeat step number 4, that is, we will introduce a small piece of wire spring, then a golden ball, a shiny black stone and another gold ball, and we will repeat this procedure 6 more times, until we achieve the desired size.
of our beautiful bracelet and to finish this beautiful elaboration we will introduce the last piece of the chain dryer and we will fasten it to the nylon then we cut the excess nylon and thus we finish this beautiful elaboration.
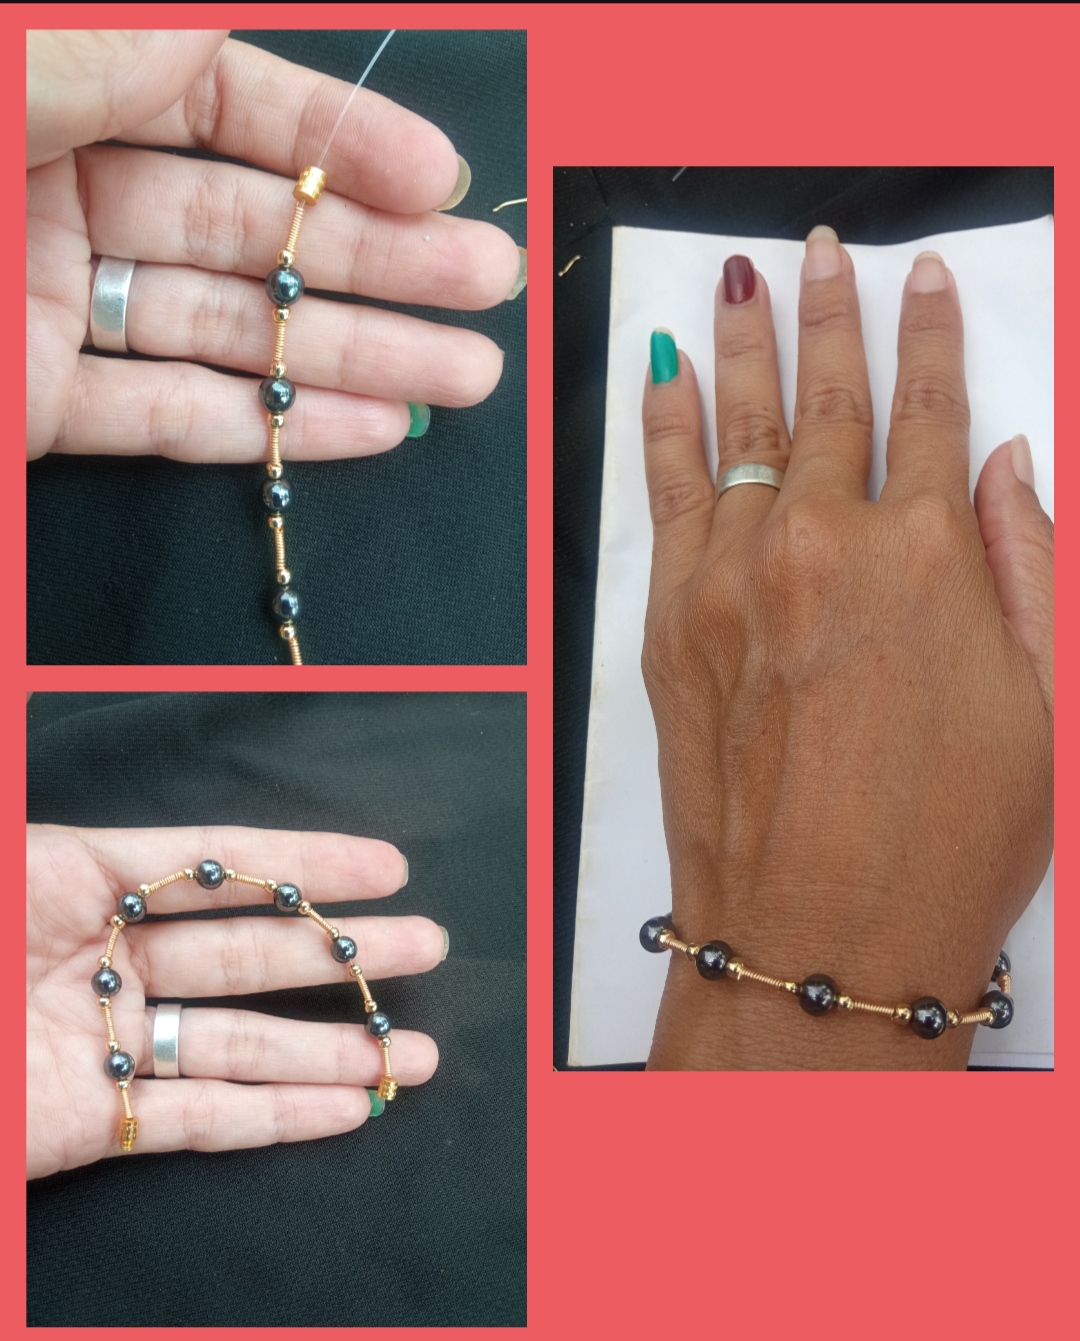
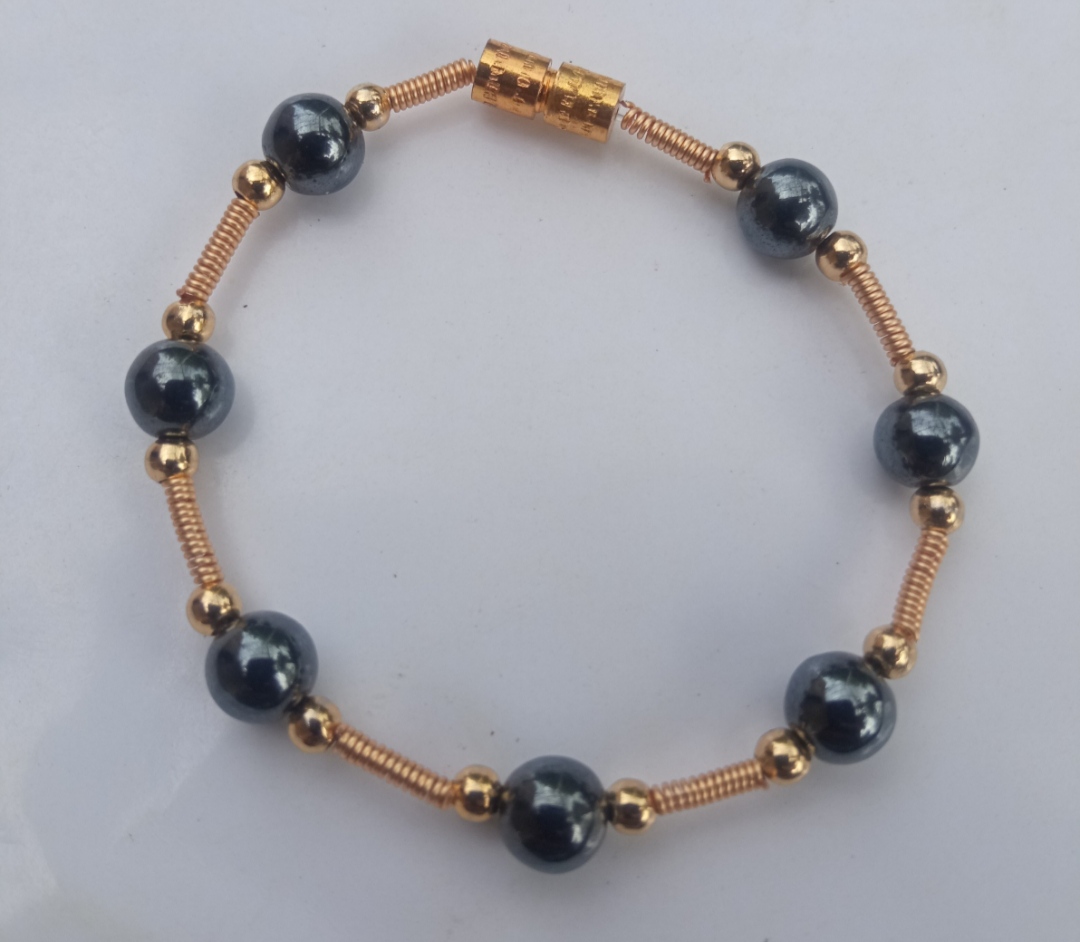
Todas las Fotos son de mi autoría y fueron tomadas con mi Celular Redmi 9As you can see in this elaboration I made a beautiful bracelet only with black stones, however in the presentation photographs you can see other designs that were made with pearls and others combined with black stones and pearls, all totally beautiful and striking.
My dear and appreciated friends I hope that this beautiful design is to your complete liking and that this simple tutorial can be useful and beneficial to you. I say goodbye for this opportunity, thanking you for your visit.
All Photos are my authorship and were taken with my Redmi 9 Cellphone