[ESP-ENG] Zarcillos Borlas de hilo /Tendrils Thread Tassels
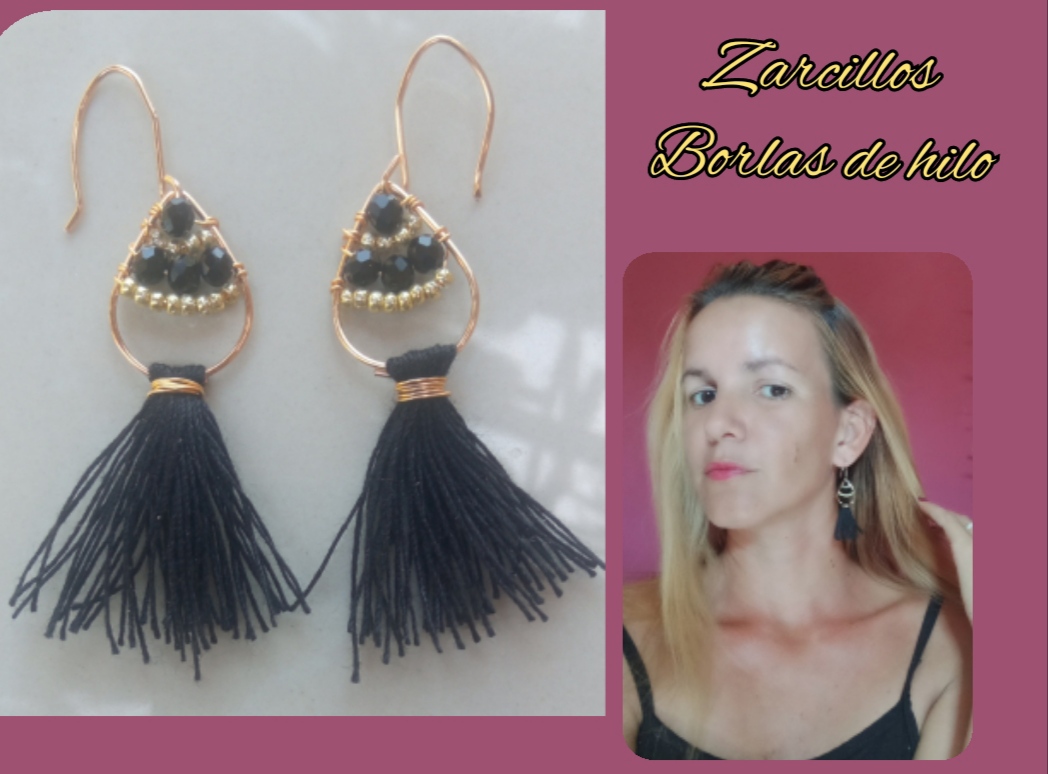
Feliz y bendecida noche tengan todos, un gusto el saludarlos el día de hoy además de compartir con ustedes un nuevo y sencillo diseño de zarcillos que elabore el día de hoy para compartirlo con ustedes. Les confieso que en mi imaginación no era este el diseño que pretendía realizar, pero en el proceso realice algunos cambios y creo que me quedaron mucho mejor de lo que deseaba, estos son unos zarcillos un poco largos pero no pesados dónde su eje principal es una hermosa borla o flequillo elaborado con hilo de coser.
Happy and blessed night everyone, it's a pleasure to greet you today as well as sharing with you a new and simple earring design that I made today to share with you.
I confess that in my imagination this was not the design I intended to make, but in the process I made some changes and I think they turned out much better than I wanted, these are a bit long but not heavy tendrils where their main axis is a beautiful tassel or fringe made with sewing thread.
This is a very simple design to make and we can make them in any color you want. I made it black because I have always thought that this is how I can wear them and combine them with all the colors of clothing. But how do you know the sewing thread can be found in countless colors.
In addition, the length of this bangs can also vary depending on your tastes.
For all of you I have prepared a simple and detailed tutorial so that at home you can be encouraged to make them.
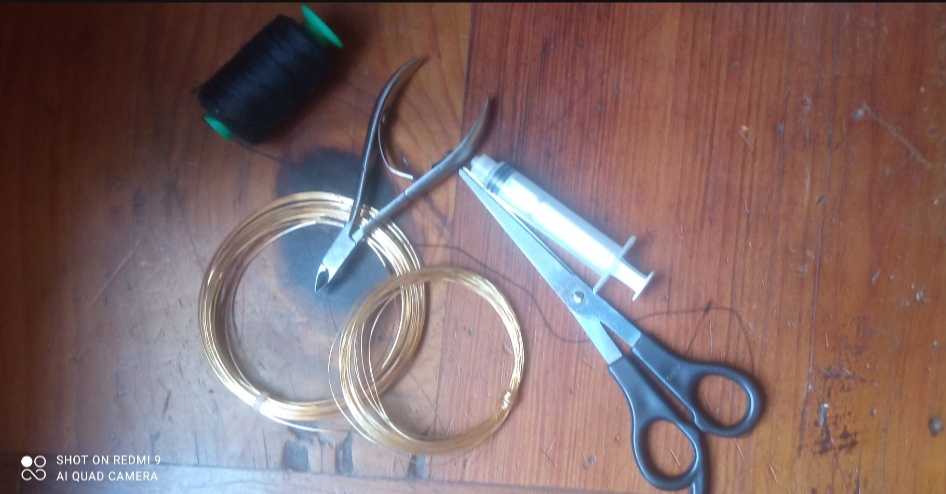
- hilo de coser color negro.
- Alambre de bisutería calibre 20.
- alambre de bisutería calibre 26.
- piedras cristales negros.
- mostacillas dorado.
- tijera y pinza de bisutería.
- black sewing thread
- 20 gauge jewelry wire.
- 26 gauge jewelry wire.
- black crystal stones.
- golden beads.
- scissors and jewelry tweezers.
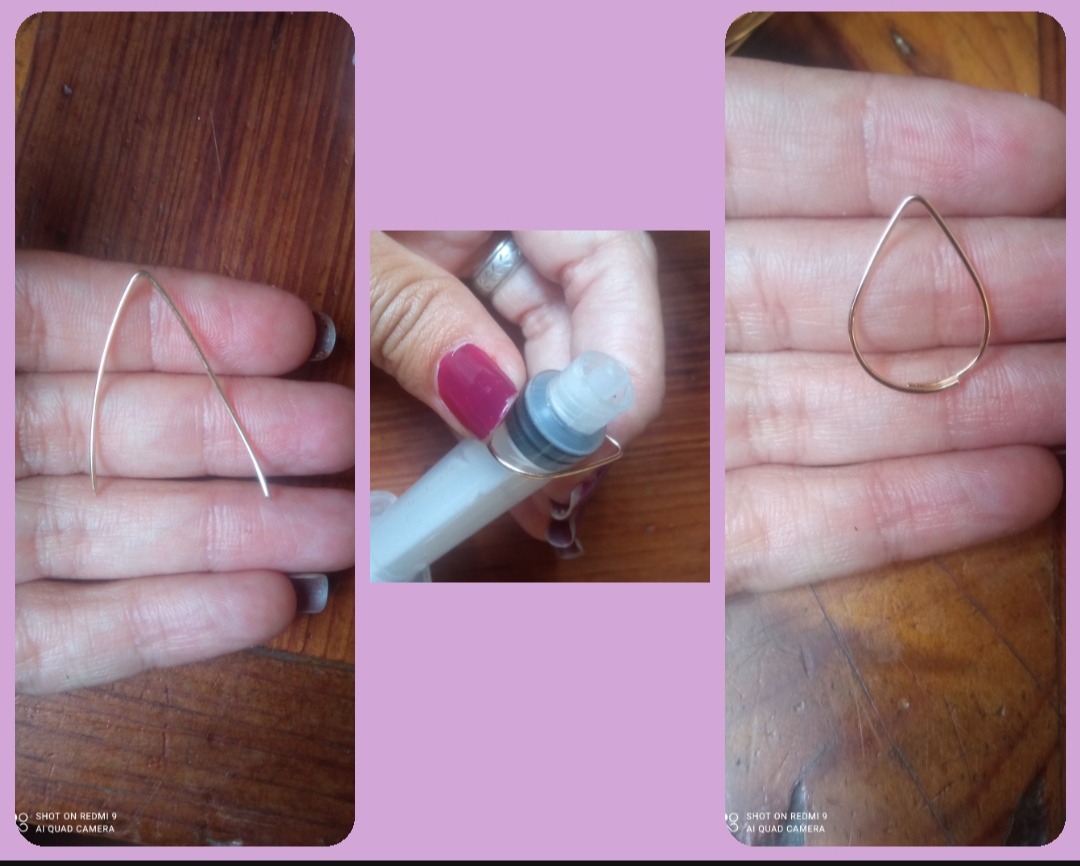
✴️ Paso 1: Primeramente tomaremos el alambre de bisutería calibre 20 y cortaremos un pedazo de aproximadamente 6 cm, este lo doblaremos un poco en la mitad y con ayuda de un tubo, en mi caso utilice como molde una inyectadora de 5cc y con ella moldeamos la parte de abajo doblando los alambre en forma semicircular formando un pequeño óvalo con la unión en la parte posterior, luego con la pinza cortamos un poco las puntitas para que se vea mejor la forma.
✴️ Step 1: First we will take the 20 gauge jewelry wire and cut a piece of approximately 6 cm, we will bend it a little in half and with the help of a tube, in my case I used a 5cc injector as a mold and With it we mold the lower part by folding the wires in a semicircular shape, forming a small oval with the union at the back, then with the pliers we cut the tips a little so that the shape can be seen better.
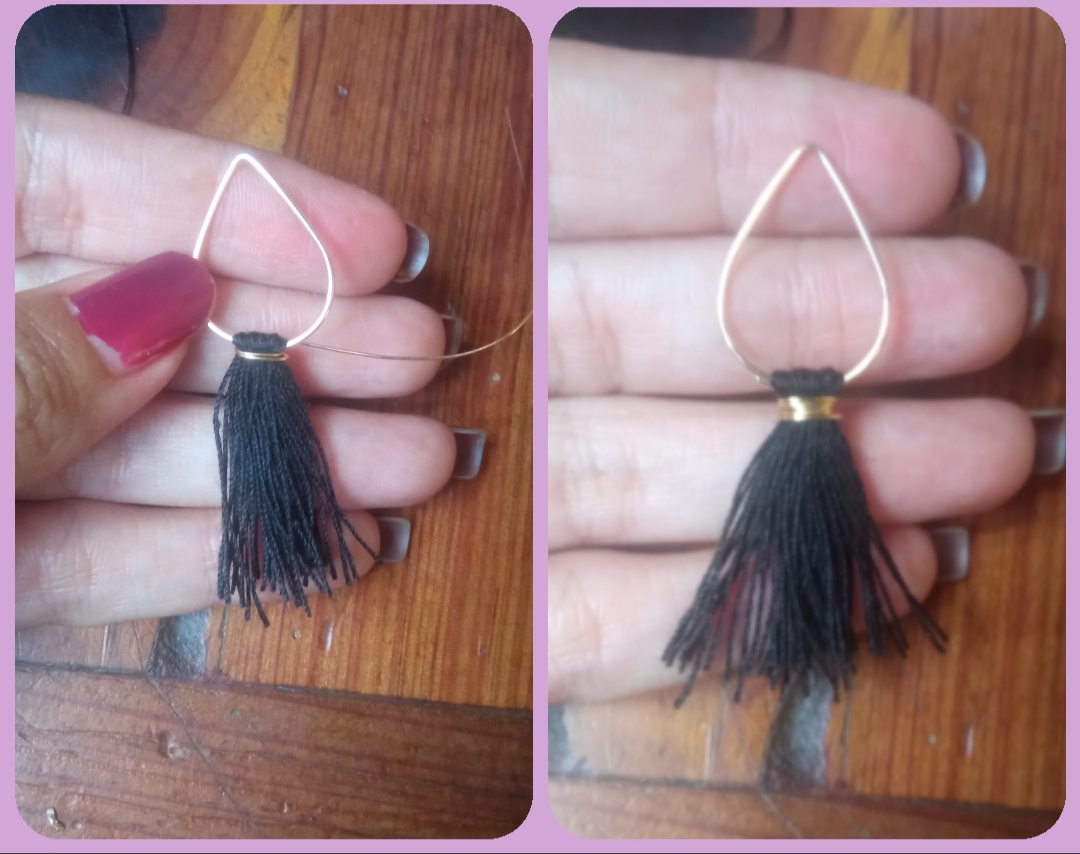
✴️ Paso 2: para continuar tomé un pedazo de cartón y corté un pedazo con una altura de 3cm y en el comencé a enrrollar el hilo negro dando vueltas a su alrededor, yo realice 25 vueltas de hilo, del número de vueltas dependerá el volumen de la borla, una vez terminada las vueltas deseada corte la punta del hilo y cuidadosamente saque del cartón estás vueltas aún unidas y Seguidamente corte una de las uniones del hilo. Esto lo lleve a la base del óvalo realizando anteriormente y lo coloque en la parte central de abajo del óvalo exactamente tapando la unión de las puntas del alambre.
✴️ Step 2: to continue I took a piece of cardboard and cut a piece with a height of 3cm and in it I began to wind the black thread around it, I made 25 turns of thread, the number of turns will depend the volume of the tassel, once the desired turns are finished, cut the end of the thread and carefully remove from the cardboard these turns still joined and then cut one of the thread unions.
This will take you to the base of the oval made previously and place it in the lower central part of the oval exactly covering the union of the ends of the wire.
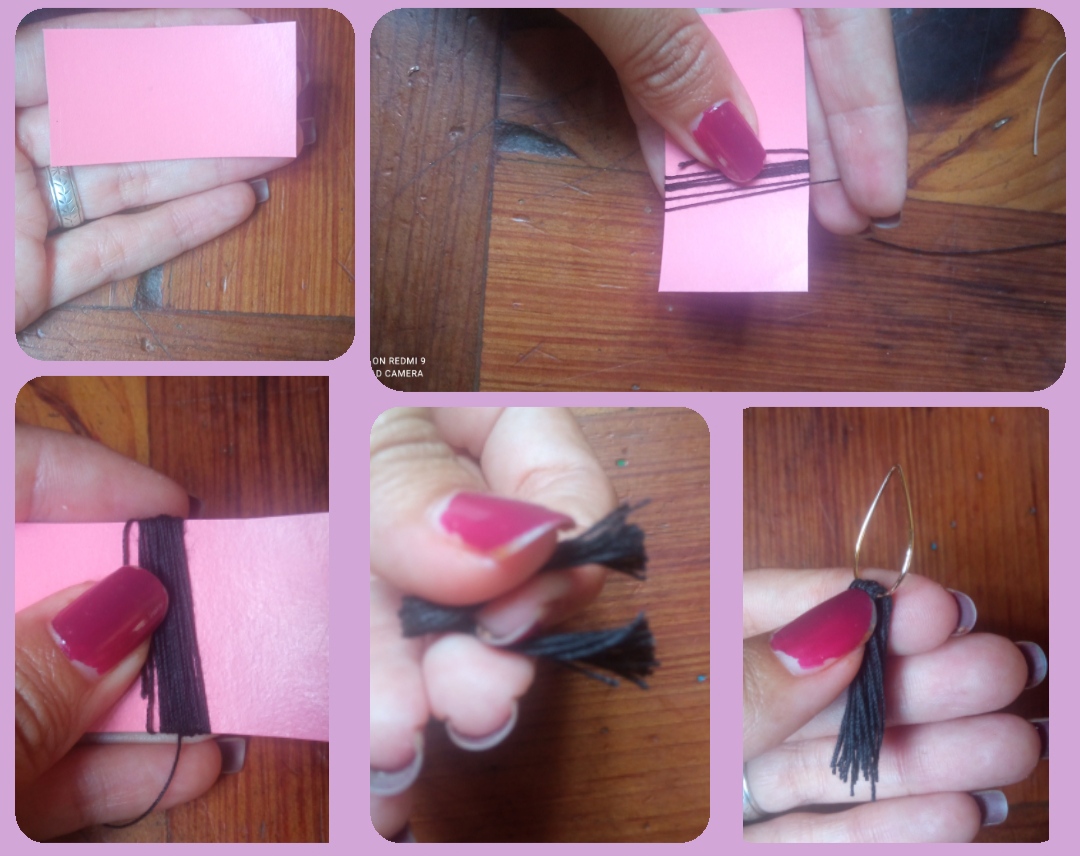
✴️ Paso 3: ahora para sujetar el hilo en la base y formar la borla tomaremos un pedazo de alambre de bisutería calibre 26 y lo enrrollamos en el dobles del hilo, dando varias vueltas y así formamos una pequeña borla que guinda de nuestra base de zarcillo.
✴️ Step 3: now to hold the thread at the base and form the tassel, we will take a piece of 26-gauge costume jewelry wire and wind it around the double thread, turning several times and thus we form a small tassel that icing on our tendril base.
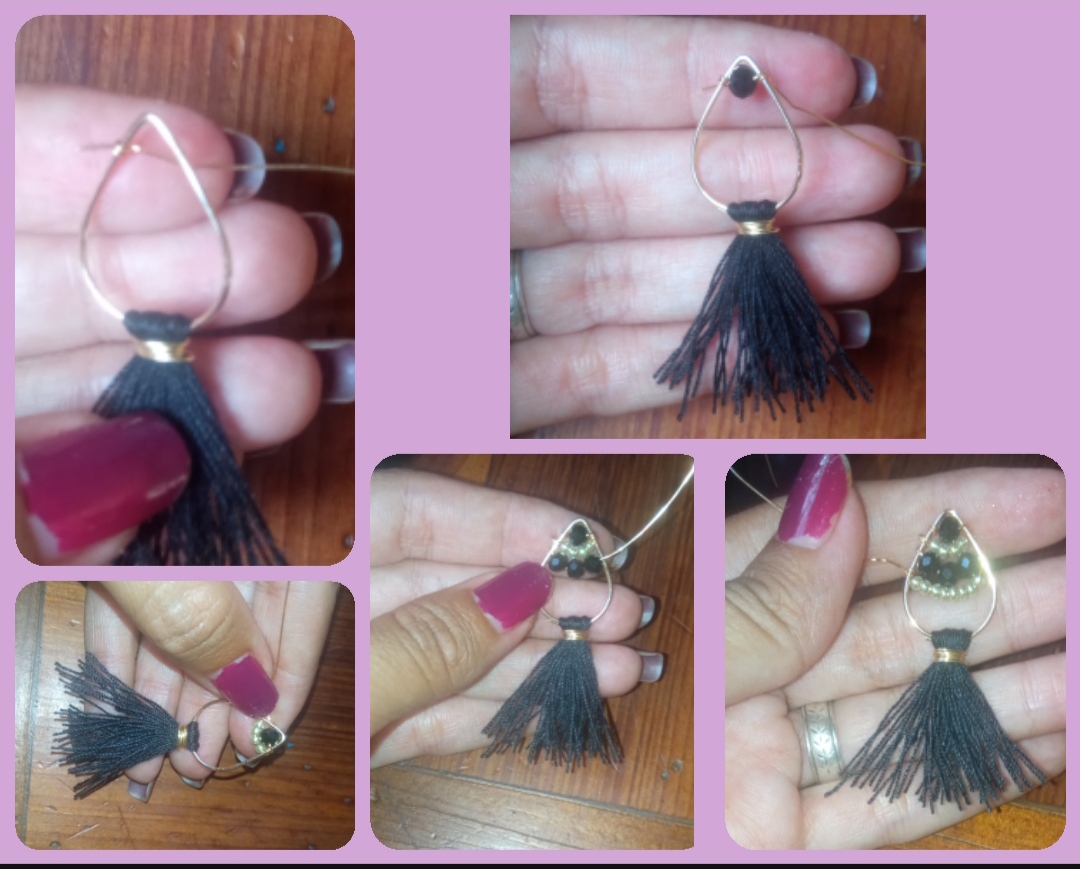
✴️ Paso 4: Seguidamente tomamos un pedazo de alambre de bisutería calibre 26 y lo sujetanos de la base del óvalo en la parte de la punta e Introducimos un cristal negro por el alambre, lo colocamos dentro de la punta del óvalo y sujetámos el alambre del otro extremo, ahora Introducimos 4 mostacillas doradas y realizamos un arco debajo del cristal negro sujetándo el alambre del extremo opuestos, después Introducimos 3 cristales negros y debajo de este un arco de 8 mostacillas doradas.
✴️ Step 4: Next we take a piece of 26 gauge jewelry wire and hold it at the base of the oval at the tip and introduce a black crystal through the wire, place it inside the tip of the oval and hold the wire at the other end, now we introduce 4 golden beads and make an arc under the black crystal holding the wire at the opposite end, then we introduce 3 black crystals and under this an arc of 8 golden beads.
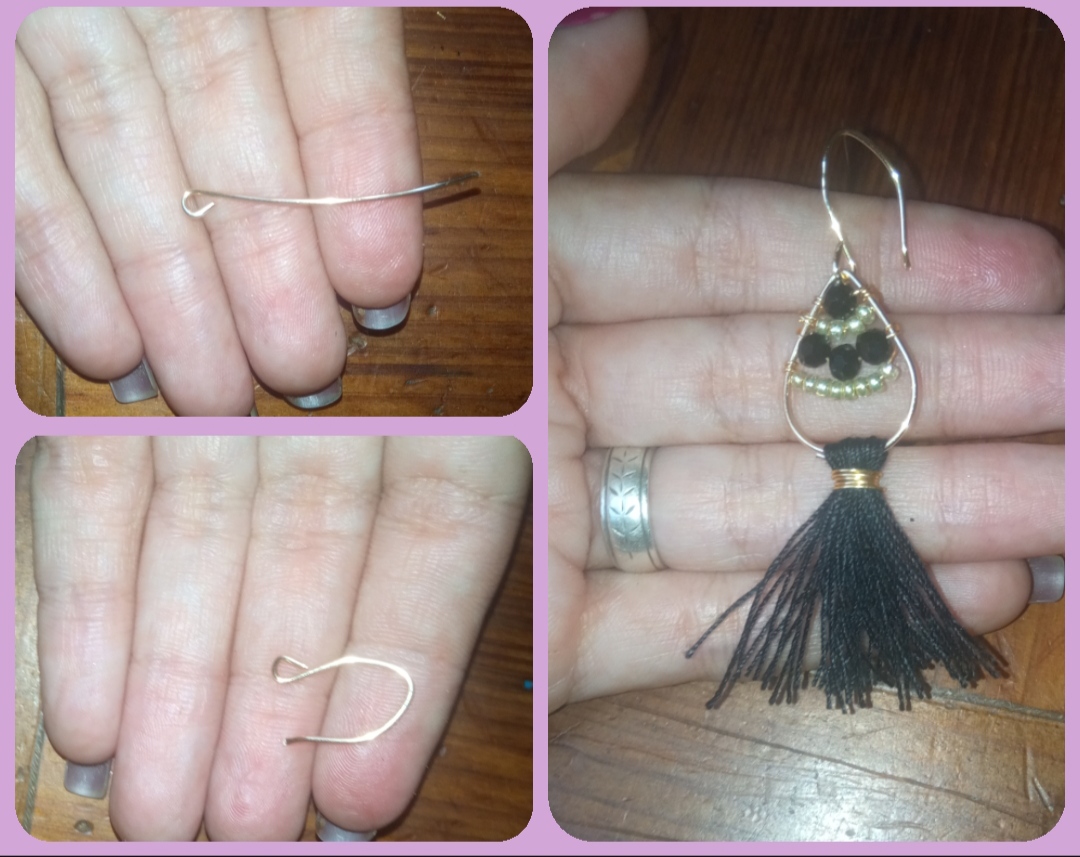
✴️ Paso 5: para finalizar con 4 cm de alambre de bisutería calibre 22 elaboraremos el anzuelo para nuestro zarcillo, para ello con la pinza realizamos un pequeño gancho en una de las puntas y lo demás lo moldearemos dando forma a este anzuelo que uniremos a nuestra base Introduciendo el gancho por la punta del óvalo y listo.
✴️ Step 5: to finish with 4 cm of 22-gauge costume jewelry wire we will make the hook for our tendril, to do this with the pliers we make a small hook at one of the ends and we will shape the rest, giving shape to this hook that we will join our base Inserting the hook through the tip of the oval and that's it.
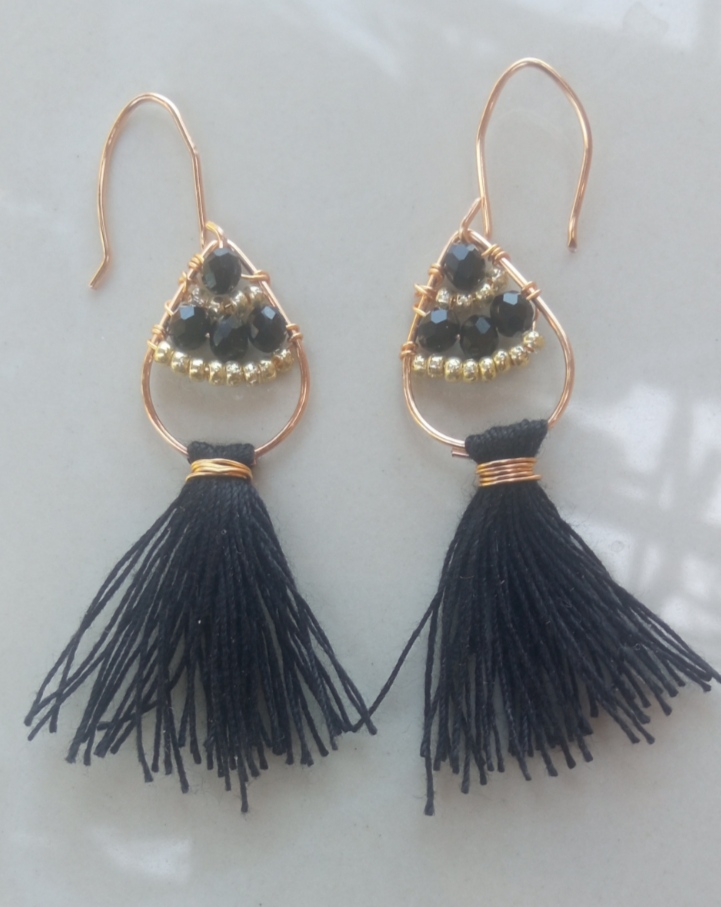
y de esta manera lograremos elaborar un bellísimo par de zarcillos ideales para lucir en cualquier ocasión, elegantes, delicados y de nuestra propia elaboración. Queridos amigos este a Sido mi aporte del día de hoy para esta bella comunidad, espero este diseño sea del agrado de todos ustedes. agradezco su visita y estaré anciosa de recibir sus comentarios y sugerencias. Saludos y bendiciones.
Todas las Fotos son de mi autoría y fueron tomadas con mi Celular Redmi 9and in this way we will be able to create a beautiful pair of earrings ideal to wear on any occasion, elegant, delicate and of our own making.
Dear friends, this has been my contribution today for this beautiful community, I hope this design is to the liking of all of you. I appreciate your visit and I will be eager to receive your comments and suggestions.
Greetings and blessings.
All Photos are my authorship and were taken with my Redmi 9 Cellphone
Casi toda mi ropa es de color negro, me encantan los accesorios de ese color, tus zarcillos los usaría sin duda, te quedaron lindoos🖤🖤🖤
Gracias amiga, me alegra que hayan Sido de tu agrado.
Es un estilo hermoso, si no es como lo imaginaste y quedo mejor de lo que pensabas, es bueno quiere decir que estas mejorando cada día más con la técnica de alambrismo, genial ver lo sencillo que lo haces ver y cada material que utilizas, como la inyectados para darle forma, que gran idea, buen trabajo amiga @emmaris 😉
Gracias por este comentario, la verdad me acostumbré a utilizar los materiales que tenía a la mano por falta de esos instrumentos q vienen especiales para esta clase de formas.
De verdad un trabajo bello, me encanta el negro y si lo combinas con dorado mas aun! Gracias por compartir tu creación con nosotros!