[ESP-ENG] Juego de pulsera y zarcillos con Mostacillas / Set of bracelet and earrings with Mostacillas
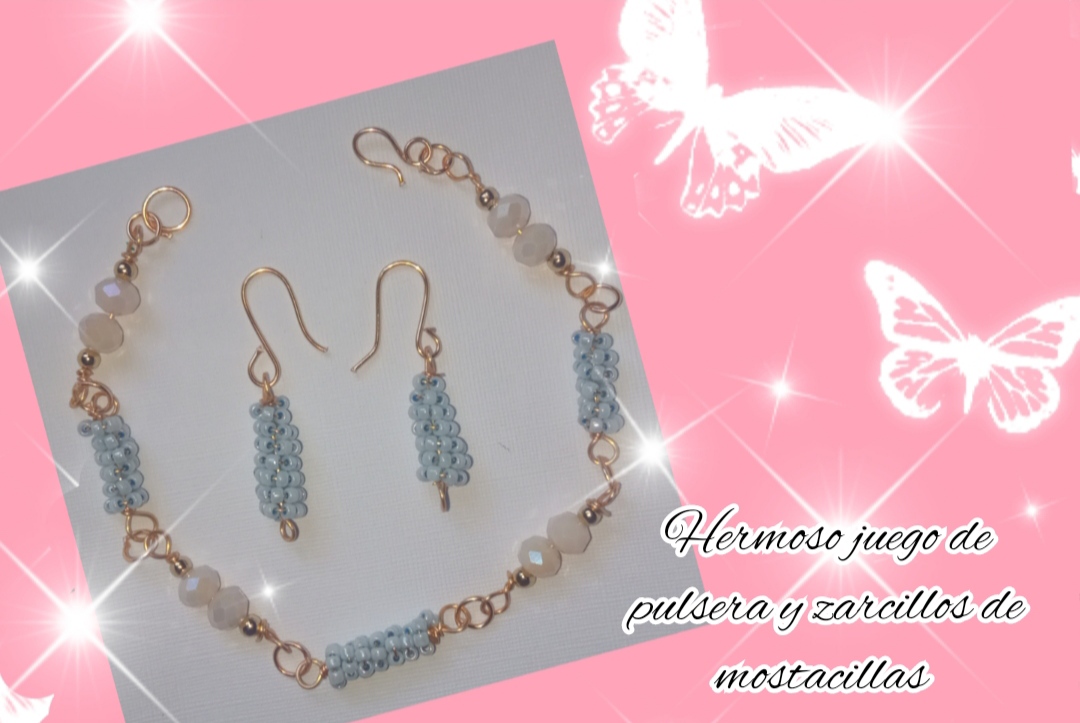
Feliz y bendecida noche tengan todos, el día de hoy Es un gran placer para mí visitar esta comunidad y compartir con todos ustedes mi mas reciente elaboración, una hermosa pulsera que quise combinar con unos sencillos zarcillos, este lindo juego es muy sencillo y práctico de elaborar, es elaborado con la técnica del alambrismos y decorado con bellos cristales y mostacillas. Es un diseño muy elegante que podemos usar para ocasiones especiales, acá les comparto mi paso a paso para todos ustedes.
Happy and blessed night everyone, today It is a great pleasure for me to visit this community and share with all of you my most recent creation, a beautiful bracelet that I wanted to combine with some simple earrings, this beautiful game is very simple and practical to make, it is made with the technique of wire rope and decorated with beautiful crystals and beads.
It is a very elegant design that we can use for special occasions, here I share my step by step for all of you.
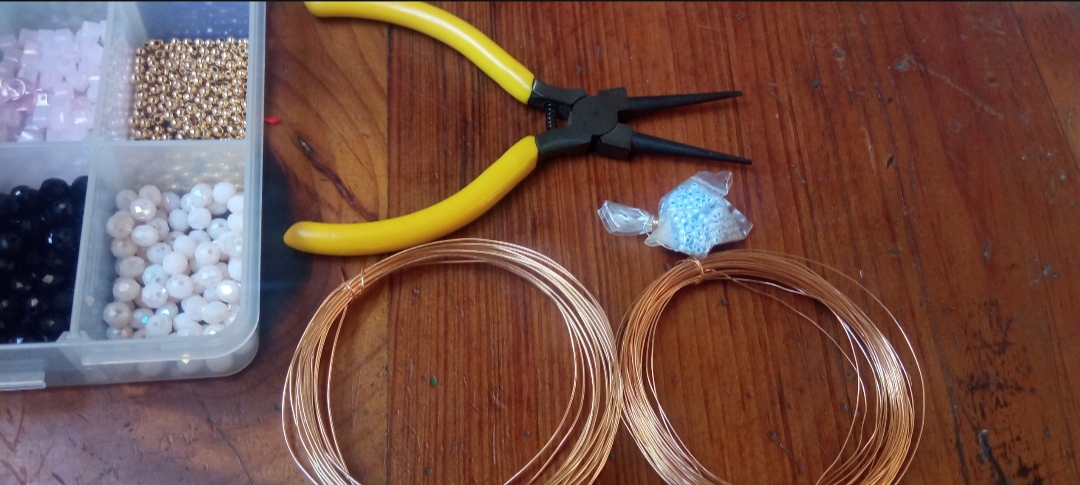
- alambre de bisutería calibre 26
- alambre de bisutería calibre 20.
- Cristales medianos rosa opaco.
- balines dorados.
- Mostacillas azules.
- pinza de bisutería.
- 26 gauge beading wire
- 20 gauge jewelry wire.
- Medium opaque pink crystals.
- golden pellets.
- Blue beads.
- jewelry clip.
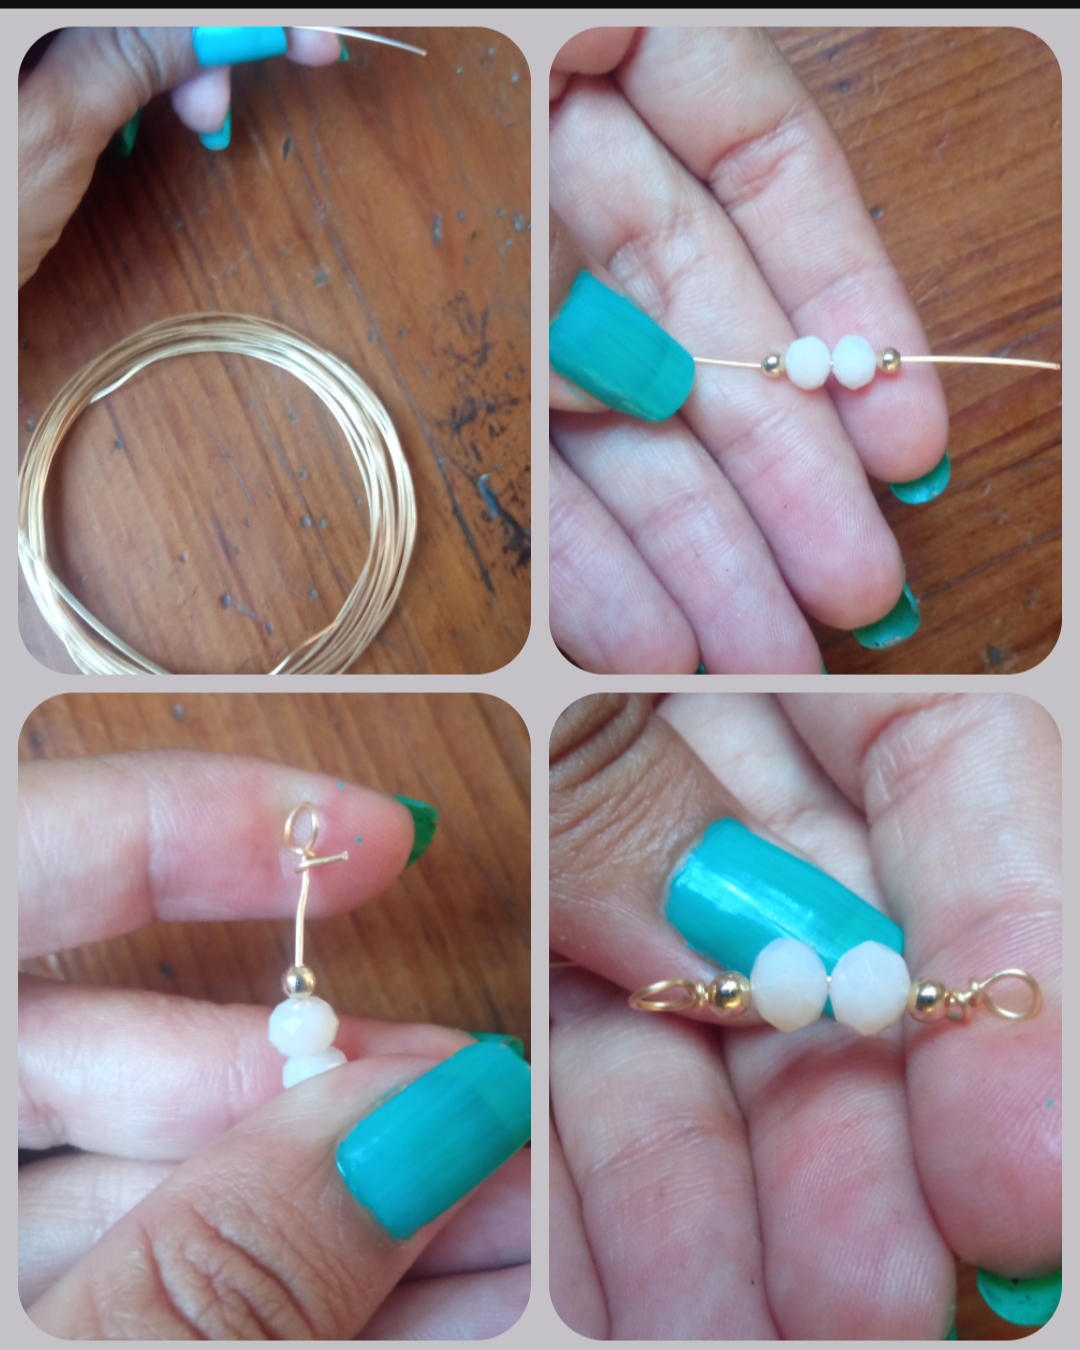
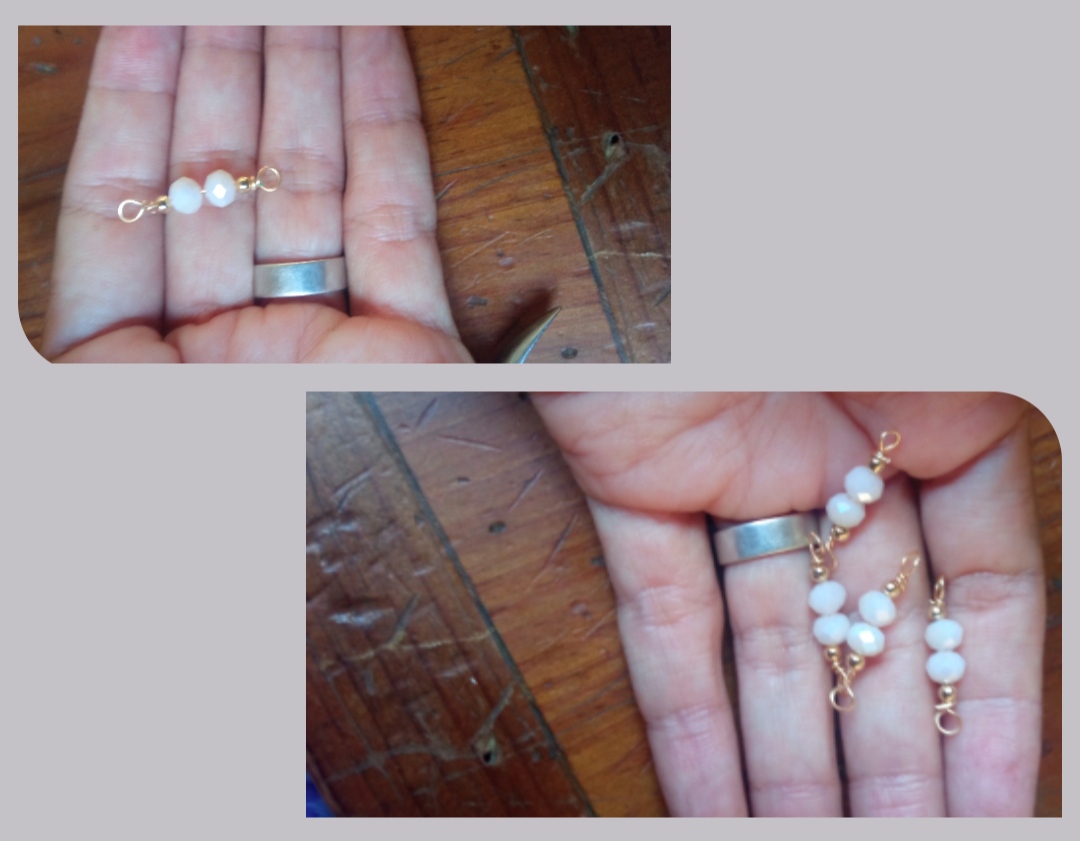
✴️ Paso 1: para iniciar esta elaboración primeramente tomamos el alambre de bisutería calibre 20 y sin picarlo Introducimos un balín, dos cristales, y un último balín y con la punta de la pinza Elaboramos una forma circular en la punta del alambre y realizamos dos vueltas para sujetar la forma, luego pegamos las piedras de esta forma circular y elaboramos la misma forma al final de las piedras y cortamos el exceso de alambre quedandonos una pieza cómo la que pueden observar a continuación. Repetimos este procedimiento por tres veces más, pues para la elaboración de nuestra pulsera necesitamos 4 piezas.
✴️ Step 1: to start this preparation, first we take the 20 gauge jewelry wire and without chopping it We introduce a pellet, two crystals, and a last pellet and with the tip of the pliers we make a circular shape at the tip of the wire and We make two turns to hold the shape, then we glue the stones in this circular shape and we make the same shape at the end of the stones and we cut the excess wire, leaving a piece like the one you can see below.
We repeat this procedure three more times, because to make our bracelet we need 4 pieces.
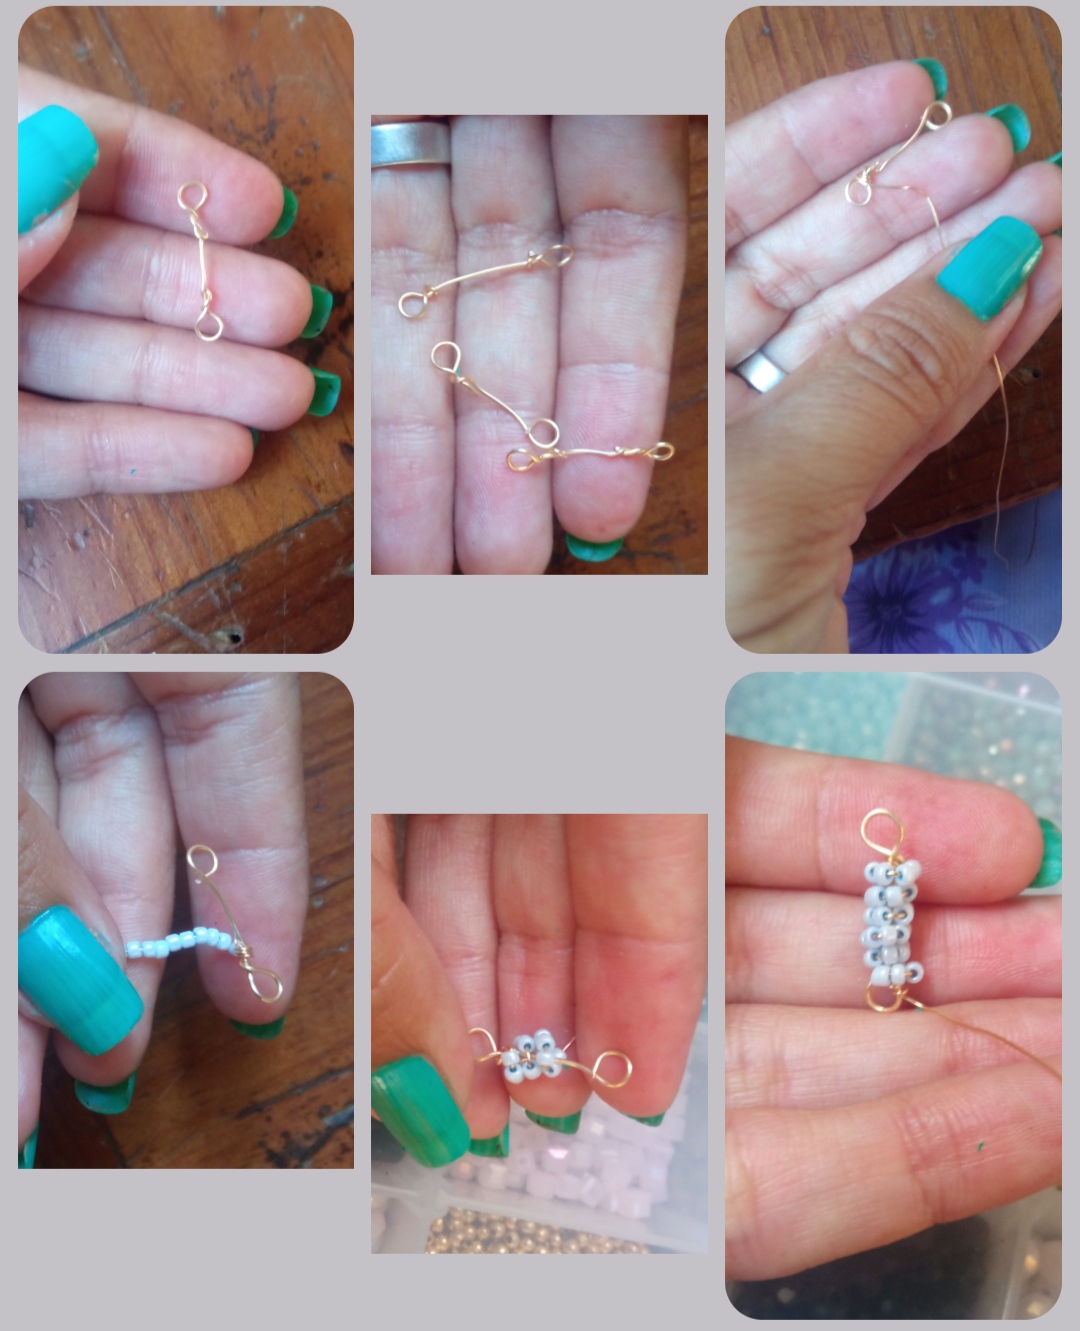
✴️ Step 2: to continue we take the 20-gauge wire again and we will make a piece very similar to the previous ones but without rhinestones, that is, we make the circular ring at each end, leaving an empty space in the central part, of these we will make three pieces.
And then we will take one of them and we will wind a bit of 26 gauge wire at the base, through this wire we will introduce the beads and we will wind them in a circular way in the empty space in the following way until we cover the entire space.
We will repeat this process with the other two pieces.
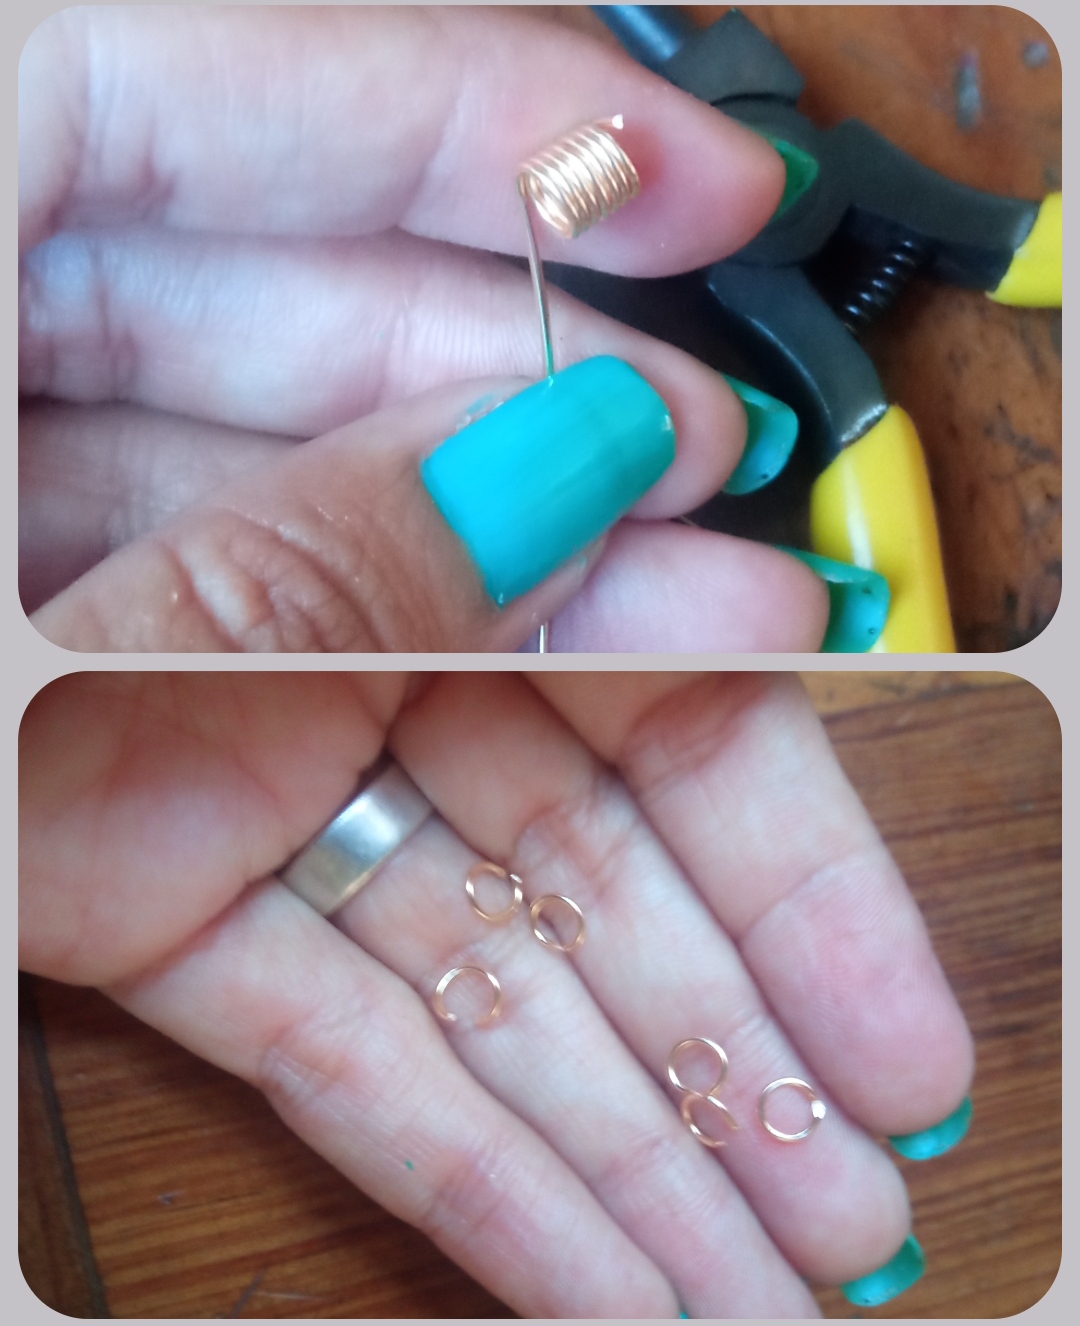
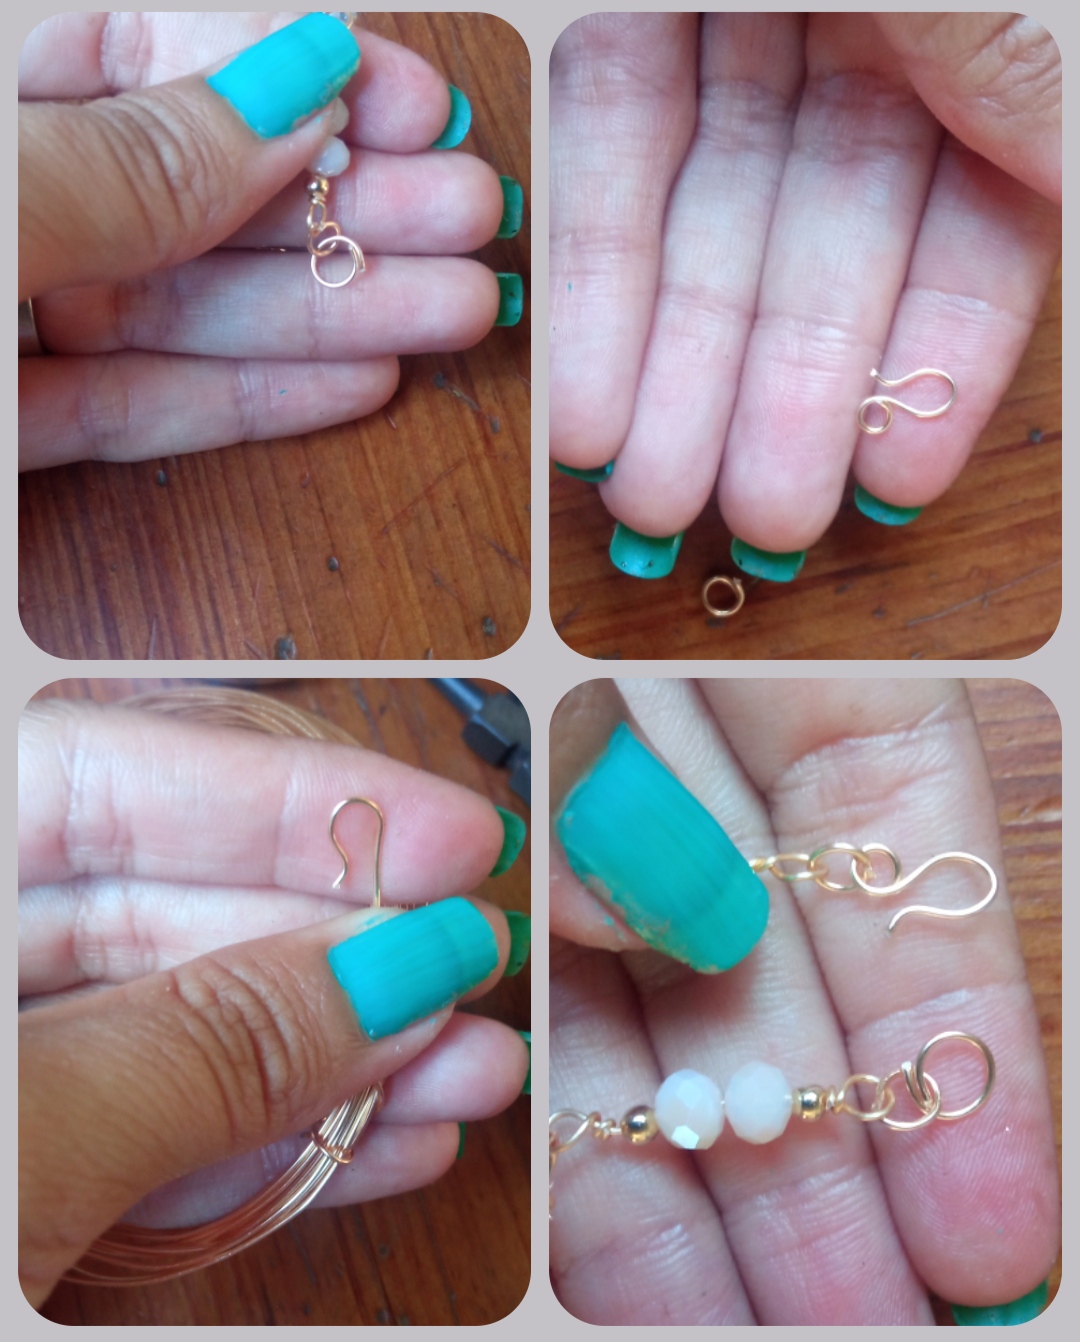
✴️ Paso 3: ahora enrrollaremos un pedazo de alambre en la punta de la pinza y cortaremos pequeñas argollitas las cuales nos servirán para armar nuestra pulsera. Para ello tomaremos una argolla y uniremos una pieza de cristal y una de mostacillas y así la iremos uniendo de forma intercalada. > ✴️ Step 3: now we will wind a piece of wire around the tip of the pliers and cut small rings which will serve to assemble our bracelet. To do this we will take a ring and join a piece of glass and one of beads and thus we will join it interspersed.
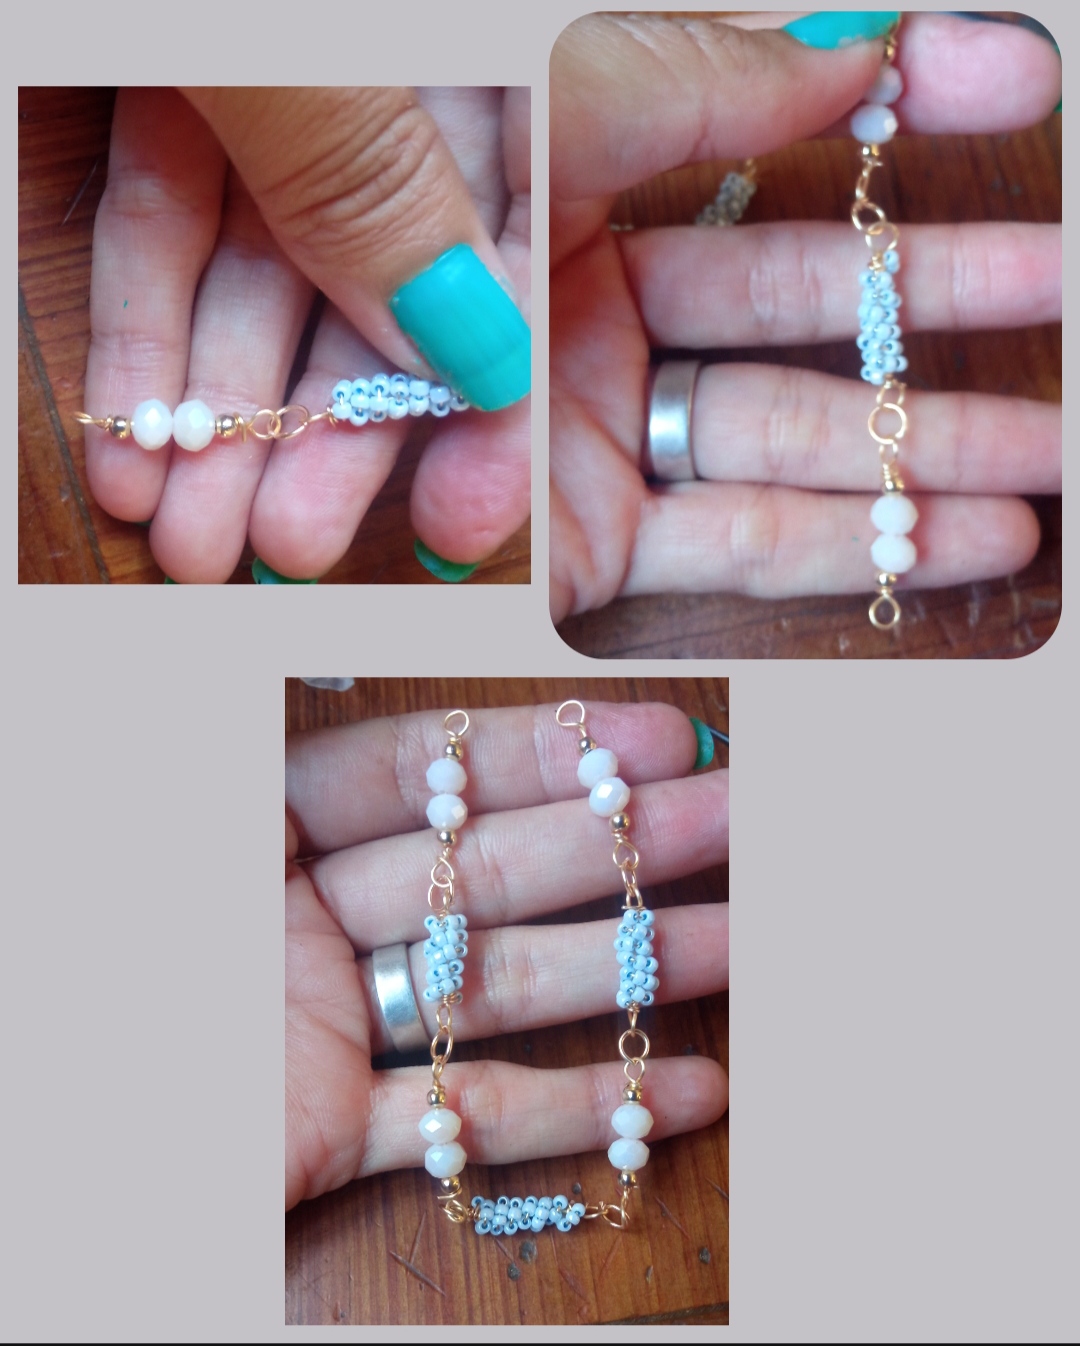
✴️ Paso 4: para finalizar la pulsera realizaremos los terminales, para ello elaboraremos una argolla con alambre de bisutería calibre 20 un poco más grande que los anteriores el cual uniremos a uno de los extremos de la pulsera uniendolo con una argollita pequeña a una de las piezas. Para el otro extremo elaboraremos una pieza tipo gancho la cual colocaremos en el otro extremo para culminar nuestra Elaboración.
✴️ Step 4: to finish the bracelet we will make the terminals, for this we will make a ring with 20 gauge jewelry wire a little larger than the previous ones which we will join to one of the ends of the bracelet joining it with a small ring to one of the pieces.
For the other end we will make a hook-type piece which we will place at the other end to complete our Preparation.
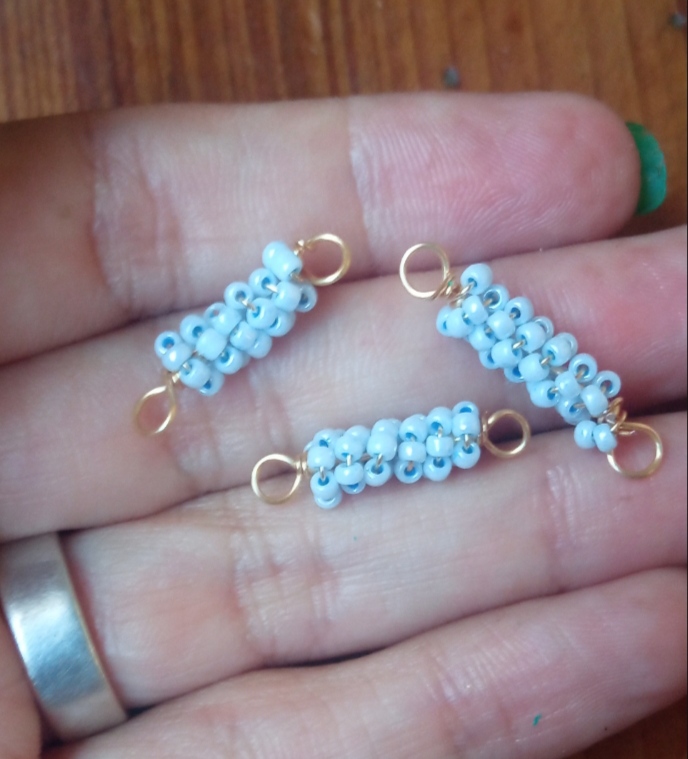
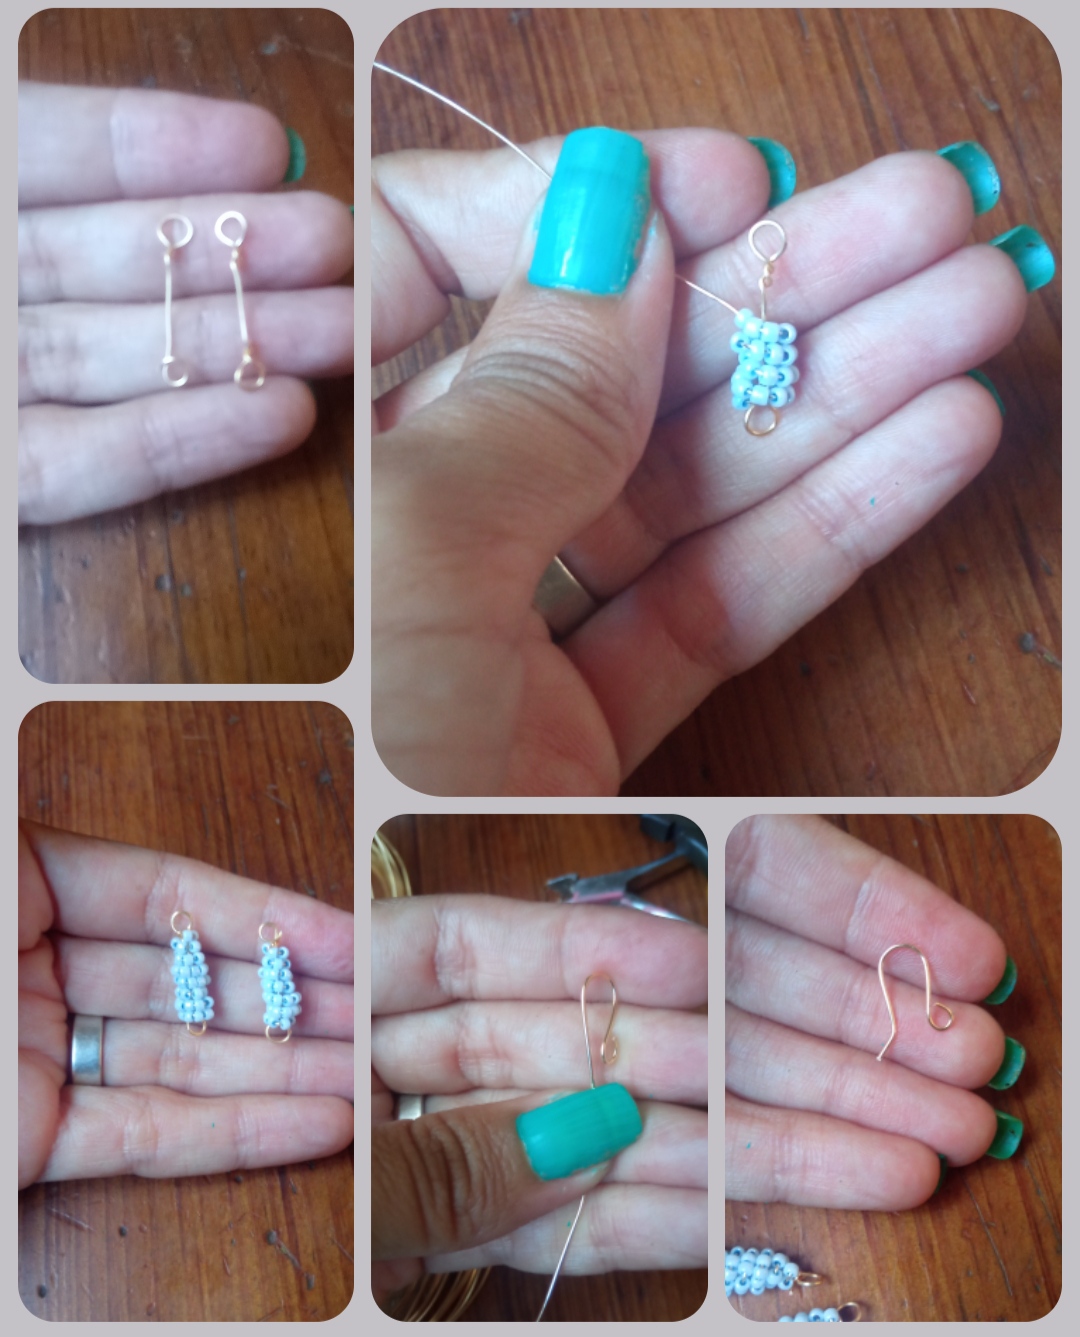
✴️ Paso 5: para elaborar los zarcillos elaboraremos dos piezas tal cual a las que elaboramos con mostacillas para la pulsera, primero elaboramos dos piezas de alambre con argolla a cada lado y un espacio limpio, Seguidamente sujetámos en la base el alambre calibre 26 e Introducimos la mostacillas y enrrollamos está el el espacio libre. Por último con un pedacito de alambre de bisutería calibre 20 elaboramos el anzuelo para zarcillos y lo unimos a la pieza de mostacillas elaborada y listo.
✴️ Step 5: to make the tendrils we will make two pieces just like the ones we made with beads for the bracelet, first we make two pieces of wire with a ring on each side and a clean space, then we hold the gauge wire at the base 26 and We introduce the beads and roll up the free space.
Finally, with a little piece of 20-gauge costume jewelry wire, we make the hook for tendrils and we join it to the piece of beads made and that's it.
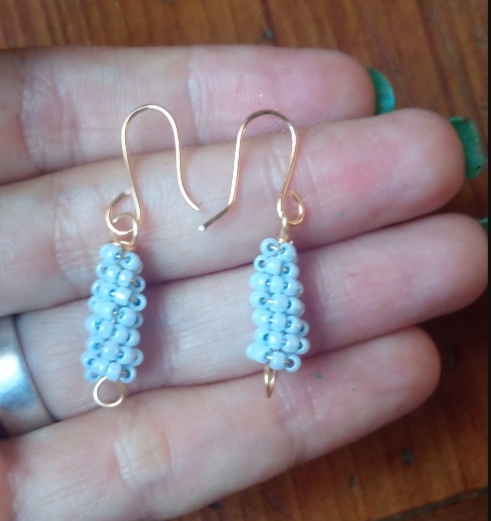
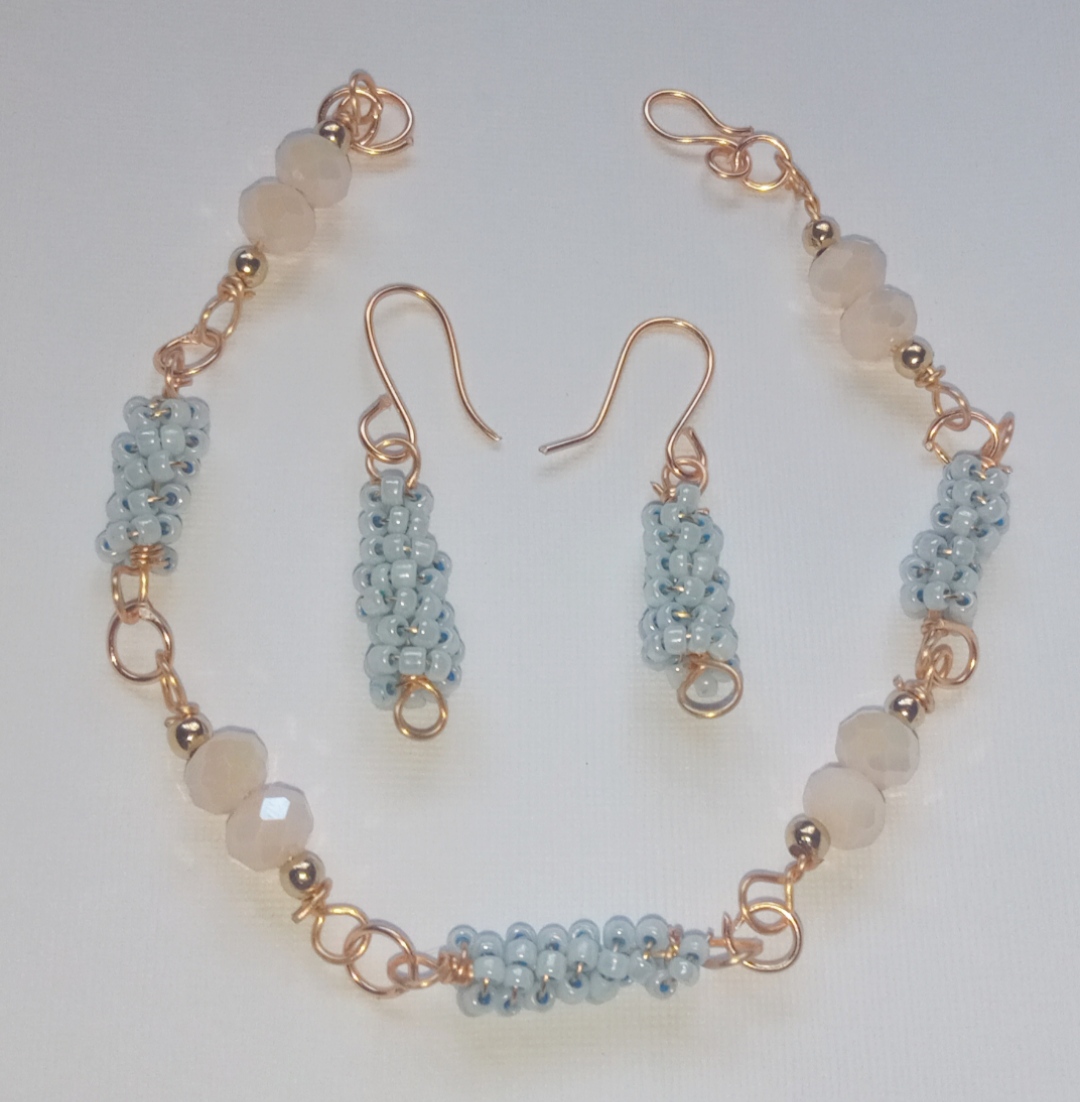
Todas las Fotos son de mi autoría y fueron tomadas con mi Celular Redmi 9And so we obtain this beautiful result, a very beautiful set of accessories ideal to wear on any occasion, my dear friends, I thank you very much for accompanying me in this post that I will elaborate with great affection for all of you, I hope this design has been to your liking.
I say goodbye for this opportunity.
Greetings and blessings.
All Photos are my authorship and were taken with my Redmi 9 Cellphone
Gracias por el apoyo.
muy bonito la verdad , los aretes me gustaron mucho asi se podrian hacer arracadas
Me encantan estas tecnicas con alambre! Quedaron muy lindos y la combinación de colores quedo bien delicadita ♥
Hola amiga me encanta tu creación.
Saludos