[ESP-ENG] hermoso Dije con tu inicial "M" / beautiful I said with your initial "M"
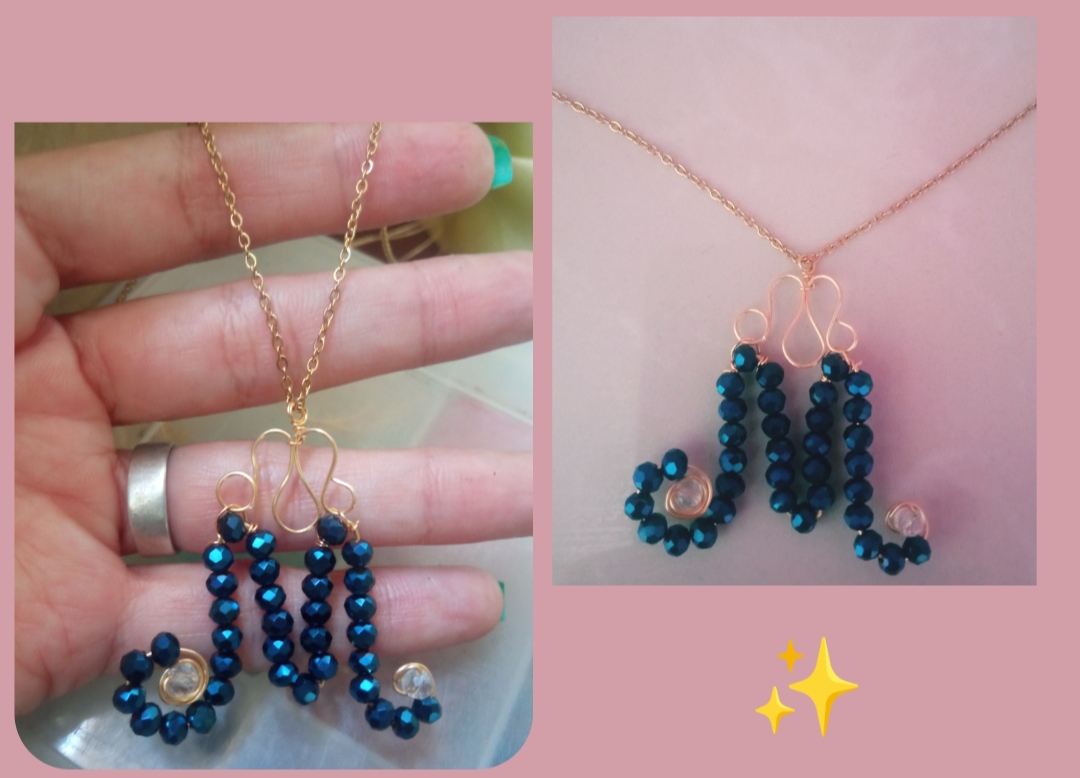
Feliz y bendecida noche tengan todos ustedes es un gran placer para mí el pasar por esta comunidad para compartir una vez más con todos ustedes, en esta oportunidad les traigo un muy sencillo tutorial para la elaboración de un hermoso dije con la inicial de mi nombre ya sé que se preguntarán si mi usuario es emmaris porque la letra m pues les cuento que mi nombre es María y el nombre de emmaris es una composición entre el nombre de mi pequeña hija el cual es emma, y mi nombre, me pareció que sonaba muy bien y decidí que ese sería mi usuario. sin embargo el día de hoy quise elaborar un lindo dije para mí puesto que este mes que está finalizando estuve de cumpleaños.
Happy and blessed night to all of you, it is a great pleasure for me to go through this community to share once again with all of you, this time I bring you a very simple tutorial to make a beautiful pendant with the initial of My name, I know that you will be wondering if my username is emmaris because the letter m, well, I tell you that my name is María and the name of emmaris is a composition between the name of my little daughter, which is emma, and my name, it seemed to me which sounded great and I decided that would be my username.
However, today I wanted to make a nice pendant for myself since this month that is ending I had my birthday.
This is a very easy and simple design to make, we also need very few materials and the result obtained is beautiful. I invite you to make this beautiful pendant together.
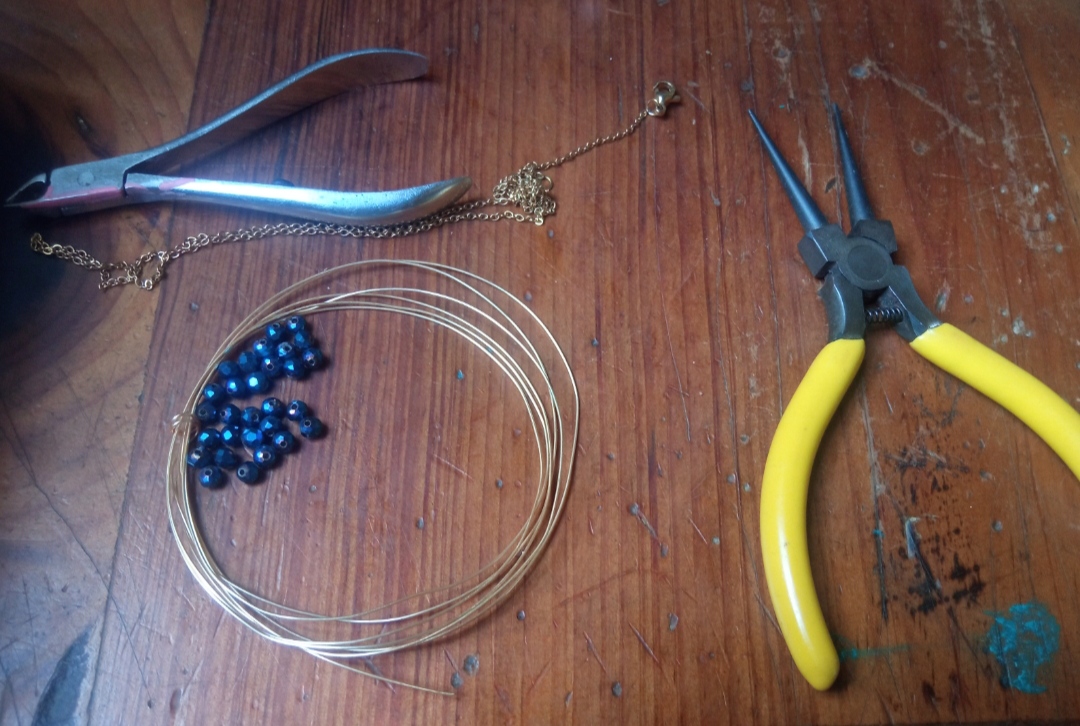
- Alambre de bisutería calibre 20.
- Alambre de bisutería calibre 26.
- cristales azul.
- cristales transparentes.
- cadenita delgada.
- Pinza de bisutería.
- 20 gauge jewelry wire.
- 26 gauge jewelry wire.
- blue crystals.
- transparent crystals.
- thin chain
- Jewelry tweezers.
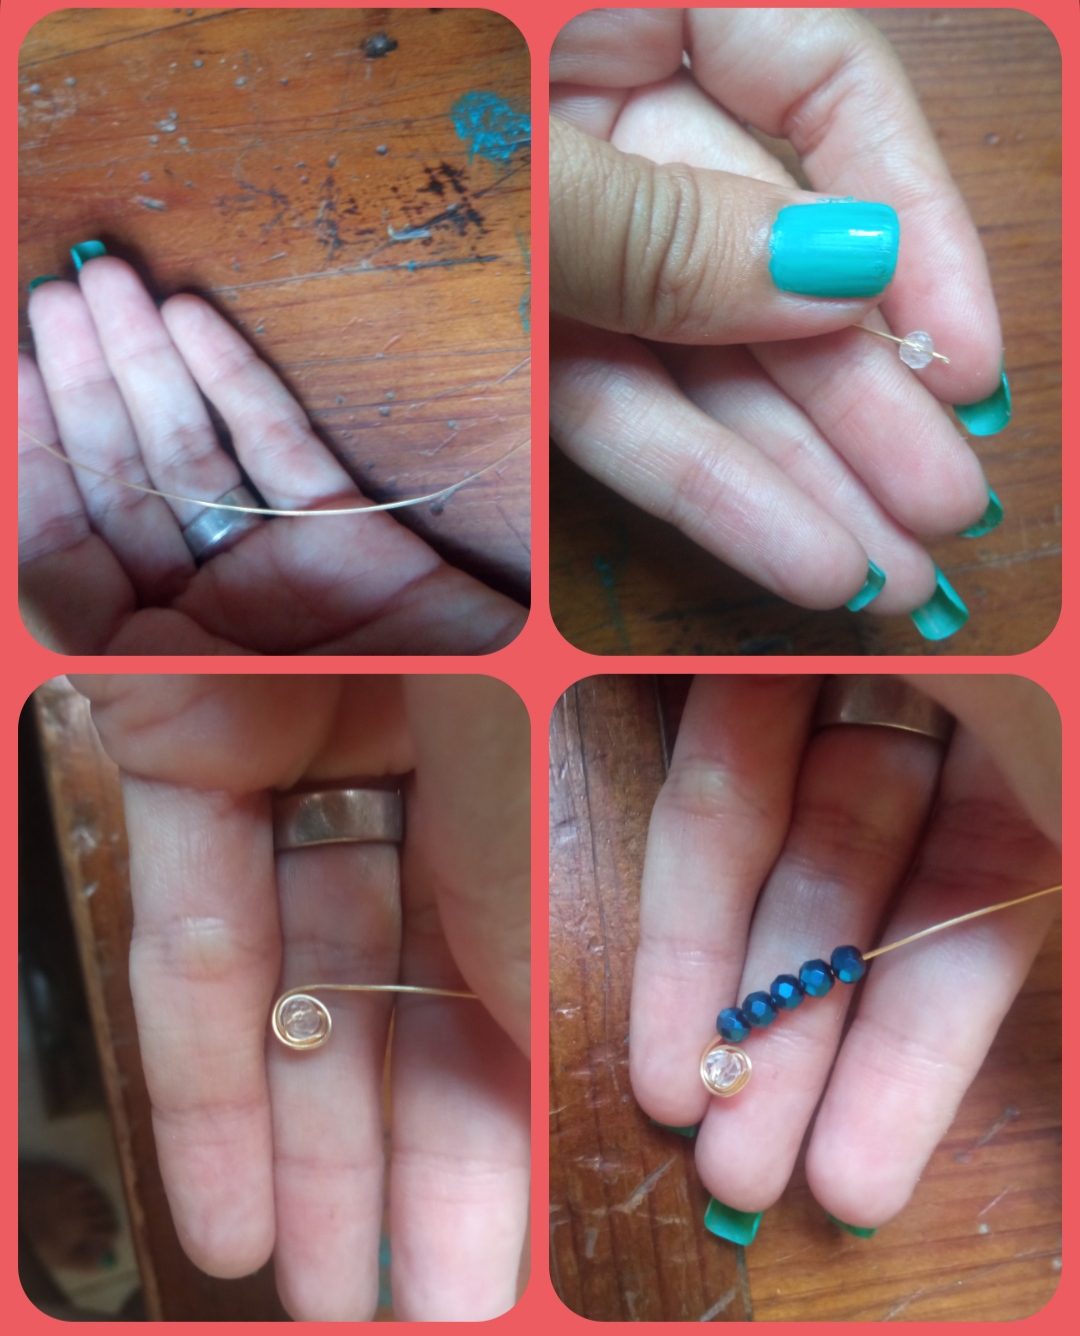
✴️ Paso 1: para iniciar esta hermosa elaboración primeramente tomaremos el alambre de bisutería calibre 20 y cortaremos un pedazo de aproximadamente 20 cm seguidamente introduciremos por uno de sus extremos un cristal transparente el cual dejaremos muy cerca de la planta con la pinza doblaremos la punta de alambre de manera que quede sujeto El pequeño cristal y a partir de allí comenzamos a enrollar en forma de espiral es decir realizamos varias vueltas del cristal en el alambre. Y para continuar comenzaremos a introducir los cristales azules.
✴️ Step 1: to start this beautiful preparation, first we will take the 20-gauge costume jewelry wire and cut a piece of approximately 20 cm, then we will introduce a transparent crystal through one of its ends which we will leave very close to the plant with the pliers and bend the tip of the wire so that the small crystal is attached and from there we begin to wind it in a spiral, that is, we make several turns of the crystal on the wire.
And to continue we will begin to introduce the blue crystals.
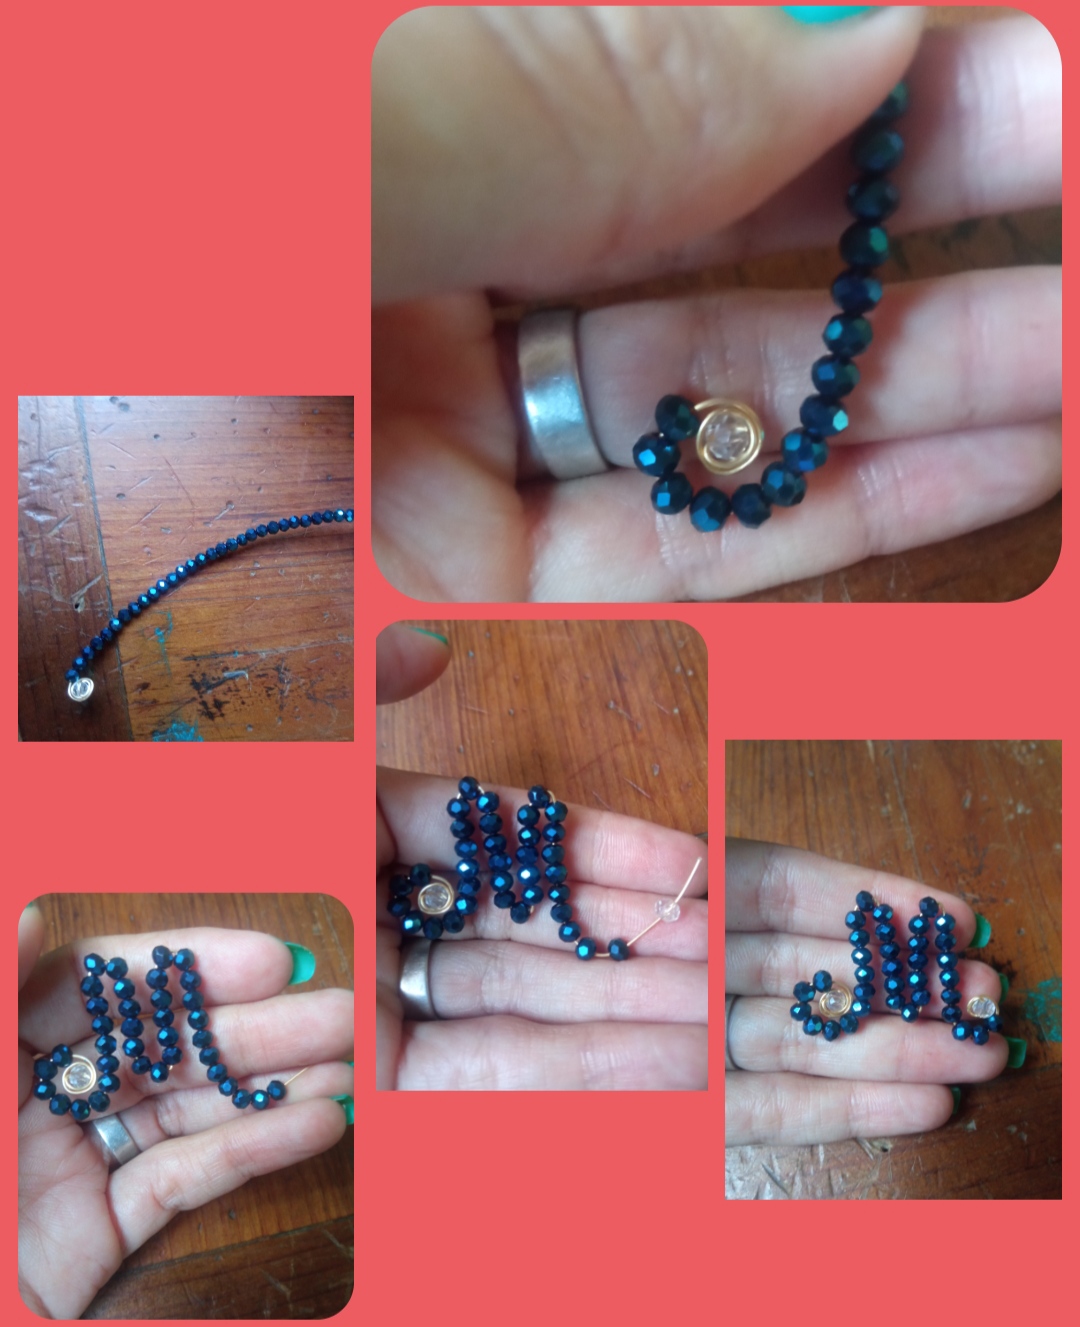
✴️ Step 2: we will introduce a large number of blue crystals and the size that we will give to this letter will depend on us for the elaboration of this "M" we bite the wire little by little making a capital shape in each fold I tried to leave a single glass so that the shape of the fold could be better noticed and at the last end, in the same way that at the beginning we introduced a transparent glass and we turn it several times at the tip of the wire and as you can see, we made this simple letter made of wire and decorated with beautiful crystals.
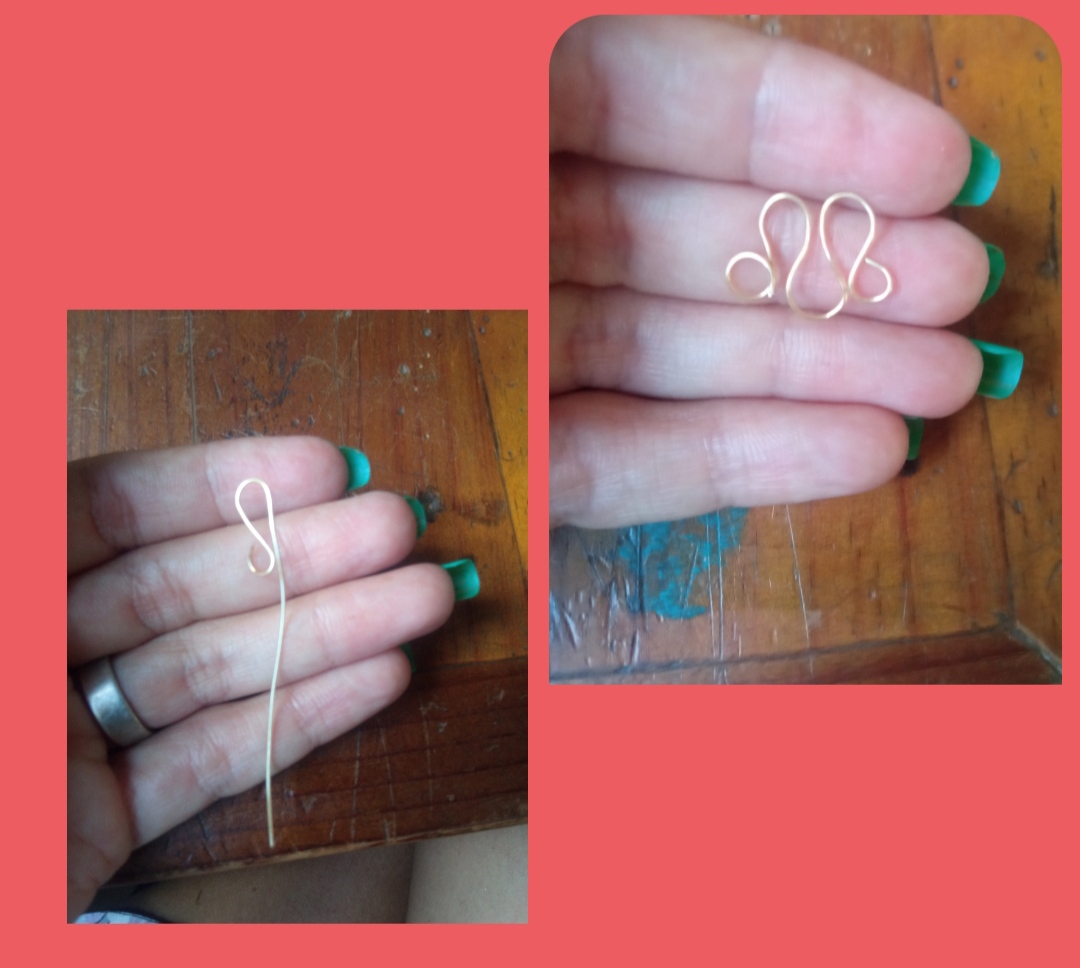
✴️ Paso 3: a continuación tomaremos un pedazo de alambre de bisutería calibre 20 de 6 cm, en su extremo elaboraremos una pequeña forma circular y luego tealizamos pequeñas formas de ondas una hacia abajo y una hacia arriba tal cual pueden observar a continuación. Con esta intenté realizar una forma un poco parecida a una corona, la cual colocaremos encima de nuestra elaboración y esta linda forma no servirá para decorar nuestra hermosa letra además de sernos muy útil para sujetarlo en la cadena.
✴️ Step 3: next we will take a piece of 6 cm 20 gauge jewelry wire, at its end we will make a small circular shape and then we will make small wave shapes one down and one up as you can see below .
With this I tried to make a shape a bit similar to a crown, which we will place on top of our elaboration and this beautiful shape will not serve to decorate our beautiful letter, as well as being very useful to hold it on the chain.
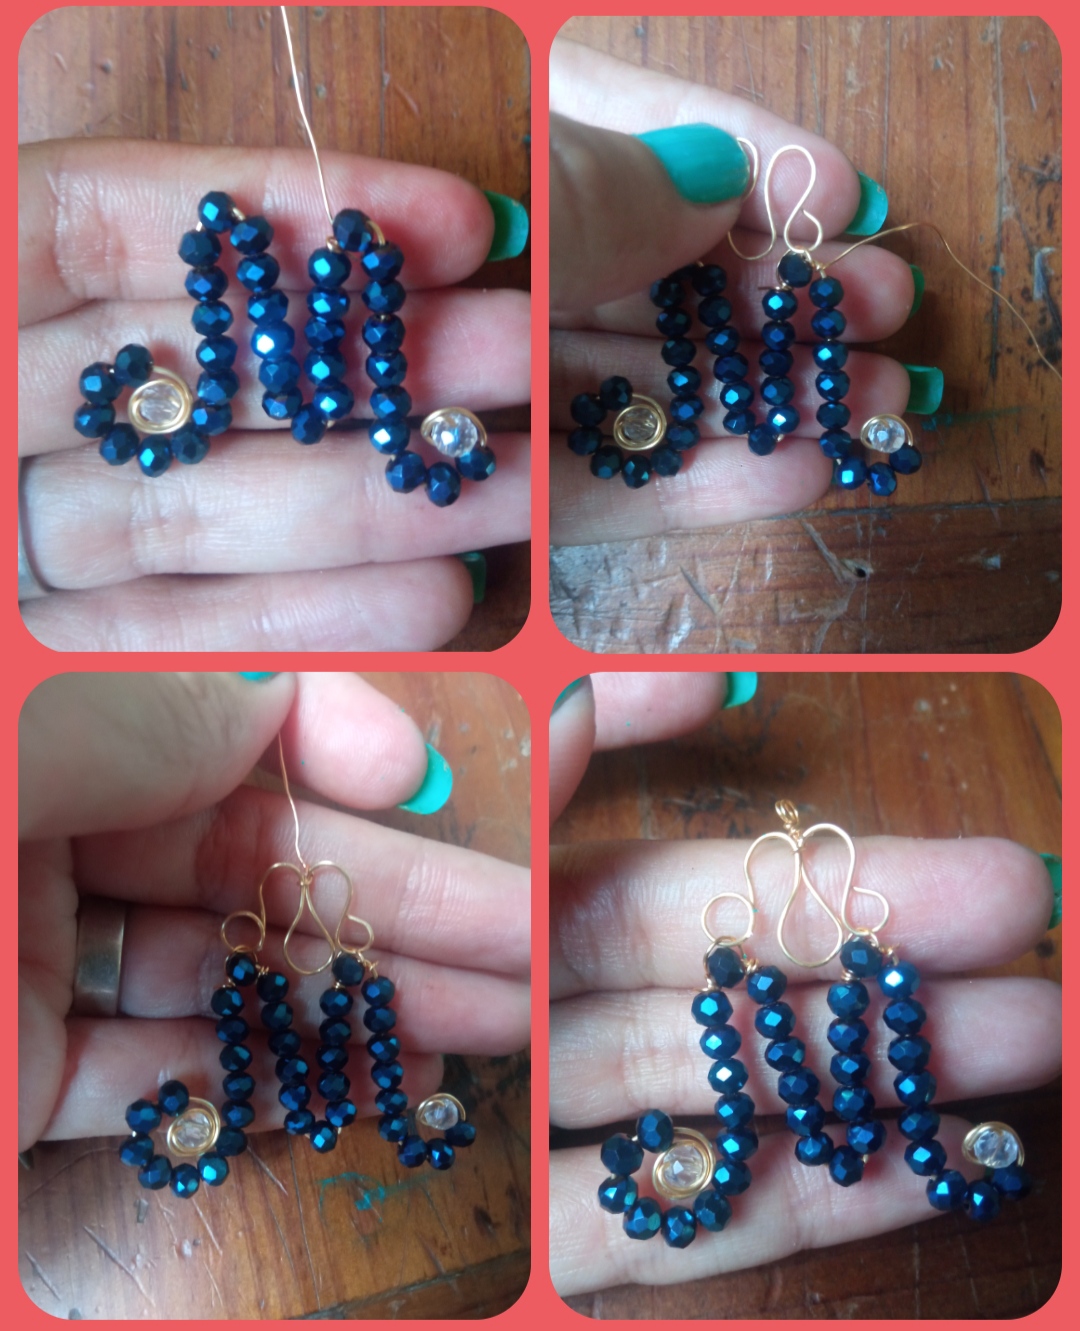
✴️ Paso 4: como ya les comenté en El Paso anterior debemos colocar la forma elaborada en el paso número 3 encima de nuestra letra para ello tomaremos un pedazo de alambre de bisutería calibre 26 lo sujetaremos en el dobles de nuestra inicial y este alambre lo introduciremos por la forma circular de nuestra pequeña corona y realizaremos varias vueltas para sujetarla bien de igual manera elaboraremos en el otro doblez de nuestra inicial. Por último en la parte superior de nuestra corona enrollaremos un pedacito de alambre de bisutería calibre 26 y con ayuda de la pinza elaboraremos un pequeño círculo en medio de ella.
✴️ Step 4: as I already mentioned in the previous Step, we must place the shape made in step number 3 on top of our letter. To do this, we will take a piece of 26-gauge costume jewelry wire, we will hold it in the double of our initial and this We will introduce the wire through the circular shape of our small crown and we will make several turns to hold it well in the same way we will elaborate in the other fold of our initial.
Finally, in the upper part of our crown we will wind a little piece of 26 gauge costume jewelry wire and with the help of the pliers we will make a small circle in the middle of it.
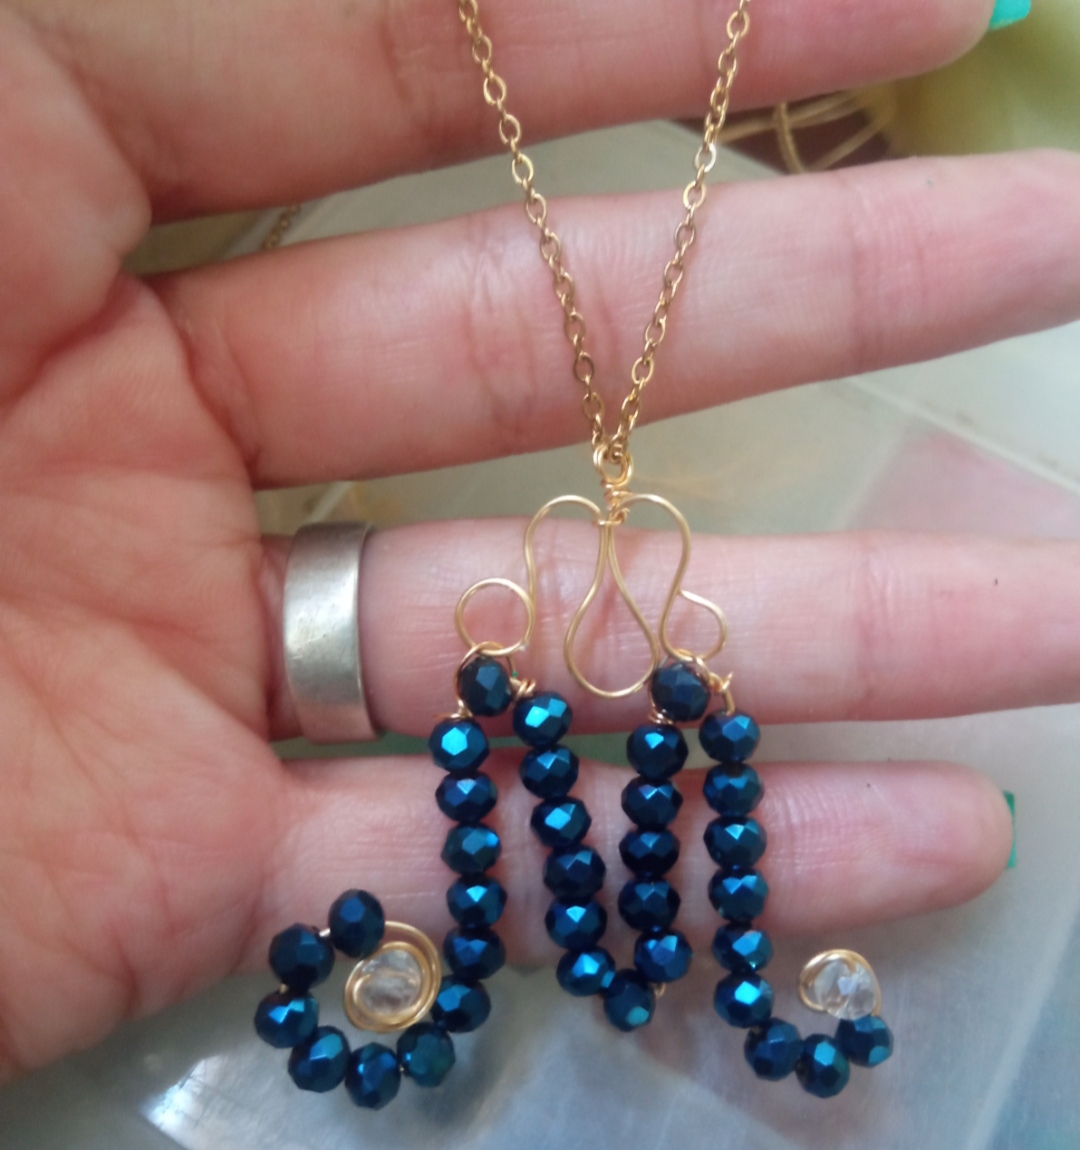
✴️ Paso 5: finalmente tomamos nuestra cadenita y la introducimos por la pequeña argolla que acabamos de realizar en El Paso anterior y terminaremos nuestra hermosa elaboración.
✴️ Step 5: finally we take our chain and introduce it through the small ring that we just made in the previous El Paso and we will finish our beautiful elaboration.
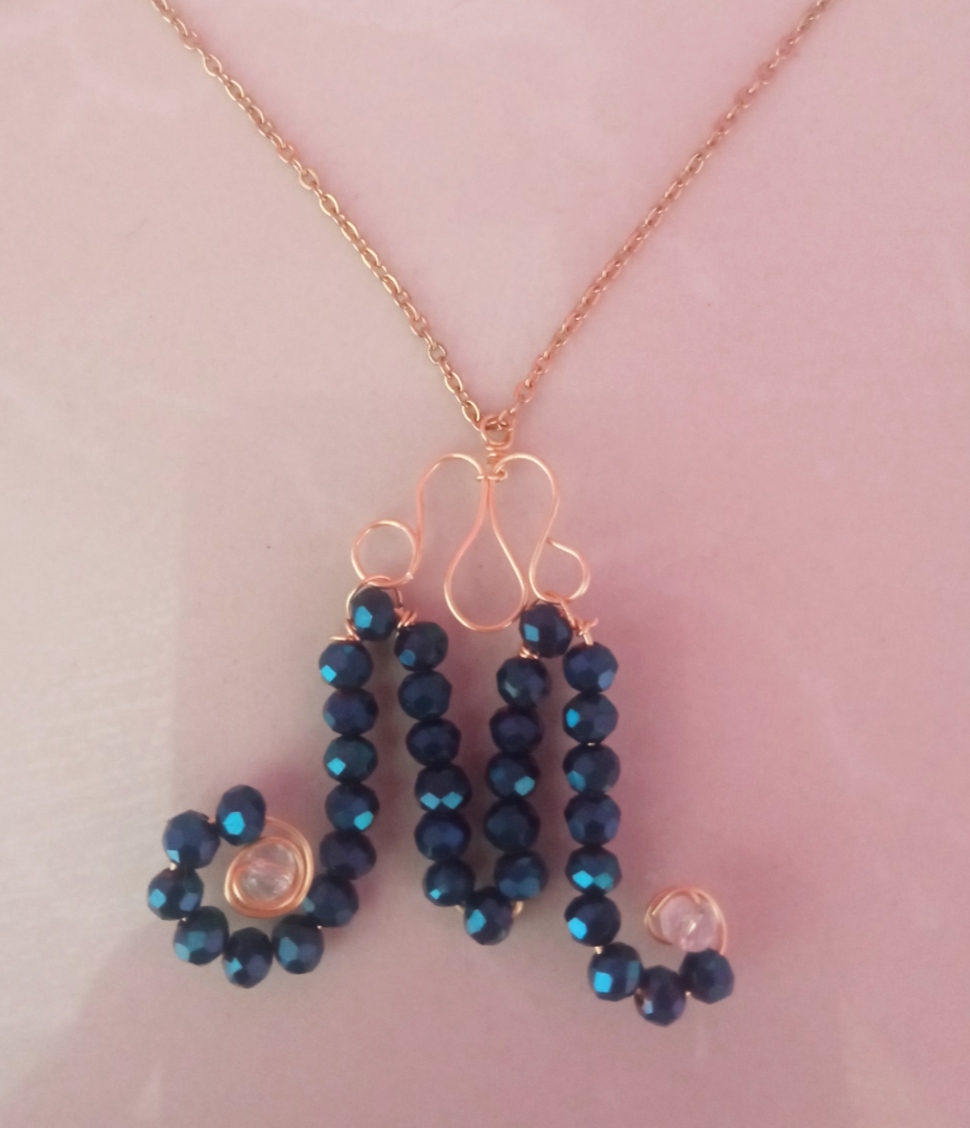
Todas las Fotos son de mi autoría y fueron tomadas con mi Celular Redmi 9And what did you think of this beautiful elaboration? It's true that it is super easy, simple and quick to elaborate, in addition to obtaining a very beautiful pendant which you can adapt to your convenience, since with this procedure we can play and make our initial, it is a very excellent Idea that we can carry out to make a detail for a special person.
Dear friends, I hope this tutorial has been to your liking and after making it useful, I say goodbye to all of you today, but not before thanking you for your visit.
greetings and blessings.
All Photos are my authorship and were taken with my Redmi 9 Cellphone
Te quedo precioso los colores se ven geniales y resalta bastante 😍, adoro la letra "M" no se porque jejeje, pero la adoro. Un trabajo hermoso y una buena explicación.
Me alegra que te haya gustado amiga 😊.
!discovery 35
This post was shared and voted inside the discord by the curators team of discovery-it
Join our Community and follow our Curation Trail
Discovery-it is also a Witness, vote for us here
Delegate to us for passive income. Check our 80% fee-back Program
Me parece muy bonito y facil de hacer😄
Que bonito, te quedo, gracias por mostrarnos el paso a paso
Excelente trabajo y muy detallada tu explicación quedó hermoso. Saludos 🤗