[ESP-ENG] Hermoso Anillo entres simples pasos 💍/ Beautiful Ring between simple steps 💍
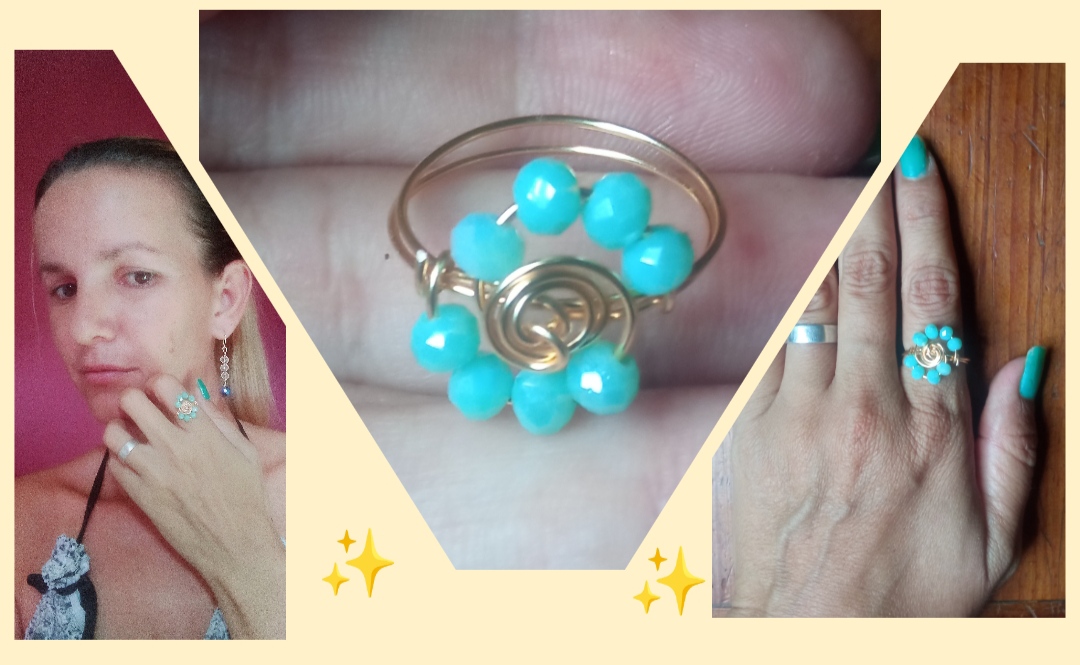
Feliz y bendecido día tengan todos, feliz fin de semana, el día de hoy como siempre es un gusto y un placer saludarlos y compartir con ustedes, en esta oportunidad les traigo una creativa y sencilla idea para elaborar un hermoso anillo con la técnica del alambrismos en tres simples y sencillos pasos. Este es un diseño que podemos elaborar muy fácilmente en casa sin tener una gran experiencia, para todos ustedes elabore este post tipo tutorial dónde les comparto como con tres simples pasos podemos obtener este hermoso resultado.
Happy and blessed day everyone, happy weekend, today as always it is a pleasure to greet you and share with you, this time I bring you a creative and simple idea to make a beautiful ring with the wire technique in three simple and easy steps.
This is a design that we can make very easily at home without having a great experience, for all of you I made this tutorial post where I share how with three simple steps we can obtain this beautiful result.
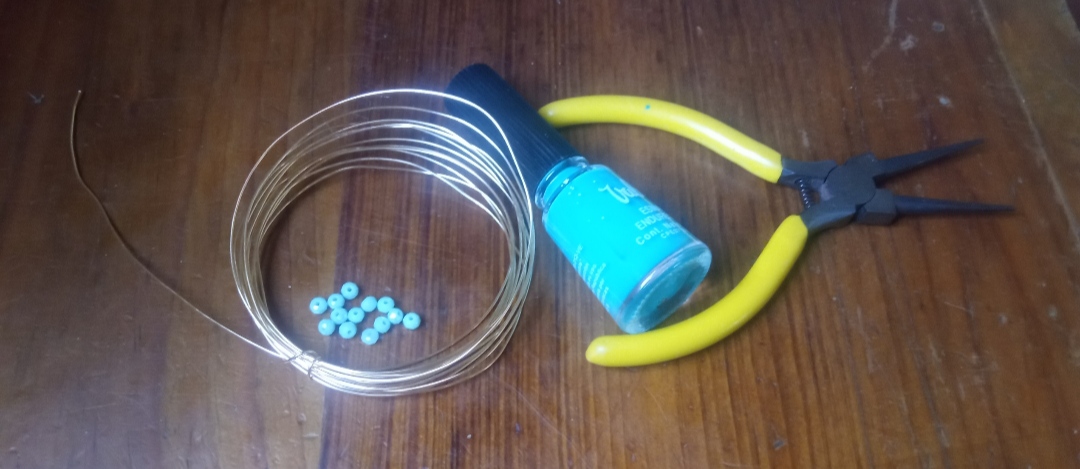
- alambre de bisutería calibre 20.
- Cristales verdes.
- pinza de bisutería.
- 20 gauge jewelry wire.
- Green crystals.
- jewelry clip.
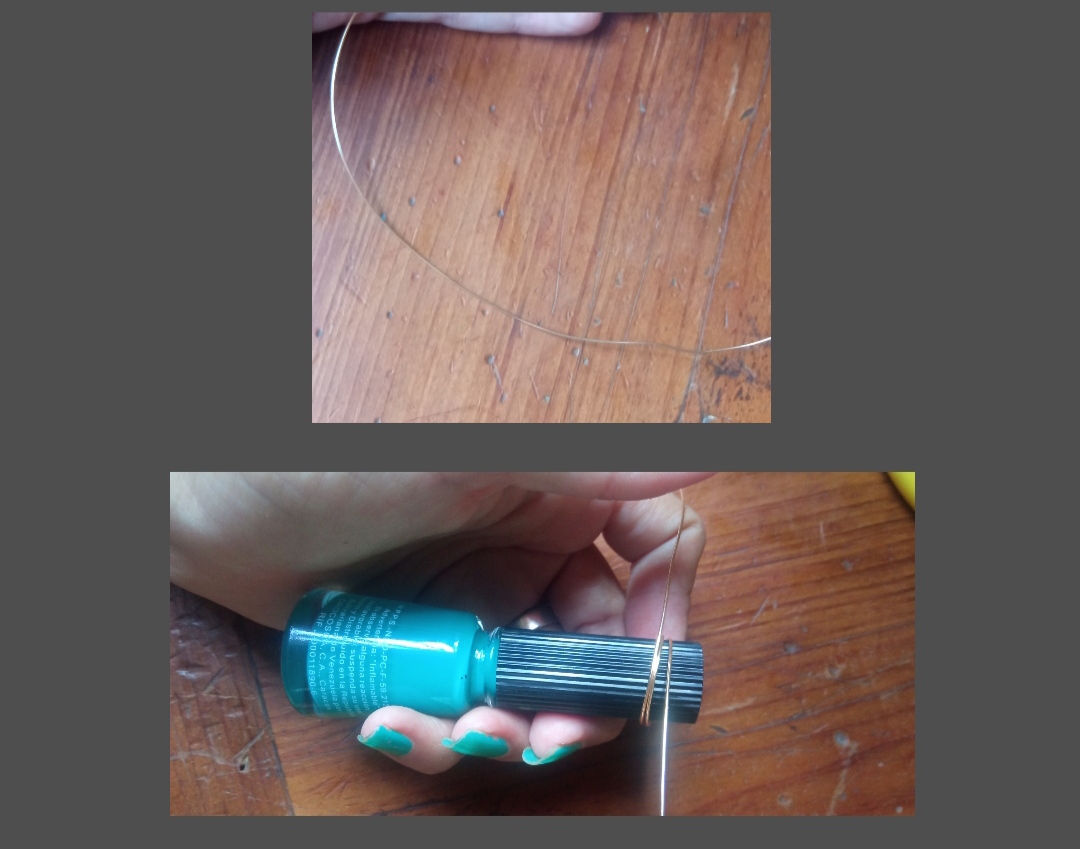
✴️ Paso 1: para iniciar esta elaboración primeramente tomamos el alambre de bisutería calibre 20 y cortaremos un pedazo de aproximadamente 20cm el cual tomaremos y apoyándonos en un tubo moldearemos el alambre en forma circular, yo use la tapa de mi pintura de uñas, tome el alambre y sosteniendo una de sus puntas realice dos vueltas en la tapa de la pintura, debemos tomar en cuenta dejar un extremo largo de alambre al principio y al final, es decir que la parte circular quede en medio de nuestro alambre tal cual pueden observar en las siguientes imágenes.
✴️ Step 1: to start this elaboration, first we take the 20 gauge jewelry wire and we will cut a piece of approximately 20cm which we will take and leaning on a tube we will shape the wire in a circular shape, I used the lid of my nail paint , take the wire and holding one of its ends make two turns on the lid of the painting, we must take into account leaving a long end of wire at the beginning and at the end, that is to say that the circular part remains in the middle of our wire as it is can be seen in the following images.
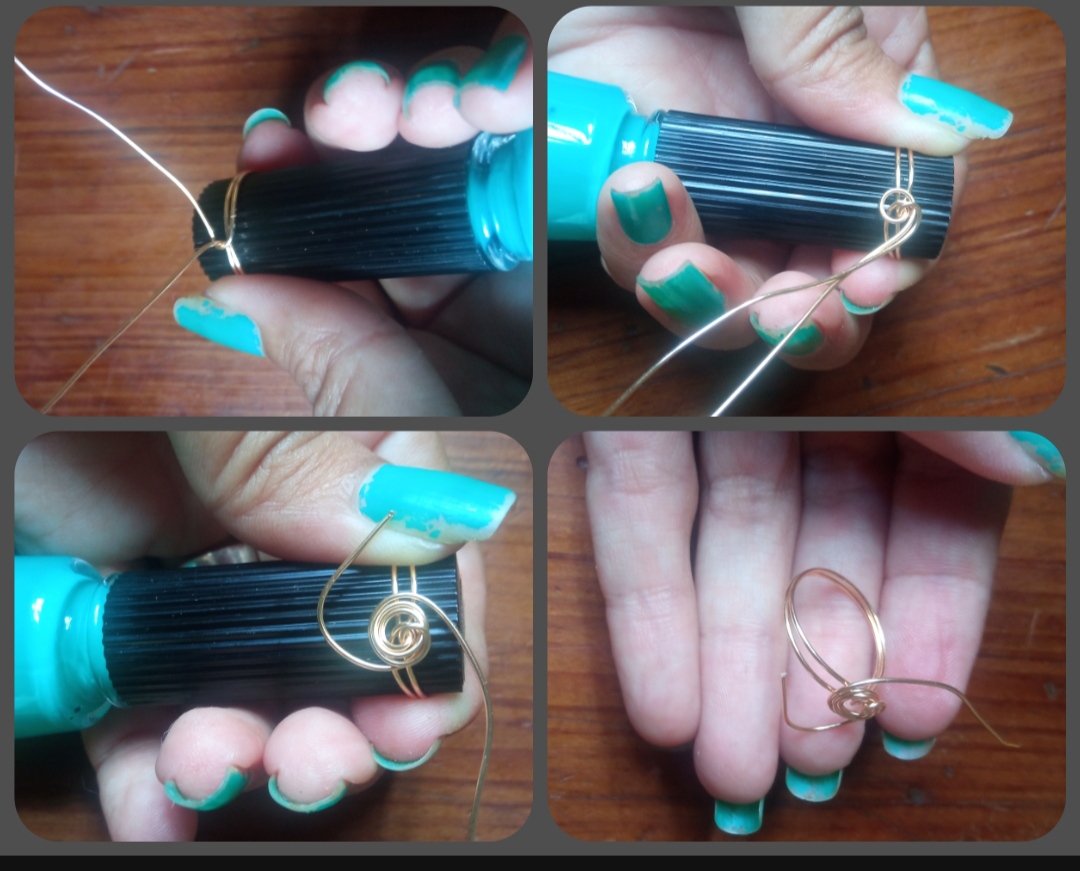
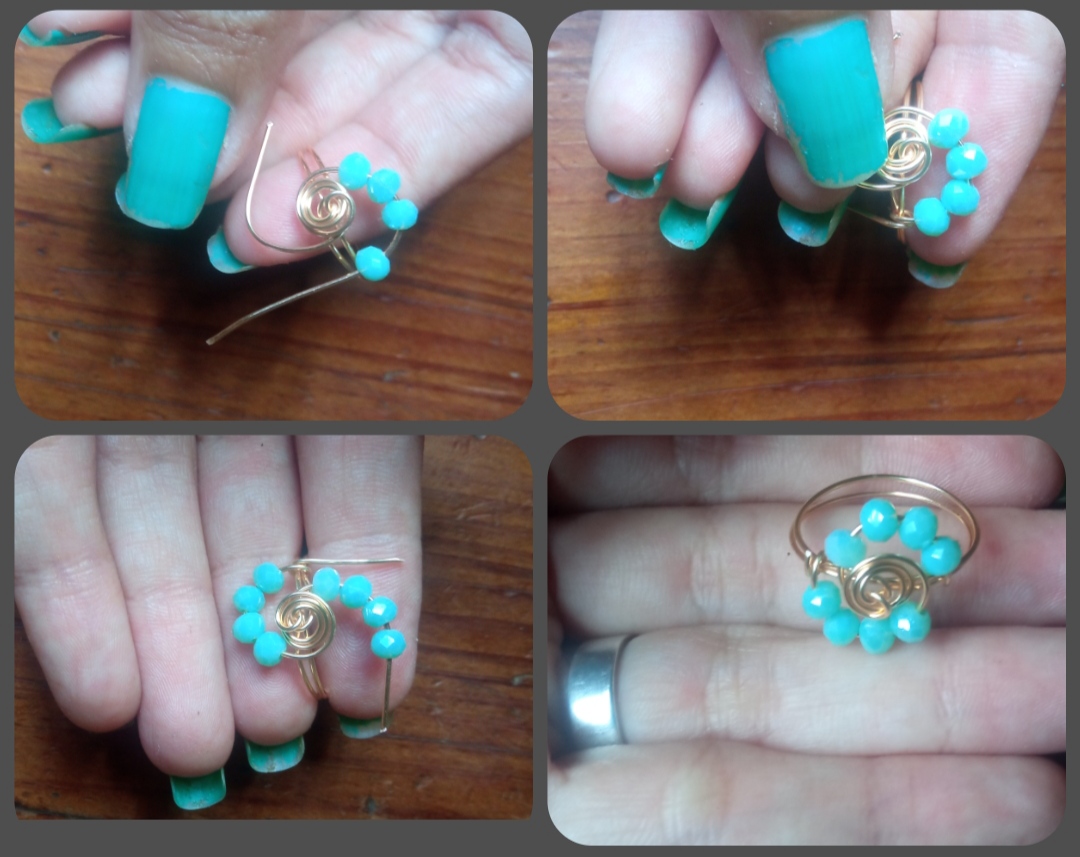
✴️ Step 2: to continue we will join the two ends of the wire in the upper part of the circular shape and we will roll a little to hold the shape made, then without removing the ring from the mold with the tip of the pliers we will begin to roll in a circular shape the two wires making a spiral shape on top of our ring and leaving a smooth piece we take the ring out of the mold to continue working on it.
✴️ Paso 3: ahora tomaremos la primera punta de alambre e Introducimos 4 cristales verde y realizamos una pequeña forma de onda un poco separado de la forma de espiral y la punta la sujetámos en la base de nuestro anillo realizando don vueltas en la misma. Para la otra punta enrrollamos un poco más para que está nos quede en la parte de abajo del espiral y de igual manera Introducimos cuatro cristales y sujetámos la punta en la base del anillo. Ya por último cortamos los excesos de alambre de cada lado y obtendremos este hermoso resultado.
✴️ Step 3: now we will take the first tip of the wire and insert 4 green crystals and make a small wave shape slightly separated from the spiral shape and we will hold the tip at the base of our ring, turning it around the same.
For the other end we roll a little more so that it stays at the bottom of the spiral and in the same way we introduce four crystals and we hold the end at the base of the ring.
Finally we cut the excess wire on each side and we will obtain this beautiful result.
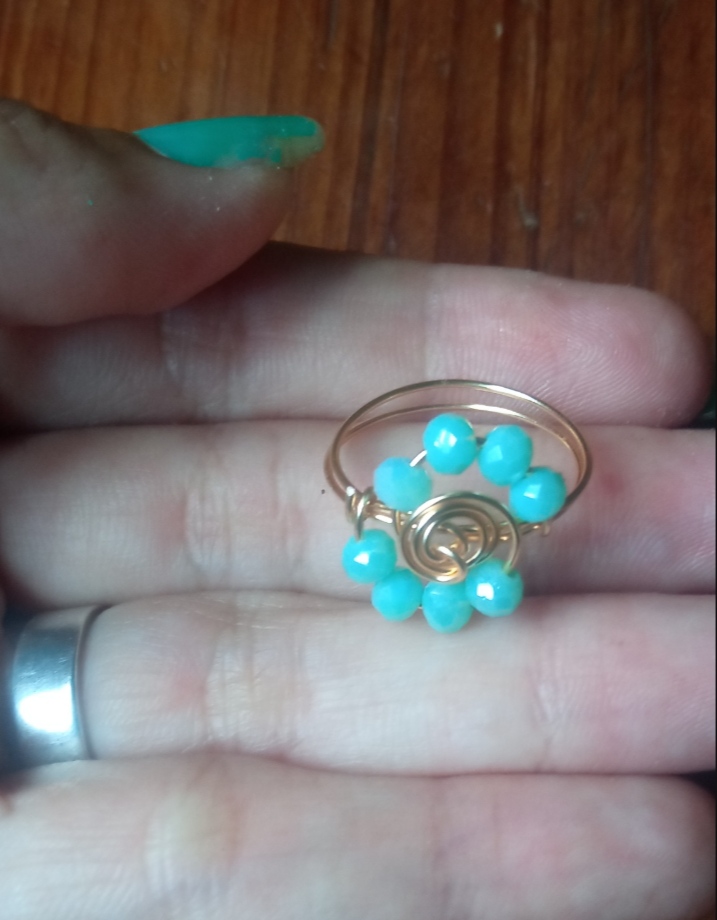
Todas las Fotos son de mi autoría y fueron tomadas con mi Celular Redmi 9And so with three simple steps we can obtain this beautiful result ideal to wear in our day to day, combine with our clothing, make a gift, it is super easy, simple, economical, because we only need 2 simple materials, 20cm of caliber costume jewelry wire 20 and 8 crystals, it is incredible that with so little we can obtain a beautiful accessory and it is so easy that any of us, if a lot of practice, can do it at home.
My dear friends, I was delighted with this beautiful result, and I hope that you also liked it as much as I did, I also hope that this very simple tutorial can be useful and beneficial to you, it has been a pleasure for me to bring you this post today, I say goodbye for this occasion thanking you for your visit and I will be eager to receive your comments and suggestions, until a new opportunity.
Greetings and blessings.
All Photos are my authorship and were taken with my Redmi 9 Cellphone
That's a nice ring. Simple and lovely.
Congratulations @emmaris! You have completed the following achievement on the Hive blockchain And have been rewarded with New badge(s)
Your next payout target is 6000 HP.
The unit is Hive Power equivalent because post and comment rewards can be split into HP and HBD
You can view your badges on your board and compare yourself to others in the Ranking
If you no longer want to receive notifications, reply to this comment with the word
STOPTo support your work, I also upvoted your post!
Check out our last posts: