[ESP-ENG] Hermosa Gargantilla de tela / Beautiful Fabric Choker
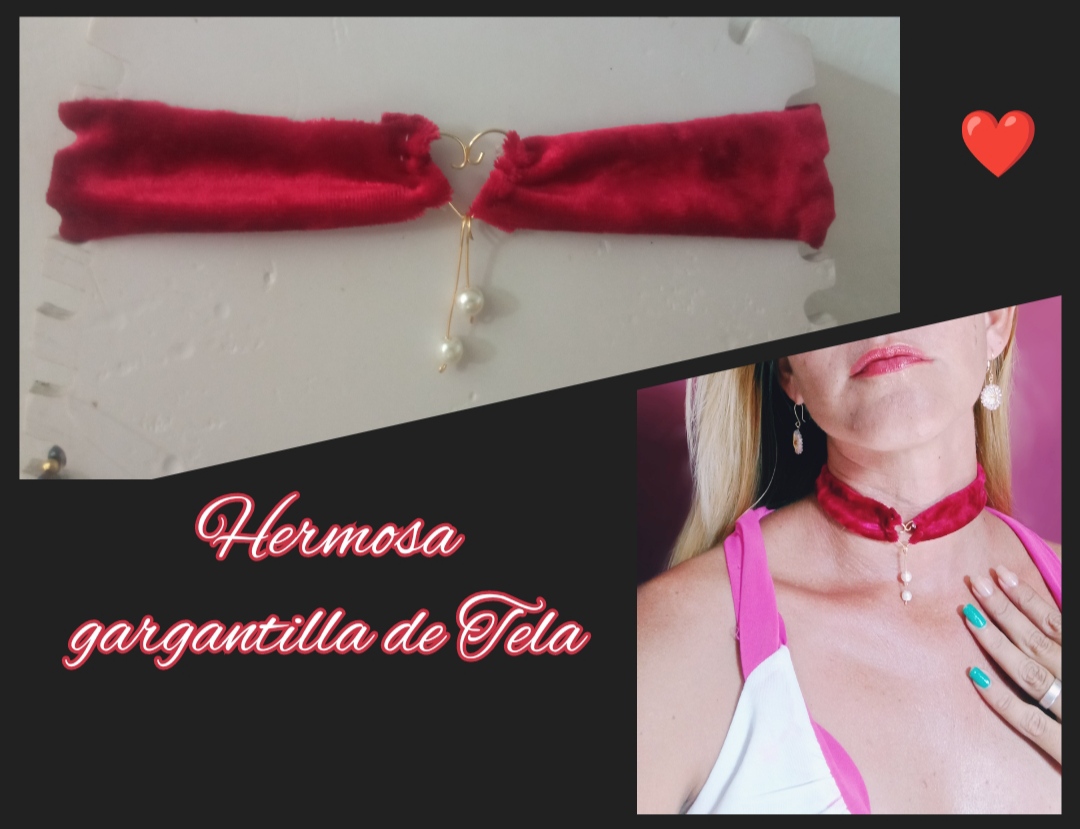
Feliz y bendecido noche tengan todos, espero pasen un excelente fin de semana, es un gran placer y un honor el poder compartir con ustedes esta nueva oportunidad, en esta ocasión les comparto una muy sencilla pero elegante elaboración de una hermosa gargantilla elaborada en tela y decorada en Alambrismo, Este es un diseño súper económico fácil y muy sencillo de elaborar en casa sin necesidad de poseer muchas habilidades en Esta técnica. Nuestro principal instrumento debe ser la tela para ello buscaremos un retazo de tela que tengamos en casa en desuso preferiblemente elástica y el color de su preferencia.
Happy and blessed night everyone, I hope you have an excellent weekend, it is a great pleasure and an honor to be able to share this new opportunity with you, this time I share a very simple but elegant elaboration of a beautiful elaborate necklace in fabric and decorated in wire mesh, this is a super economical design that is easy and very simple to make at home without the need to have many skills in this technique.
Our main instrument must be the fabric, for this we will look for a piece of fabric that we have at home in disuse, preferably elastic and the color of your choice.
I confess that I am not used to wearing chokers, however, this design seemed super beautiful and very striking. Also, because it is an elastic fabric, it is super comfortable so much that it will not bother you at any time for all of you.
I have made this very simple tutorial so that from home you can make your own necklace.
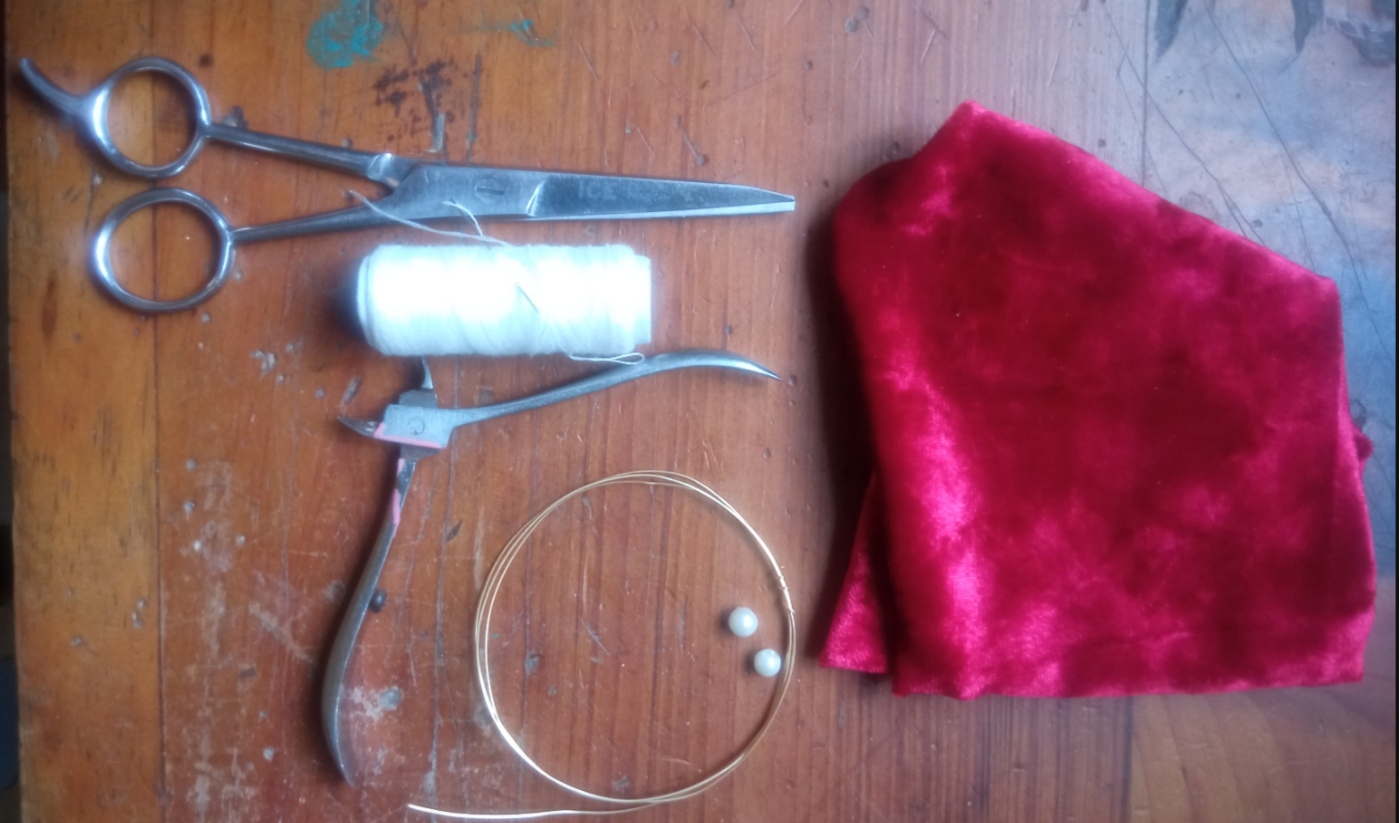
- Alambre de bisutería calibre 20.
- Retazos de tela elástica.
- hilo y aguja.
- piedras perladas.
- Tijera
- pinza de bisutería.
- 20 gauge jewelry wire.
- Pieces of elastic fabric.
- thread and needle.
- pearl stones.
- Scissors
- jewelry clip.
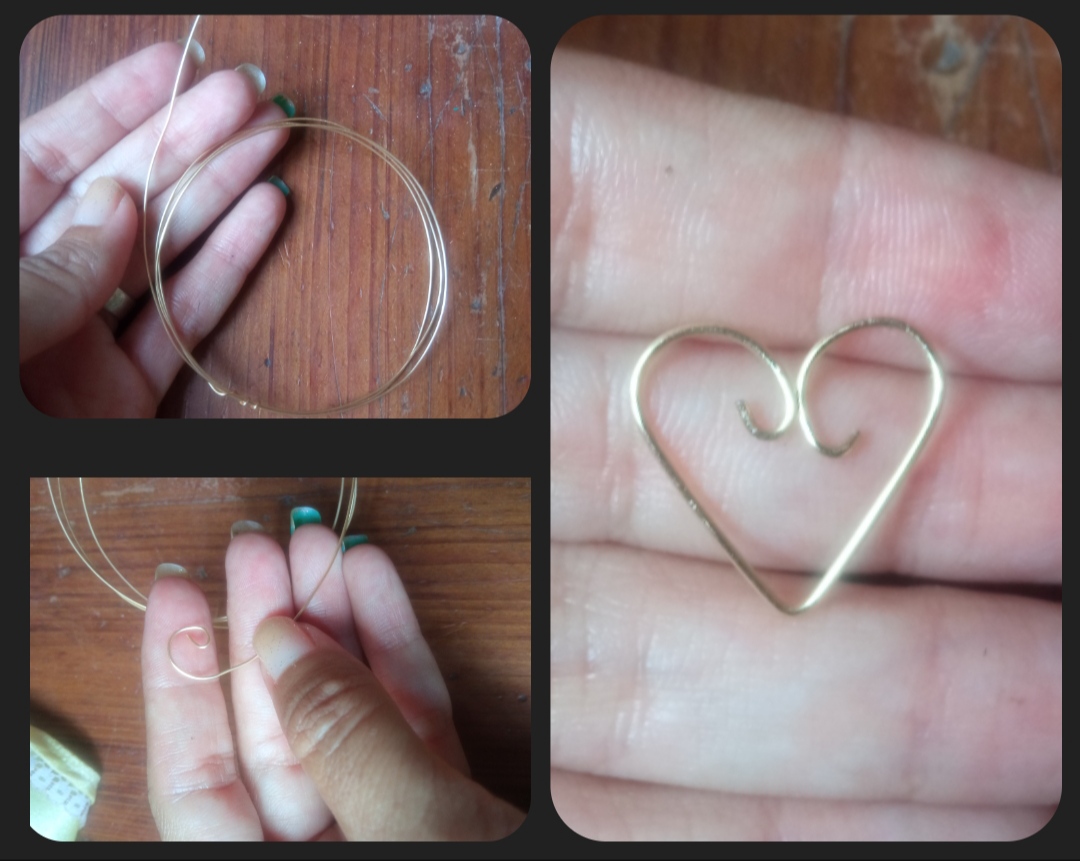
✴️ Paso 1: para iniciar la elaboración de esta bella gargantilla lo primero que debemos hacer es tomar el alambre de bisutería calibre 20 con ayuda de la pinza doblaremos la punta y luego apoyándonos en objeto circular moldearemos y daremos forma de corazón a este pedazo de alambre tal cual pueden observarlo En las siguientes fotografías.
✴️ Step 1: to start making this beautiful necklace, the first thing we must do is take the 20-gauge costume jewelry wire with the help of pliers, we will bend the tip and then, using a circular object, we will shape and shape this into a heart piece of wire as you can see it in the following photographs.
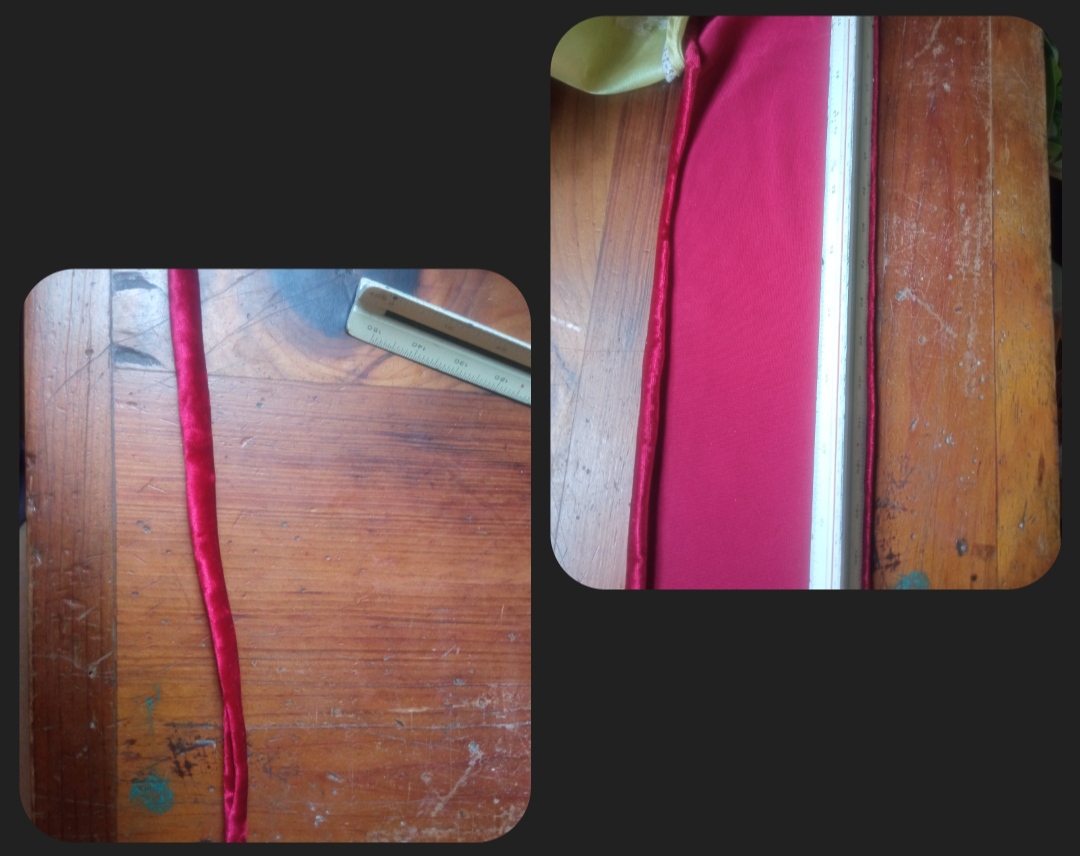
✴️ Step 2: to continue we will take the piece of fabric that we have selected for this elaboration and place it on a stretched table, then we will take the tape with which we will measure the fabric to ensure that everything fits us to the same size and of the same thickness and we will mark the strip of the thickness that you want it.
I did not want to make it very thick but nevertheless This is a fabric that tends to fold at its ends or edges, so I had to cut it to a measurement of 3 cm thick and 30 cm long, then with the help of scissors cut this strip .
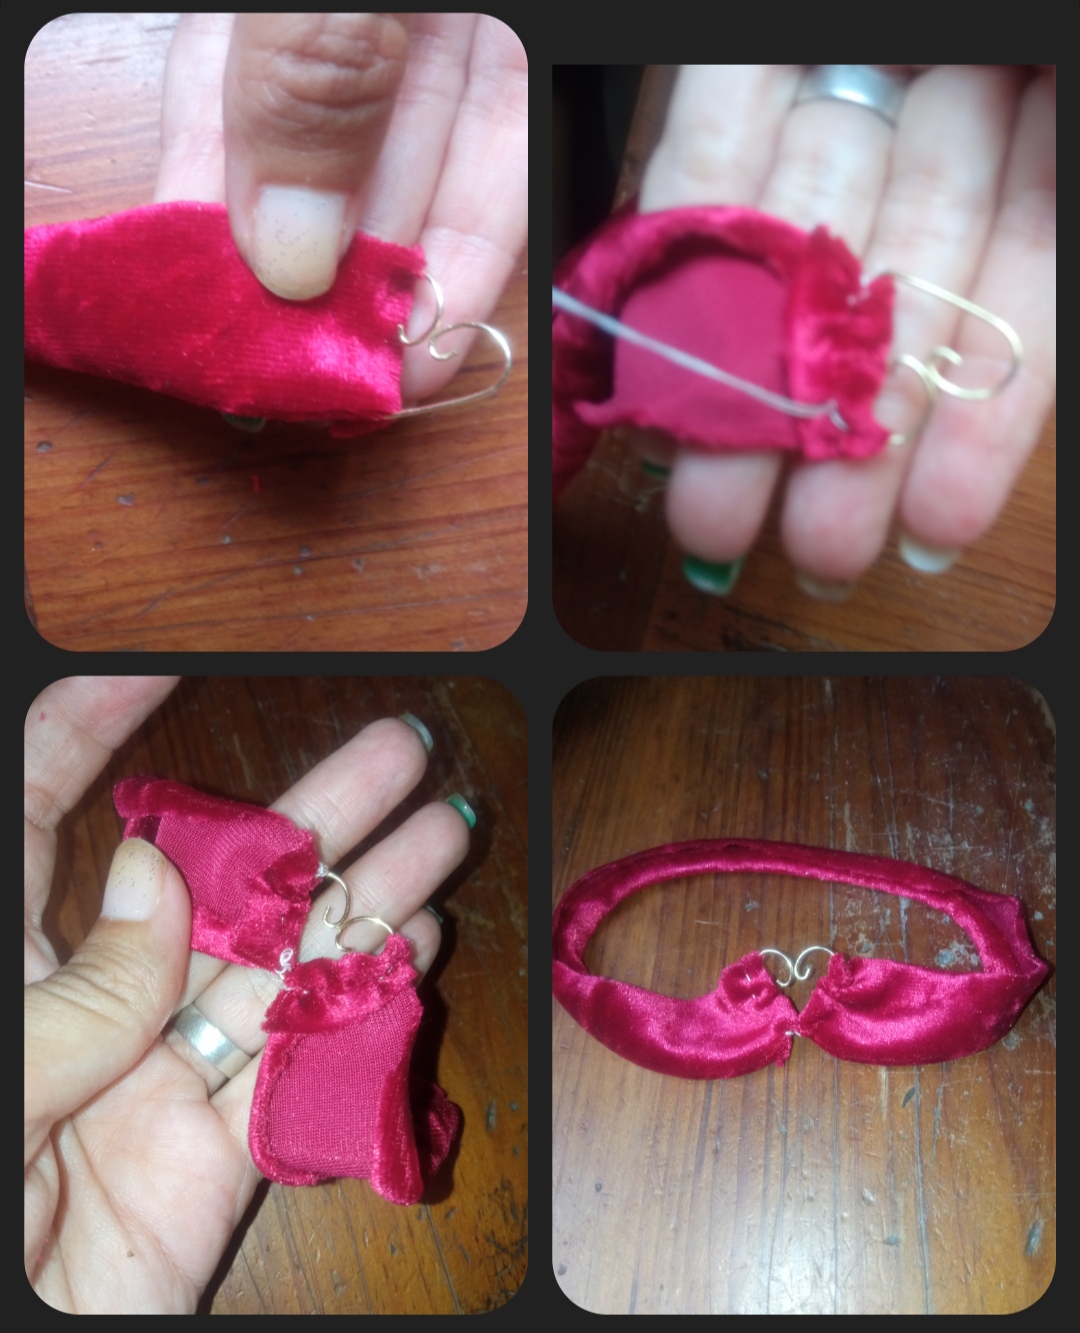
✴️ Paso 3: después tomaremos la pieza de corazón que elaboramos con alambre de bisutería e introduciremos una de las puntas de la tira de tela elástica por uno de los lados del corazón doblaremos la punta y uniremos con una pequeña costura por la parte posterior de la tela intentando que se viera lo menos posible por la parte frontal lo mismo elaboraremos del otro lado con la otra punta de la tela y nos quedará esta linda gargantilla que pueden observar.
✴️ Step 3: then we will take the piece of heart that we made with costume wire and we will introduce one of the ends of the strip of elastic fabric on one of the sides of the heart, we will fold the end and join with a small seam on the part back of the fabric, trying to make it as little visible as possible on the front, we will make the same on the other side with the other end of the fabric and we will have this beautiful necklace that you can see.
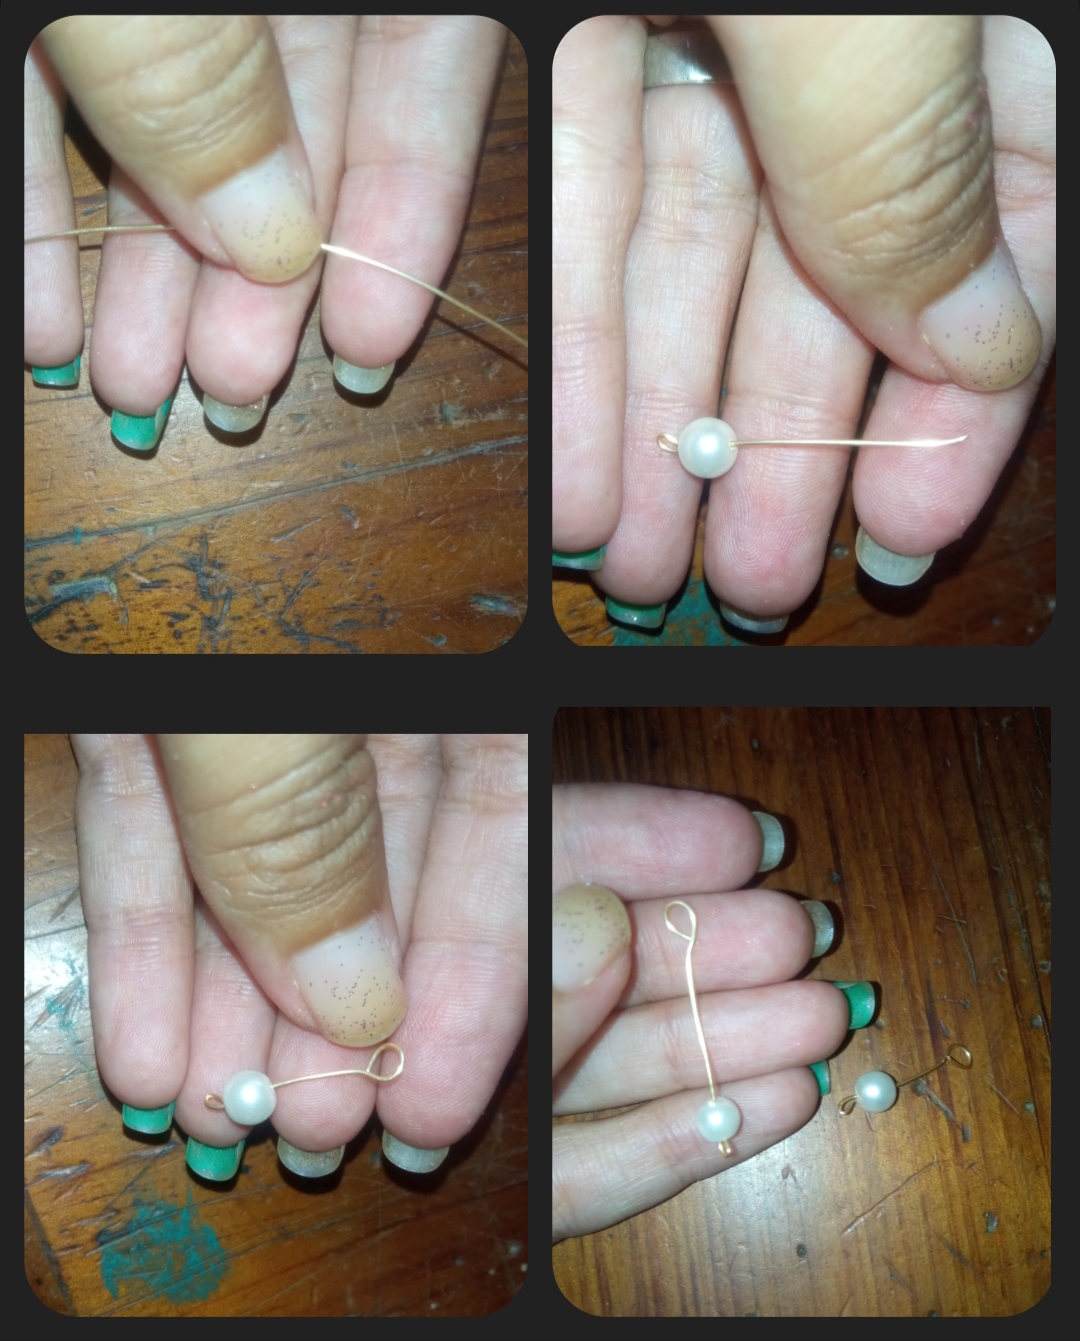
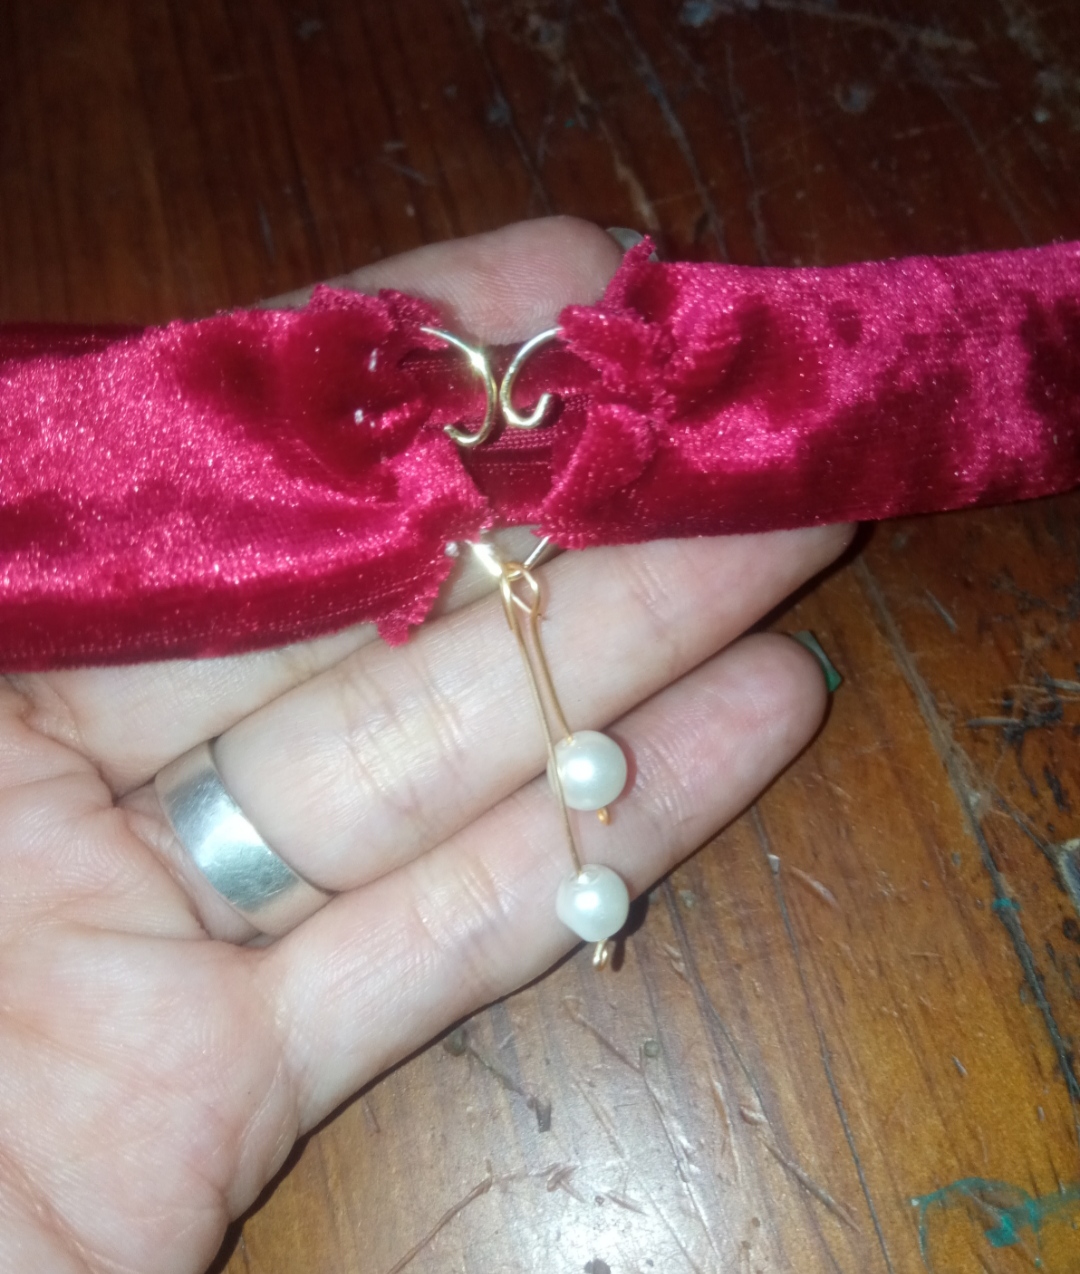
✴️ Paso 4: como último toque un toque especial tomé dos pedacitos de alambre de bisutería calibre 20 uno un poco más largo que otro tomé el primero de ellos doble una de sus puntas e introduje por el otro extremo una pequeña piedra perlada seguidamente realicé una forma circular en su otra punta lo mismo que le hice con la segunda pieza de alambre. Al tener ambas piezas listas las uní a mi hermosa gargantilla enganchándola en la punta de abajo de nuestro corazoncito y así le di este toque final y de elegancia a nuestra gargantilla.
✴️ Step 4: as a last touch, a special touch, I took two bits of 20 gauge jewelry wire, one a little longer than the other. I took the first one, doubled one of its ends and inserted a small pearl stone at the other end. I made a circular shape at its other end the same as I did with the second piece of wire.
Having both pieces ready, I attached them to my beautiful choker by hooking it to the bottom tip of our little heart and thus gave this final touch of elegance to our choker.
Todas las Fotos son de mi autoría y fueron tomadas con mi Celular Redmi 9And so my dear friends we will be able to make without much expense, my effort is an elegant necklace, very simple but very flirtatious that will not stand out wherever you go.
Dear friends I hope that this simple creation is to the liking of all of you and I hope this tutorial will be useful and I say goodbye for this opportunity, grateful for your visit.
Greetings and blessings.
All Photos are my authorship and were taken with my Redmi 9 Cellphone
It's super economical and super beautiful ❤️ in regard to the use of fabrics to make up the necklace and it's choker.
Es super económico y super bonito ❤️ en cuanto al uso de tejidos para confeccionar el collar y su gargantilla.
Este diseño está muy original. Me encanta!