Control and monitoring: Remote with LabView EN/ES
We have finally reached the final chapter of our "Monitoring" series and every final chapter usually has some excitement and suspense so this one took this part very seriously and has given me more work than any other project I have undertaken before (I will think twice before organizing a series into chapters).
But we finally have something functional after a few days of headache, so it's time to put an end to it and we will do it by creating the remote mode in LabView to be able to visualize our data on a PC.
Finalmente hemos llegado al capítulo final de nuestra serie "Monitoring" y todo capitulo final suele tener cierta emoción y suspenso así que este se tomó muy en serio esta parte y me ha dado mas trabajo que cualquier otro proyecto que haya emprendido antes (me lo pensare dos veces antes de organizar una serie en capítulos).
Pero finalmente tenemos algo funcional despues de unos dias de dolor de cabeza, así que ha llegado el momento de poner punto y fin y lo haremos creando el modo remoto en LabView para poder visualizar nuestros datos en un PC.

The first thing was to modify our program code to add the monitoring and remote control functions, if you have followed the sequence of this series you will remember that for remote data purposes we only sent the same thing we displayed on the LCD.
Now it has been necessary to send a coherent data string with a structure capable of being interpreted by a remote terminal (in this case labview). For this we send all the data: mode, sdv_status, adc and leds status in a single text string with the following format:
Lo primero era modificar nuestro código de programa para añadir las funciones de monitoreo y control remoto, si has seguido la secuencia de esta serie recordaras que para efectos de datos remotos solo enviábamos lo mismo que mostrabamos en la LCD.
Ahora ha sido necesario enviar una cadena de datos coherentes con una estructura capaz de ser interpretada por un terminal remoto (en este caso labview). Para ello enviamos todos los datos: mode, sdv_status, adc y estados de los leds en una sola cadena de texto con el siguiente formato:
      printf("%s,%s,%lu,%u,%u,%u,\r\n", mode, sdv_status, adc_value, closed_ind, opened_ind, error_ind);

      delay_ms(200);
The comma has been placed intentionally because it is the signal that we will use in the receiver (labview) to separate the data.
I also added the lines that can interpret external open and close commands, in which case only the state of the variables open_signal and close_signal is modified, this is chained to the rest of the code that we saw in the previous article to perform the corresponding tasks.
La coma se ha colocado de forma intencional porque es la señal que usaremos en el receptor (labview) para separar los datos.
Además añadí las líneas que puedan interpretar comandos externos de open y close, en cuyo caso solo se modifica el estado de las variables open_signal y close_signal, esto se encadena al resto del codigo que vimos en el articulo anterior para realizar las tareas correspondientes.
if(mode == "REMOTE")

          {

          if(kbhit() > 0)

           {

            read_string_until('*', string, 20);

            if (!strcmp(string, "100"))

             {

              estop = 1;

              mode = "STOP";

              output_low(PIN_C0);

              close_signal = 1;

             }

            if(!strcmp(string, "010"))

            {

            open_signal = 1;

            }

            if(!strcmp(string, "001"))

            {

             close_signal = 1;

            }

             delay_ms(200);

          }

       }
By adding these lines to our program we already have the microcontroller capable of transmitting and receiving data in a format that can be interpreted by another device. Now let's create the interface in Labview.
Añadiendo esas líneas a nuestro programa ya tenemos el microcontrolador en capacidad para transmitir y recibir datos en un formato que puede ser interpretado por otro dispositivo. Ahora vamos a crear la interfaz en Labview.
Creating the LabView interface |
|---|
The data management in LabView will be divided in two stages, in the first one we will configure the data reception, we will separate each one of them and we will show them in indicators that we will place in the front panel.
With the NI Visa modules we establish the serial configuration and open the port.
El manejo de datos en LabView lo vamos a dividir en dos etapas, en la primera vamos a configurar la recepción de datos, separaremos cada uno de ellos y los mostraremos en indicadores que colocaremos en el panel frontal.
Con los módulos de NI Visa establecemos la configuración serial y abrimos el puerto.

Now we create a while loop with 275ms delay and place the block to read the serial data coming from the microcontroller, in turn we create a structure to separate the data using the comma as separation indicator.
Ahora creamos un bucle while con 275ms de retardo y colocamos el bloque para leer los datos serial que vienen desde el microcontrolador, a su vez creamos una estructura para separar los datos usando la coma como indicador de separación.

The data will come out as an array and we will use an array separator to get each data separately, in turn we will place a gauge for each one to see the data on the front panel, also for the ADC we will place a gauge to give an animated visual to our analog variable, for the leds we will evaluate a condition and depending if it is false or true they will be shown on or not. Finally we close the port out of the while loop.
Los datos saldrán en forma de arreglo y usaremos un separador de arreglos para poder obtener cada dato por separado, a su vez vamos a colocar un indicador para cada para ver los datos en el panel frontal, también para el ADC colocaremos un gauge para dar una visual animada a nuestra variable analogica, para los leds evaluaremos una condición y dependiendo si da falso o verdadero se mostrarán encendidos o no. Finalmente cerramos el puerto fuera del bucle while.

For writing data is much simpler, we will place the buttons and then convert the data from boolean to numeric and finally convert it to string. Then these data are grouped into a single string with the concatenation block and we place a * to represent the end of the string and the microprocessor can process the data without errors.
Para la escritura de datos es mucho mas sencillo, colocaremos los botones y luego convertimos los datos de booleanos a numéricos para finalmente convertirlos en string. Luego estos datos se agrupan en una sola cadena con el bloque de concatenación y colocamos un * para que represente el fin de la cadena y el microprocesador pueda procesar los datos sin errores.

Our LabView program would look like this:
Nuestro programa en LabView tendría la siguiente forma:

And on our front panel we would have the buttons and indicators to monitor the process from the PC.
Y en nuestro panel frontal tendríamos los botones e indicadores para monitorear el proceso desde el PC.

Testing phase |
|---|
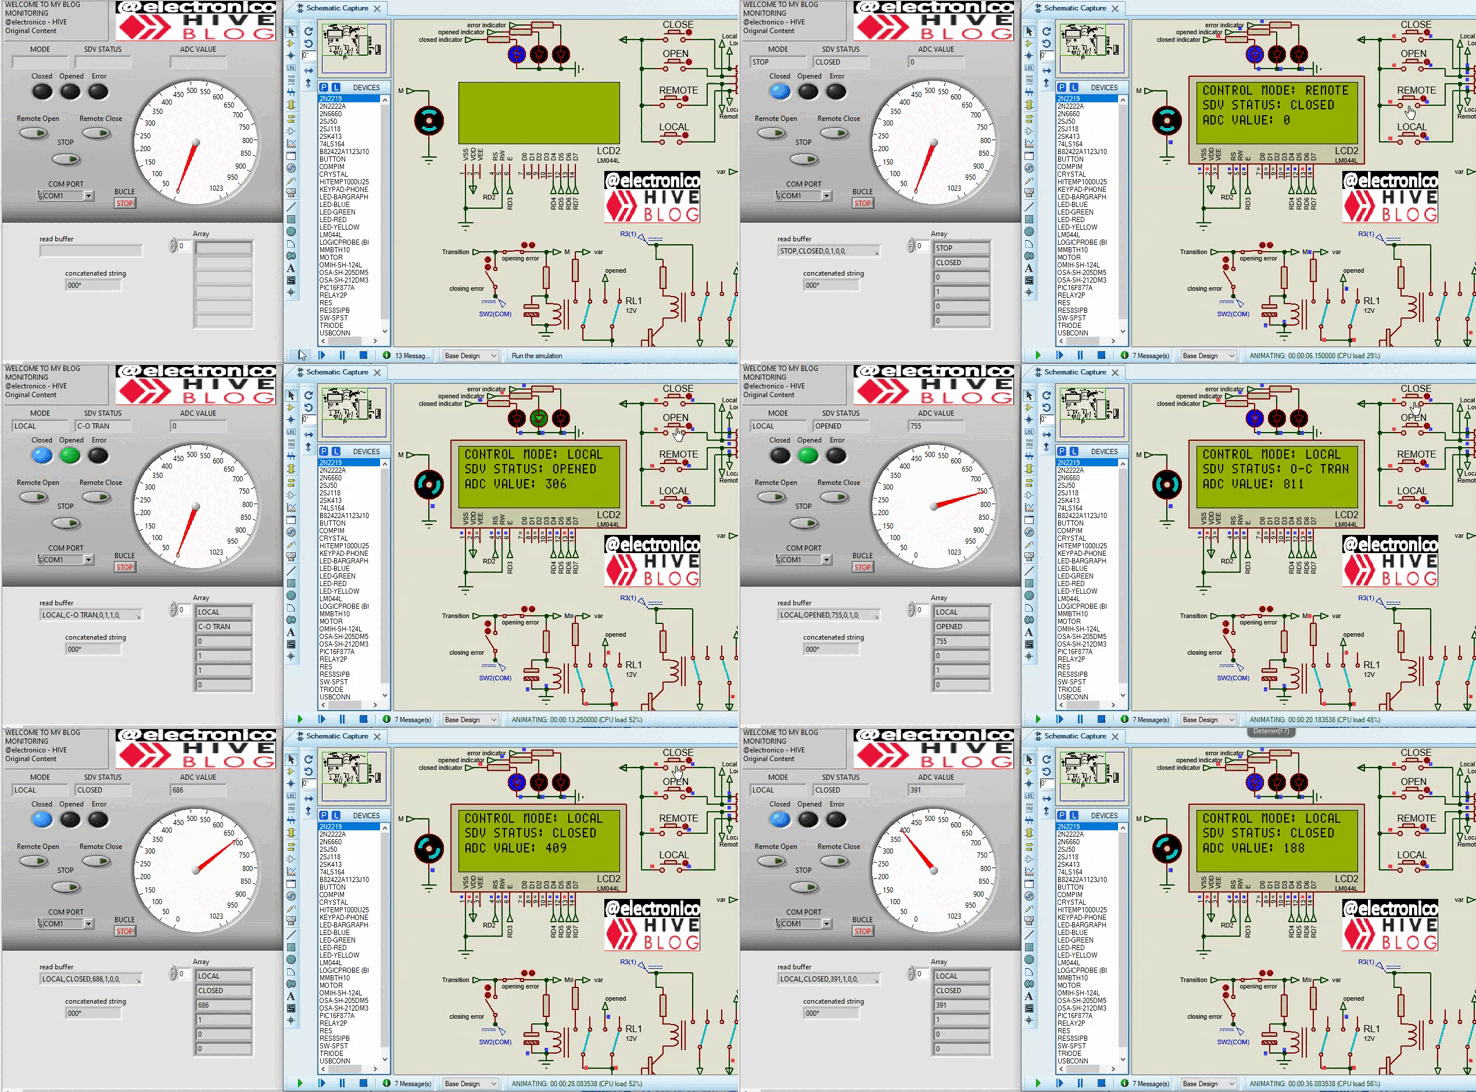
The first test will be to perform the opening and closing by comparing the LCD values with our Labview interface, it is possible to notice some signal delay and/or flickering because I am running two powerful simulators and my PC suffers a bit.
La primera prueba será realizar la apertura y cierre comparando los valores del LCD con nuestra interfaz de Labview, es posible notar cierto retardo en la señal y/o parpadeos debido a que estoy corriendo dos simuladores potentes y mi PC sufre un poco.
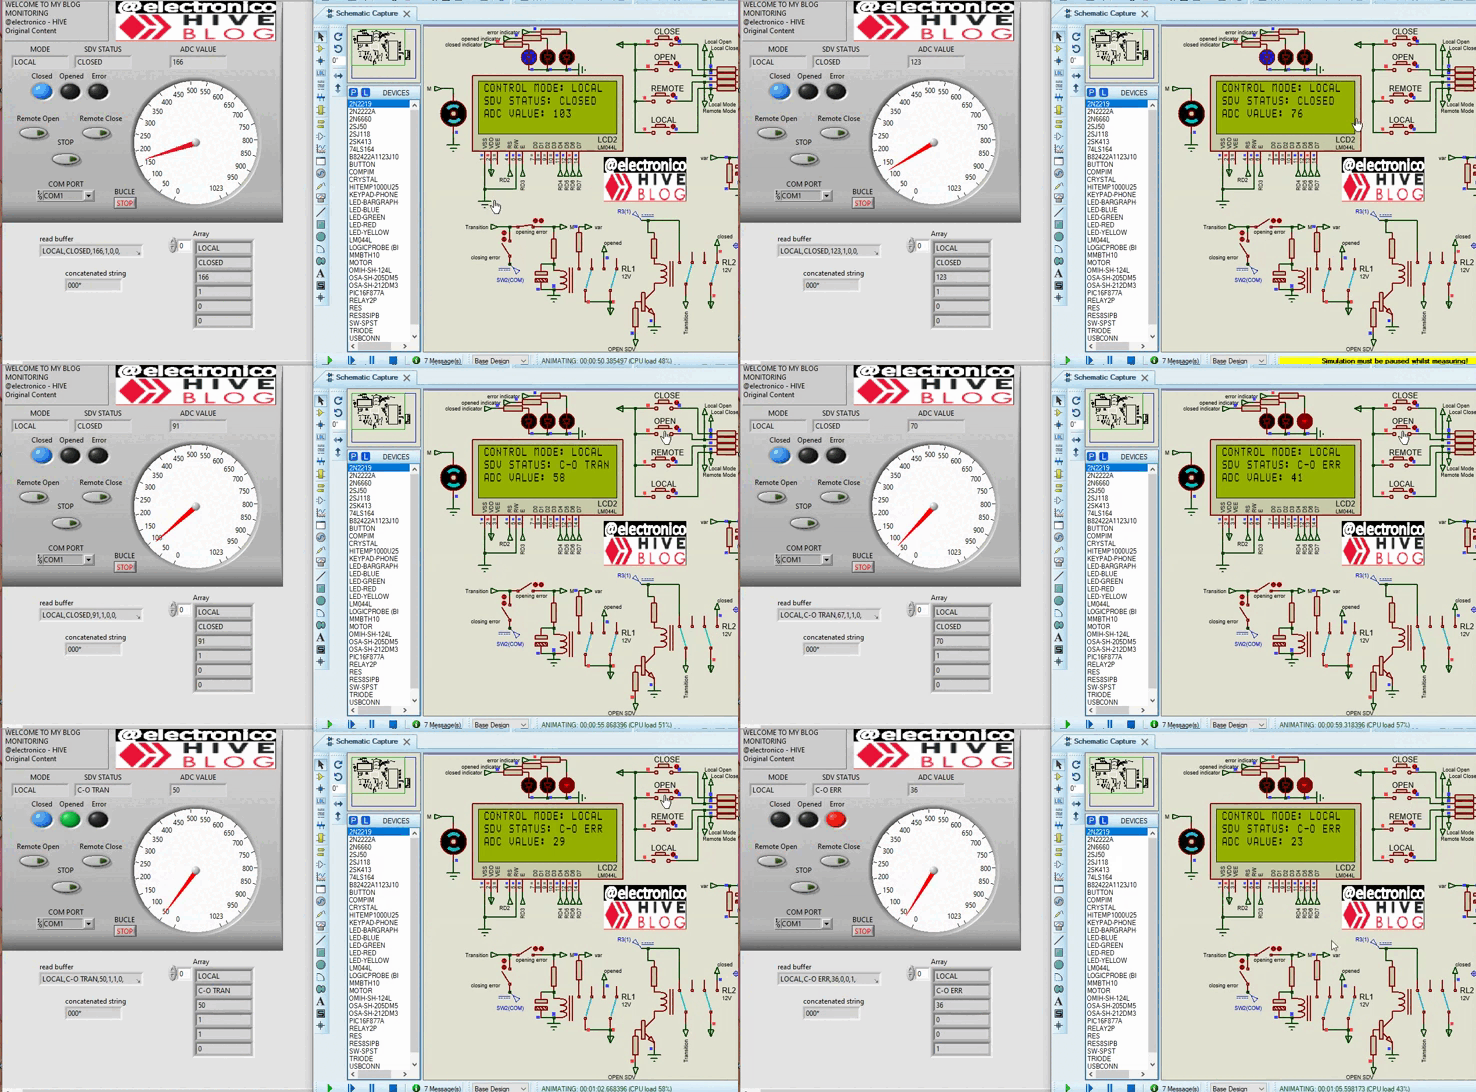
Now we are going to use the error switch to generate the opening error (C-O) and evaluate if the interface is able to detect it:
Ahora vamos a usar el interruptor de error para generar el error de apertura (C-O) y evaluar si la interfaz es capaz de detectarlo:
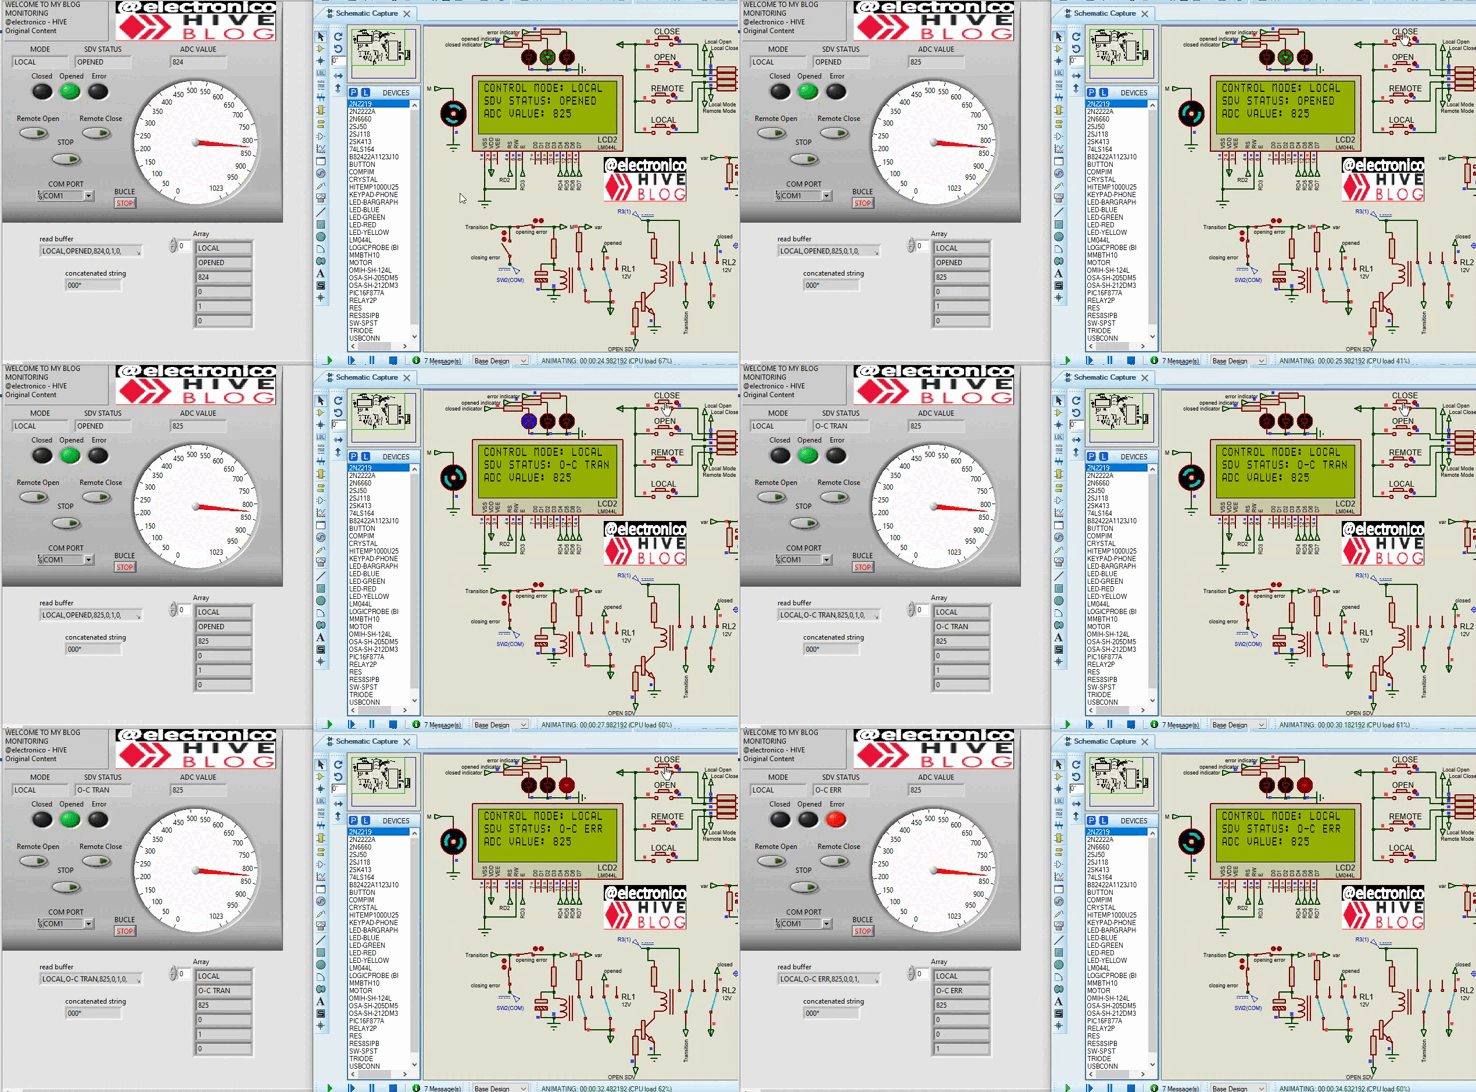
We are going to perform the same test with the closing error (O-C) by sending the close command but we close the error switch to force feed the SDV.
Vamos a realizar la misma prueba con el error de cierre (O-C) al enviar el comando de cierre pero cerramos el interruptor de error para alimentar la SDV de forma forzada.
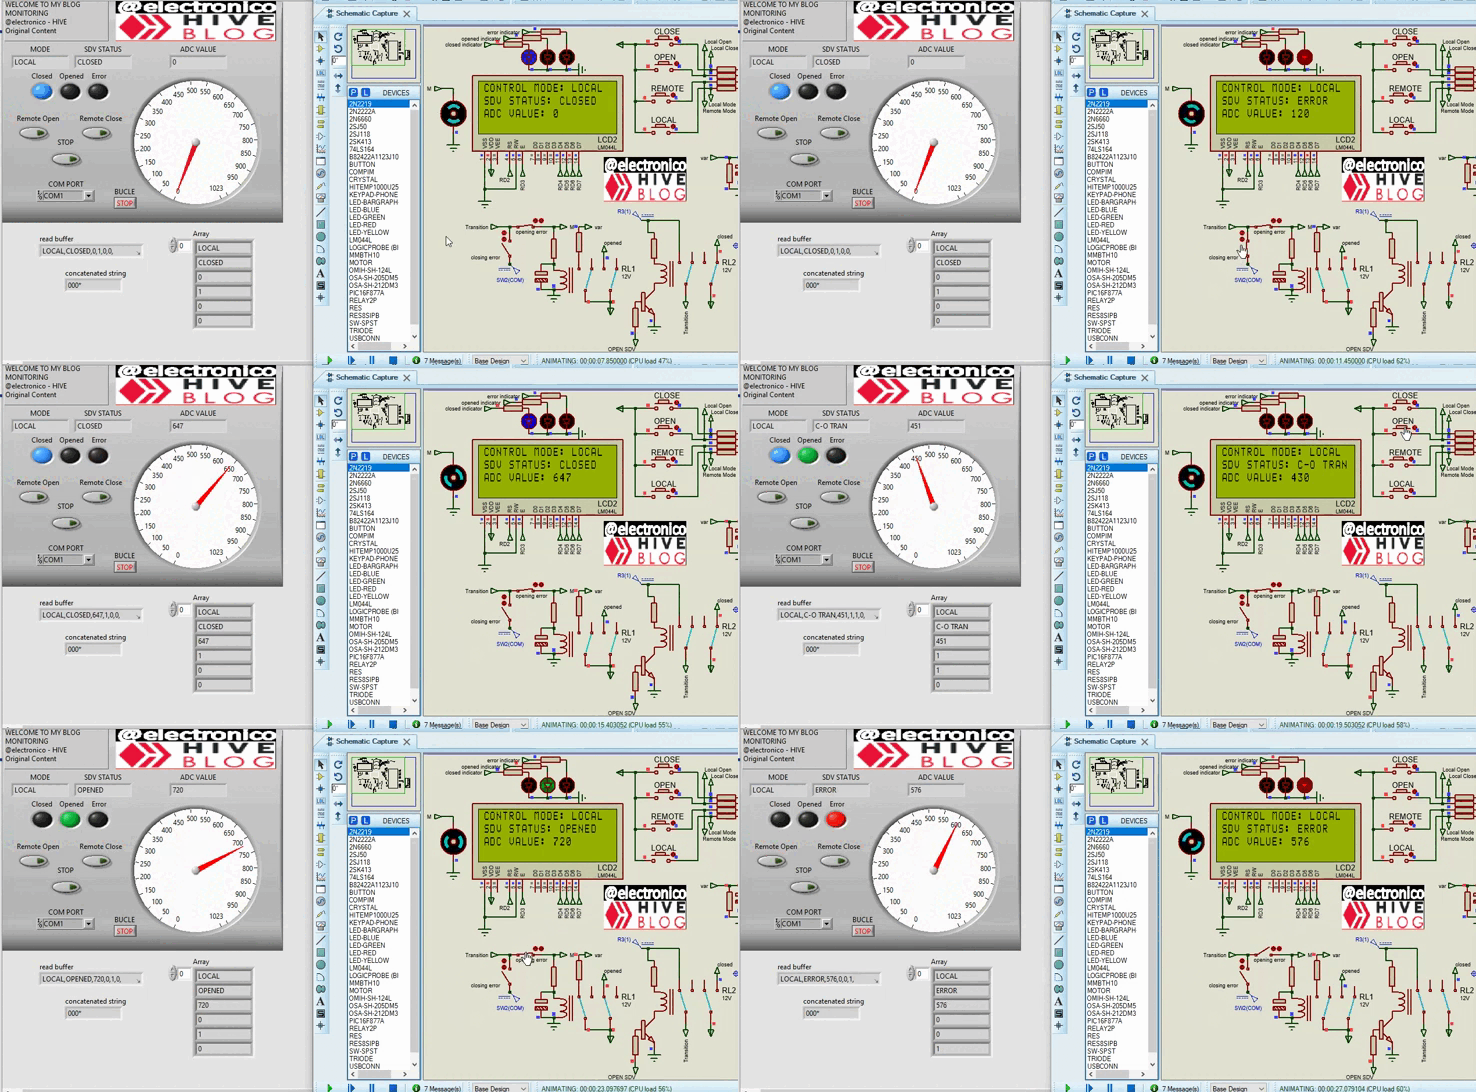
For our last test we are going to use the error switches to force the SDV to open and close without any commands having been received, in this case the sdv_status should indicate ERROR.
Para nuestra última prueba vamos a usar los interruptores de error para forzar a que la SDV abra y cierre sin que se hayan recibido comandos, en este caso la sdv_status debe indicar ERROR.
And so ends our series after 4 articles that gave me work but that I definitely enjoyed a lot while developing, I thank you very much for joining me during my journey.
Y así termina nuestra serie luego de 4 artículos que me dieron trabajo pero que definitivamente disfruté mucho mientras desarrollaba, te agradezco mucho por acompañarme durante mi travesía.


Congratulations @electronico! You have completed the following achievement on the Hive blockchain And have been rewarded with New badge(s)
Your next target is to reach 150 posts.
You can view your badges on your board and compare yourself to others in the Ranking
If you no longer want to receive notifications, reply to this comment with the word
STOPTo support your work, I also upvoted your post!
Thanks! my firts 100! oh yeah!!

The first one is often the best one! 😜
Yay! 🤗
Your content has been boosted with Ecency Points, by @electronico.
Use Ecency daily to boost your growth on platform!
Support Ecency
Vote for new Proposal
Delegate HP and earn more
Thanks for your contribution to the STEMsocial community. Feel free to join us on discord to get to know the rest of us!
Please consider delegating to the @stemsocial account (85% of the curation rewards are returned).
You may also include @stemsocial as a beneficiary of the rewards of this post to get a stronger support.