My first handmade scrunchies - step by step

Hola amigos de Hive❤️
Les doy la bienvenida a mi blog y feliz día para todos!
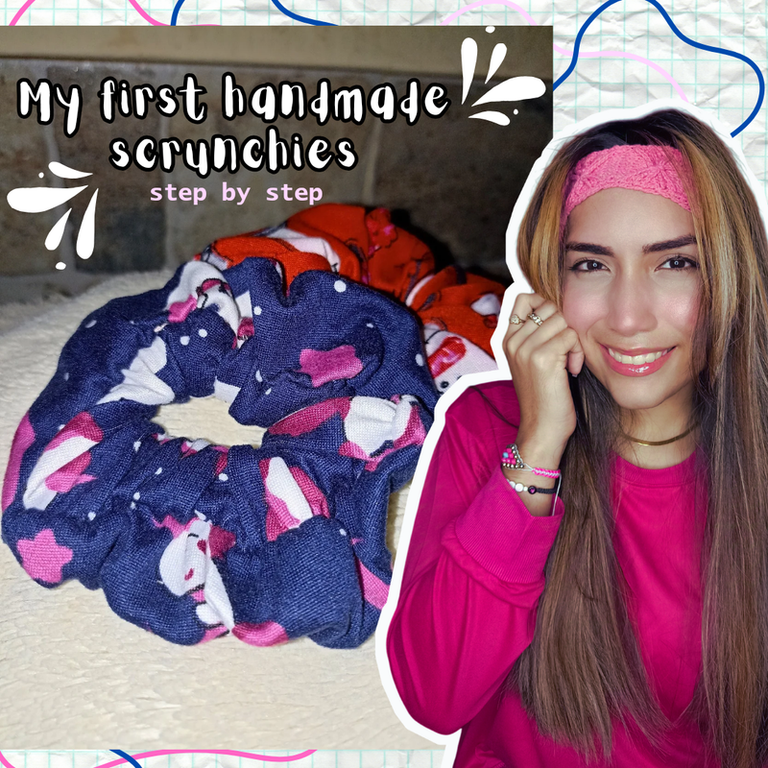
En esta oportunidad me encuentro en esta linda comunidad para compartirles un nuevo y hermoso proyecto de costura, esta vez uno súper sencillo y hecho a mano.. aunque si lo deseas lo puedes hacer de una forma más práctica y rápido en la máquina. Le hablo de unas croquetas coletas o colas para el cabello también conocidas como scrunchies. Estas que les comparto son mis primeras piezas y una vez hice la primera ya no quise parar de hacer muchas más. 🥰
Así que en un sencillo paso a paso les muestro un poco lo que fue mi proceso de creación, para lucir, vender o regalar en estas próximas fechas, espero les guste!!
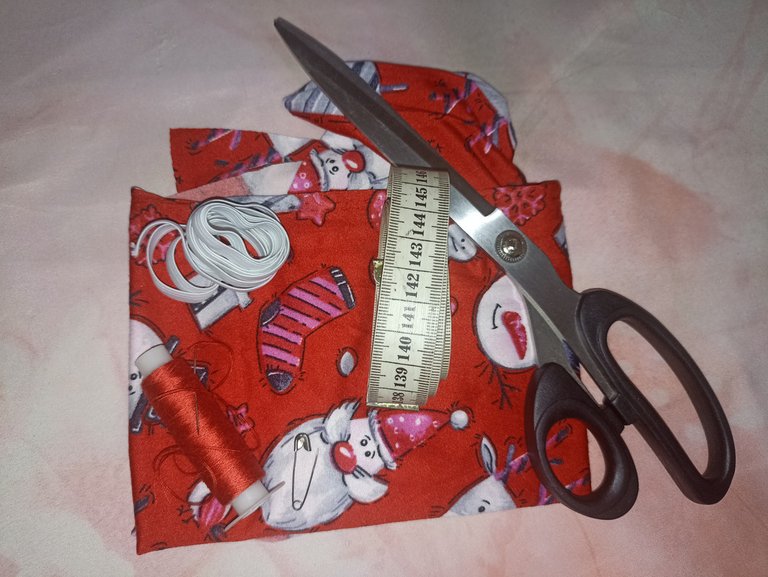
Materiales:
- Rectángulo de tela de 10x45cm
- Hilo color rojo de tu preferencia
- Alfileres
- Aguja
- Tijera
- Regla o cinta métrica
- Prendedor
- Elástica 18cm aprox

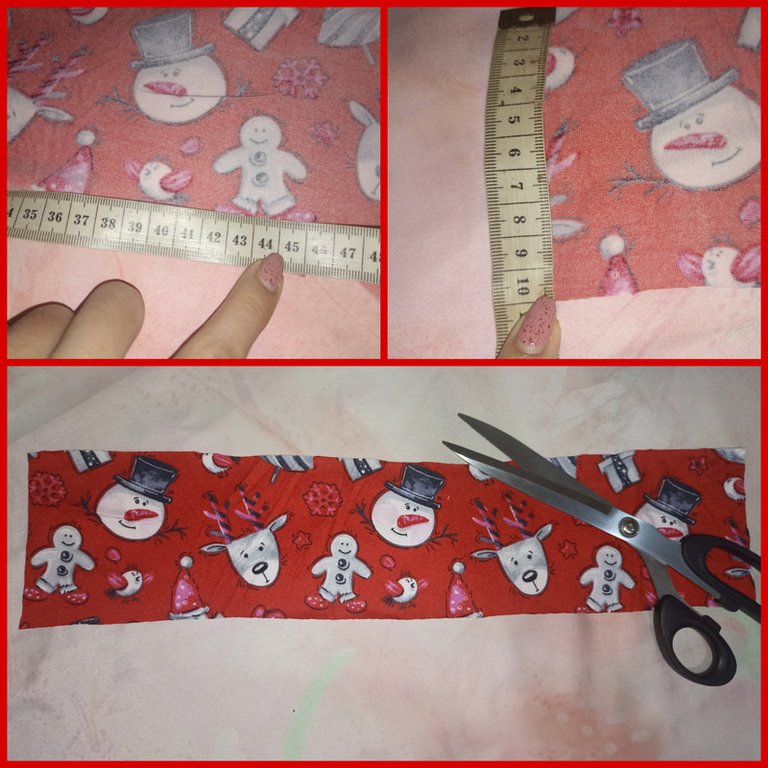
Lo primero que vamos hacer es medir una tira de 20 cm por 45 cm en la tela que deseamos, yo escogí un estampado muy lindo navideño y de unicornio porque será para una niña. Hecho esto lo sujetamos con alfileres y cortamos.

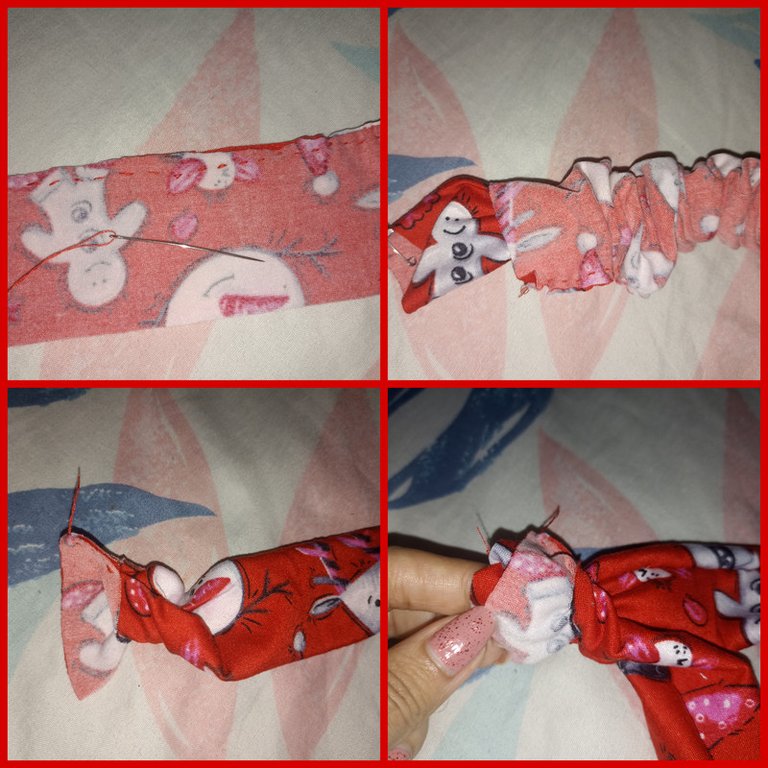
Luego con aguja e hilo vamos a coser todo el borde en forma de basta pero que sea lo más corta que podamos, si es posible hacemos una costura en reversa para reforzarla, cosemos todo y dejamos un segmento sin coser, y seguimos gaata llegar al final de la tira. Luego volteamos por el revés esa tira con ayuda de los dedos, pero sin llegar al final, y luego el otro extremo lo pasamos por el segmento que no cosimos y juntamos ambos extremos y lo cosemos, tratando de coincidir ambas costuras.

Ahora vamos a cortar una tira de elástico de 18 aprox, lo pasamos por la tira de tela con ayuda de un prendedor hasta dar toda la vuelta y cuando juntemos ambos extremos hacemos un nudo y cortamos el excedente. Y ya quedaría cerrar ese segmento que dejamos al principio sin coser.

Y así nos quedaría lista!! 🤗❤️..lucir nuestras prendas o accesorios y verlas puestas en alguien más es lo más satisfactorio que hay en este arte...los invito animarse y probar crear sus propias proyectos o emprender en ello!!🥰🎄🎁
Espero les haya gustado y pronto compartirles más contenido como éste...🤗, con esto me despido y nos vemos en una próxima oportunidad!! ✨♥️

Hello friends of Hive❤️
I welcome you to my blog and happy day to all!
This time I am in this beautiful community to share with you a new and beautiful sewing project, this time a super simple and handmade one... although if you want you can do it in a more practical and fast way in the machine. I'm talking about some crochet ponytails also known as scrunchies. These that I share with you are my first pieces and once I made the first one I didn't want to stop making many more. So in a simple step by step I
show you a little bit of my creation process, to show off, sell or give as a gift in these upcoming dates, I hope you like it!
Materials:
- Rectangle of fabric 10x45cm
- Red thread of your choice
- Pins
- Needle
- Scissors
- Ruler or tape measure
- Pin
- Elastic approx. 18cm - Elastic band 18cm
The first thing we are going to do is to measure a strip of 20 cm by 45 cm in the fabric we want, I chose a very nice Christmas and unicorn print because it will be for a little girl. Once this is done, we pin it and cut it.
Then with needle and thread we are going to sew all the edge in a coarse shape but as short as we can, if possible we make a reverse seam to reinforce it, we sew everything and leave a segment without sewing, and we continue sewing until we reach the end of the strip. Then we turn the strip inside out with the help of our fingers, but without reaching the end, and then we pass the other end through the segment that we did not sew and join both ends and sew it, trying to match both seams.
Now we are going to cut a strip of elastic about 18 cm long, we pass it through the strip of fabric with the help of a pin until it goes all the way around and when we join both ends we tie a knot and cut the excess. And now we have to close the segment that we left at the beginning without sewing.
And so we would be ready! 🤗❤️...to wear our garments or accessories and see them on someone else is the most satisfying thing in this art...I invite you to encourage and try to create your own projects or undertake it!!!🥰🎄🎁 ✨♥️
I hope you liked it and soon I will share with you more content like this...🤗, with this I say goodbye and see you next time!! ✨♥️

Todo el contenido es de mi autoría y las imágenes son de mi propiedad
Cámara: Redmi note 10s
All content is my own and images are my property
Camera: Redmi note 10s

Edición y Separador|Editing and Separator
App PicMonkey - App Picsart - App Canva
Traductor|Translator
DeepL


Your work is just so perfect and it doesn't look as if it your first time.
You did a great job.
Las scrunchies son un clásico que nunca pasa de moda, son super practicas y lindas. Gracias por compartir.
Son tan hermosas y cuchis..y tan faciles de hacer 🤭🥰..me alegro que te gustara!! Saluditos
It's beautiful and will be useful for parking our hair.