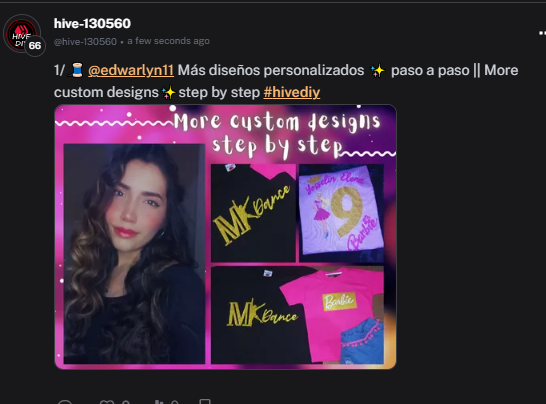
Más diseños personalizados ✨ paso a paso || More custom designs✨step by step [ESP/ENG]
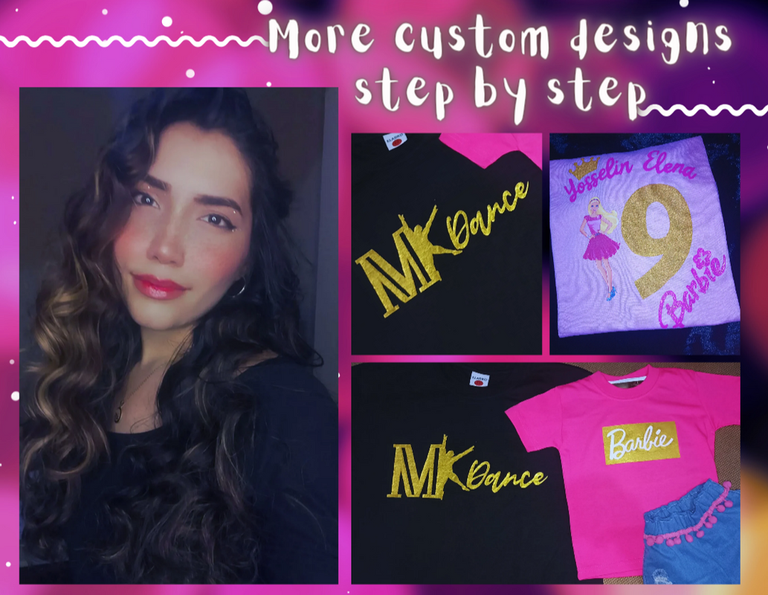


Hola amigos de Hive ❤️ el día de hoy inicio de semana, les quiero mostrar un poco lo que fueron mis últimos trabajo diseñando y pintando ropa, las últimas de ellas fueron personalizadas, y de esas precisamente son de las que les hablaré y también les compartiré mi paso a paso para hacerlas y así te sirva de guía si te animas hacerlas también.
De todos los encargos que me han hecho, tengo que decir que los personalizados son mis favoritos... quizás porque tienen un valor especial y sería una pieza única la que estoy creando, la mayoría de ellas destinadas a un regalo.
En estos dos proyectos hay dos historias detrás, la primera que es para mi amiga, como le encanta el baile y estar en ese mundo deportivo, me pidió hacerle una camisa con el logo del gym, y por petición de ella que el diseño quedara por mi cuenta, use un color que creo queda perfecto en telas oscuras y sobre todo reflejara mucha personalidad. El segundo fue mucho más especial, ya que era para una niña que cumplí años, y su tía la quería sorprender con su motivo especial de Barbie. Las instrucciones fueron bastantes claras y específicas así que a la hora de armar el diseño fue muy fácil. Cómo les muestro, cuando hago un diseño personalizado me gusta primero hacer una especie de boceto en una aplicación y luego pasarlo a una hoja del tamaño deseado para calcar y luego pintar. En éste diseño también usa para calcomanías o stickers de calor que creo dan un toque más especial, profesional con un acabado de tienda que como cliente se agradece.
Ahora ya sin mas los dejo con el proyecto y mi proceso en un mini collage, esperando que les guste y se animen a crear y diseñar sus propias prendas.


- Camisa básica (negro, rosado)
- Pinturas acrílicas o para tela
- Pinceles
- Stickers para tela
- Patrón del diseño


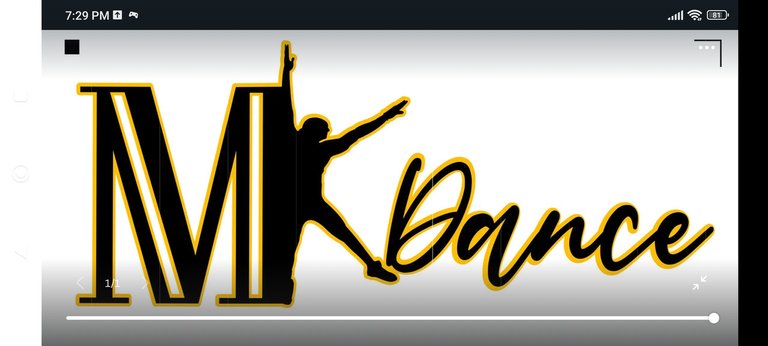
Con la primera camisa trabaje con pintura dorada metalizada, como les dije a petición de mi amiga, ella quería una camisa negra, y viendo el sisal de me ocurrió combinarlo con éste hermoso color. Cuando dibujo sobre telas de fondo oscuro me gusta aplicar una base en color blanco para que color original no necesite tantas capas. Una vez pinte la primera parte en blanco, ayudándome con un pincel liner y uno más plano, espere que sacara y empecé aplicar el dorado, solo necesite 1 capa y ya quedó lista, solo quedaría planchar para entregar!!


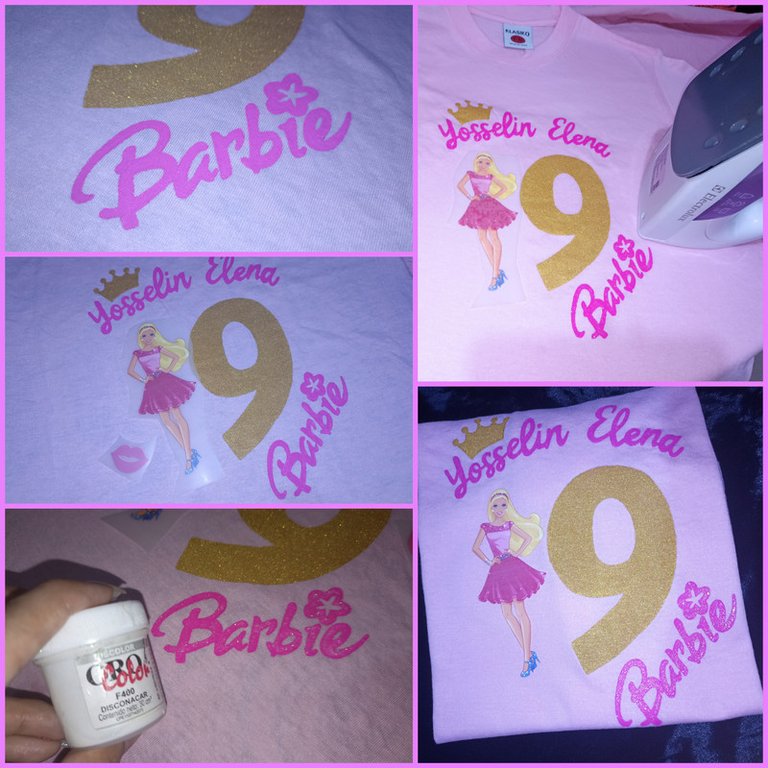
En esta segunda camisa prácticamente trabaje con los colores característicos de Barbie ya que la temática de la fiesta de la niña era esa, así que primero use color fucsia para las letras con su nombre, ya que creo que con la base de la camisa combinaría muy bien. Luego use la misma pintura dorada en el diseño anterior, también use una pintura que tiene un efecto escarchado (glitter) que es como una pega transparente que una vez seca queda todo escarchado, este producto se llama "disconacar", y se lo aplique a las letras en color fucsia para hacer más llamativa la camisa. Por último deje los stickers, que se activan con calor, para ello solo debes planchar por unos minutos directamente en la posición que deseas y retiras el vinil y listo!! Ya nos quedaría terminada.

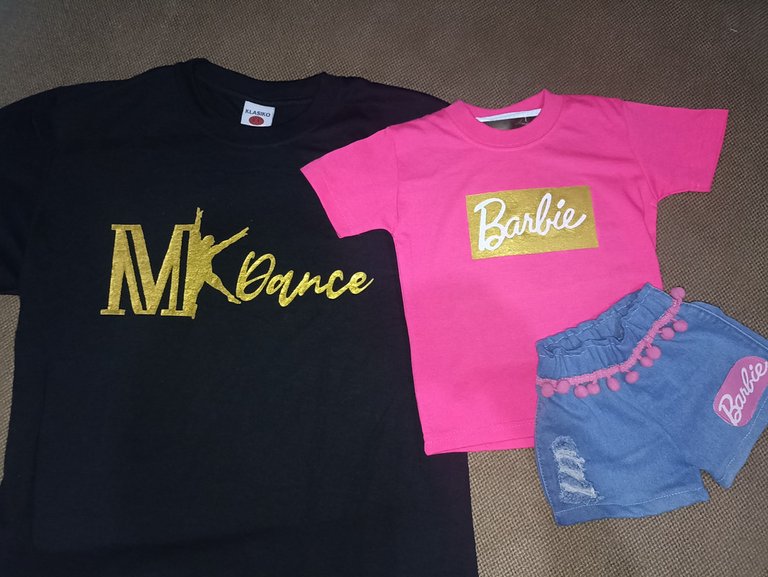
Como se los prometí, aquí les muestro el trabajo terminado de ambas piezas y también una extra que hice para una bebé 💖🤗, lo mejor que todo hecho con un lindo diseño por nosotros mismos que más gratificación nos da!...espero compartirles muy pronto nuevos trabajos como este que vaya creando, con mucho cariño me despido y será hasta la próxima!!💕


Hello friends of Hive ❤️ today at the beginning of the week, I want to show you a little of my latest work designing and painting clothes, the last of them were personalized, and those are precisely the ones I will talk about and I will also share my step by step to make them so you can use it as a guide if you want to make them too.
Of all the orders I've received, I have to say that the personalized ones are my favorites... maybe because they have a special value and it would be a unique piece that I'm creating, most of them destined for a gift.
In these two projects there are two stories behind, the first one is for my friend, as she loves dancing and being in the sports world, she asked me to make a shirt with the logo of the gym, and at her request that the design was on my own, I used a color that I think is perfect in dark fabrics and above all reflect a lot of personality. The second one was much more special, as it was for a little girl who had a birthday, and her aunt wanted to surprise her with her special Barbie motif. The instructions were very clear and specific so when it came to putting the design together it was very easy. As I show you, when I do a custom design I like to first make a kind of sketch on an app and then transfer it to a sheet of the desired size to trace and then paint. In this design I also use for decals or heat stickers that I think give a more special touch, professional with a store finish that as a customer is appreciated.
Now without further ado I leave you with the project and my process in a mini collage, hoping you like it and encourage you to create and design your own garments.


- Basic shirt (black, pink)
- Acrylic or fabric paints
- Brushes
- Fabric stickers
- Pattern of the design


With the first shirt I worked with metallic gold paint, as I told you at the request of my friend, she wanted a black shirt, and seeing the sisal I thought of combining it with this beautiful color. When I draw on dark background fabrics I like to apply a white base so that the original color does not need so many layers. Once I painted the first part in white, helping me with a liner brush and a flatter one, I waited for her to take it out and started applying the gold, I only needed 1 layer and it was ready, I only had to iron it to deliver it!


In this second shirt I practically worked with the characteristic colors of Barbie since the theme of the girl's party was that, so first I used fuchsia color for the letters with her name, since I think that with the base of the shirt would combine very well. Then I used the same gold paint in the previous design, I also used a paint that has a frosted effect (glitter) which is like a transparent glue that once dry is all frosted, this product is called "disconacar", and I applied it to the letters in fuchsia to make the shirt more striking. Finally leave the stickers, which are activated with heat, for this you just have to iron for a few minutes directly in the position you want and remove the vinyl and ready! And we would be finished.


As I promised, here I show you the finished work of both pieces and also an extra one I made for a baby 💖🤗, the best thing that all done with a nice design by ourselves that gives us more gratification!...I hope to share very soon new works like this that I create, with much affection I say goodbye and will be until next time!


Todo el contenido es de mi autoría y las imágenes son de mi propiedad
Cámara: Redmi note 10s
Uso un aro de luz LED como base para mi teléfono y tomarme las fotos
All content is my own and images are my property
Camera: Redmi note 10s
I use an LED light ring as a base for my phone to take pictures of myself

Edición y Separador|Editing and Separator
App PicMonkey - App Picsart - App Canva
Traductor|Translator
DeepL


Those are lovely designs for the shirts and wears. Makes them look more personalized too.
I love custom designs. Thank u for your support !!
@edwarlyn11
https://leofinance.io/threads/view/hive-130560/re-leothreads-agw7jfd9
https://twitter.com/hivediy47901/status/1709039132222050399
Los diseños lucen muy bien, al ser de un solo color resaltan muy bien tanto el diseño sobre el fondo unicolor de la prenda.