Gift Bags Made with Magazine Paper//Bolsas para Regalar Elaboradas con Papel de Revistas
Greetings friends hivers, receive a warm greeting.
Today I share with you again and I bring you a project made with reused materials, some gift bags made with magazine sheets. I really enjoy the work done with magazine sheets because each one is different and gives a variety of shades of colors that make any work done is unique and that's something I like.
In other opportunities I have already shared in my blog some works made with magazines, I think it is a good resource to work crafts and achieve a variety of decorative and even utilitarian items for the home.
In the case of these gift bags are a good choice for gifts, even if it is a candy, as they have a delicate touch and are a nice detail, they are easy to make, do not require many materials and are unique. It is a matter of letting your creativity fly, use the materials in different ways and give a personal touch to each detail made with love and above all enjoy the process of creating.

Materials:
- Magazine sheets.
- White glue
- Scissors
- Ruler
- Silicone gun
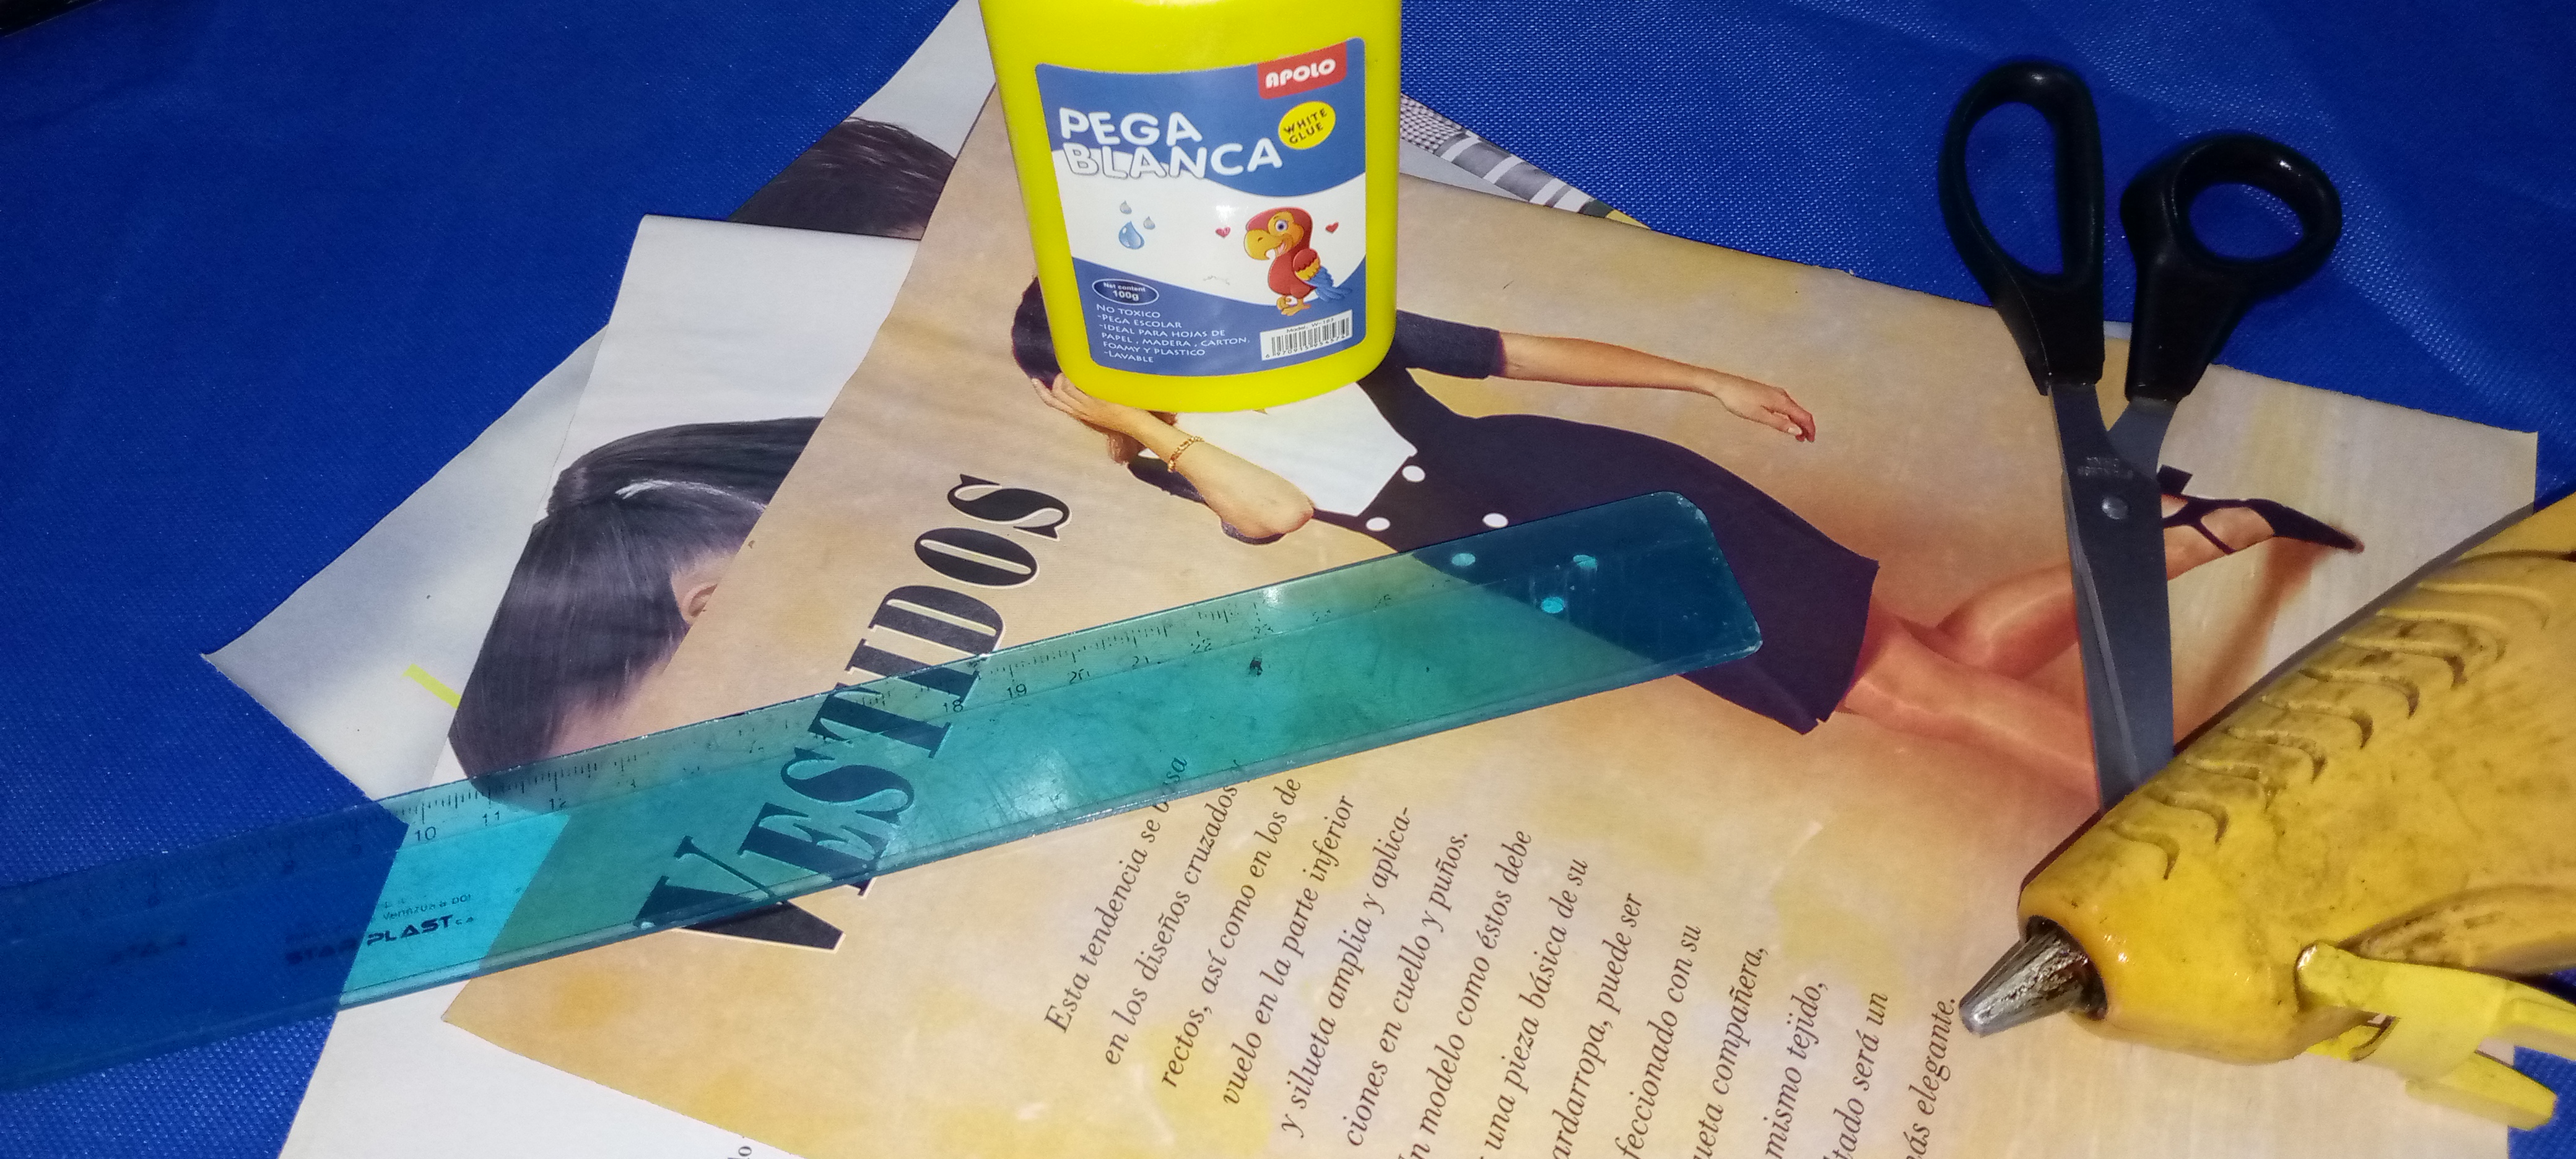
Step by step elaboration
Step 1.
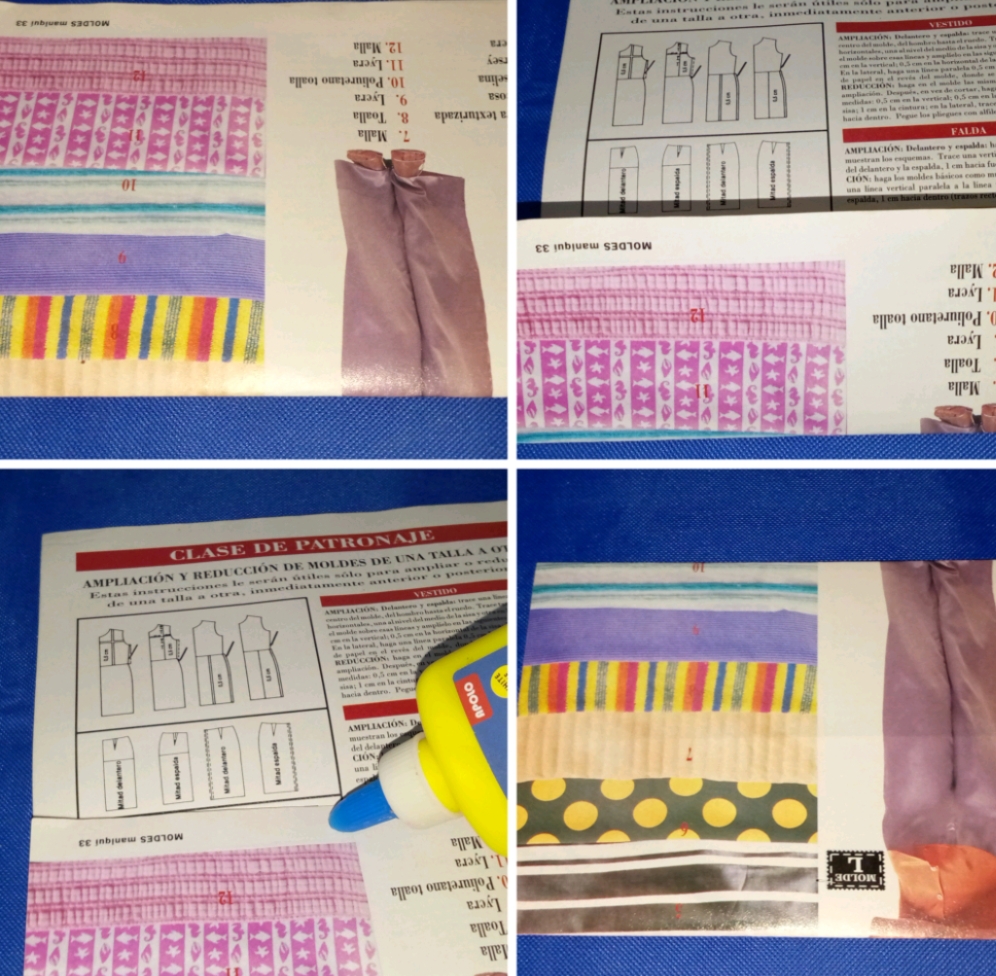
To make these bags I used magazine sheets, in this case they are 27 cm long by 20 cm wide, that is the size of the magazine. It is not really relevant since we can work with any size and simply adjust.
To make the bag I took a sheet of magazine and folded it in half vertically, then I joined the ends in the middle.
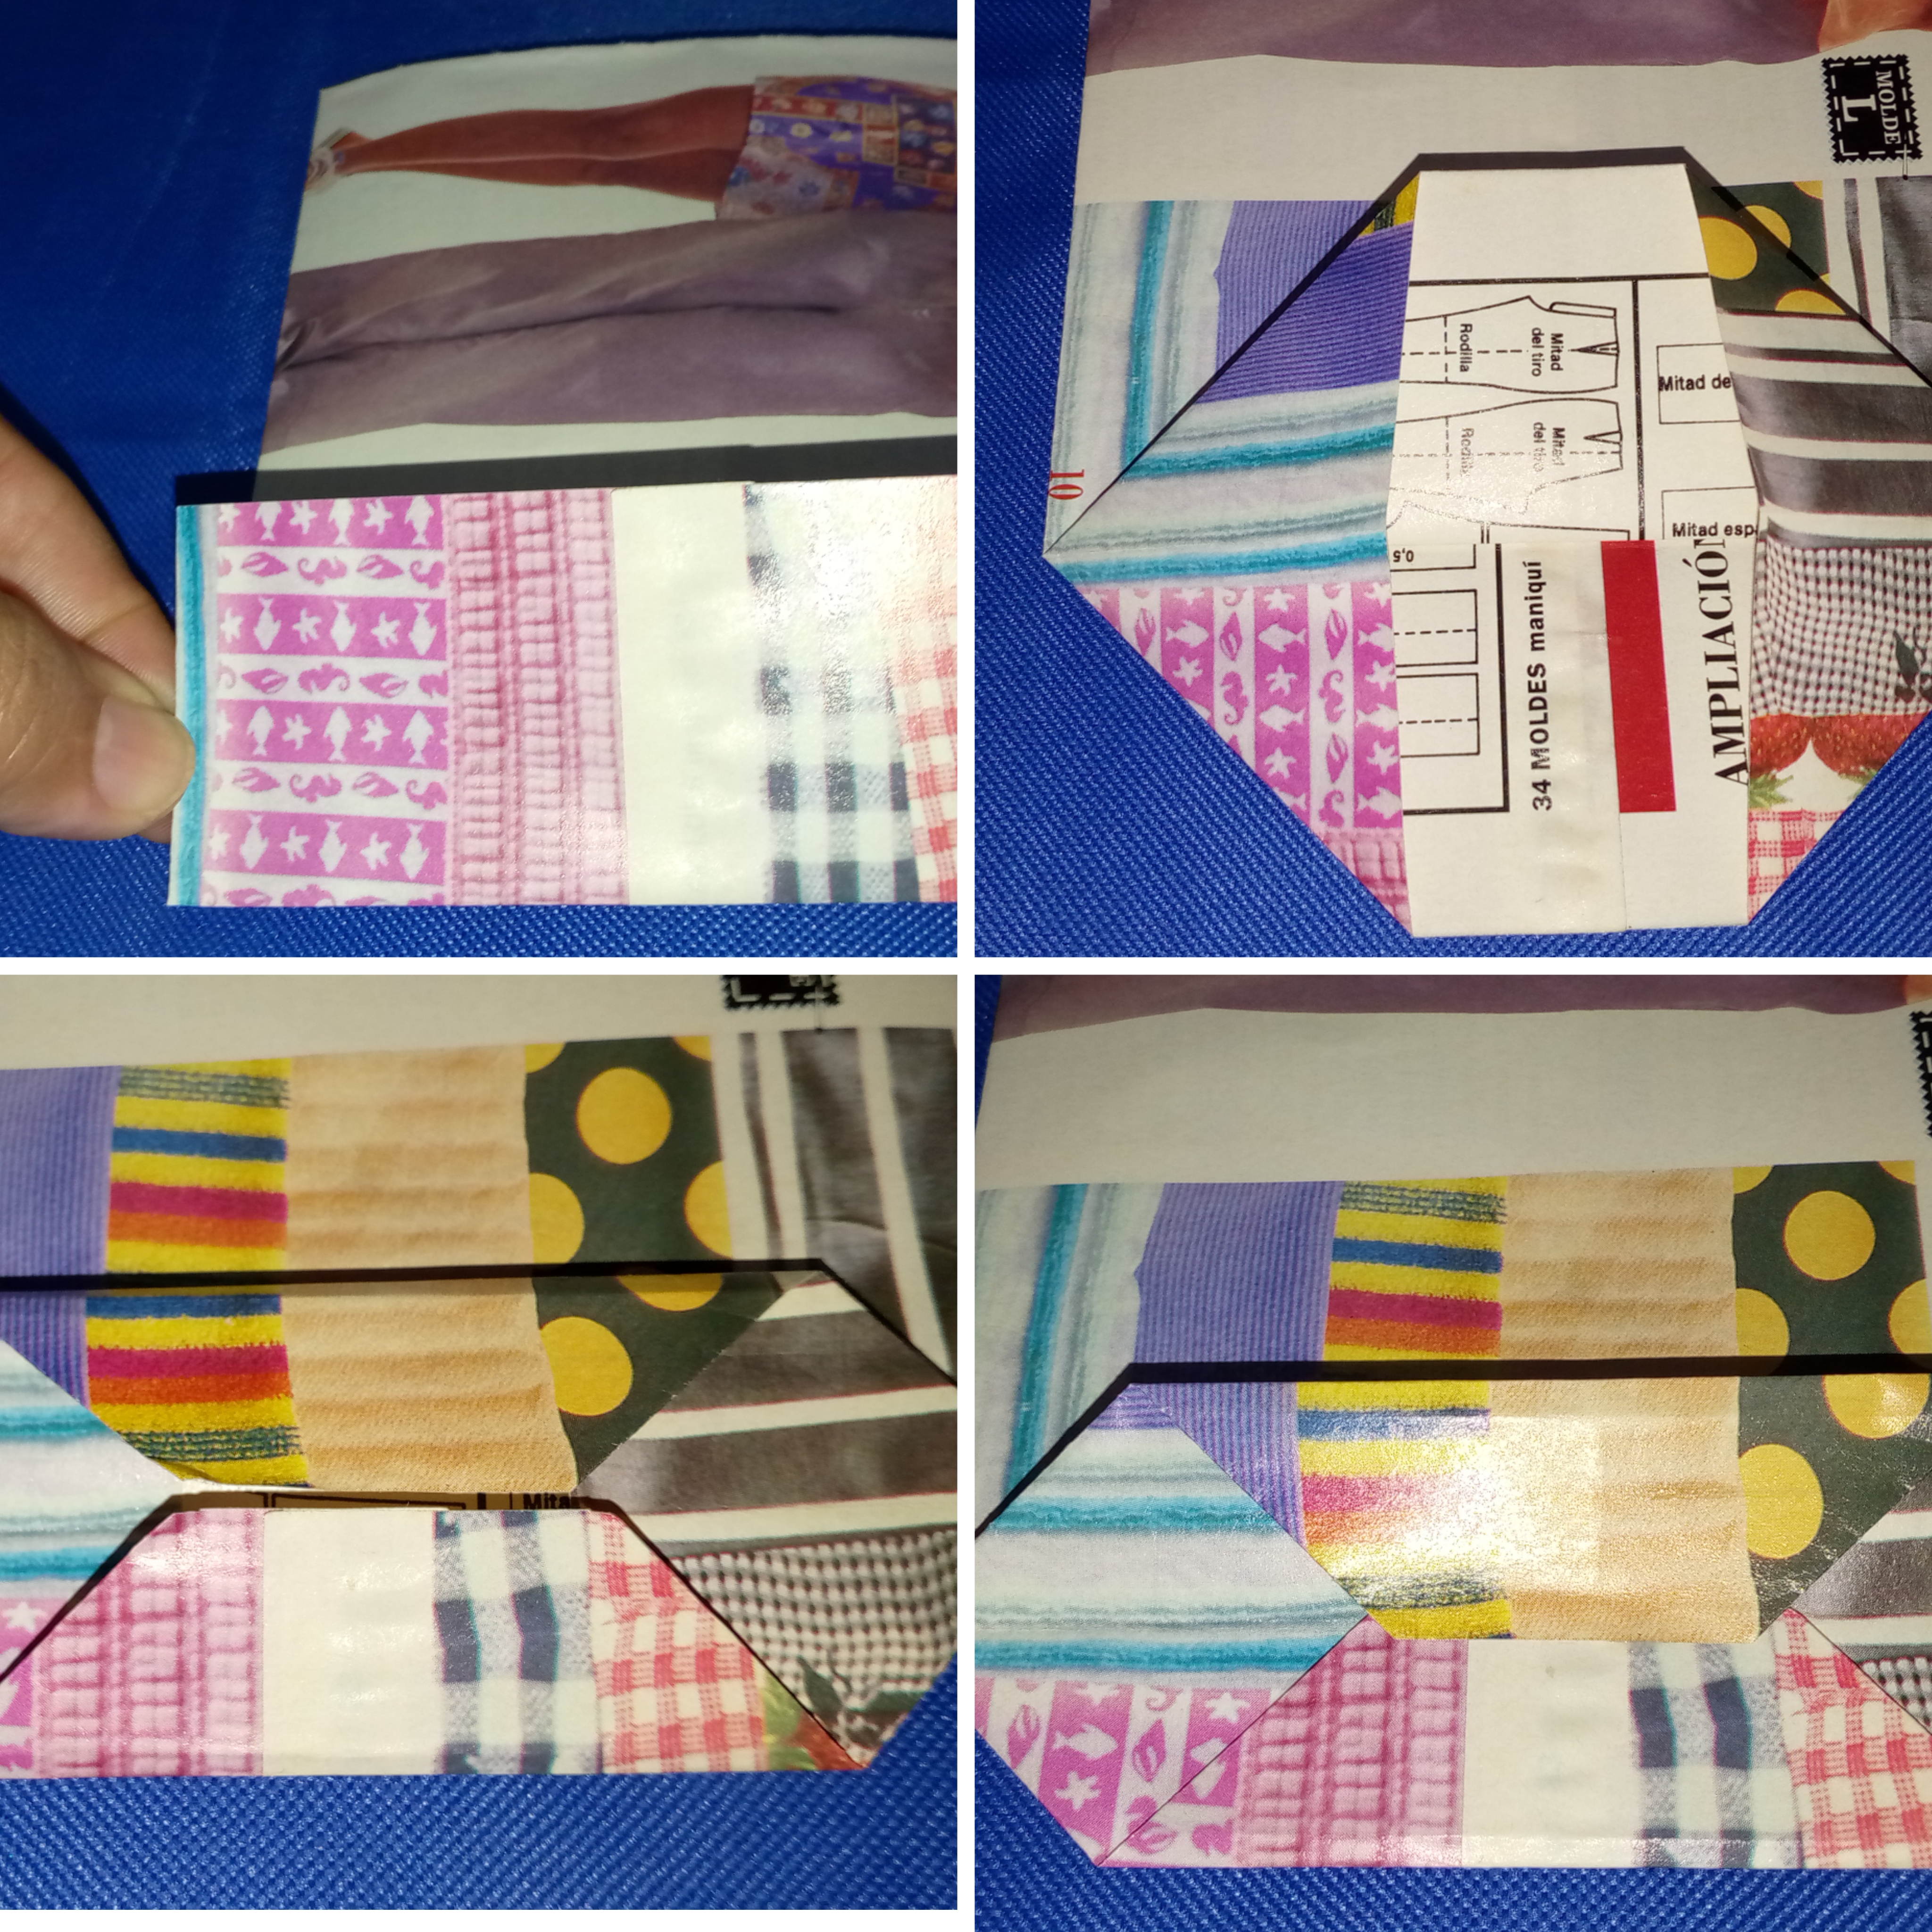
Then I folded the bottom up, measuring 5 cm, to proceed to make the bottom of the bag, after folding I put the white glue and let it dry.
Step 2.
In this step I proceed to make the fold of the sides, I measured 2 cm on each side, the fold should be made inward so that of the internal space of the bag. Depending on the number of centimeters left in this part, will be the width of the bag.
Step 3.
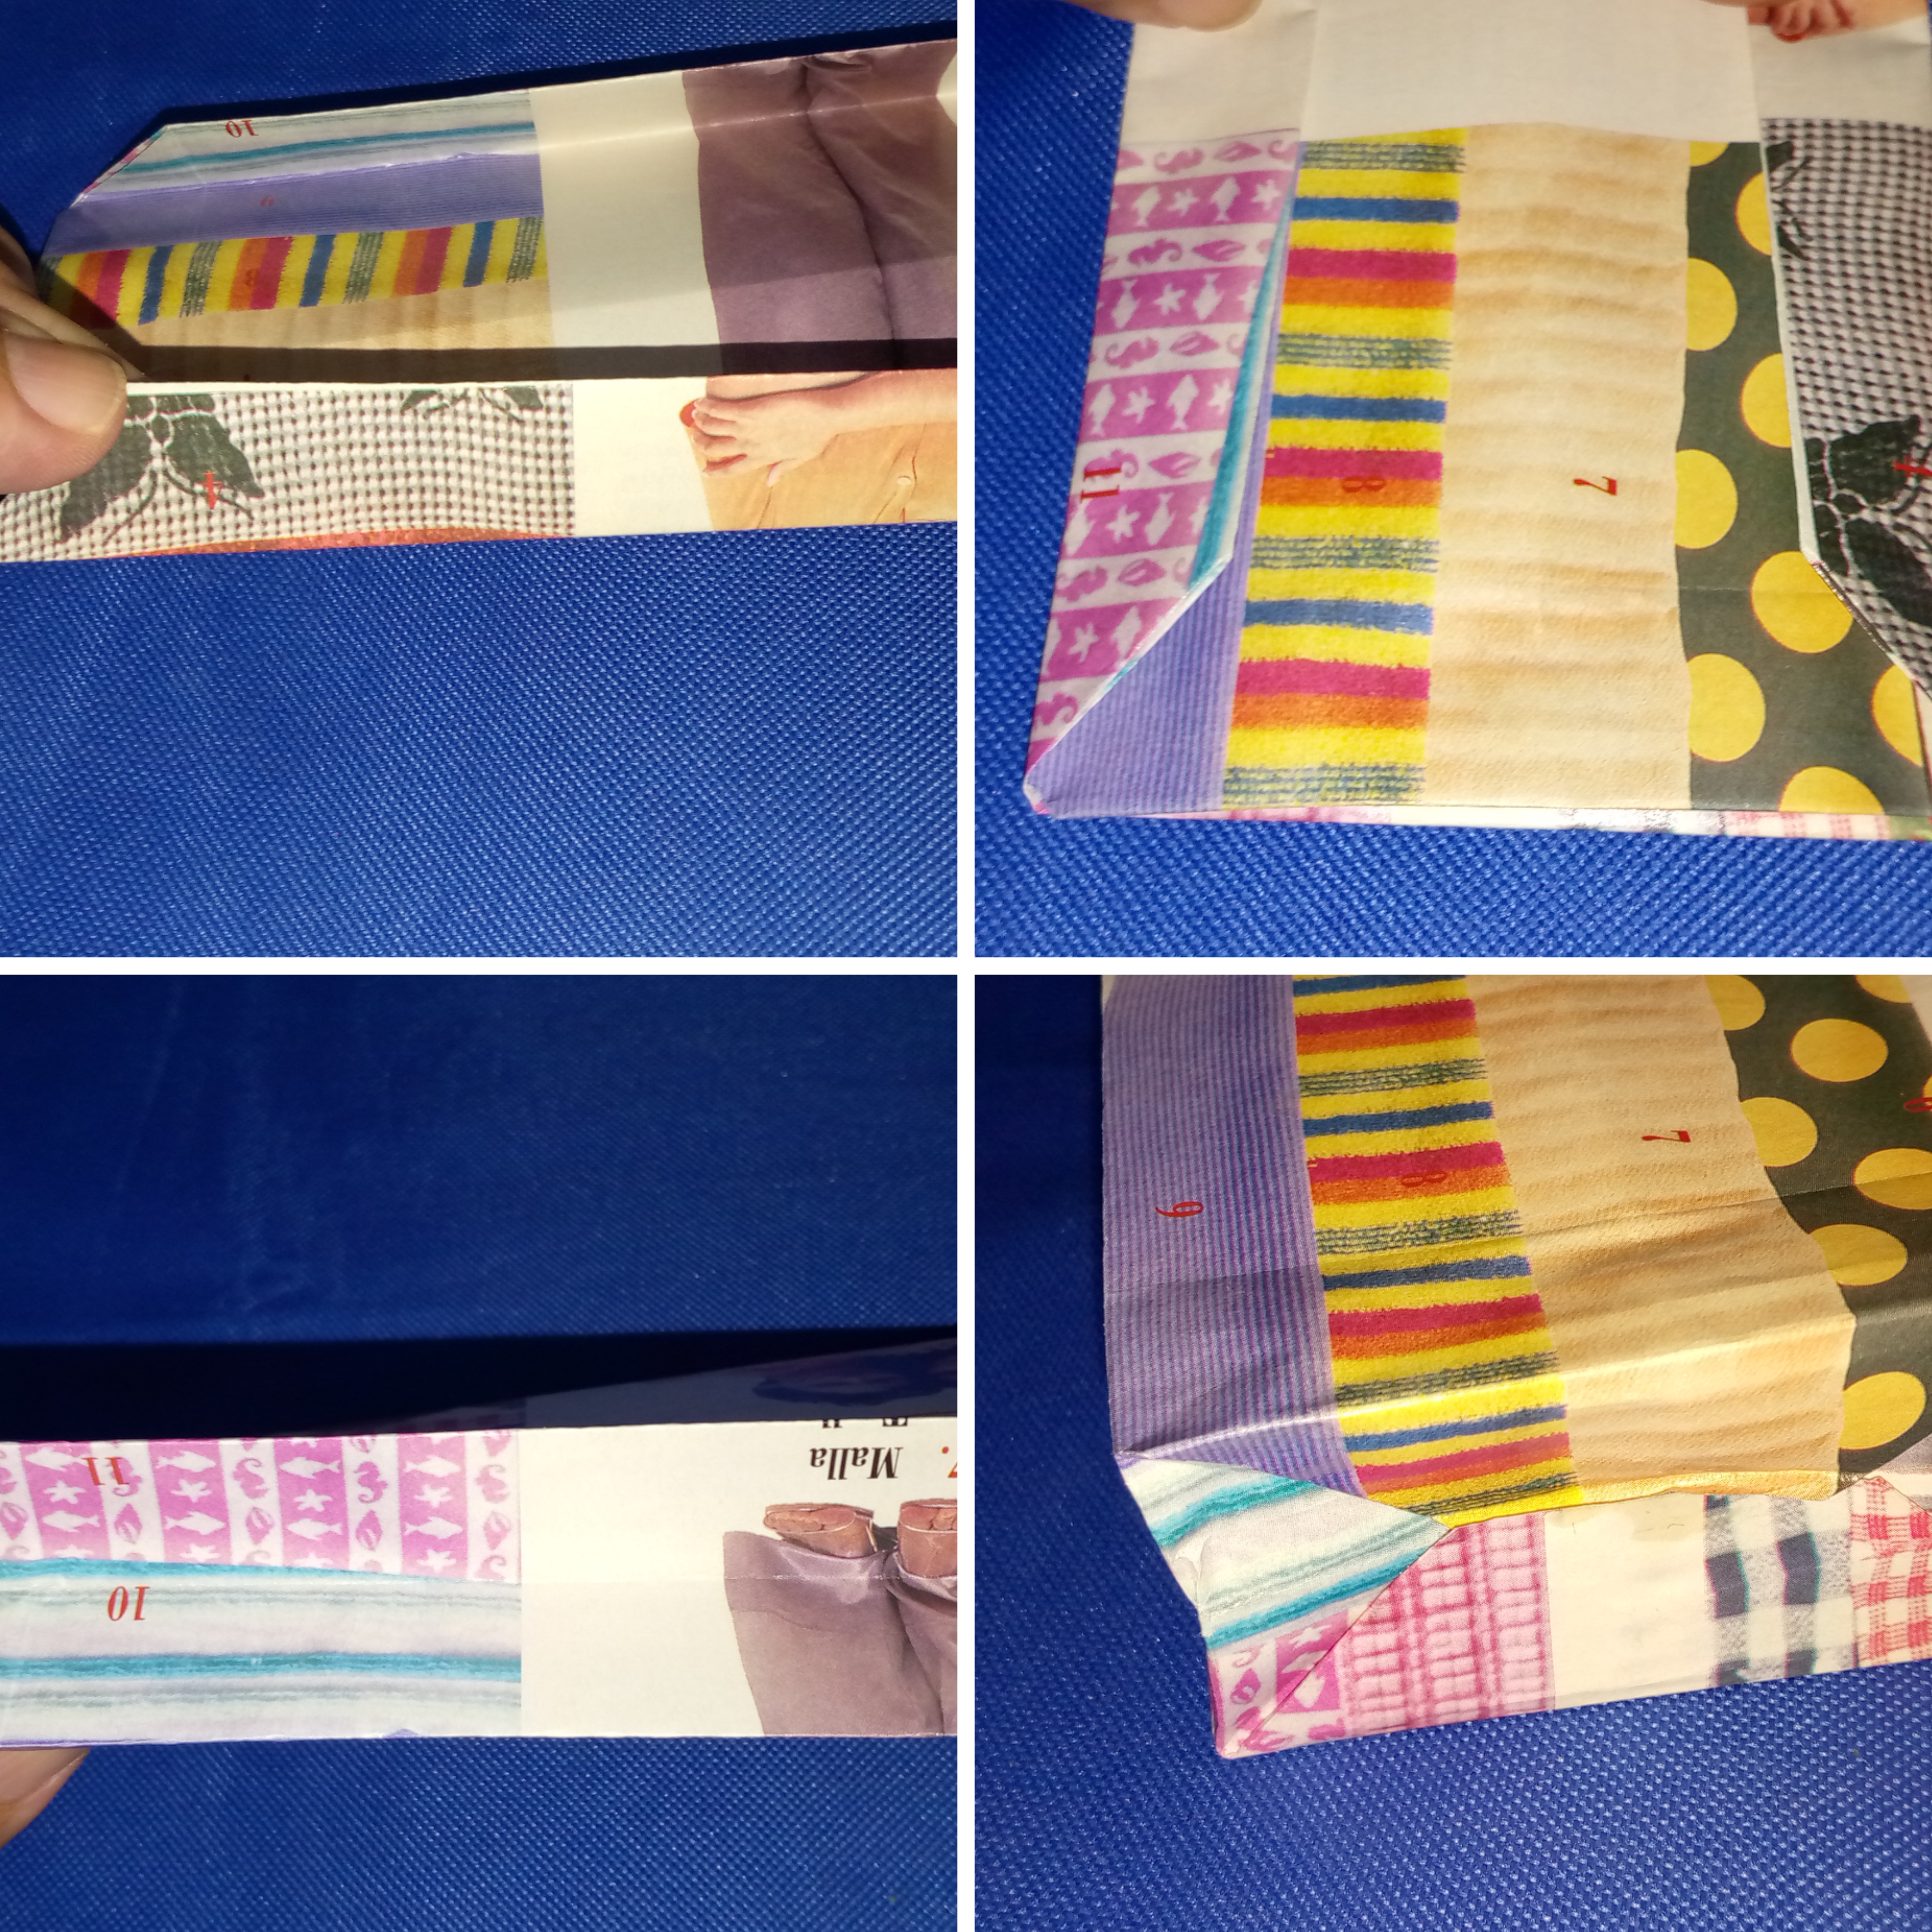
After having the bottom and sides of the bag ready I proceeded to fold the top, there I also took as a reference 5 cm. I measured, folded it to make a mark and then folded it inwards. This is done in order to reinforce the top and give a better finish. Depending on the height we want the bag, it is folded less or more centimeters.
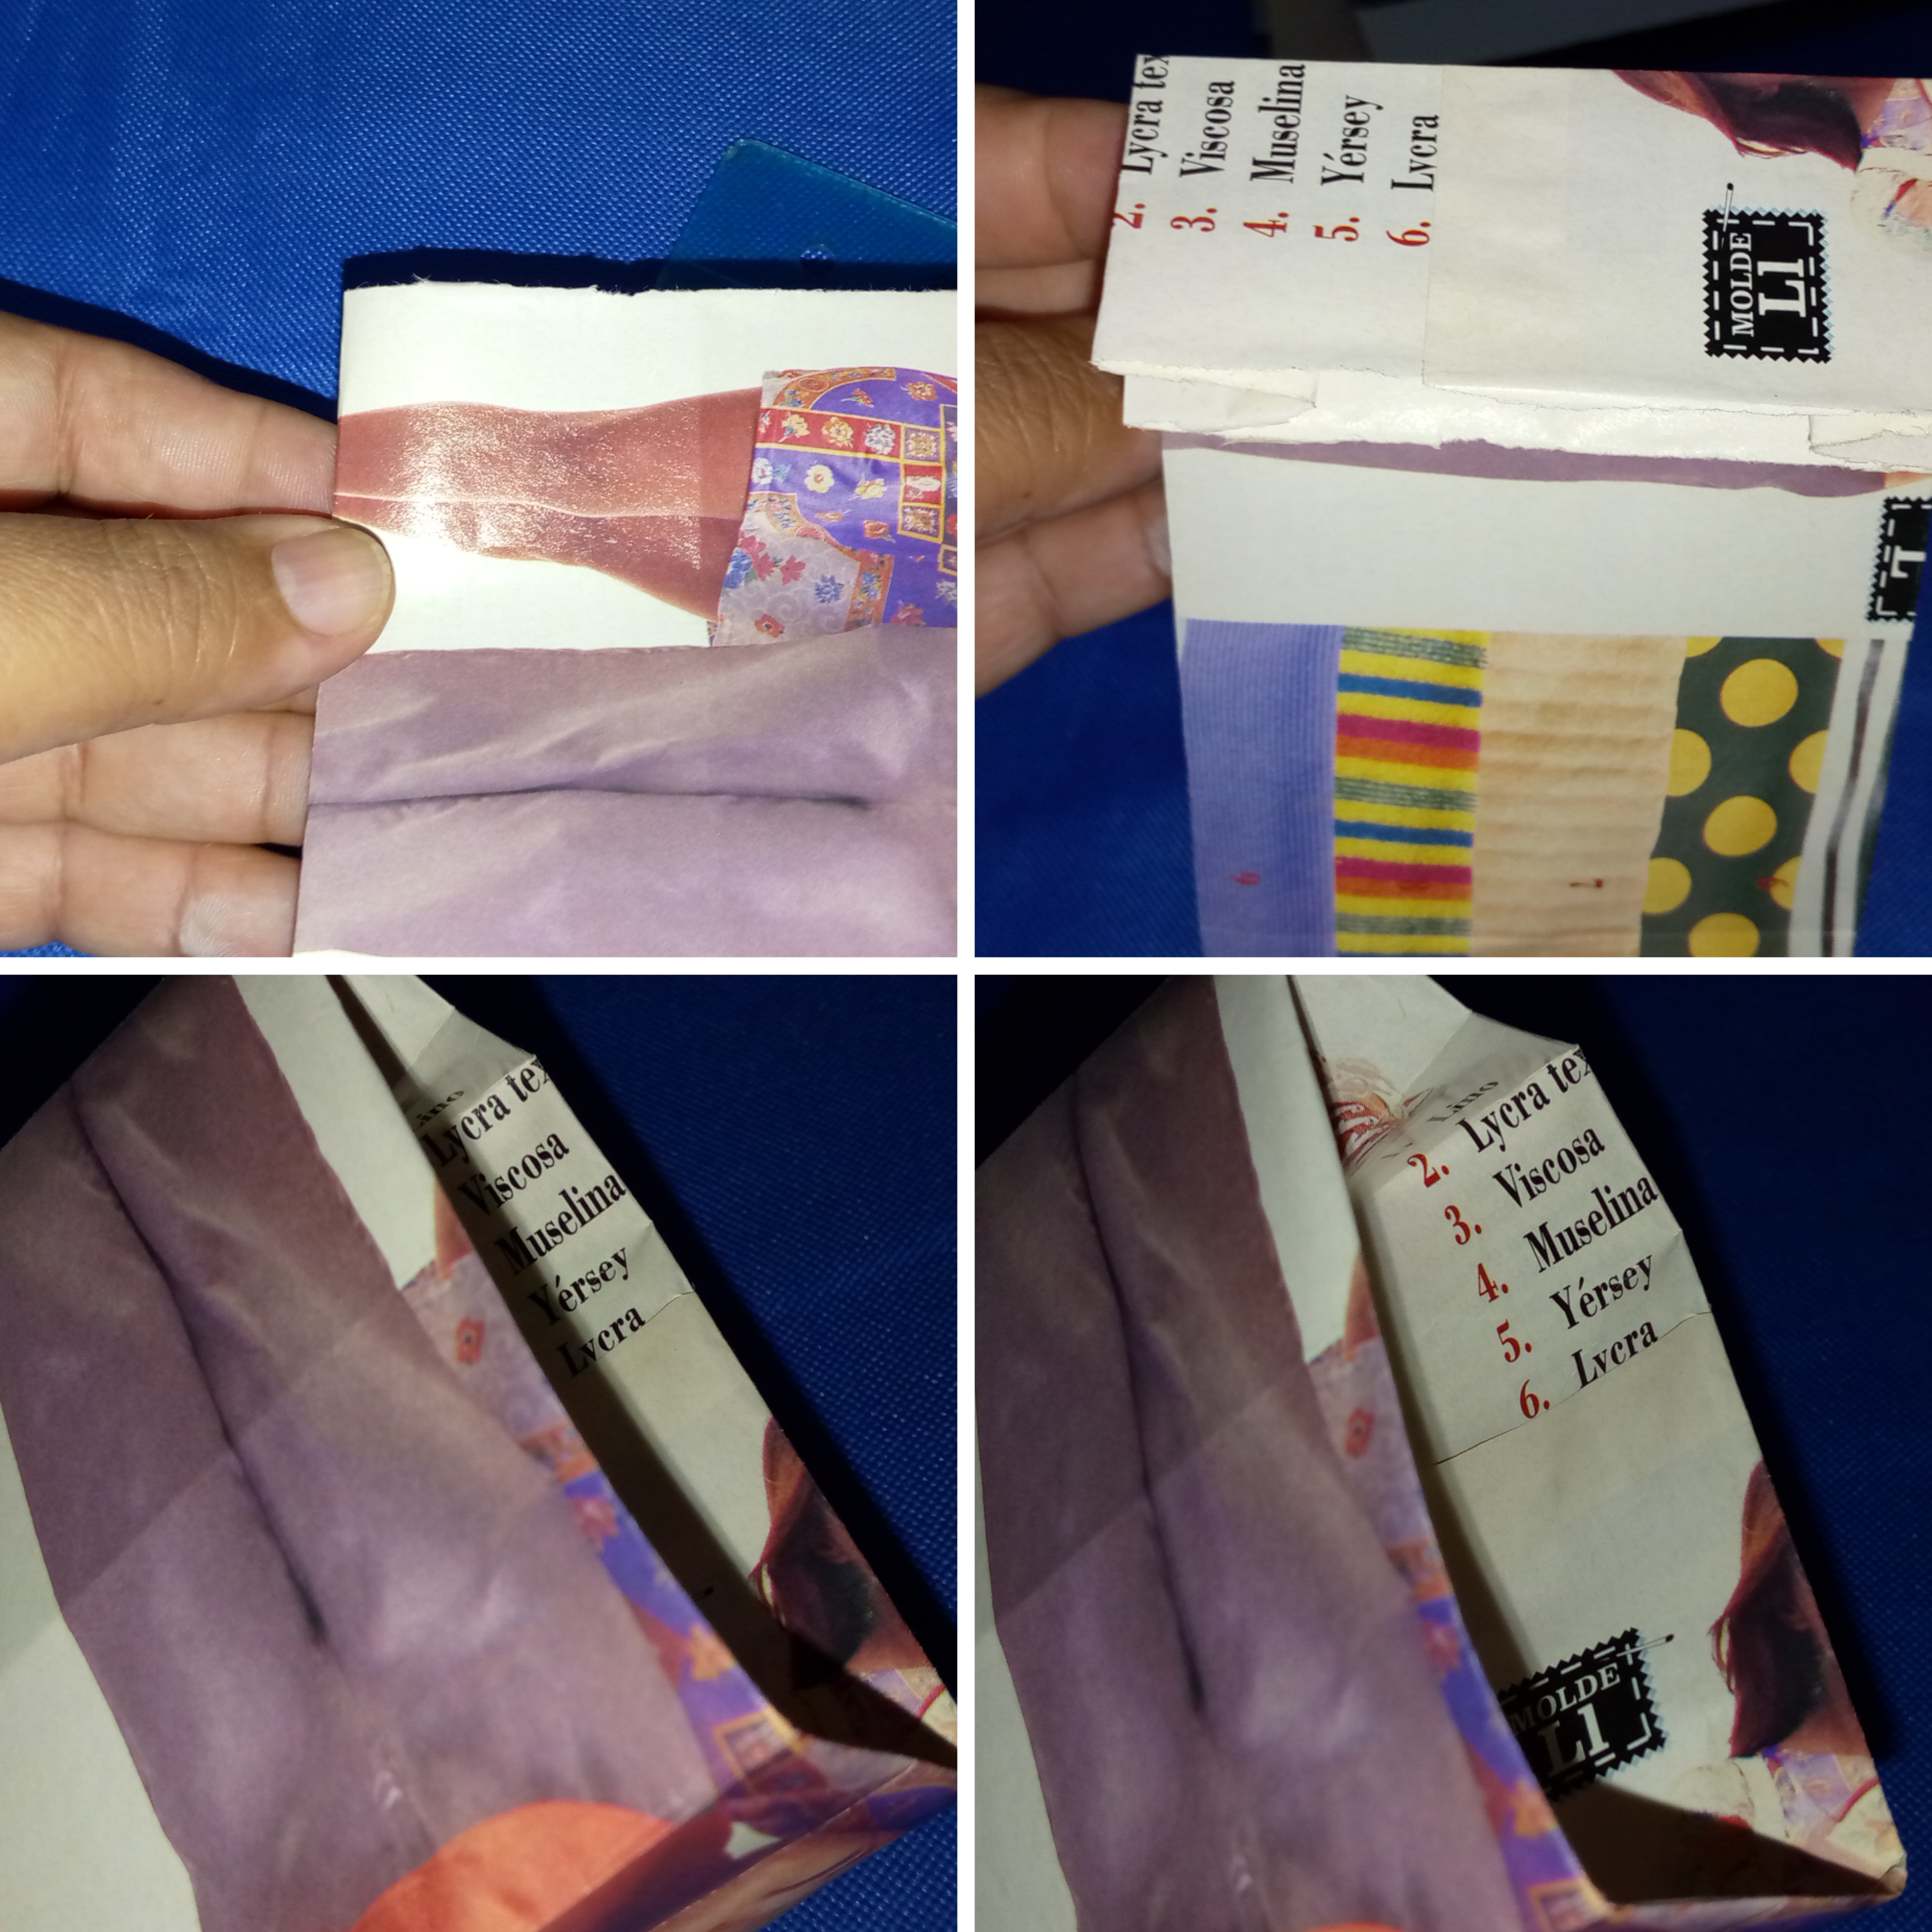
Step 4.
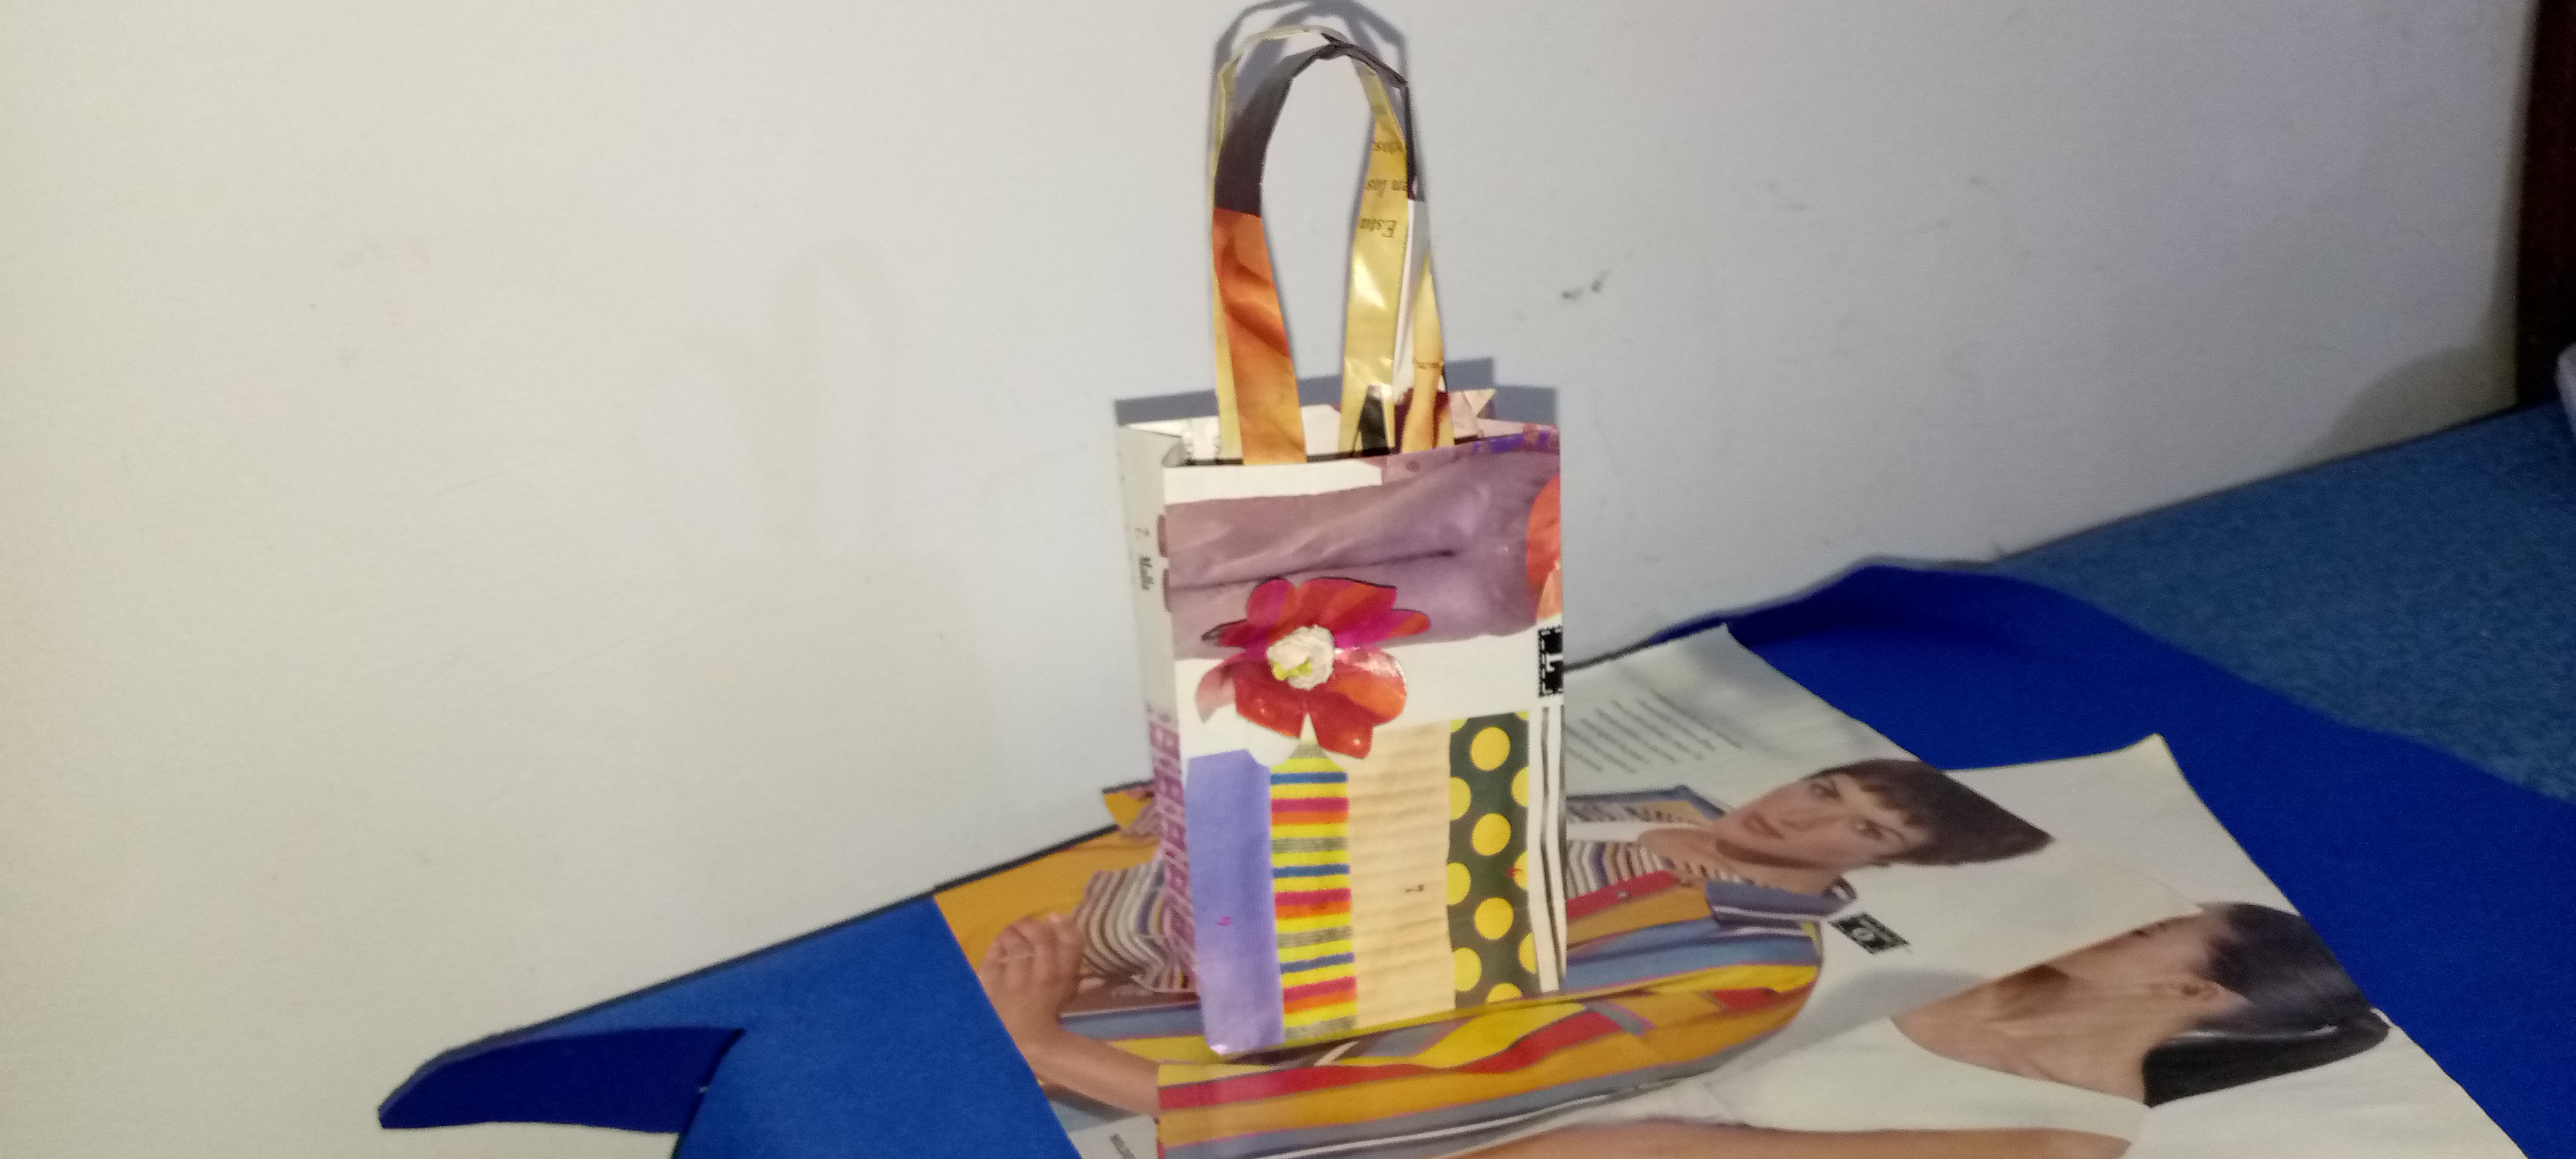
At this point I made a flower to decorate the bag, for this I selected a piece of colorful magazine paper, traced on the back side the flower, cut it out, shaped it by pressing in the center, made a little ball of paper and glued it in the center of the flower, then glued it to the bag.
To make the handles I used a sheet of magazine, I cut it in half and then folded it three times, in this case they were 1 cm wide. I glued them to the bag using hot silicone.


My bag made from magazine sheets is now finished....
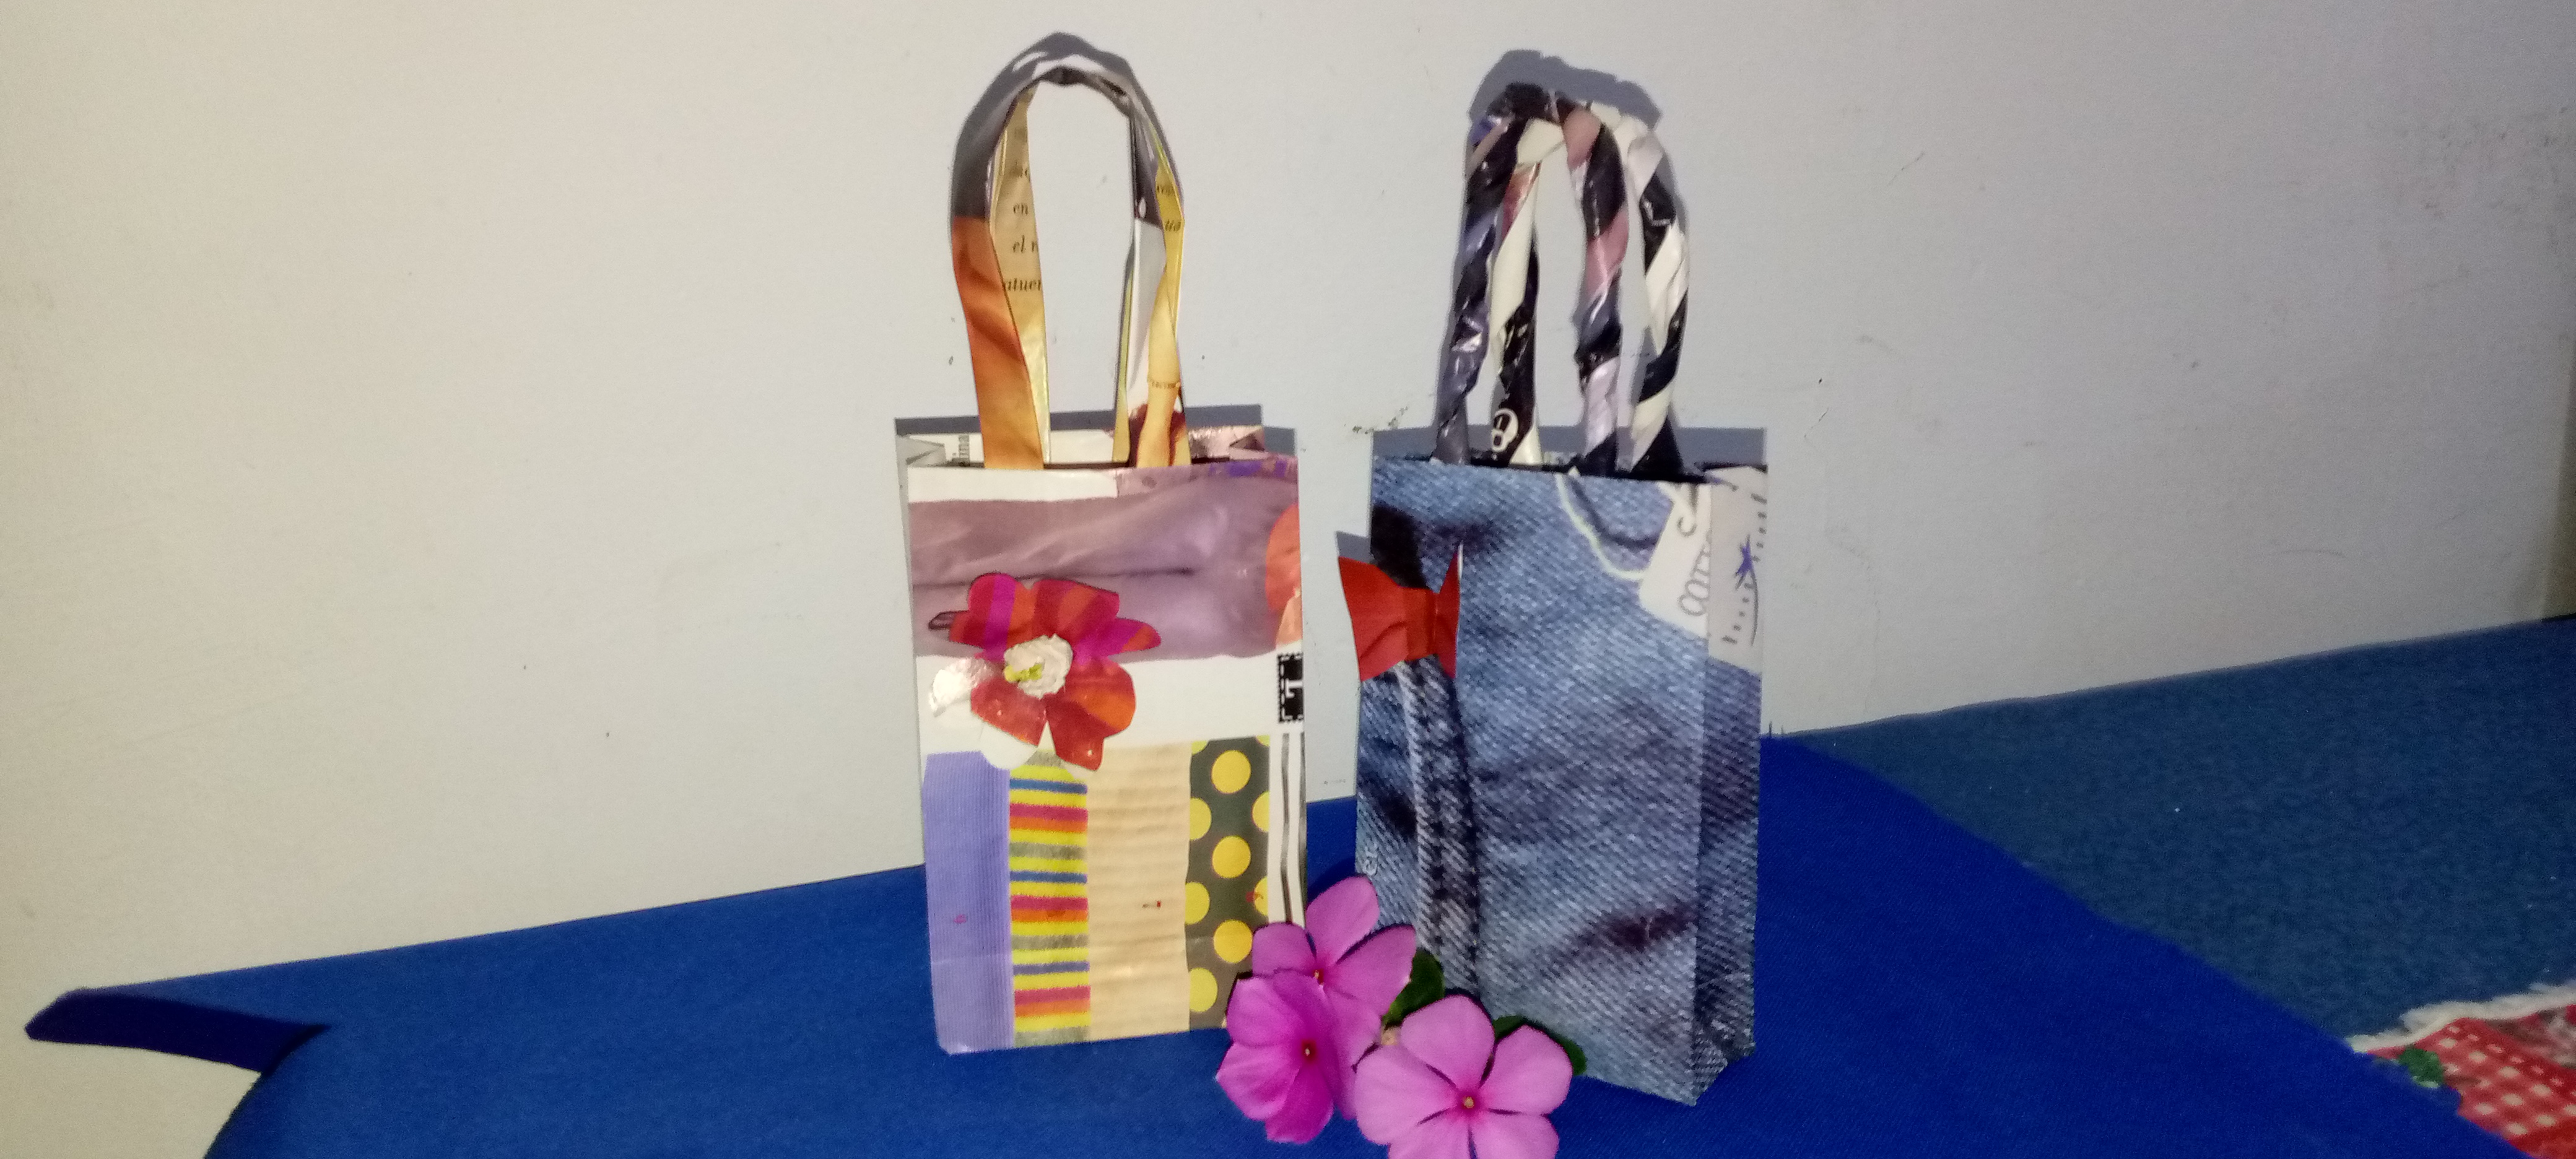
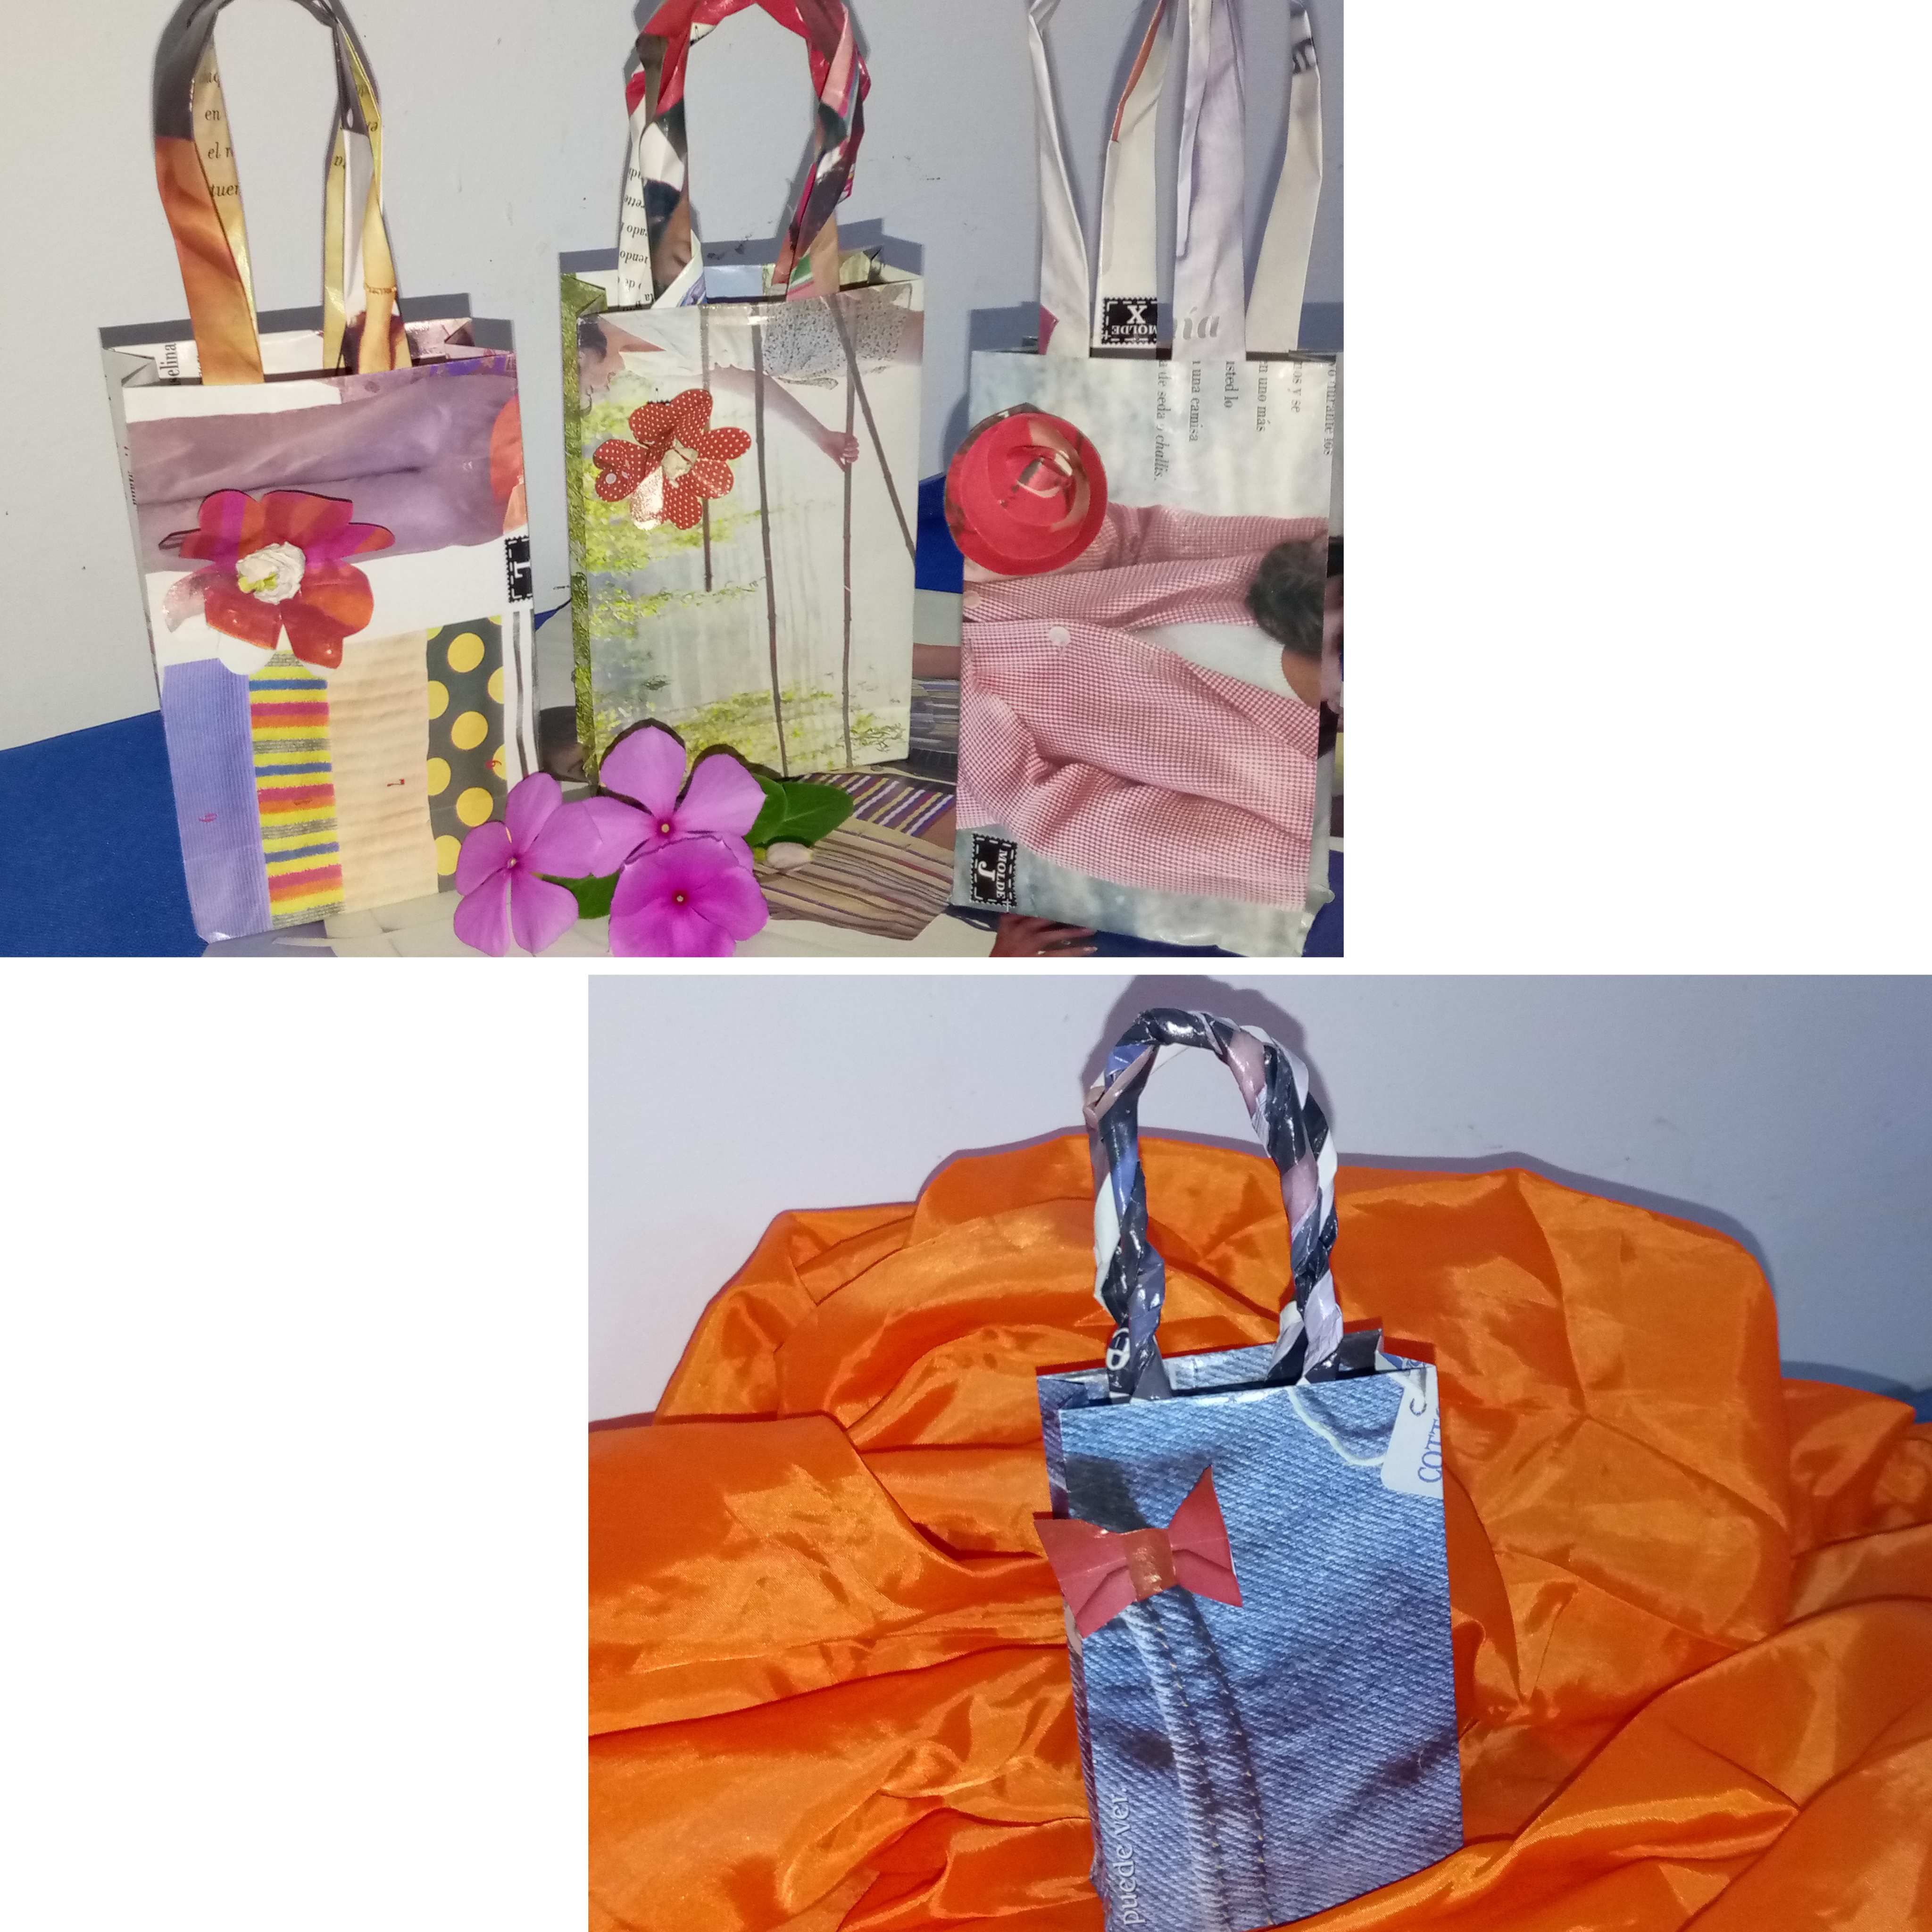
Here are some other bags I made.

Life is Art...
Thanks for reading me. I'll meet you in @dorada's next post.
Images captured with tecno spark mobile device.
Translation (https://www.deepl.com/translator)

Español
Saludos amigos hivers, reciban un cordial saludo.
Hoy comparto nuevamente con ustedes y les traigo un proyecto realizado con materiales reutilizados, unas bolsas de regalo elaboradas con hojas de revistas. Disfruto mucho de los trabajos realizados con hojas de revistas ya que cada uno es diferente da una variedad de tonalidades de colores que hacen que todo trabajo que se realice sea único y eso es algo que me gusta.
Ya en otras oportunidades he compartido en mi blog algunos trabajos realizados con revistas, considero que es un buen recurso para trabajar las manualidades y lograr variedad de elementos decorativos y hasta utilitarios para el hogar.
En el caso de estas bolsas de regalo son una buena opción para obsequiar, aunque sea un caramelito, ya que tienen un toque delicado y son un bonito detalle, son fáciles de realizar, no requieren de muchos materiales y son únicas. Es cuestión de dejar volar la creatividad, utilizar los materiales de diversas maneras y dar un toque personal a cada detalle hecho con cariño y sobretodo disfrutar del proceso de crear.

Materiales:
- Hojas de revistas
- Pegamento blanco
- Tijera
- Regla
- Pistola de silicón

Elaboración Paso a paso
Paso 1.
Para elaborar estas bolsas utilicé las hojas de revistas, en este caso tienen una medida de 27 Cms de largo por 20 cms de ancho, esa es la medida que tiene la revista. Realmente no es relevante ya que podemos trabajar con cualquier tamaño y simplemente ajustar.
Para realizar la bolsa tomé una hoja de revista la doblé a la mitad de manera vertical, después uní los extremos por el centro.
Luego doblé la parte inferior hacia arriba, midiendo 5 Cms, para proceder a realizar el fondo de la bolsa, después de doblar le coloco el pegamento blanco y dejo secar.


Paso 2.
En este paso procedo a hacer el doblez de los laterales, medí 2 cm a cada lado, se debe realizar el doblez hacia adentro para que del espacio interno de la bolsa. Dependiendo del número de centímetros que se deje en esta parte, será el ancho de la bolsa.

Paso 3.
Luego de tener lista la parte inferior y laterales de la bolsa procedí a doblar la parte superior, allí también tomé como referencia 5 cm. Medí, lo doblé para lograr marcar y luego lo doblé hacia adentro. Esto se realiza con la finalidad de reforzar la parte superior y dar un mejor acabado. Dependiendo de la altura que deseemos la bolsa, se dobla menos o más centímetros.

Paso 4.
En este momento realicé una flor para decorar la bolsa, para ello seleccioné un trozo de papel de revista colorido, tracé por el lado posterior la flor, la recorté, le di forma haciendo presión en el centro, hice una bolita de papel y la pegué en el centro de la flor, luego la pegué a la bolsa.
Para realizar las asas utilicé una hoja de revista, la recorté a la mitad para luego doblar tres veces, en este caso quedaron de 1 cm de ancho. Las pegué a la bolsa utilizando silicón caliente.


Ya está terminada mi bolsa realizada con hojas de revistas...

Por acá les dejo otras bolsas que realicé.


La Vida es Arte...
Gracias por leerme. Nos encontraremos en el próximo post de @dorada
Imágenes capturadas con dispositivo móvil tecno spark.
Traducción (https://www.deepl.com/translator)

Posted Using InLeo Alpha
Without a doubt, an excellent idea. Not only is it a beautiful craft, but we also help the planet by recycling.
Bellísimas bolsas y con material reciclado, que bueno... Saludos, bendiciones y éxitos...❤️🤗
Keep up the good work