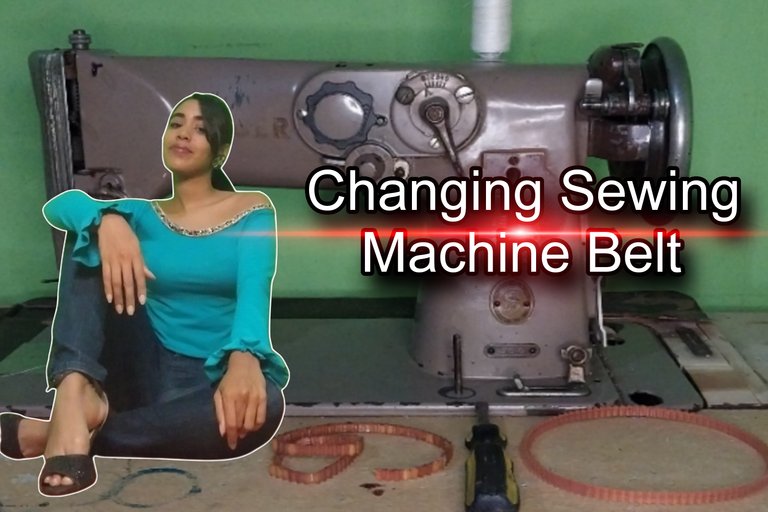
Sewing Machine Belt Change | Cambio de Correa de Maquina de Coser
Hello friends. I hope you are doing well in this new beginning of the week.
When we use our sewing machines the belt or band tends to break or stretch, this due to the forces of friction, torsion and the working force with which these elements are subjected.
That is why today I want to explain a basic way of how to change these belts.
We will need a belt always evaluating that this is the model of our sewing machine. And also a screwdriver.
Step by Step
1
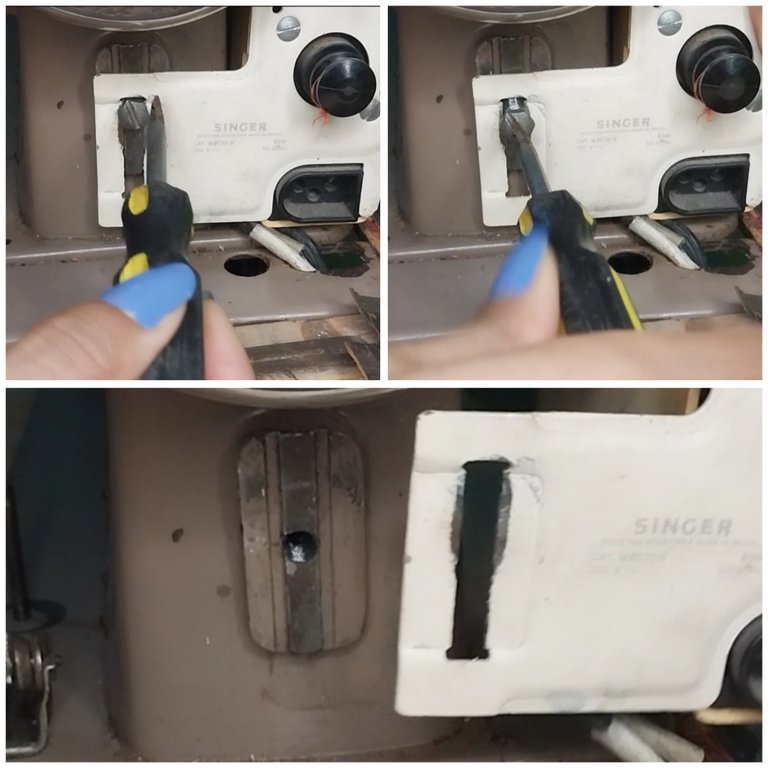
We begin by removing the screw from the slot in the motor base that is attached to the base of the sewing machine foot. Loosen and remove the screw to allow us to comfortably move the motor.
2
Then we insert the belt into the pulley groove, we can also help us with the spade screwdriver to bring the belt into the pulley groove.
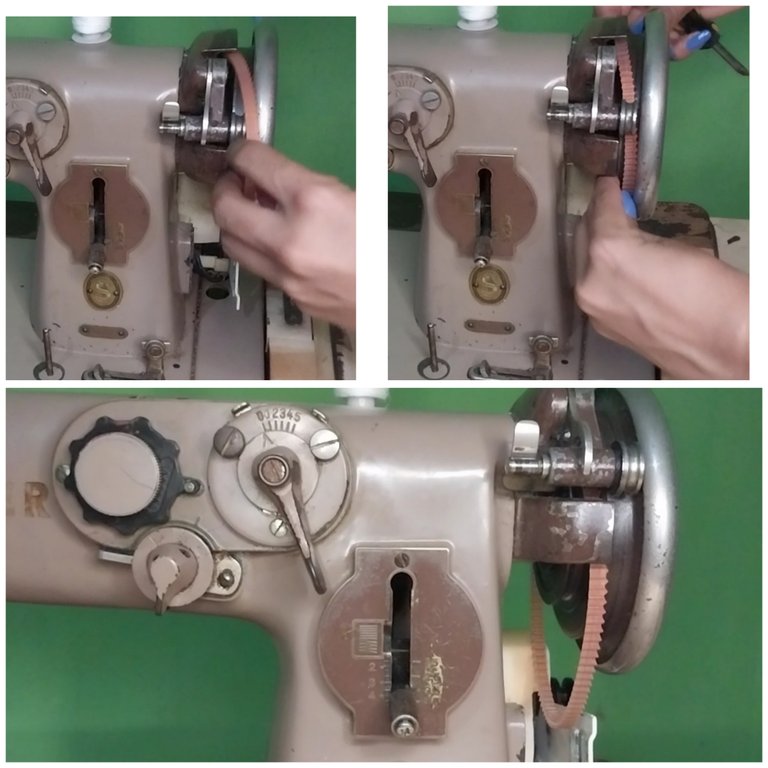
3
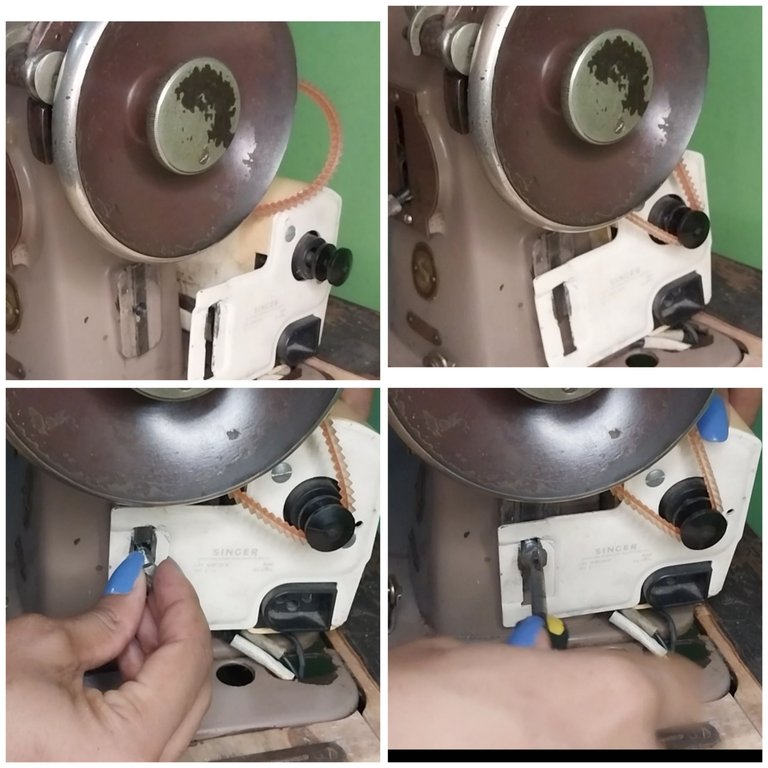
Then we move the motor and insert the belt on the shaft of the motor groove.
Next we match the base or the motor housing with the base of the sewing machine foot and with the screwdriver we tighten the screw.
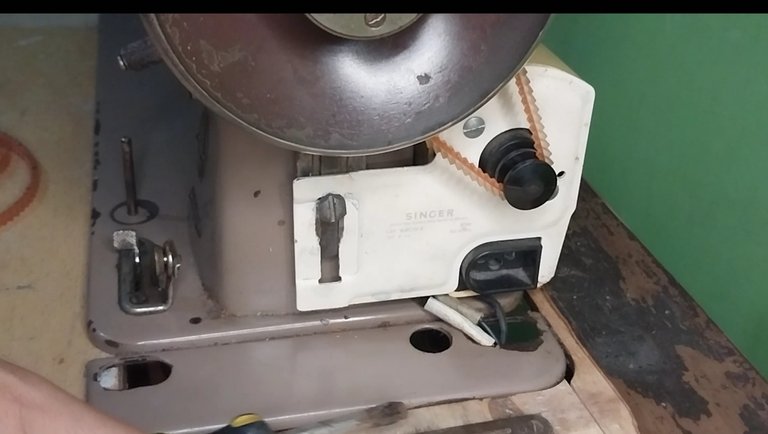
Once it is fixed and well adjusted, we can use the sewing machine satisfactorily.

Hola amigos. Espero se encuentren muy bien en este nuevo inicio de semana.
Cuando usamos nuestras máquinas de coser la correa o la banda tiende a romperse o estirarse, esto debido a las fuerzas de fricción, torsión y a la fuerza de trabajo con la que están sometidos estos elementos.
Es por eso que el día de hoy quiero explicarles una forma básica de como se cambian estas correas.
Necesitaremos una banda siempre evaluando que esta sea del modelo de nuestra máquina de coser. Y también un destornillador.
Paso a Paso
1
Iniciamos sacando el tornillo de la ranura de la base del motor que esta acoplado a la base del pie de la máquina de coser. Desajustes y sacamos el tornillo para que nos permita mover cómodamente el motor.
2
Luego insertamos la correa o banda en la ranura de la polea, también nos podemos ayudar del destornillador de pala para llevar esta a la ranura de la polea.
3
Luego movemos el motor e insertamos la correa en el eje de la ranura del motor.
Seguidamente hacemos coincidir la base o la carcasa del motor con la base del pie de la máquina de coser y con el destornillador ajustamos el tornillo.
Una vez que esté este fijado y bien ajustado, podemos utilizar la maquina de coser satisfactoriamente.
- Images belong to me
- Translator: Deepl Traslator
- Editing: Canva
- Video editing: Capcut
- Music: Vlog
- Las imágenes me pertenecen
- Traductor: Deelp traslator
- Edicion: Canva
- Edicion del video: Capcut
- Musica: Vlog

▶️ 3Speak
VEry cool small tutorial video, the machine is even more interesting to see on the video :) 😇😇😇🤗👍 I hope you can make more this videos some day . And you was put it together well .
Thanks ♥️ ♥️ ♥️
Npr 😋😋 happy to see cool post.
This is such a useful and helpful tutorial. Thank you for sharing
Thanks @diyhub
This is really useful, thanks for sharing dear
muy útil saber esto, tenemos una que ya tiene sus años y no sabíamos de ello jeje, excelente post!
very useful to know this, we have one that already has its years and we didn't know about it hehe, excellent post!
Muchas gracias amiga! Saludos!