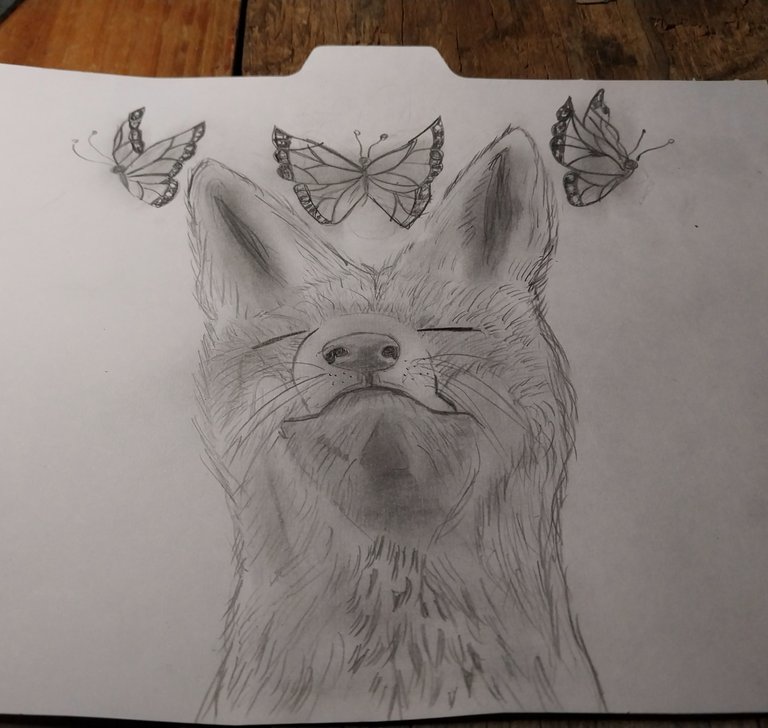
Grass Racoon - Fan Art B&W 🦊
Hello my dear friends of Hive.
The black and white technique in drawings is a tool that takes a lot of practice and skills. Although I am not an expert on the subject I want to give you a step by step of one of our Holozing creatures in black and white making the character a little realistic of "Grass Racoon".
Materials
- Pencil
- Eraser
- Pencil sharpener
Step by Step
1
1000229131.jpg](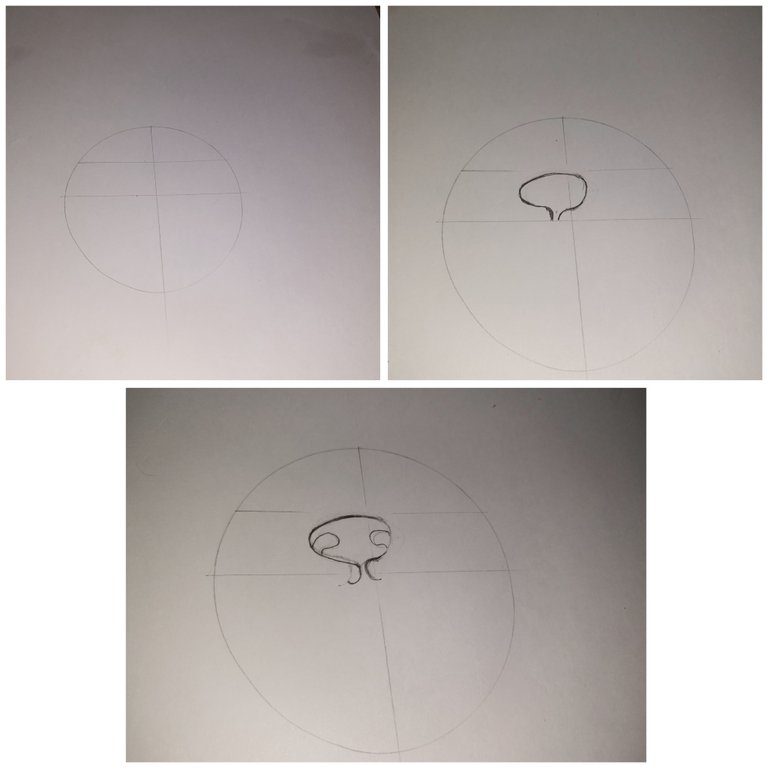 )
)
We must draw a circle and divide it into 4 equal parts. Then in the upper area of the circle make two lines.
In this area of the two lines we are going to form the nose developing the nose in the left axis of the quadrant. We also make the holes in the nose of our fox.
2
1000229145.jpg](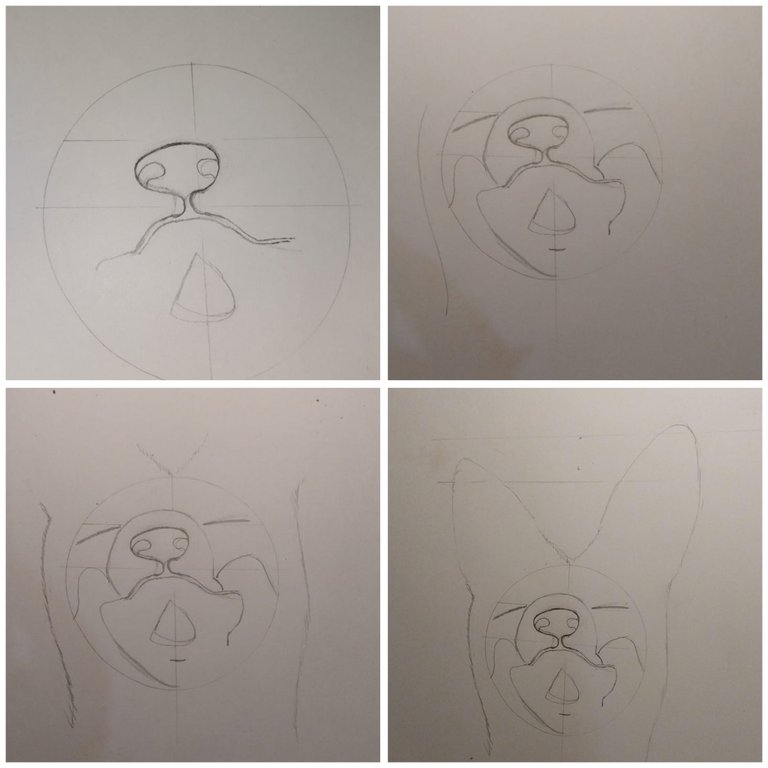 )
)
Then we draw downward and curving lines to form the muzzle of our Grass Racoon.
The cheeks and chin area are formed. Then we form the ears from the circular base we have created, the right ear should be shorter than the left ear to form the perspective of the drawing.
3
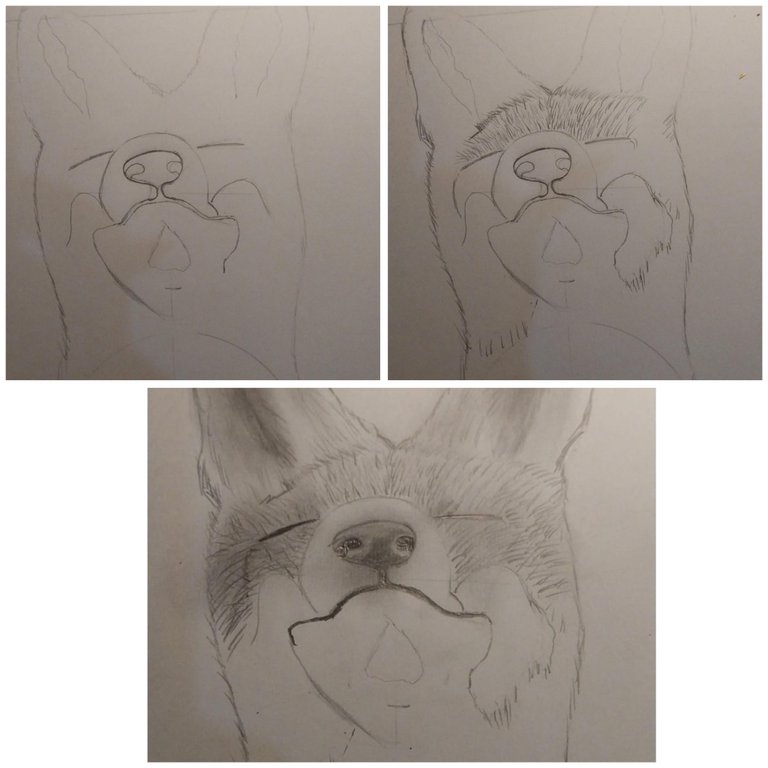
Then you must mark fine lines to make the hairs of our fox. We must have well sharpened the tip of the pencil, the most advisable is to have different tones of graphite pencil to achieve a contrast between each hair, however I lonhe done with a pencil HB. N°2 pencil, to make the whole process.
Add color to the nose and make a descending tone to the tip of the nose.
4
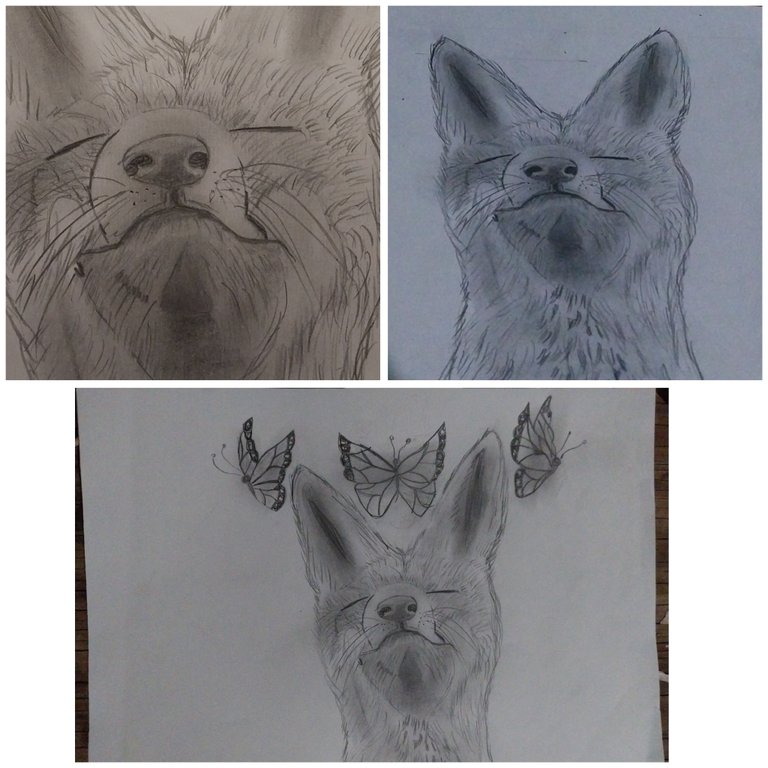
In this way we add shadow to the body and do the same technique hair by hair on the fox body.
On the muzzle we add some dots on both sides and long whiskers as you can see.
- Images belong to me
- Translator: Deepl Traslator
- Editing: Canva
Hola mi queridos amigos de Hive.
La técnica del blanco y negro en los dibujos es una herramienta que lleva mucha practica y habilidades. Aunque no soy una experta en la materia quiero regalarles ún paso a paso de una de nuestras criaturas de Holozing en blanco y negro haciendo el personaje un poco realista de "Grass Racoon"
Materiales
- Lapiz
- Borra
- Sacapuntas
Paso a Paso
1
Debemos trazar un circulo y dividir este en 4 partes iguales. Luego en la zona superiro del cirsmculo hacer dos líneas.
En esta zona de las dos líneas vamos a formar la nariz desarrollando la nariz en el eje izquierdo del cuadrante. También le hacemos los orificios a la nariz de nuestro zorro.
2
Luego se trazan líneas hacia abajo y de forma de curva para formar el hocico de nuestro Grass Racoon.
Se forman las mejillas y la zona del mentón. Luego formamos las orejas desde la base circular que hemos creado, la oreja derecha debe ser más corta que la oreja izquierda para formar la perspectiva del dibujo.
3
Luego se debe marcar líneas finas para hacer los pelos de nuestro zorro. Debemos tener buen afilada la punta del lápiz, lo más recomendable es tener distintos tonos de lápiz de grafito para lograr un contraste entre cada pelito, sin embargo yo lonhe hecho con un lápiz HB. N°2, para realizar todo el proceso.
Agregamos color a la nariz y hacemos un tono descendente hasta la punta de la nariz.
4
De esta manera agregamos sombra al cuerpo y hacemos la misma técnica de pelo por pelo en cuerpo del zorro.
En el hocico agregamos algunos puntos en ambos lados y bigotes largos como pueden apreciar.
- Las imágenes me pertenecen
- Traductor: Deelp traslator
- Edicion: Canva
It looks one very happt fox 😋👌👌 who sits in the great grassland and enjoys its fresh scent, and butterflies fly around him to make the state of the mind even more interesting.
Cool ... I like this work 😋👌👌🦊☕🐝
Thank you very much. Yes, he is a happy fox
When Fox happy, then all day going to be happy. 😋🦊👌👌👌
The racoon looks quite relaxed.
Yesssss . Thanks
!PIZZA
Thanks
$PIZZA slices delivered:
@danzocal(4/10) tipped @divergente1
You are good in drawing, the explanation of the pencils to used at one stage and another, almost draw me closer to become a good artist like you, you art is nice, impressive 🥰🙏
Thanks my friend ❤️🙌