⛄🎄 DIY: Beautiful Christmas Mailbox 🎄⛄
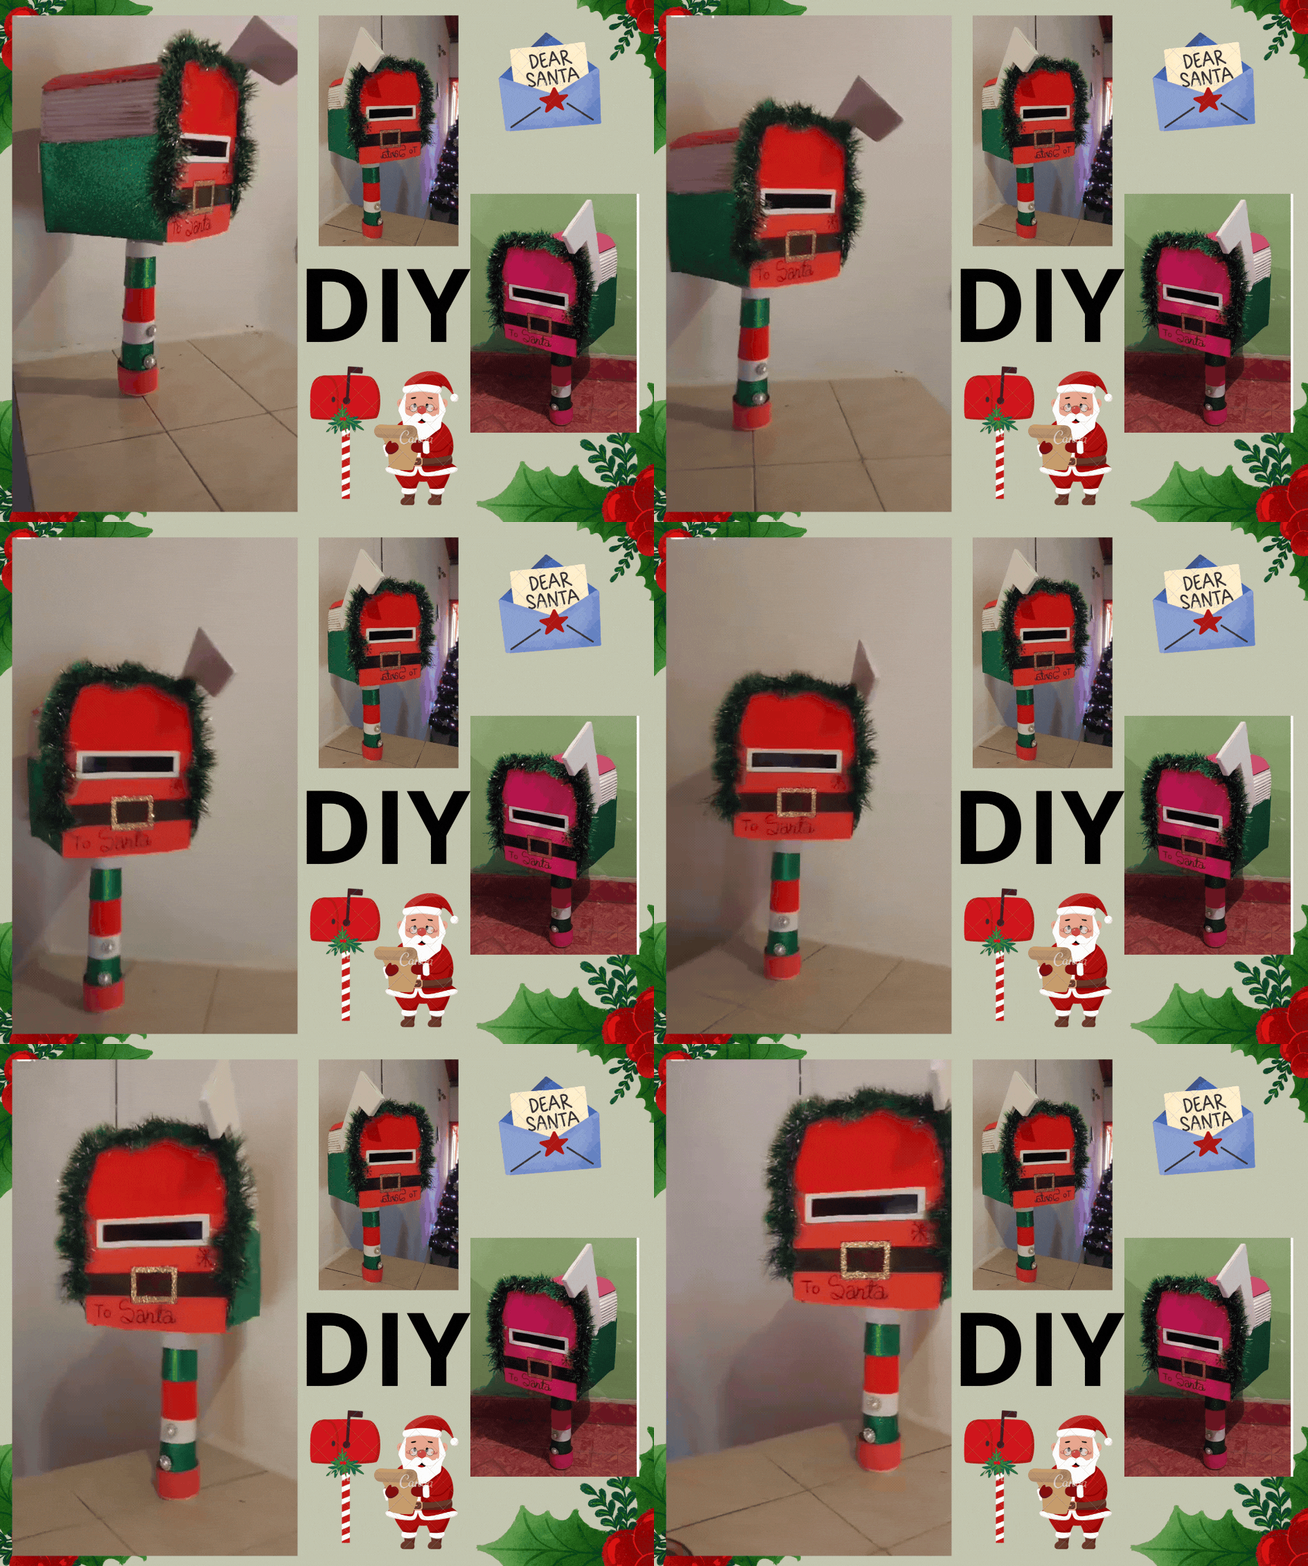
Hello my Hive friends, I hope you are well. I am happy to be able to share again my Christmas creation for this, our dear Diy-Hub community.
As you can see it is a Christmas mailbox design, to make it I have used recycled material. I hope you like it.

Materials
- Cardboard
- Scissors
- Cylindrical cardboard (cardboard base of toilet paper or tissue paper)
- White paint
- Red, white and green Foami
- Garland
- Silicone gun
- Black marker
- White glue and gold frosting
- Decorative buttons

Step by Step
1
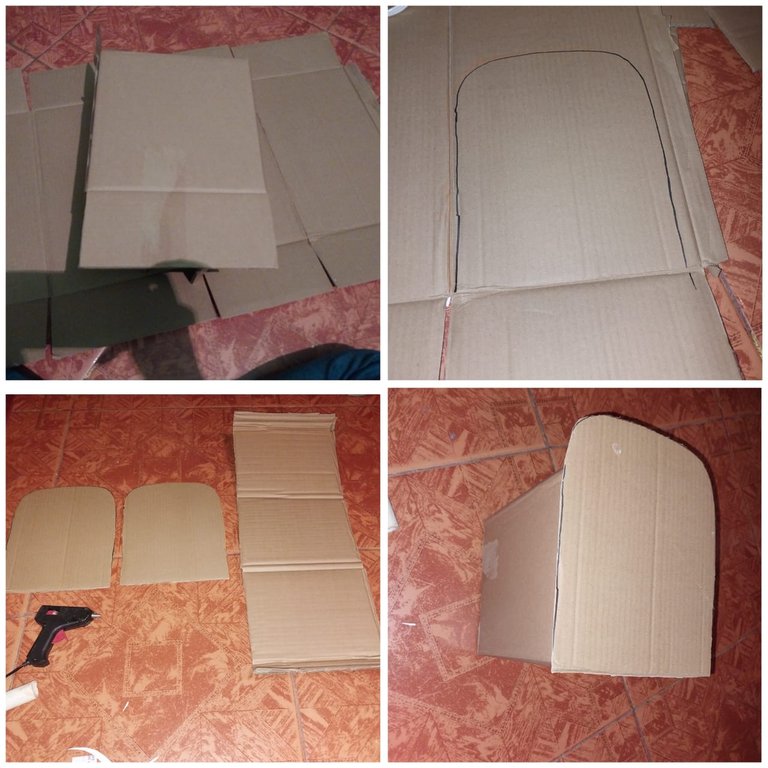
We must start by making the two faces on the cardboard and in each corner we must make a curve on these.
2
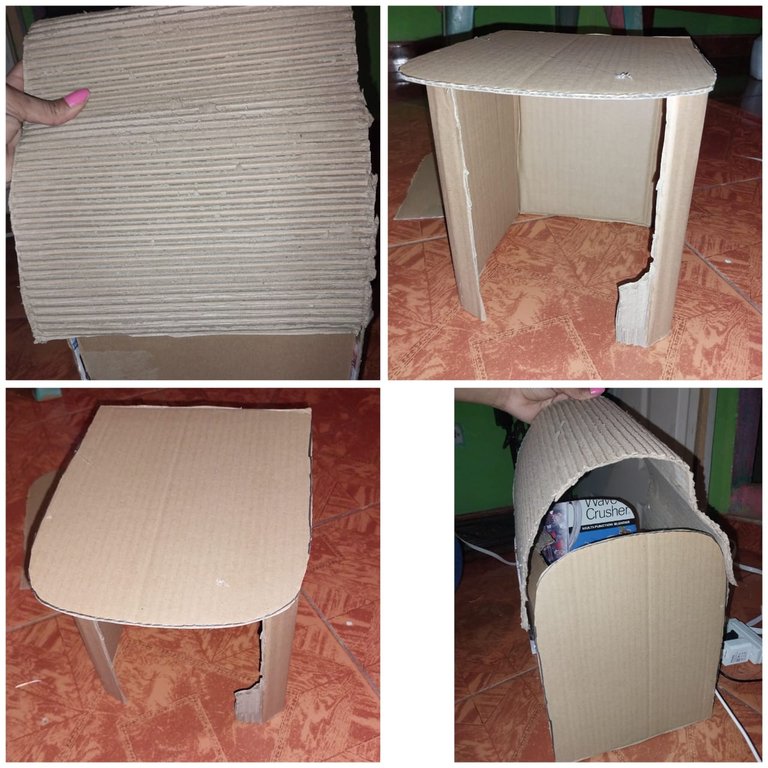
Then we must cut out each of these, then we must glue on each side a square shape to form the box of our mailbox.
Then we must glue on the mailbox box, a cardboard over it from one end to the other. This area of the cardboard should be removed the first layer to leave the embossed structure of the cardboard.
3
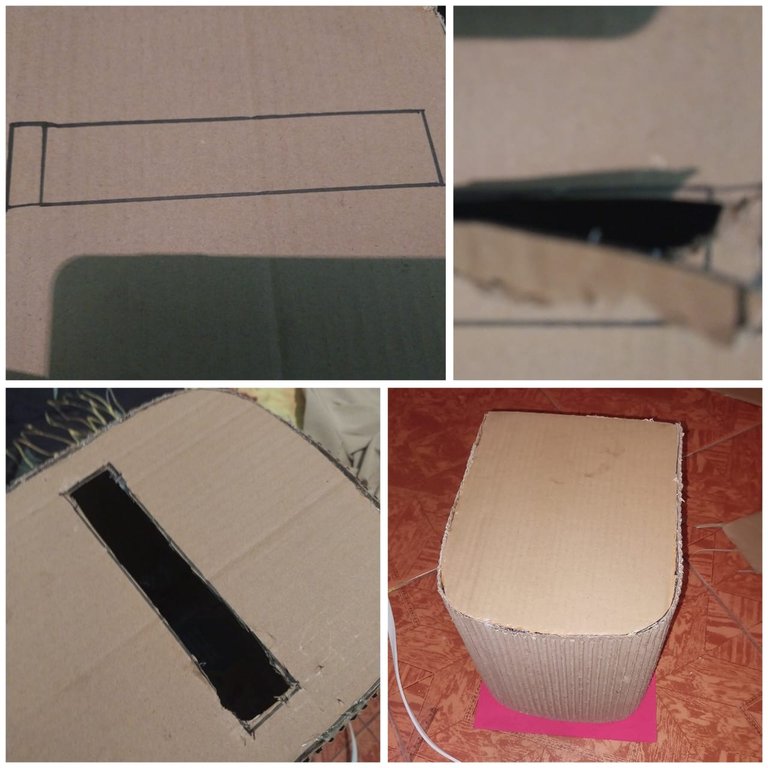
Then we must open a rectangle in the middle area of the cardboard so that the letter to Santa Claus can be inserted, then we open the hole and then we must glue the red foami on this area.
4
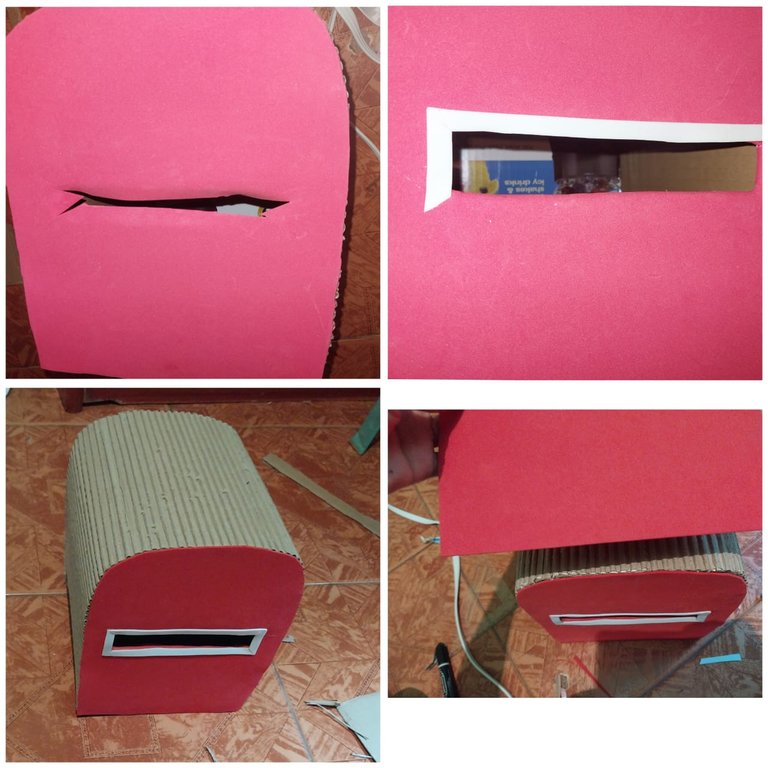
Then we must open the hole also in the area of the foami. Then we must glue white lines of foami in the area of the opening of the mailbox. Then glue the red foami in the upper area of the mailbox.
5
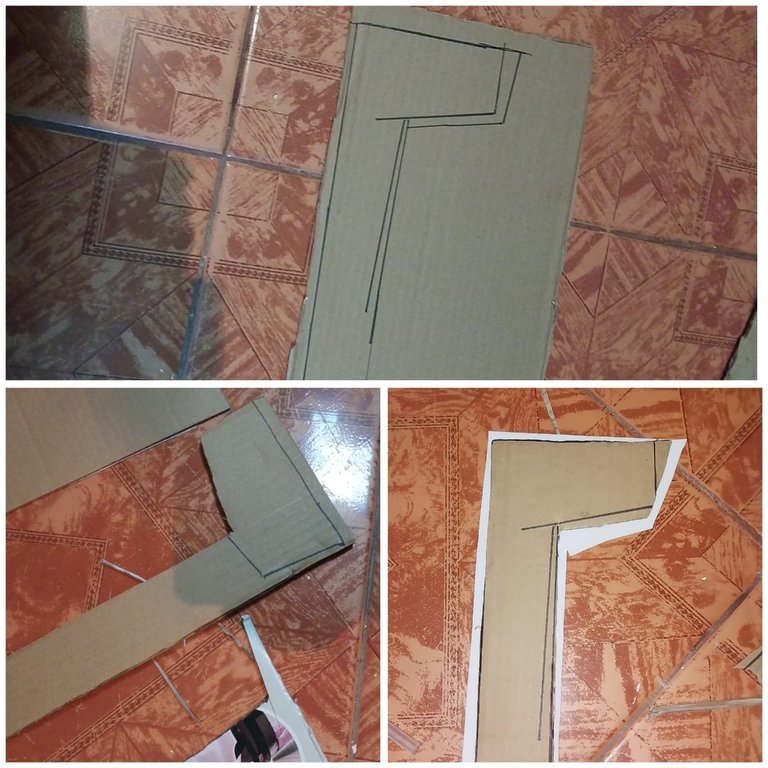
Then we must make a structure of the mailbox lever on the cardboard. Then we cover the cardboard with the white foami.
6
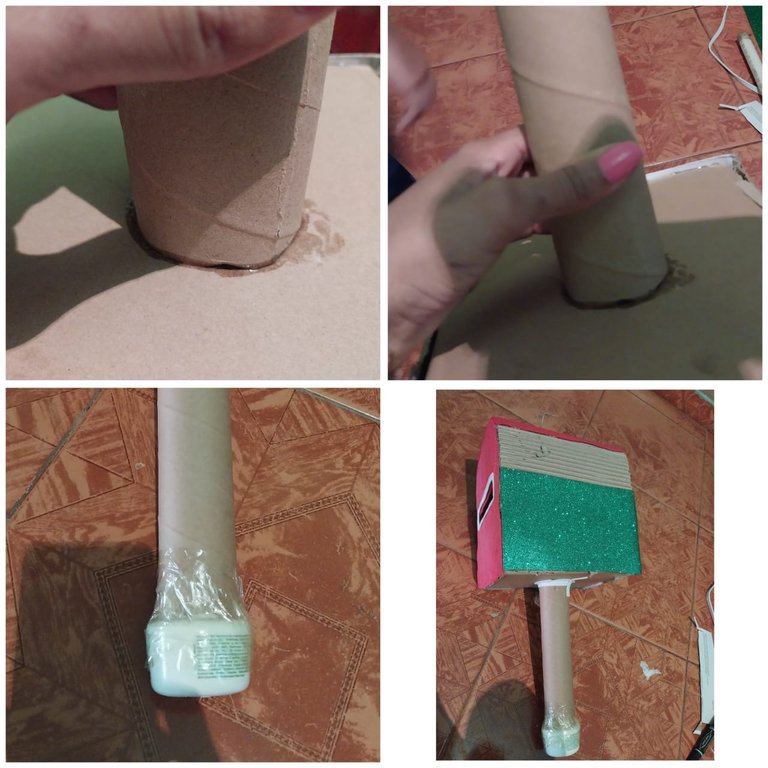
Then we must glue the cardboard cylinder on it with the help of the silicone, then I inserted the cardboard in the base of a small plastic container.
7
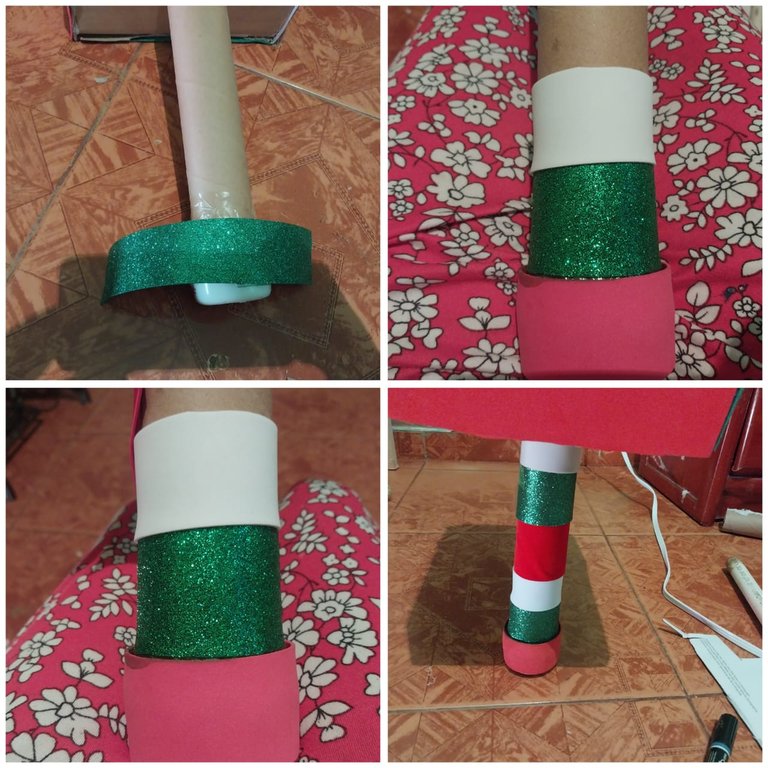
Then we cut out green, red and white foami ribbons and glue them on the cylinder.
8
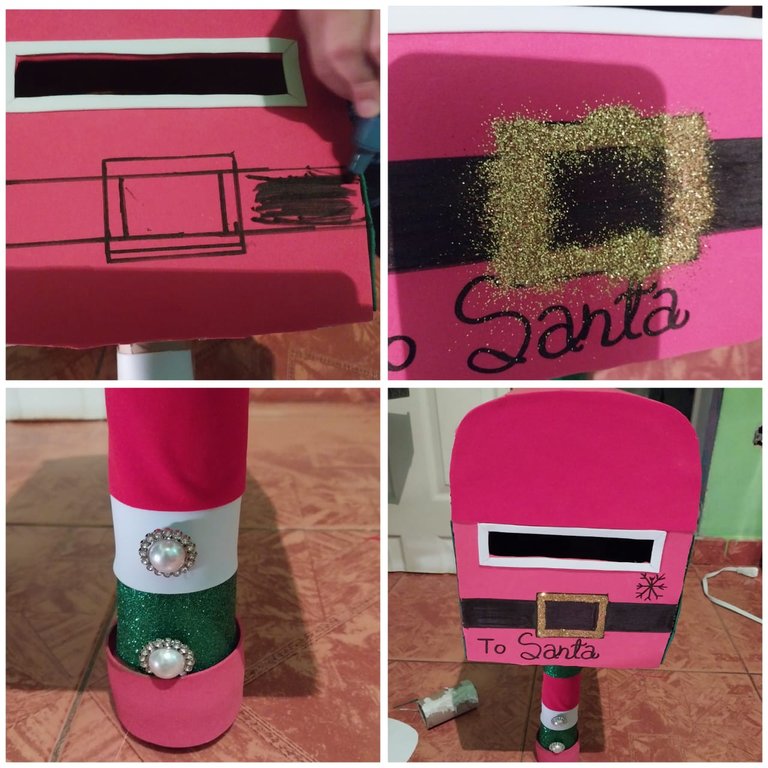
Then we must make a Christmas belt, for this we make the belt with the marker and in the middle area of the buckle we add glue and then gold frosting. Then we must glue the buttons in the lower area of the foot of the mailbox!
9
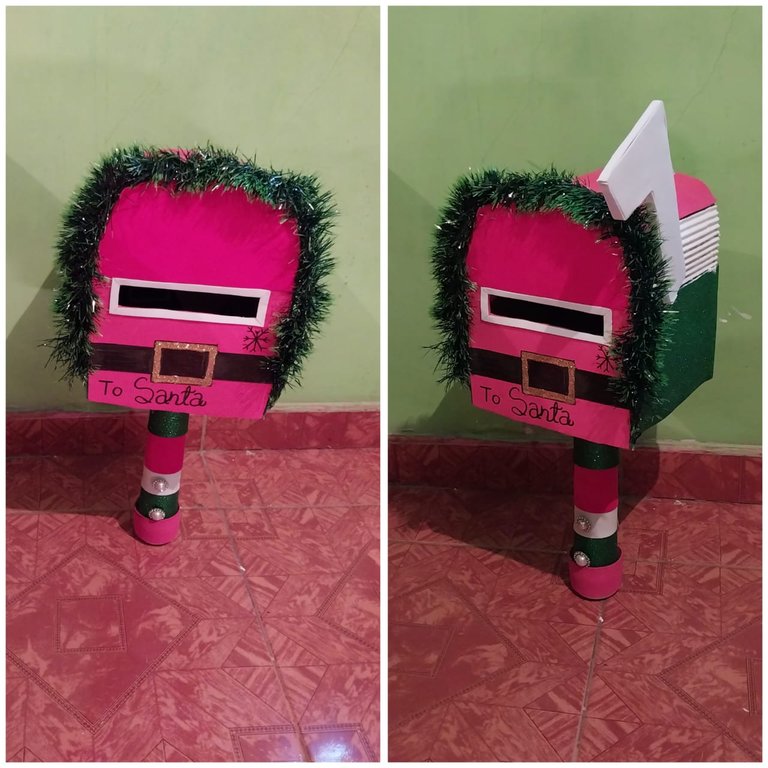
Next we glue the raincoat on the edge area of our mailbox. Finally we glue the lever with the help of the silicone. I hope you like the final result.

Thanks to my dear niece Elizabeth for helping me to make the Mailbox and for giving me the idea to make this one! She has already sent the letter to Santa Claus.

I hope you have a Merry Christmas my dear friends!
- Images belong to me
- Translator: Deepl Traslator
- Editing: Canva

Hola mis amigos de Hive, espero que estén bien. Estoy feliz de poder nuevamente poder compartir mi creación navideña para esta, nuestra querida comunidad de Diy-Hub.
Como pueden apreciar es un diseño de buzón navideño, para realizarlo he utilizado material de reciclaje. Espero que les guste.

Materiales
- Carton
- Tijeras
- carton cilindrico ( base de cartón de papel higiénico ó de servilletón)
- Pintura Blanca
- Foami rojo, blanco y verde
- Guirnalda
- Pistola de silicón
- Marcador negro
- Pega blanca y escarcha dorada
- Botones decorativos

Paso a Paso
1

Debemos iniciar realizando las dos caras en el cartón y en cada esquina de esta debemos realizar una curva en estas.
2

Luego debemos recortar cada uno de estos, luego debemos pegar en cada cara una forma cuadrada para formar el cajón de nuestro buzón de mensajería.
Luego debemos pegar sobre el cajón del buzon, un carton sobre este desde un extremo al extremo. Esta zona del cartón se debe eliminar la primera capa para dejar la estructura de relieve del carton.
3

Luego debemos abrir un rectángulo en la zona media del cartón para que se pueda introducir la carta a Papa Noel, luego abrimos el orificio y luego debemos pegar sobre esta area el foami rojo.
4

Luego debemos abrir el agujero también en la zona del foami. Después se debe pegar líneas blancas de foami en la zona de la abertura del buzón. Seguidamente en la zona superior del buzon se pega el foami rojo.
5

Luego debemos hacer una estructura de la palanca del buzón en el cartón. Después forramos el cartón con el foami blanco.
6

Después debemos pegar sobre este el cilindro de cartón con la ayuda del silicón, luego introduje el cartón en la base de un envase pequeño de plástico.
7

Luego recortamos cintas de foami verde, rojo y blanco y las pegamos en el cilindro.
8

Luego debemos hacer un cinturón navideño, para ello realizamos el cinturón con el marcador y en la zona del medio la hebilla le agregamos pega y luego escarcha dorada. Despues debemos pegar los botones en la zona baja del pie del buzón!
9

Seguidamente debemos pegar la gabardina en la zona de la orilla de nuestro buzón. Finalmente pegamos la palanca con la ayuda del silicón. Espero que les guste el resultado final.

Agradecer a mi querida sobrina Elizabeth por ayudarme a fabricar el Buzón y además de darme la idea para realizar este! Ella ya le envió la carta a Papá Noel.

Espero que pasen una feliz navidad mis queridos amigos!
- Las imágenes me pertenecen
- Traductor: Deelp traslator
- Edicion: Canva

Genial y divertido buzón navideño para las cartas de los niños y sus regalos ....muy original sigue así creando....
Nice Christmas mailbox 📬 showing the creativeness in human brain.
¿ᴺᵉᶜᵉˢᶦᵗᵃˢ ᴴᴮᴰ? ᵀᵉ ˡᵒ ᵖʳᵉˢᵗᵃᵐᵒˢ ᶜᵒⁿ @ruta.loans
This is creativity,your work is so neat and beautiful