Beautiful Flexible Dough Flower Earrings

Hello, my dear friends at Hive: I hope you are feeling well! Cold pliable dough is a very versatile material with which we can elaborate different decorative pieces. In addition, it is very easy to work it to make rings or earrings, as it is a malleable material that dries very quickly.
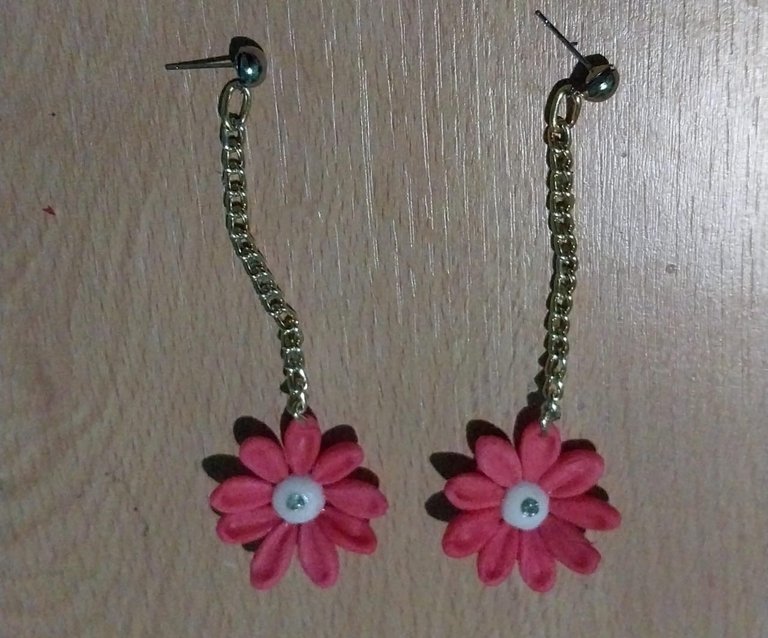
In this way, I have made beautiful earrings of 9 petals, a very elegant design that enhances the beauty of women. These are elongated floral earrings! I hope you like them.
Materials
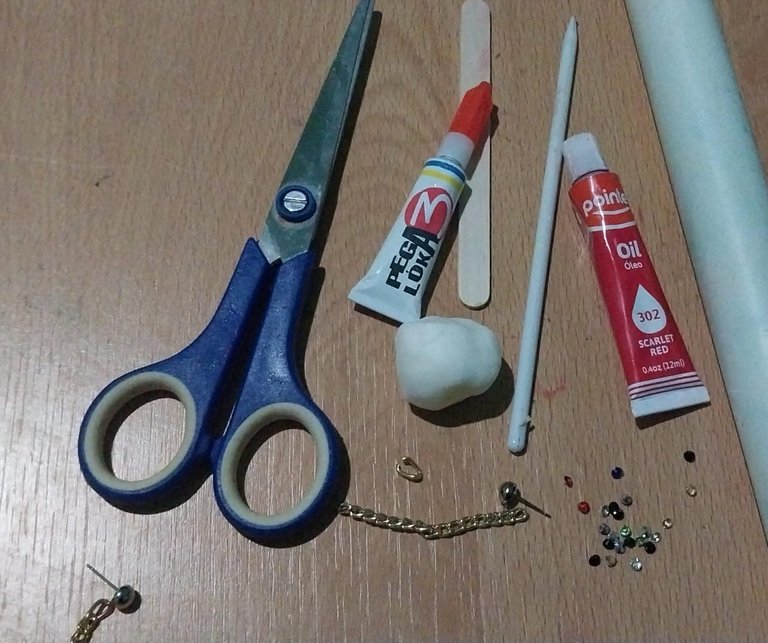
- Cold pliable dough
- Red oil paint
- Instant glue
- Scissors
- Rolling pin
- Stake
- Small crystals
Step by Step
1

We take a small handful of flexible dough and we must massage the dough little by little so that it acquires consistency to make the pieces, we can knead the dough for about 2 minutes, then we must add a little red paint and knead the dough.
Then we must make small balls and then we must lengthen this cylinder-shaped, as you can see in the image.
2
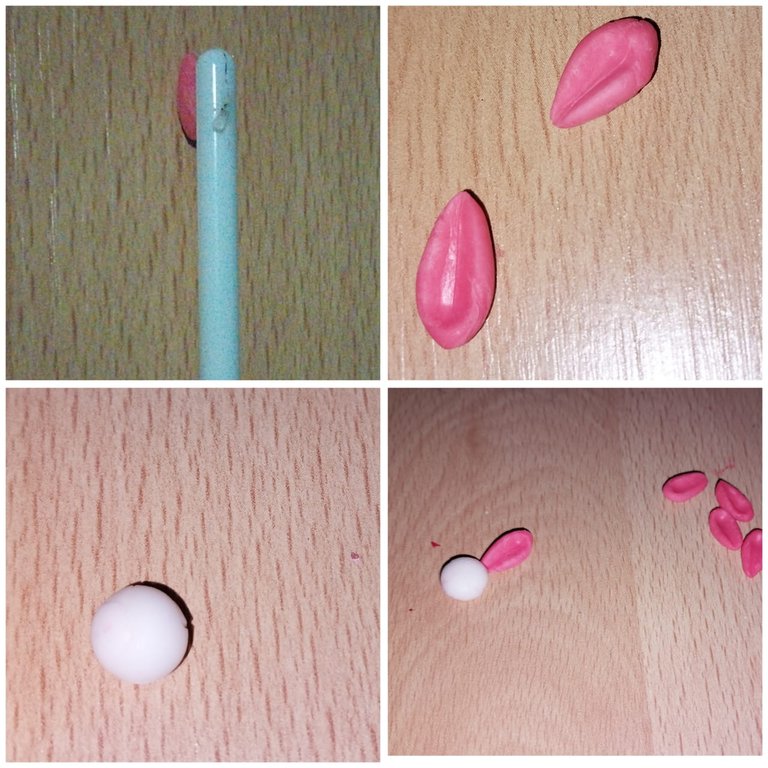
Then we must begin to give the shape to the small petals, for this we use the stake, and we press this in the central form of the flexible dough, in this way we make 9 petals.
Then we use a little flexible dough to make the central part of the flower. Then we glue petal by petal to form the flower.
3

Generally to glue the flowers we can glue them together with school glue, but I have particularly used instant glue and I have noticed that it has a greater resistance. When gluing the petals we must align them to the circular shape.
4
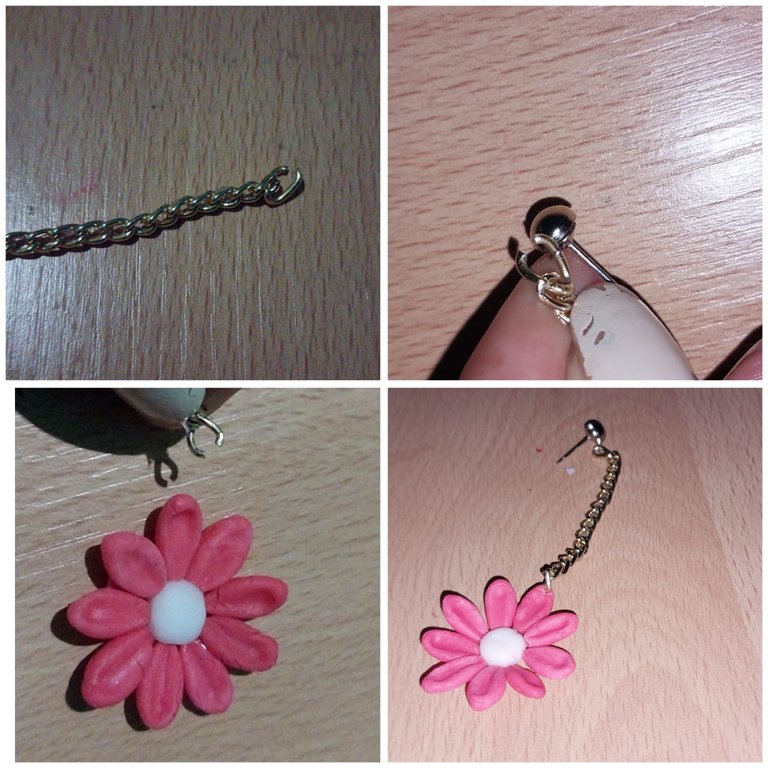
Then we must open one of the small rings of the ring mass that we have, and then we introduce it into the hole of the buckler to form the earring itself.
At the end of the ring we must open this one and then introduce it in one of the petals of the flower. Once we introduce it we must close it!
5
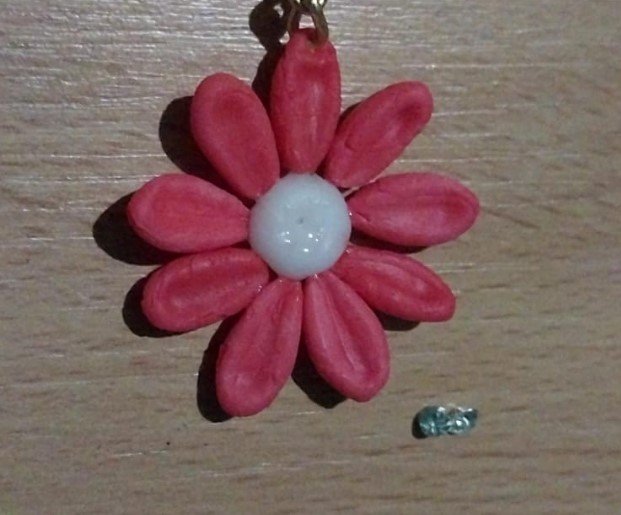
Next, in the middle point of the white area of our earring, we must make a small point with the stake or with some instrument that allows us to make a point or a small cavity in the flower.
Then we must apply some instant glue in the area of the dot. Then we glue the crystal in this area!
Finally we must create another earring following the previous steps, finally according to the thickness of the petal we must wait for this material to dry, I mean the flexible mass. In this case I waited approximately 30 minutes for the material to dry completely.
So preferably we should create accessories that have little thickness first to minimize the drying time and also so that it does not weigh too much at the time of use.

This is the final result of our floral design. I hope you like it and also encourage you to use this kind material that allows us to create different designs.
Thank you very much Hive family, I hope to continue sharing much more of this useful material as it is the Flexible dough!
- Images belong to me
- Translator: Deepl Traslator
- Editing: Canva
Hola, mis queridos amigos de Hive: ¡Espero que os encontréis muy bien! La masa flexible en frío es un material muy versátil con el que podemos elaborar distintas piezas decorativas. Además, es muy fácil trabajarla para hacer anillos o pendientes, ya que es un material maleable que se seca muy rápido.
De esta manera, he realizado unos hermosos pendientes de 9 pétalos, un diseño muy elegante que realza la belleza de la mujer. Se trata de unos aretes alargados florales! Espero que les guste.
Materiales
- Masa flexible al frio
- Pintura de oleo roja
- Pegamento instantáneo
- Tijera
- Rodillo
- Estaca
- Cristales pequeños
Paso a Paso
1
Tomamos un puñado pequeño de masa flexible y debemos masajear poco a poco la masa para que esta vaya adquiriendo consistencia para realizar las piezas, podemos amasar la masa por aproximadamente 2 minutos, luego debemos añadir un poco de pintura roja y amasamos la masa.
Luego debemos hacer pequeñas bolitas y luego debemos alargar esta de forma de cilindro, asi como pueden apreciar en la imagen.
2
Luego debemos iniciar a darle la forma a los pequeños pétalos, para ello utilizamos la estaca, y presionamos esta en la forma céntrica de la masa flexible, de esta manera hacemos 9 pétalos.
Seguidamente utilizamos un poco de masa flexible para hacer la parte céntrica de la flor. Luego debemos ir pegando petalo a petalo para formar la flor.
3
Generalmente para pegar las flores podemos ir uniendo esta con pega escolar, pero particularmente he utilizado la pega instantánea y he podido notar que tiene una mayor resistencia. Al momento de pegar los pétalos debemos alinear estos a la forma circular.
4
Luego debemos abrir una de las argollas pequeñas de la masa de argolla que tenemos, y luego introducimos esta en el orificio del broquel para de esta manera formar el arete en si.
Al final de la argolla debemos abrir esta y luego de debe introducir en uno de los pétalos de la flor. Una vez que la introducimos debemos cerrar esta!
5
A continuación, en el punto medio de la zona blanca de nuestro arete, debemos hacer un pequeño punto con la estaca o con algún instrumento que nos permita hacer un punto o una pequeña cavidad en la flor.
Luego debemos aplicar un poco de pegamento instantáneo en la zona del punto. Luego pegamos el cristal en esta zona!
Por ultimo debemos crear otro arete siguiendo los pasos anteriores, finalmente de acuerdo con el grosor del pétalo debemos esperar que este material seque, me refiero a la masa flexible. En este caso aproximadamente he esperado 30 minutos para que el material secara completamente.
Así que preferiblemente debemos crear accesorios que tengan poco grosor primero para minimizar el tiempo de secado y además de ello para que este no pese mucho al momento de utilizarlos.
Este es el resultado final de nuestro diseño floral. Espero que les guste y que además se animen a utilizar este material tan bondadoso que nos permite crear diferentes diseños.
Muchas gracias familia de Hive, espero poder seguir compartiendo mucho más de este material tan útil como lo es la masa Flexible!
- Images belong to me
- Translator: Deepl Traslator
- Editing: Canva
Hermoso trabajo amiga. Éxito en tu post
Muchas gracias por tus palabras amiga! Saludos Exito para ti tambien en todo
Te ha quedado precioso, una flor hermosa y ese toque con la cadena larga y la flor es genial muy original, y el toque del cristal en el centro lo hace ver mejor, buen trabajo 👏
Muchas gracias por el apoyo Jewelry! Siempre agradecida de esta hermosa comunidad
Very fell maid work ☺👌👌👌🌺 .. and they look also cool on you 👌☺
thanks for yours words
This is so beautiful
Thanks you my friend
You are welcome
Wow, this is lovely. I love how creative you her. Weldone
Thanks my friend
It is elegant, stylish, and attractive. Love its design and it shows your creativity. You did a great job! Keep it up!
Thanks Diyhub ❤️
So beautiful 😍
Thnaks my friend
Welcome 🤗
Very nice design and It really suits you.