Beautiful Bow inspired by Forest Hearle 💚 || 💚 Hermoso Lazo inspirado en Forest Hearle |
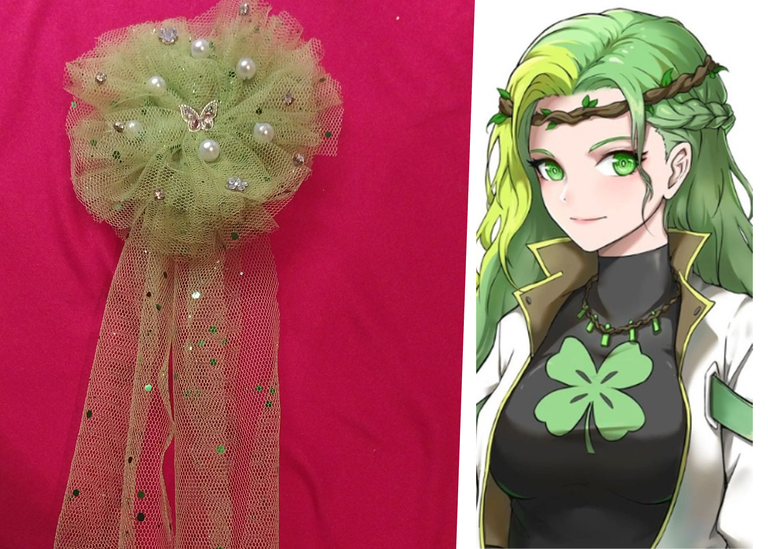
Hello friends of Hive. I hope you are doing well! Forest Hearle is a character that always causes inspiration in our creations. This time I want to present you a round ribbon inspired by this beloved character.
I hope you like it.
Materials:
- 4 ribbons of tull of 60 cm × 6 cm.
- 2 tull ribbons of 80 cm X 4 cm
- Decorative beads and crystals
- Thread and needle
- Silicon or instant glue.
Step by Step
1
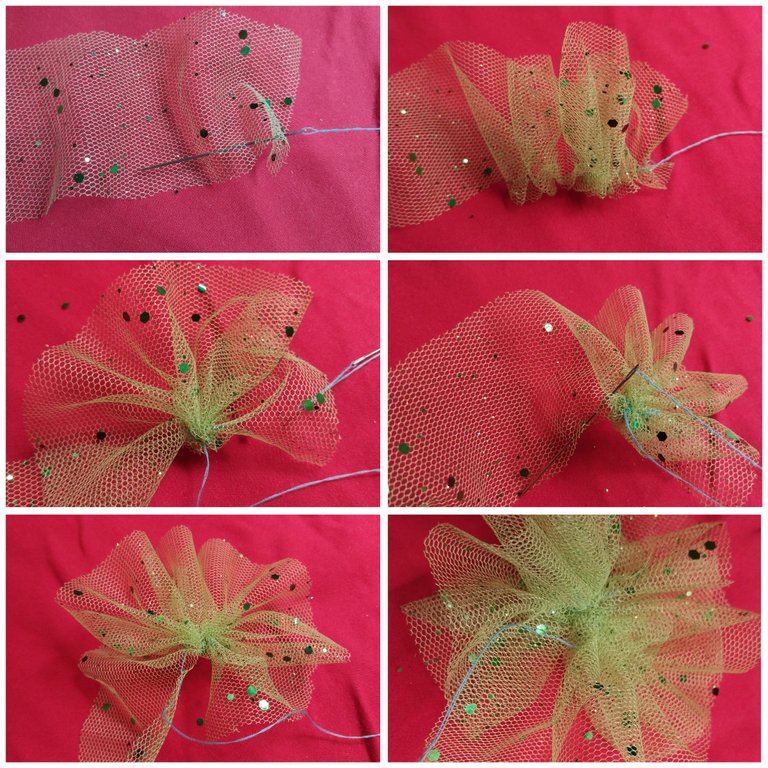
We start taking the needle and thread and proceed to sew the ribbon making painted and I recommend the fabric to form the bangs and at the same time give it a round shape.
2
Then we sew the center area and join both ends and sew again.
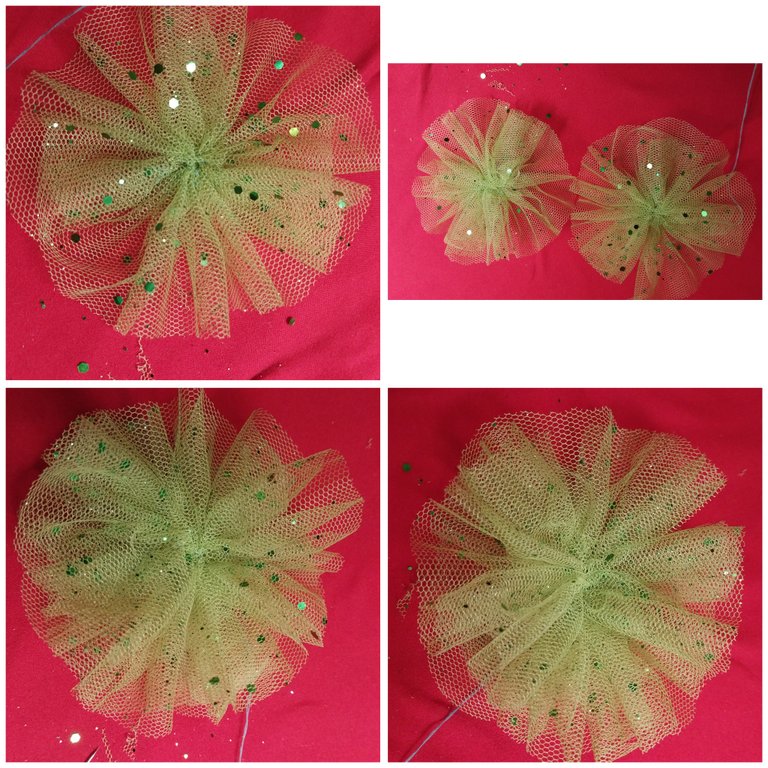
Then we make a second round fringe and then overlap one with the other and sew.
3
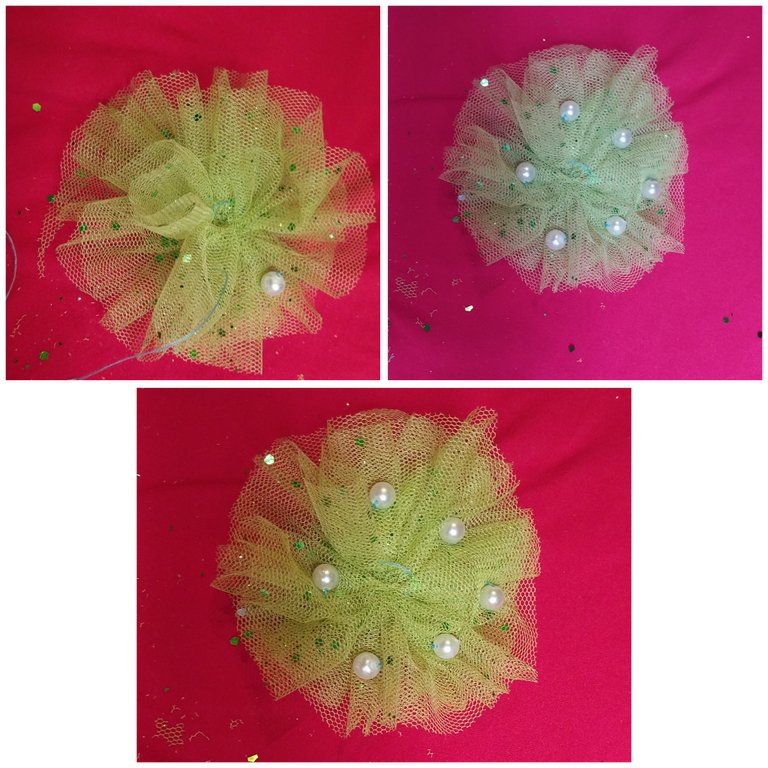
Then we sew the beads to the tull bangs using the thread and the Needle.
4

Then we use two ribbons and make a loop cut at the end of the ribbon making a triangle in the middle and trimming this area.
Finally we glue this ribbon behind the tull circles.
5

Then we glue with the silicon a butterfly in the middle and several crystals to decorate the tull.
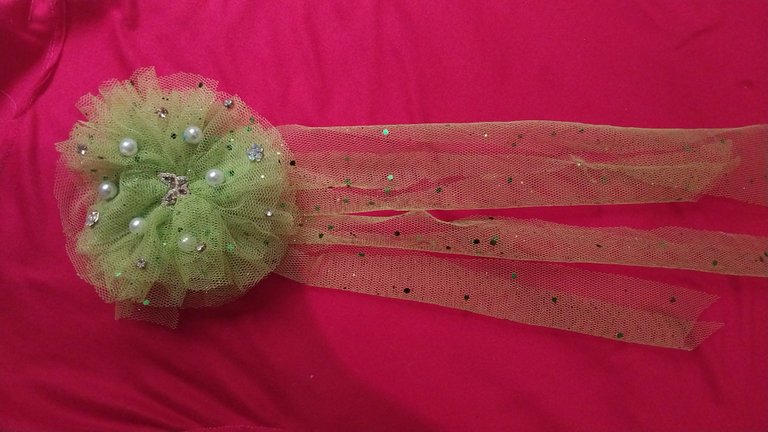
This is the pretty bow, we can add a hook on the back or a tail.
- Images belong to me
- Translator: Deepl Traslator
- Editing: Canva
Que tal amigos de Hive. Espero estén muy bien! Forest Hearle es un personaje que causa inspiración siempre en nuestras creaciones. En esta oportunidad quiero presentarles un lazo redondo inspirado en este querido personaje.
Espero les guste.
Materiales:
- 4 Cintas de tull de 60 cm × 6 cm
- 2 cintas de tull de 80 cm X 4 cm
- Perlas y cristales decorativos
- Hilo y Aguja
- Silicon o pega instantáneo.
Paso a Paso
1
Iniciamos tomando la Aguja y el hilo y la cinta la procedemos a coser haciendo pintadas y recomiendo la tela para que se formen los flequillos y a la vez darle una forma redonda.
2
Luego cosemos la zona del centro y unimos ambos extremos y cosemos nuevamente.
Luego hacemos un segundo flequillo redondo y luego sobreponernos una con la otra y cosemos.
3
Luego cosemos las perlas a los flecos del tull utilizando el hilo y la Aguja.
4
Luego utilizamos dos cintas y hacemos un corte tipo lazo al final de la cinta haciendo un triangulo en el medio y recortando esta zona.
Finalmente se pega esta cinta detrás de los círculos de tull.
5
Luego pegamos con el silicon una mariposa en el medio y varios cristales para decorar el tull.
Este es el bonito lazo, podemos agregarle un gancho en la parte trasera o una cola.
- Las imágenes me pertenecen
- Traductor: Deelp traslator
- Edicion: Canva

The bow is really nice and simple. Very well done
Now we need to find woman who would wear it too 😋👌👌 ... very cool work. 🌺👌👌😋
It is a very beautiful art work production
Thank you for sharing
!PIZZA
Thanks ♥️
$PIZZA slices delivered:
@oadissin(5/15) tipped @divergente1
So beautiful ❤️
Thank you
So Beautiful friend
Thank you
Welcome dear