Rudolf Mini Christmas Sock - Easy DIY Needlework How to
Hello, friends especially needleworkers!
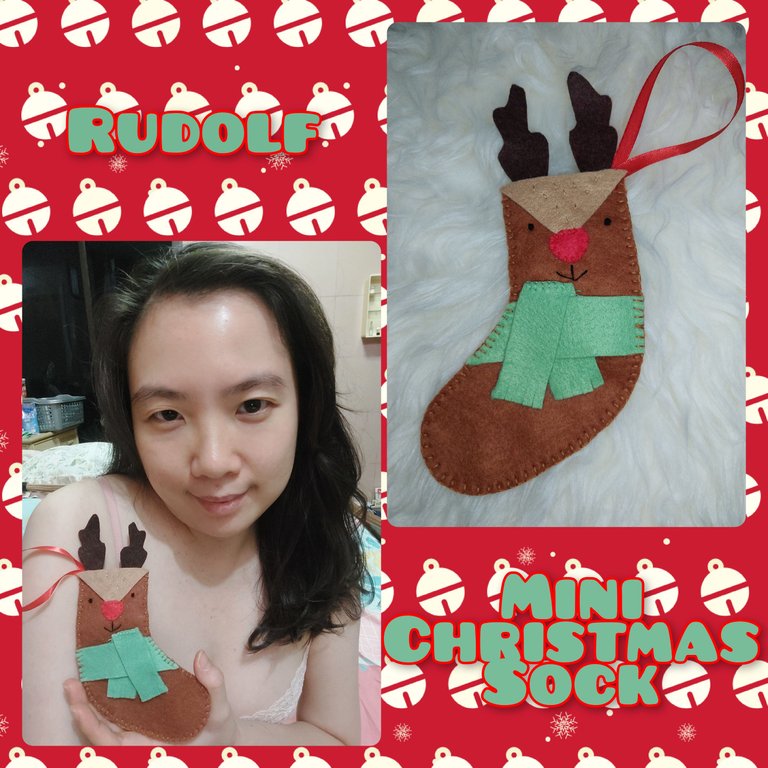
Christmas is at the door and finally i could dedicate some of my time to make Christmas cute decoration, Rudolf mini sock which would be so cute to be hanged on the Christmas tree or anywhere you like. Follow how i made it and you would be able to make one at your house too. Let's check it out!
Project Time: around 4 hours
Difficulty: Medium
Skills needed:
- whipped stitch
- basic stitch
- french knot
- smiling stitch (i don't know the name so i name it myself)
- blanket stitch
Materials and Things needed:
- paper
- pencil
- scissors (i used both my paper scissors and craft scissors)
- pins
- felt fabrics in brown, light brown, red, light green and dark brown
- sewing needle
- embroidery threads
- red ribbon
How to make it:
1ST
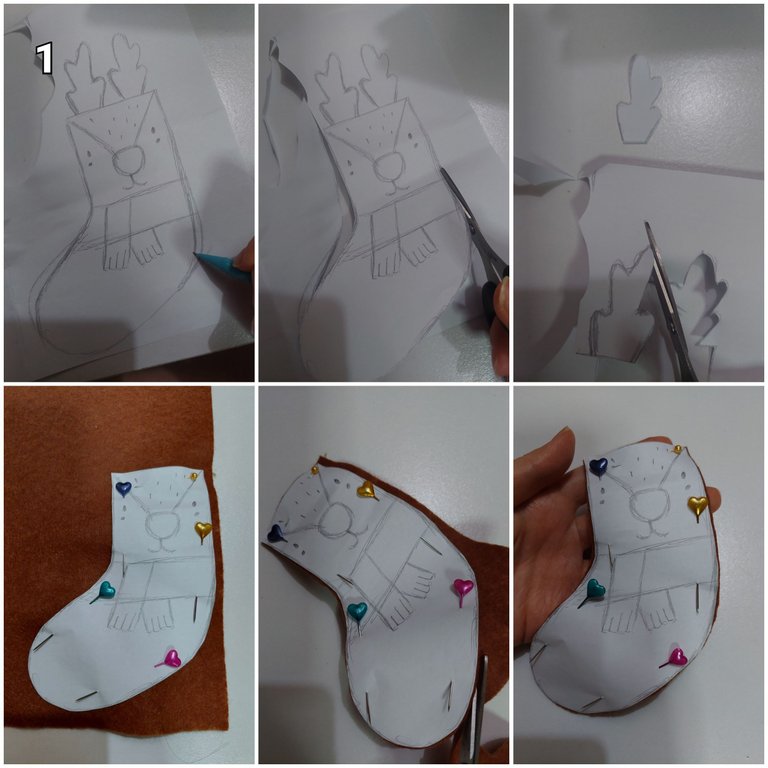
I drew the rudolf sock on a piece of paper. Then i cut it off. I cut separately between the sock and the antlers. After that i pinned it to the brown felt and cut it off.
2ND
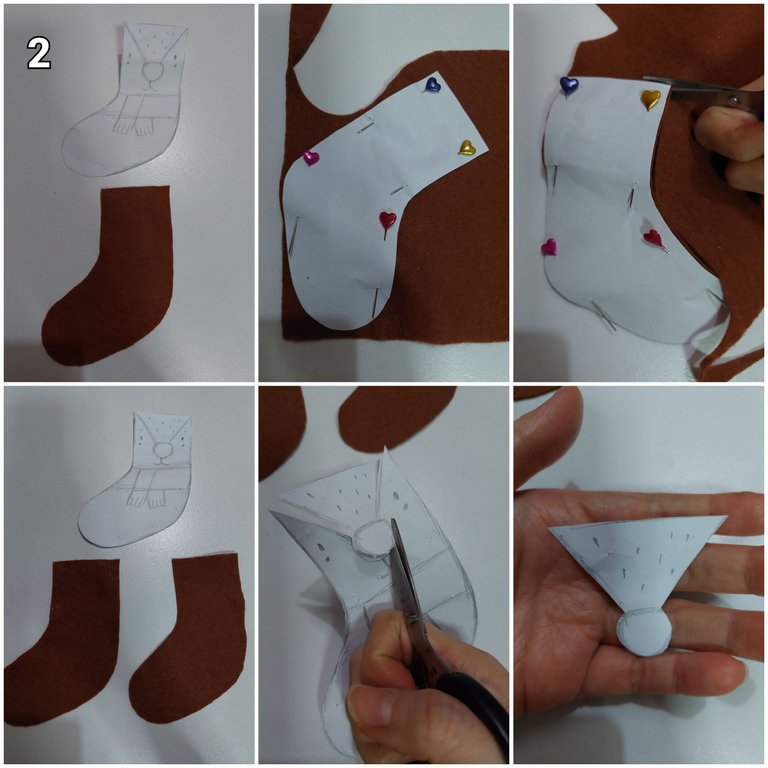
After finished with the front part. I pinned the sock again to the brown felt then cut it. So i got the front and back part of the sock. Next, i cut the patter, on the upper part so i got the triangle plus nose like below.
3RD
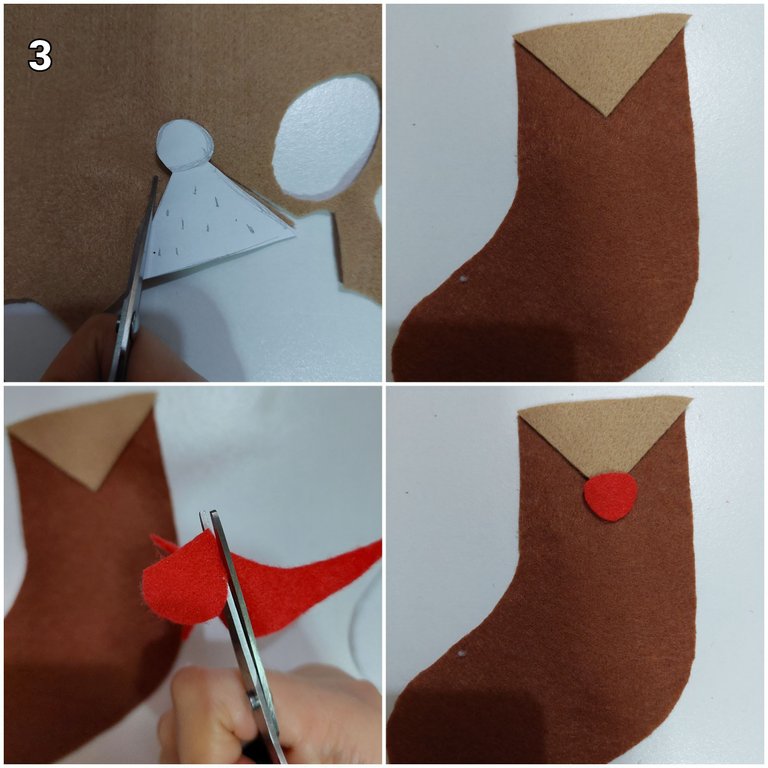
I cut the light brown felt by using the cut pattern. After that cut the red felt for the nose. Look what i got now.
4TH
Next, i needed to cut the light green felt to make the scarf. The scarf would have fringe on its' two parts. The result of the cutting off was below.
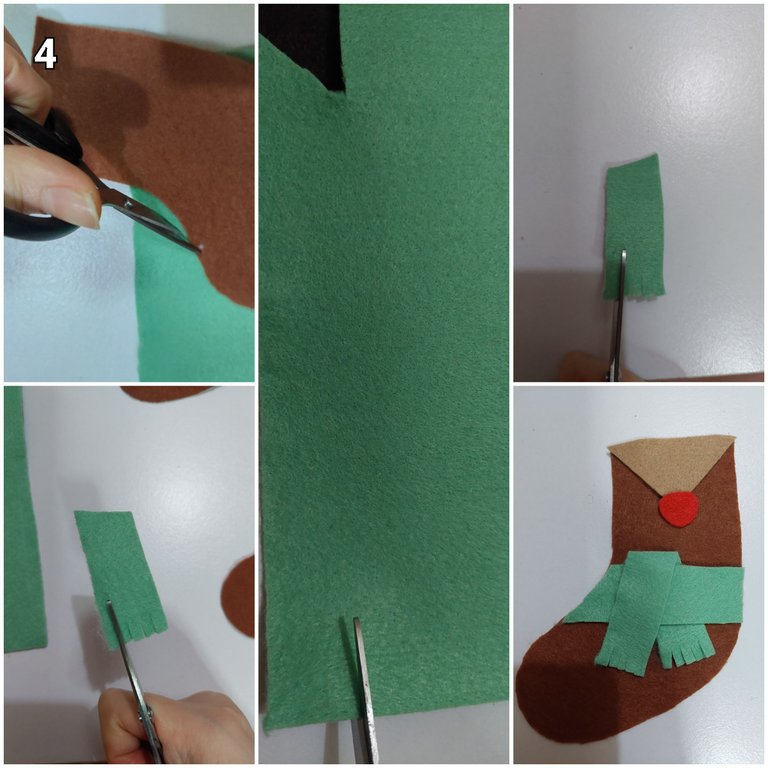
5TH
I also made the antlers by pinning the pattern on dark brown felt then cut it. I made it a bit bigger than the pattern, like below.
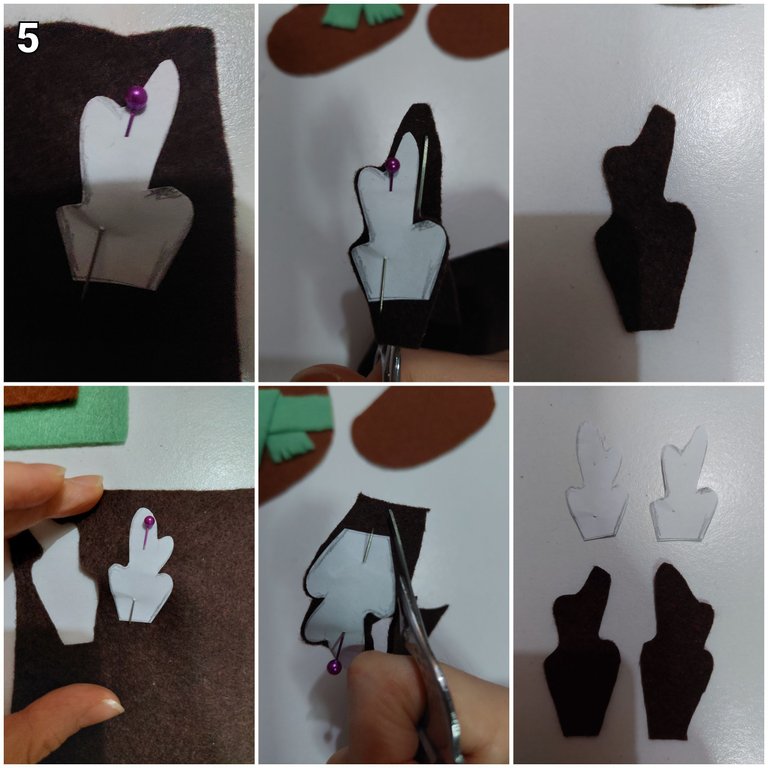
6TH
Next, i put the antlers behind the light brown triangle but upon the sock. Then i did basic stitch to join them, like below. I also did the whipped stitch fot the nose. I made the eyes with french knot, by using double black thread. To complete the face i made the basic stitch and smiling stitch. After that, rudolf cute face was finished.
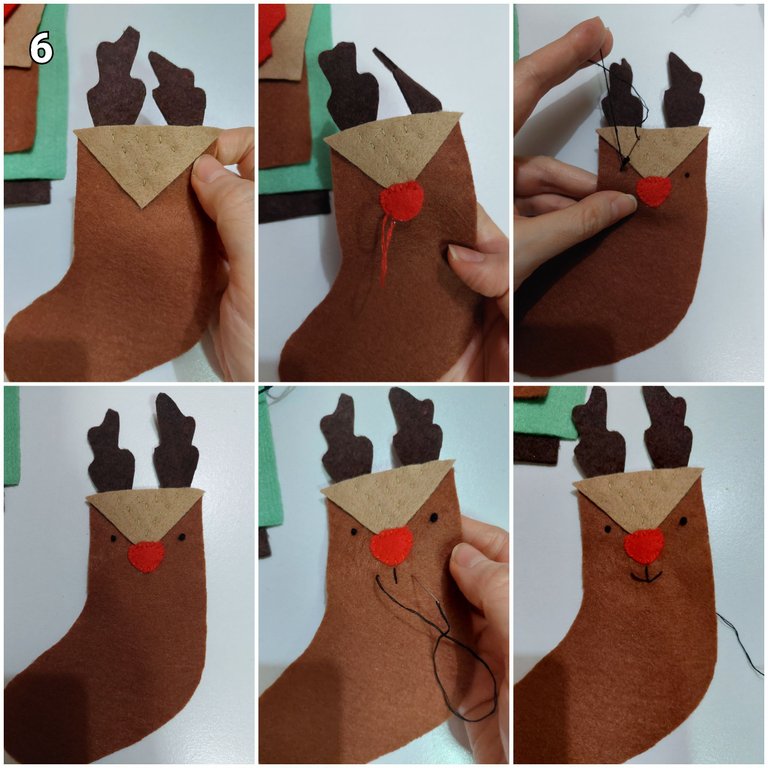
7TH
I joined the back and front part of the fringe scarf with the blanket stitch. Then i cut off the red ribbon. After that i sew it behind the triangle light brown head part, to hid it. I then put the scarf correctly on its' place, after that the last thing to do was only sew around with the blanket stitch.
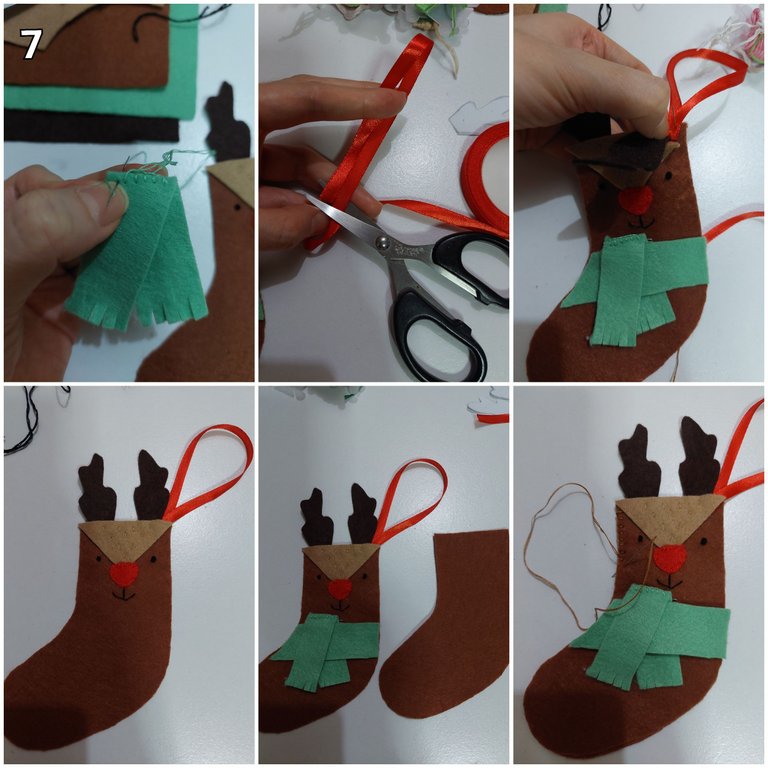
8TH
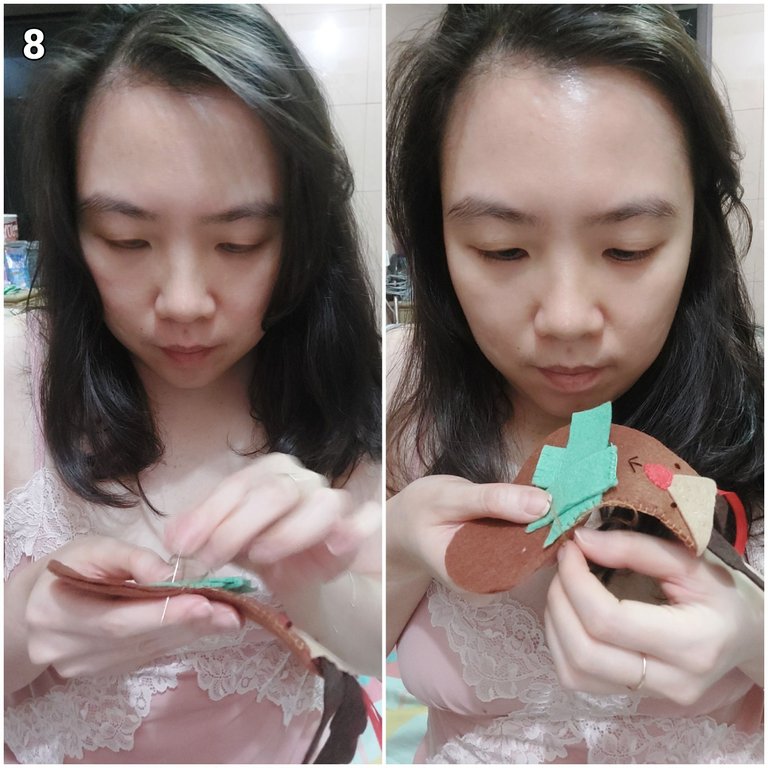
Last thing i did was sewing around with the blanket stitch and of course i didn't sew the top part.
THE RESULT
Ta da, here it is...
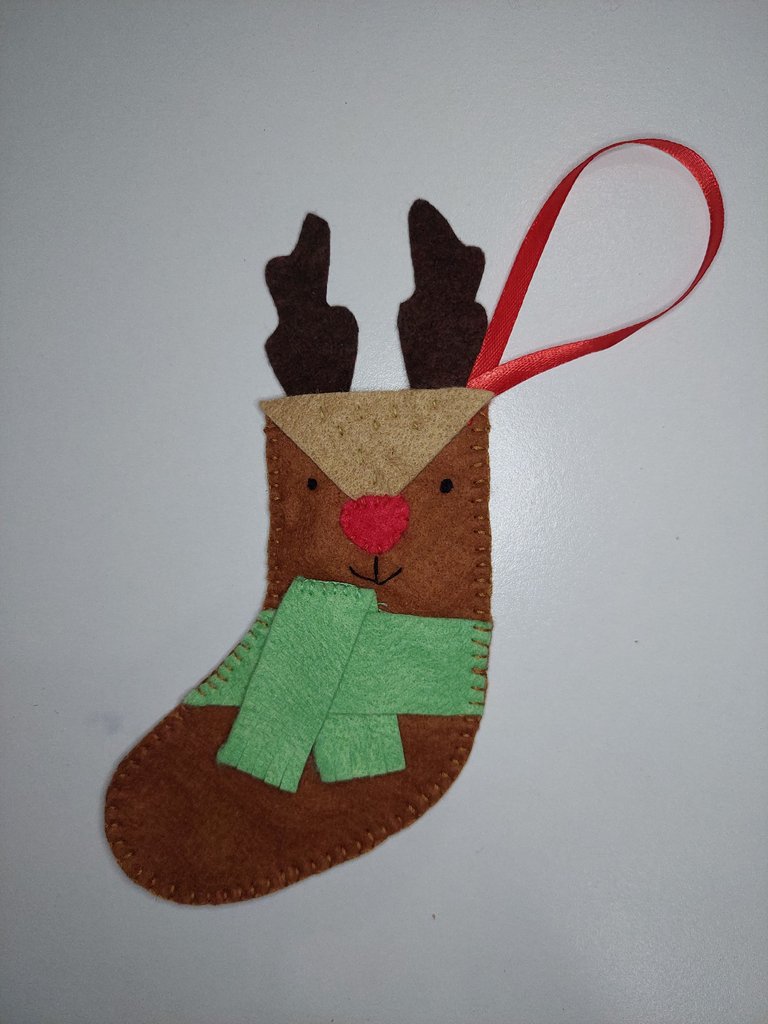
Cute Rudolf Mini Sock is ready for Christmas.
How do you think of it?
Thanks for reading my article, if you enjoy my article, upvote, reblog, follow me and stay tune for more CRAFT things from me!
All of the pictures were taken with Samsung A52 5G android phone and i used incollage apps for the cover picture.
A bit about the author

She works in a bank but she interests in CRAFT (CRaft, Art, Food and Travel). To pursue her art passion she does the cross stitch, embroidery, handsewing, crafts, crochet and also draws. Find hers in
https://de-creartique.redbubble.com and https://decreartique.threadless.com/designs. Also find her cute collectibles pixel cat pictures here https://opensea.io/collection/pixelcryptocat .
This work is beautiful.🤗❤️
Thank you
❤️❤️❤️❤️❤️❤️❤️🤗
Very creative of you. This looks really classy. Well done.
Thank you very much
You're welcome
This made me smile remembering all the cartoons I have watched Rudolf the red nose reindeer in.
Thanks for participating in the contest.
Thank you very much :)
Thanks for sharing, excellent step by step explanation. Regards
Thank you for passing by
So creative, I love it 🦌🎄
Thank you!
You have made this one very beautiful, my friend! Congratulations.
Thanks so much!
Wow that’s really creative of you. I like how you added a little details in there. Great job.
Thank you very much
You’re welcome
Beautiful project, and even more during this lovely time of the year. Without a doubt, the most beautiful time. Blessings.
Thanks a lot
Beautiful. You show us a simple and adorable way to make a cute Rudolph sock.
Success and good luck in the contest.
Thanks a lot :) glad you like it