Paper Jack o Lantern – Easy DIY How to
Hello, friends!
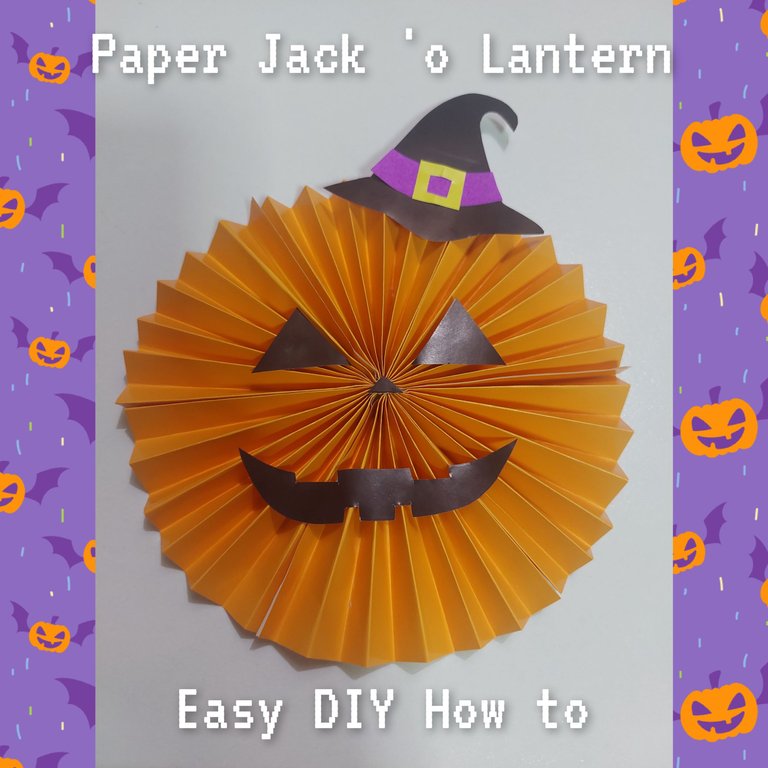
Halloween is nearby, so on weekend I made one more Halloween ornament, so easy to make but it was also perfect for Halloween, a paper Jack o Lantern. I am sure you will be able to make it at home and good thing that it didn’t take much of your time to make. So let’s get started!
Project Time: around 1.5 hours
Difficulty: easy
Materials & Things needed:
- Pencil
- Ruler
- 16x16 cm origami paper in orange, black, purple and yellow
- Scissors
- Stick glue
- Multi purpose glue
How to make it:
1ST
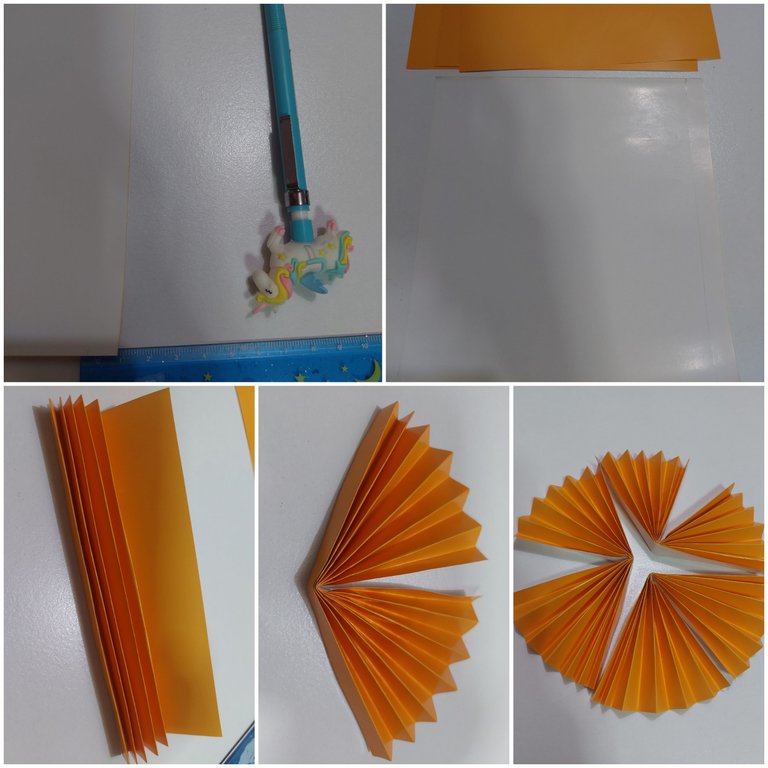
I measured the paper with 1cm width, drew a line, then folded the orange origami paper. Then folded it in the middle and I did the same for all 3 sheets of orange origami paper I had.
2ND
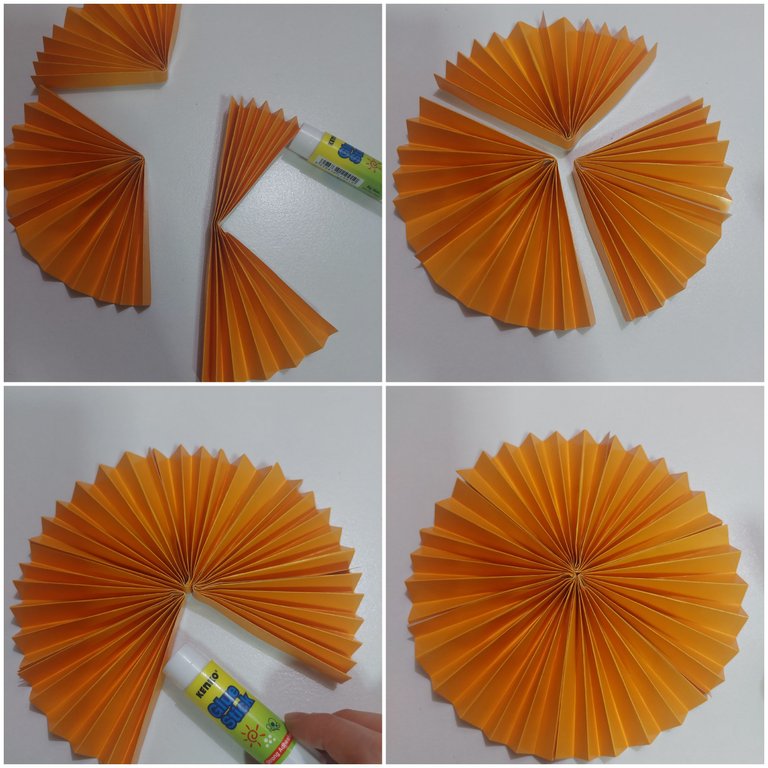
Then I connected the two side of folded origami with stick glue. Then I pasted them all together, just like below.
3RD
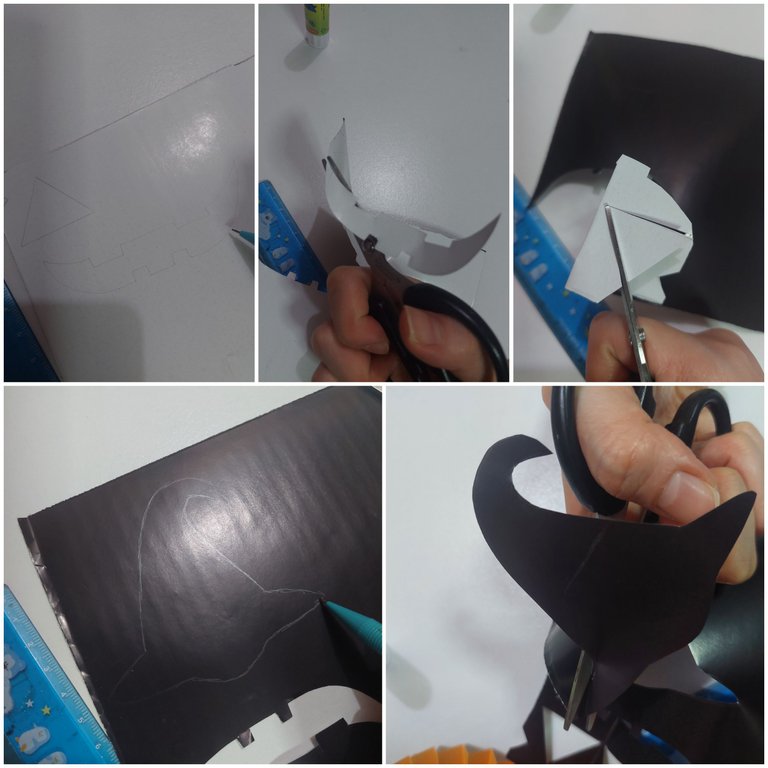
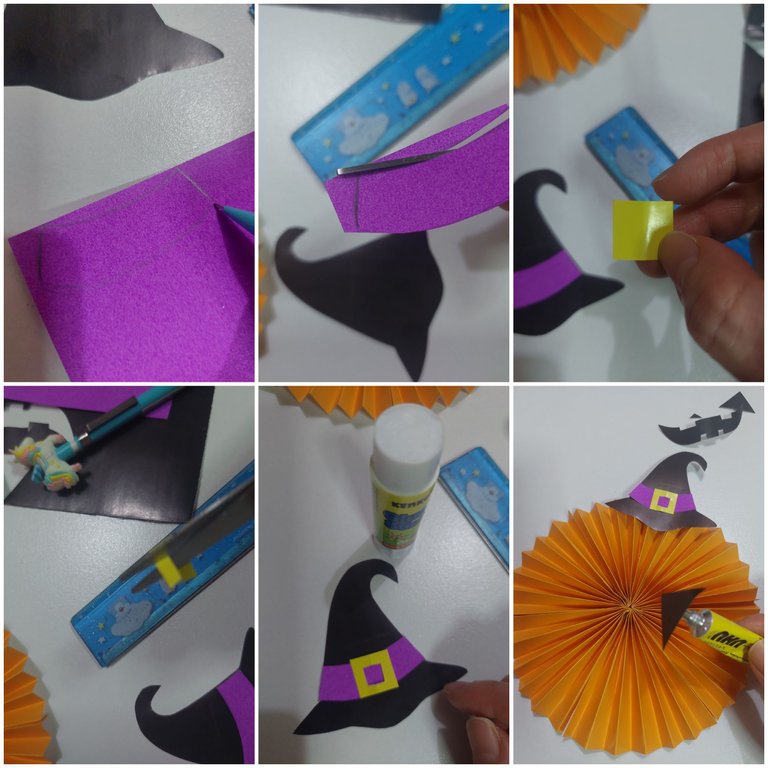
I then drew the eyes and the mouth in the black origami then cut it. I also made the witch hat and also cut it.
4TH
I made the decoration for the witch hat, the belt with purple origami then cut, also the buckle with yellow, cut the inner part. Now time to paste all the ornaments with multi purpose glue.
The Result
Voila, here it is.. Paper Jack o Lantern. It could be hang on the wall perfectly now.
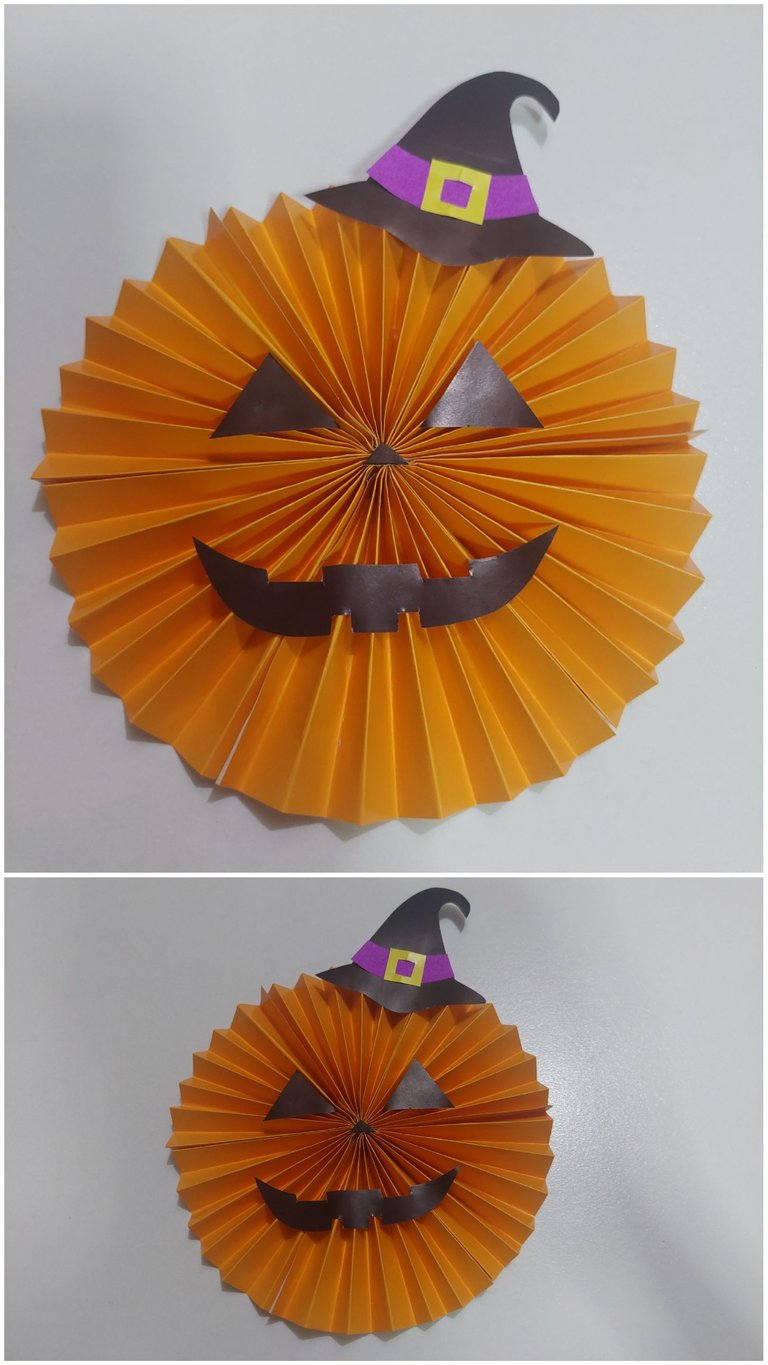
Hope you enjoy it. Happy early Halloween!
A bite about Devy

Hola amiga, que bonita idea para decorar en este halloween 🎃
Hola, amiga. Gracias
¡Me encanto! es una linda y fácil idea para decorar 😘 quiero intentarlo 💛
Gracias :)