Hello Kitty Mini Zippered Pouch - Easy DIY Needlework How to

Hello, friends especially needleworkers!
In my busy time at work, went home lately, I finally could finished this Hello Kitty cute little zippered pouch. The result is not perfect I know, but I was trying my best and I would show you how I made it easily. Let’s get started!
Project Time: around 6 hours
Difficulty: Medium
Skills needed:
- whipped stitch
- blanket stitch
- back stitch
- running stitch
Materials and Things needed:
• Hello Kitty’s face pattern, you could browse then print it like I did or you could also draw it. But if you want the proportion to be correct and precise, just browse then print it
• felt fabrics in white, black, yellow, and red
• scissors (i used both my paper scissors and craft scissors)
• pins
• sewing needle
• embroidery thread in white, yellow, black, and red
• red zipper in 17 cm length
How to make it:
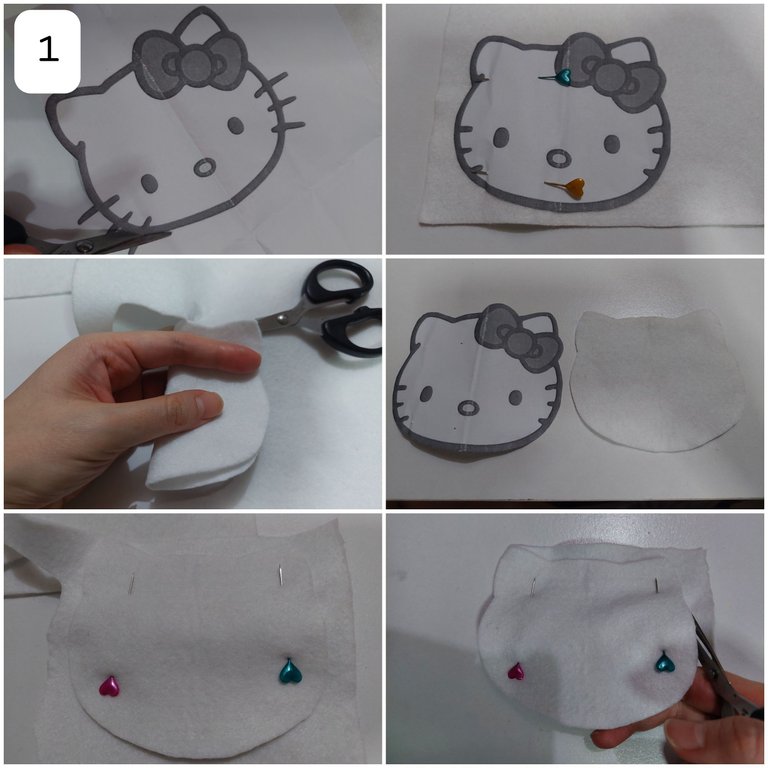
1ST
I cut the kitty’s face. Then I pinned it on the white felt and cut the felt. To make the exact symmetric face without the bow, I folded the felt like below after I got the perfect left side of the face, then this way was to make the right part then I got the perfect shape of it. After that I would like to make the exact same of the kitty face so I pinned the cut felt to the white felt. Then cut it..
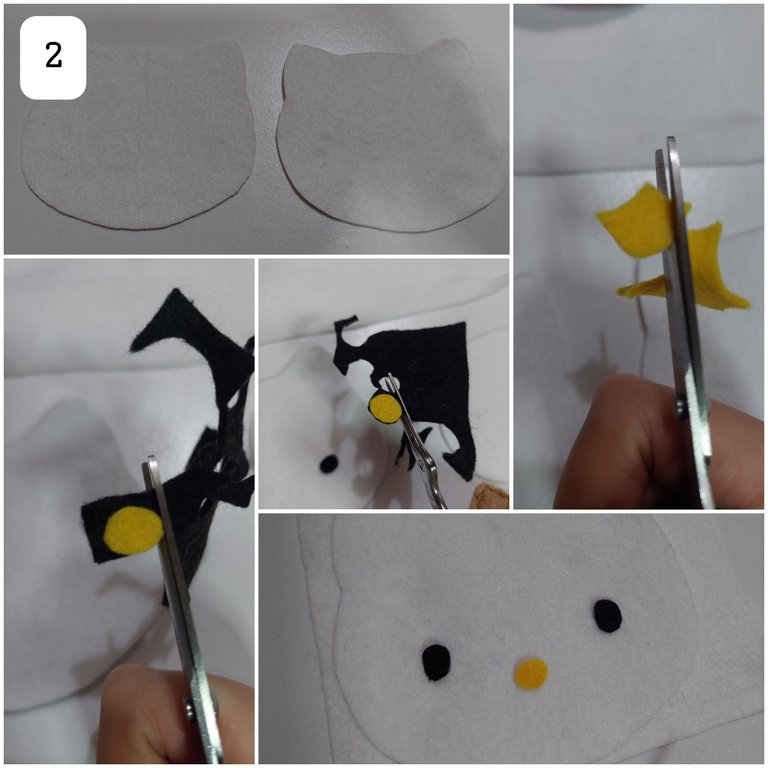
2ND
Then I got two identical kitty’s head. After that I cut the small little yellow nose with oval shape. I used this yellow nose for the identical two black eyes.
3RD
Then I cut the bow from kitty’s head. Pinned it to the red felt then cut it. I also prepared the middle part of it and also a circle for its’ middle part. I done to cut down the parts of the bow.

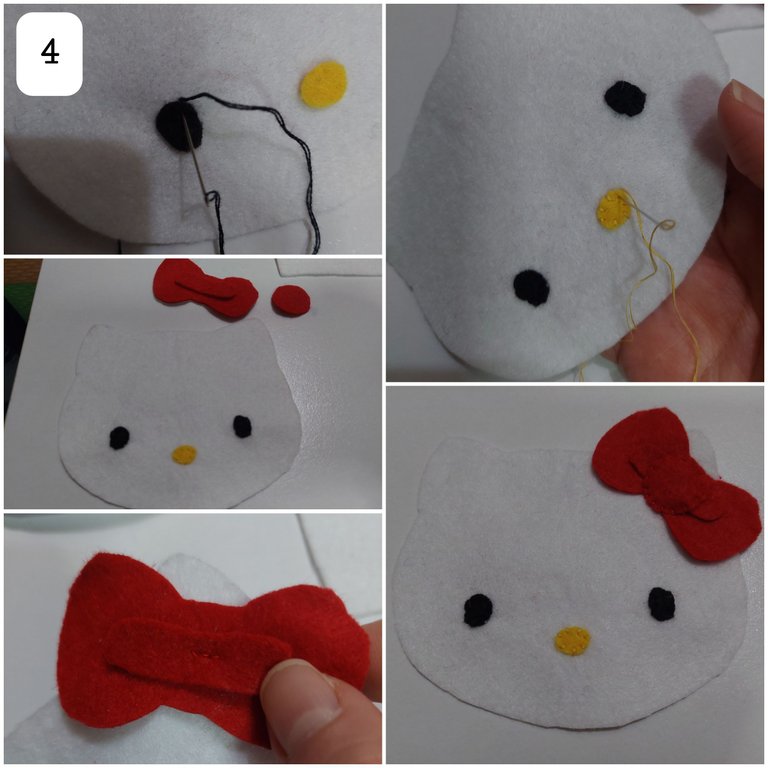
4TH
Next, i put on the eyes with the whipped stitch and I also did the same for the nose. While for the bow, in the middle I sew with the back stitch then I covered it by whipped stitched the circle in its’ centre like below.
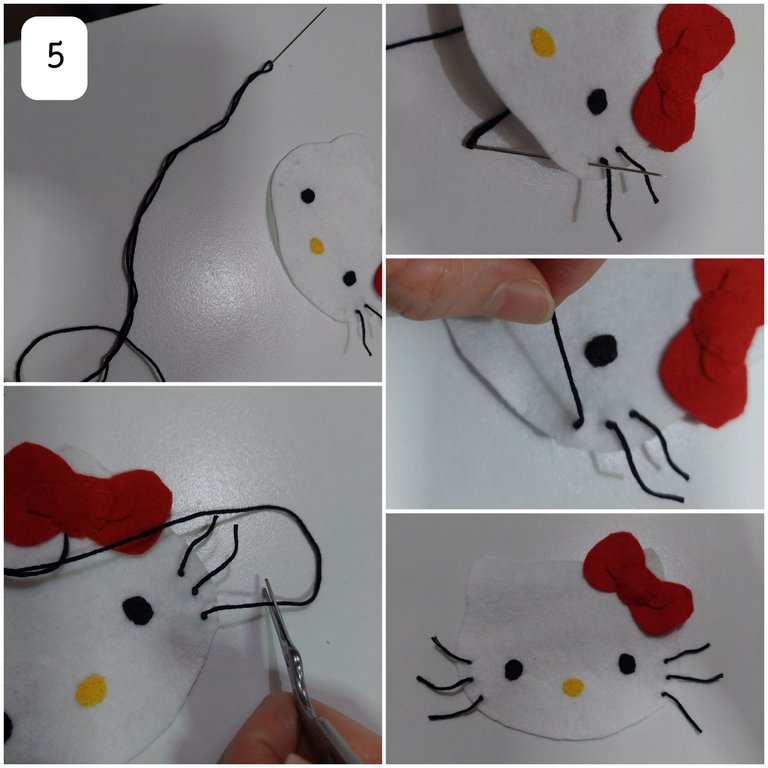
5TH
For the whiskers’ I am using the old trick. I knotted the black embroidery thread after I pulled it through the needle. Then I pulled the thread through the back then knotted it on the top. After that I measured some centimetre then I cut it off. I did it six times to make all of the whiskers. Then the front part is finished.
6TH
Next, i cut the other part of the head with the proportion like below. After that I running stitched it to the zipper just like below.
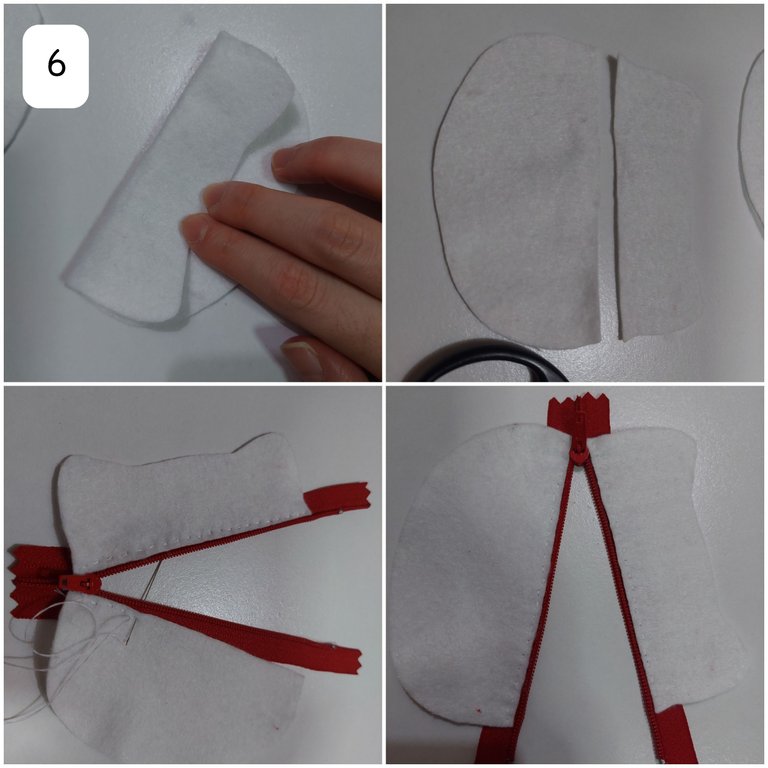
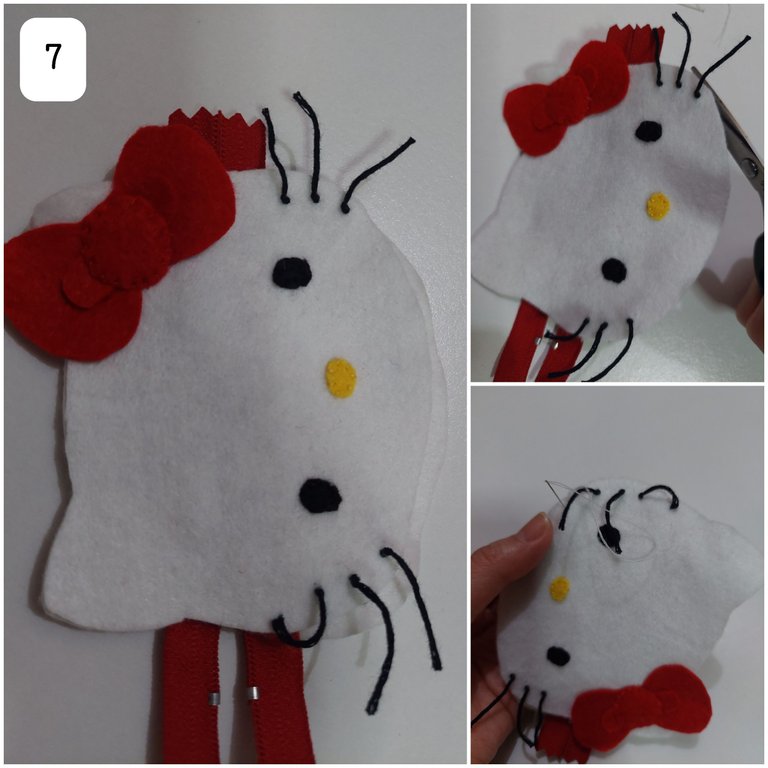
7TH
Now I got the back part of the head a bit bigger than the front part so I cut the recess off. After that I blanket stitched around the head.
THE RESULT
Voila, here it is...
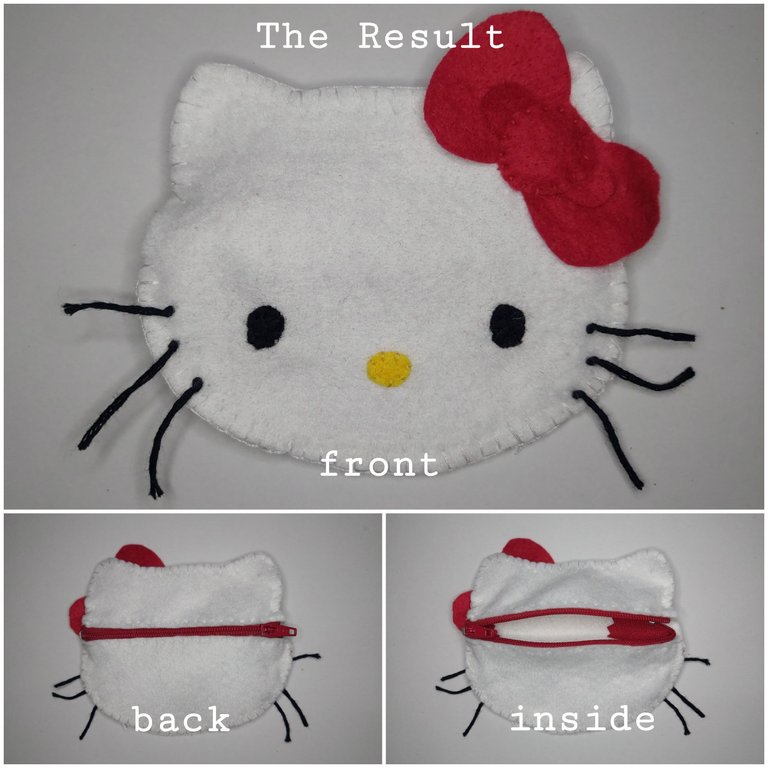
Hello Kitty mini zippered pouch is now ready to use..
This was when I put my kitty’s comb and mirror closed to it. Cute together!
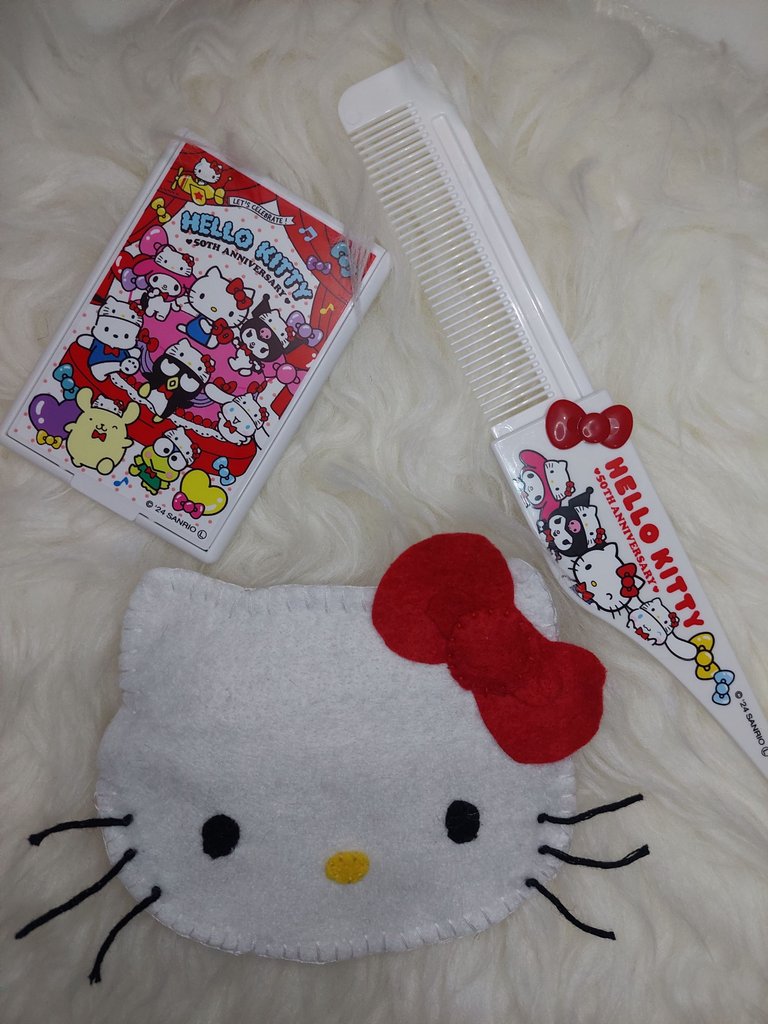
What do you think of it? Isn’t it cute?
Thanks for reading my article, if you enjoy my article, upvote, reblog, follow me and stay tune for more CRAFT things from me!
All of the pictures were taken with Samsung A52 5G android phone and I used Canva for the cover picture.
A bit about the author

She works in a bank but she interests in CRAFT (CRaft, Art, Food and Travel). To pursue her art passion she does the cross stitch, embroidery, handsewing, crafts, crochet and also draws. Find hers in
https://de-creartique.redbubble.com and https://decreartique.threadless.com/designs. Also find her cute collectibles pixel cat pictures here https://opensea.io/collection/pixelcryptocat .
This is really nice, cute and useful pouch.
Thank you :)
This is really cute and beautiful.
Thank you
Aww this is cute. It’s definitely something I will try to crochet in the coming days. I love how you made it so easy and simple to understand
Thanks for sharing
Thanks for passing by :)
You’re welcome
It is very cute and lovely. I really like this project. Thanks so muchfor sharing with us.