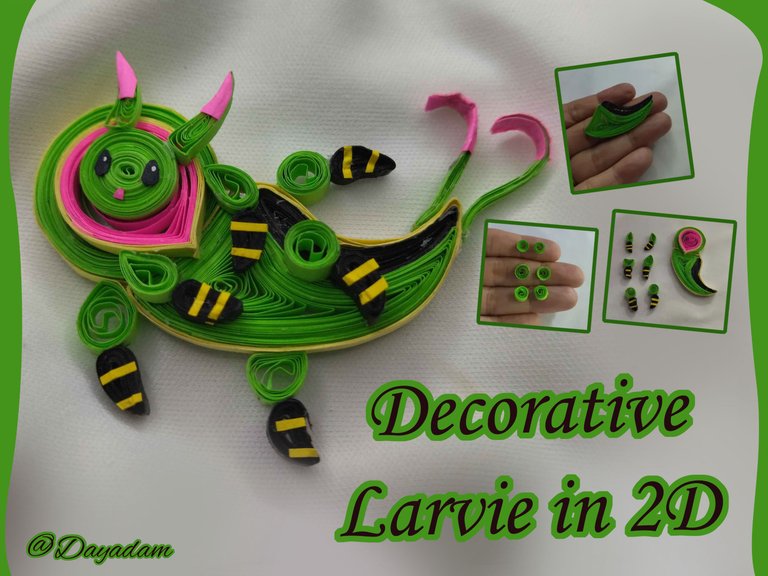
Rewards update // 2D Decorative Larvie Quilling Technique [Eng-Esp]
Hello everyone... 🐱
Hello to my dear Hivers and the dear community of Holozing, very pleased and excited to be here to show you a very simple work made with much love and especially for you.
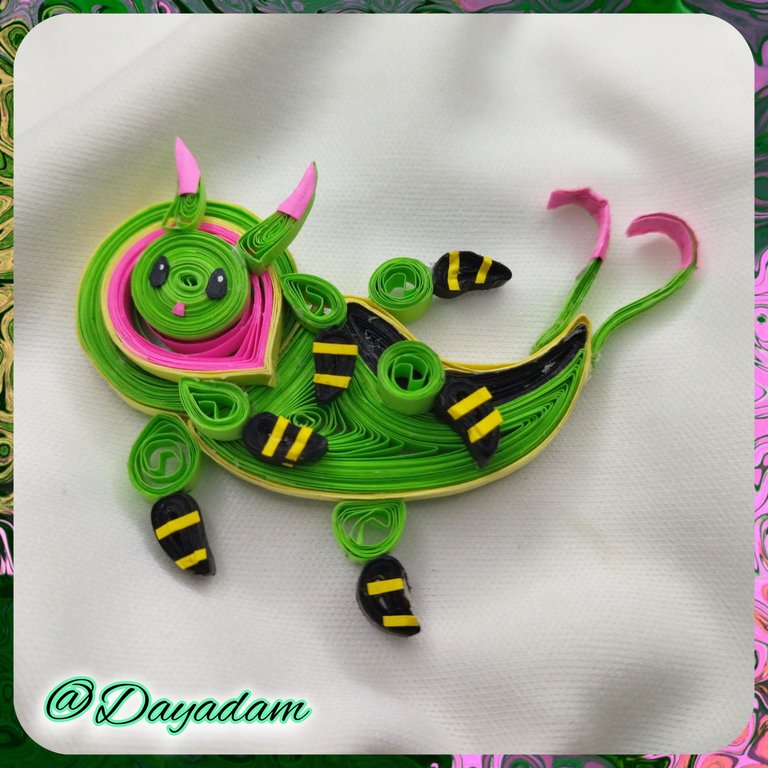
In my previous reward update I decided to make a necklace charm in 2D with the beautiful figure with such striking colors Noxic, I wanted in that opportunity to start with the evolution, because for today in this new reward update following with my art, I decided to make a decorative figure in 2D of "Larvie" in the quilling technique.
If you want to see my previous work here is the link to this 2D necklace charm of Noxic: https://peakd.com/hive-131131/@dayadam/rewards-update-noxic-pendant-for.
I attach images of my progress claiming the rewards for my delegation to Holozing which so far are 709.44HP, and I have an accumulated Stake of 10,754.514 tokens $ZING.
I hope you like my work, join me in this short creative process.
Let's begin:😃

Hola a Todos... 🐱
Hola a mis queridos Hivers y a la querida comunidad de Holozing, muy complacida y emocionada de encontrarme por acá para mostrarles un trabajo muy sencillo hecho con mucho amor y especialmente para ustedes.
En mi actualización de recompensas anterior decidí realizar un dije para collar en 2D con la bella figura con colores tan llamativos Noxic, quise en esa oportunidad empezar con la evolución, pues para hoy en esta nueva actualización de recompensas siguiendo con mi arte, decidí realizar una figura decorativa en 2D de "Larvie" en la técnica de quilling.
Si deseas ver mi trabajo anterior por aca te dejo el link de este dije para collar en 2D de Noxic: https://peakd.com/hive-131131/@dayadam/rewards-update-noxic-pendant-for.
Les adjunto imágenes de lo que ha sido mi progreso reclamando las recompensas por mi delegación a Holozing que hasta ahora son 709.44HP, y llevo un acumulado en Stake de 10,754.514 tokens $ZING.
Espero sea de su agrado mi trabajo, acompáñenme en este corto proceso creativo.
Comencemos:😃


• Cintas de quilling de diversos colores.
• Aguja para quilling.
• Pintura blanca.
• Repujador punta redonda.
• Pega blanca extra fuerte (de carpintería).
• Tijera.
- Quilling ribbons of different colors.
- Quilling needle.
- White paint.
- Round tip pusher.
- Extra strong white glue (carpentry glue).
- Scissors.

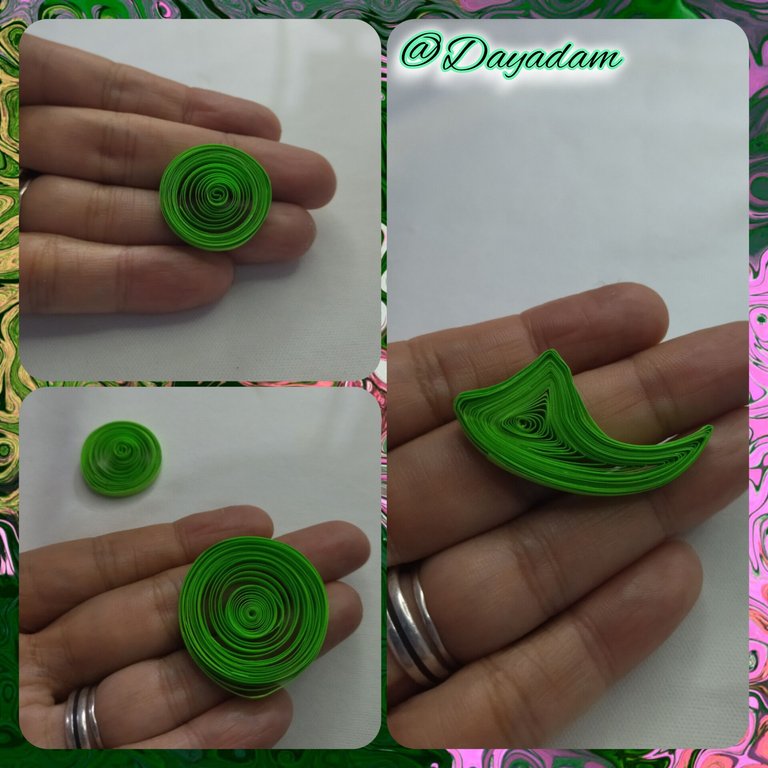
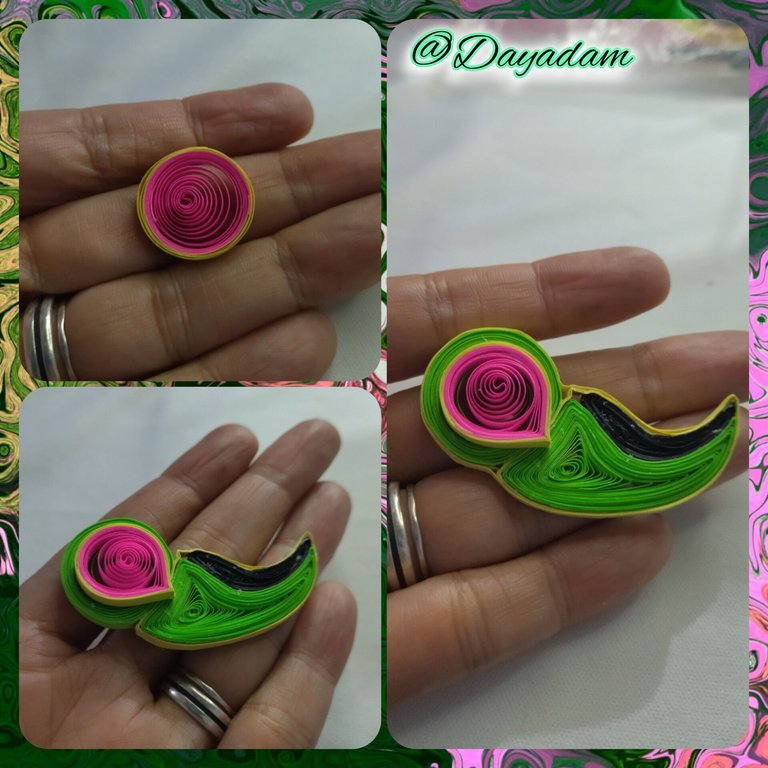
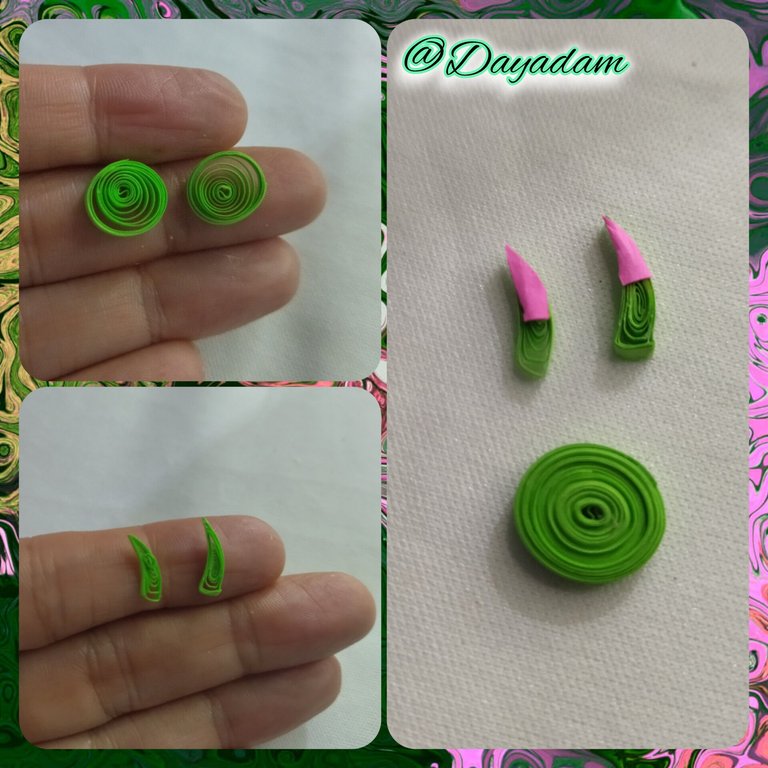
- For the first part of the head I started by making an open circle with the help of a quilling needle and 3mm wide green ribbon, which I set aside.
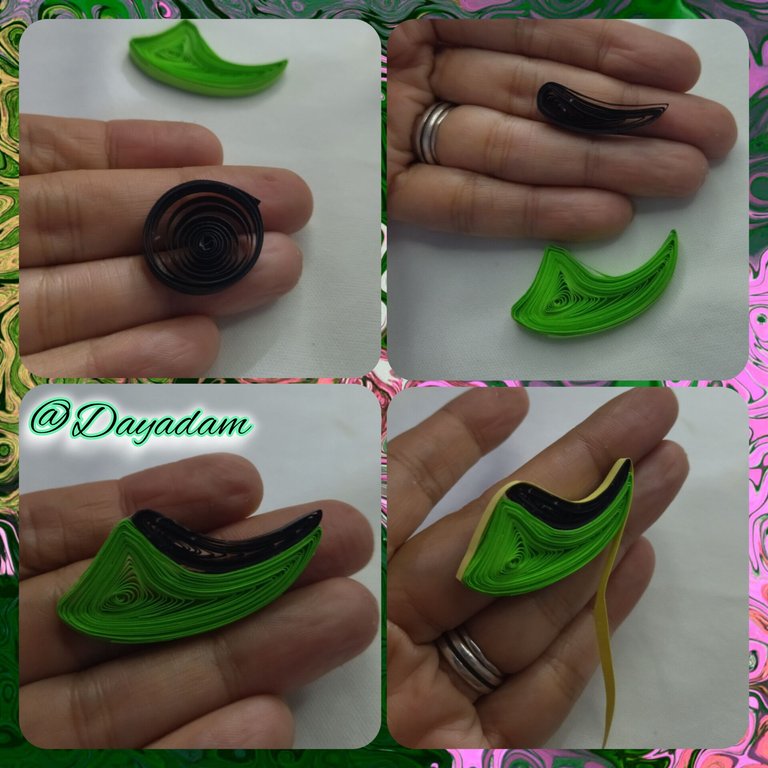
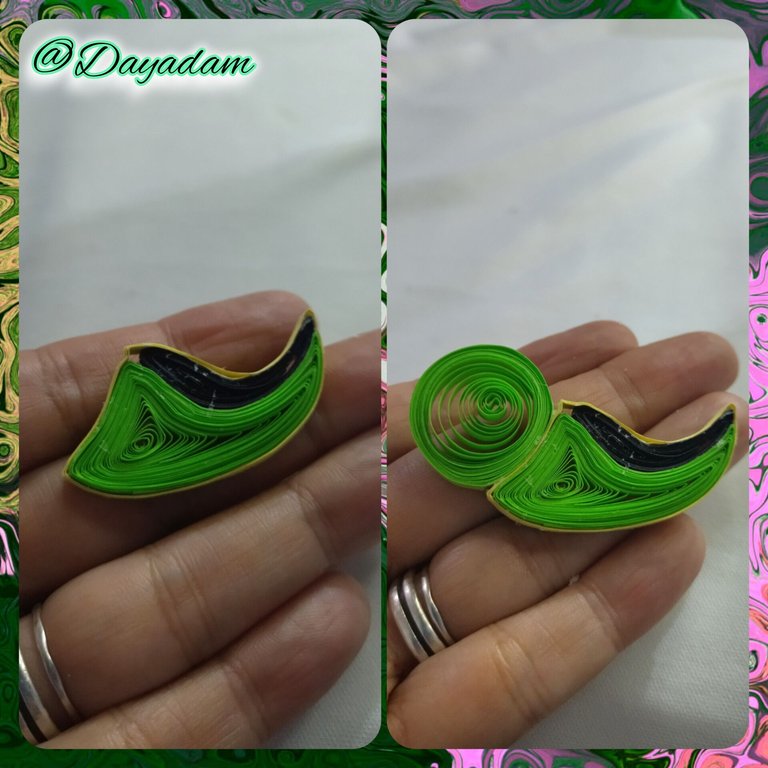
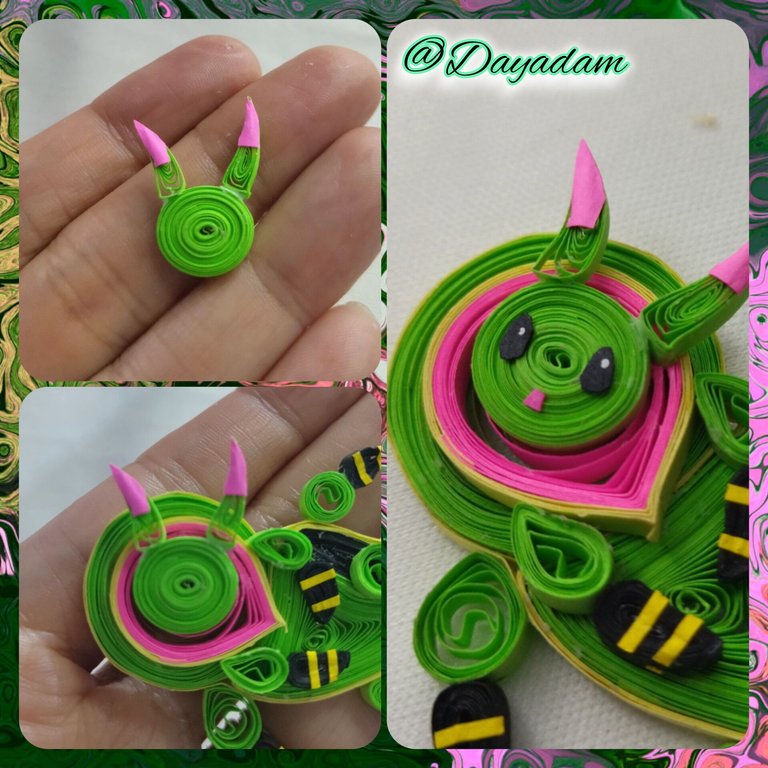
- For the body I made 2 open circles, one green with 3mm wide tape and the other smaller black with 3mm wide tape, once the circles were ready I molded them in an elongated shape and joined both pieces with extra strong white glue, then I proceeded to pass a pale yellow 3mm wide tape around the 2 joined pieces. Continue gluing the first circle that I made from the flat part of this last piece.
- With a piece of fuchsia quilling tape and a piece of pale yellow quilling tape, I made a combined open circle, which I molded as a kind of drop and glued from the circle that belongs to the first part of the head.

• Para la primera parte de la cabeza comencé elaborando con la ayuda de la aguja para quilling y con cinta de color verde de 3mm de ancho, un circulo abierto el cual reserve.
• Para el cuerpo realice 2 círculos abiertos, uno de color verde con cinta de 3mm de ancho y otro más pequeño de color negro con cinta de 3mm de ancho, una vez listos los círculos los moldee, de una forma alargada y unir ambas piezas con pega blanca extra fuerte, luego procedí a pasar una cinta de color amarillo pálido de 3mm de ancho alrededor de las 2 piezas unidas. Continúe pegando el primer circulo que elabore de la parte plana de esta última pieza elaborada.
• Con un trozo de cinta para quilling de color fucsia y otro de color amarillo pálido, elabore un círculo abierto combinado, el cual moldee como especie de una gota y pegue del círculo que pertenece a la primera parte de la cabeza.
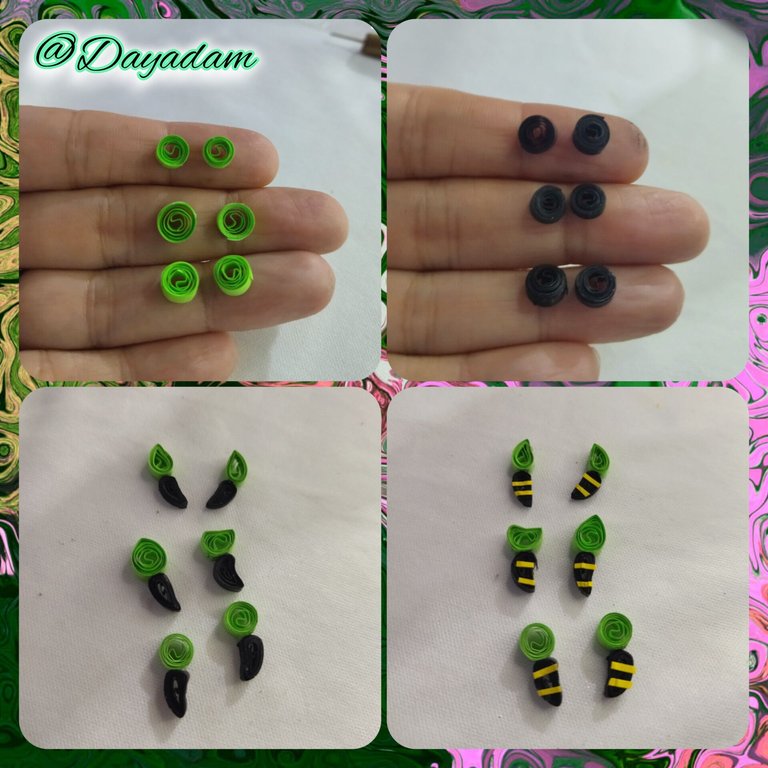
- For the legs I made 6 green open circles 3mm wide, and another 6 black circles 3mm wide. I molded all the circles according to how I wanted the legs to look like as you can see in the pictures, I joined the green pieces to the black ones and made the details of the lines with pale yellow tape of 0.5mm wide, ready the legs I glued in different parts of the central piece.
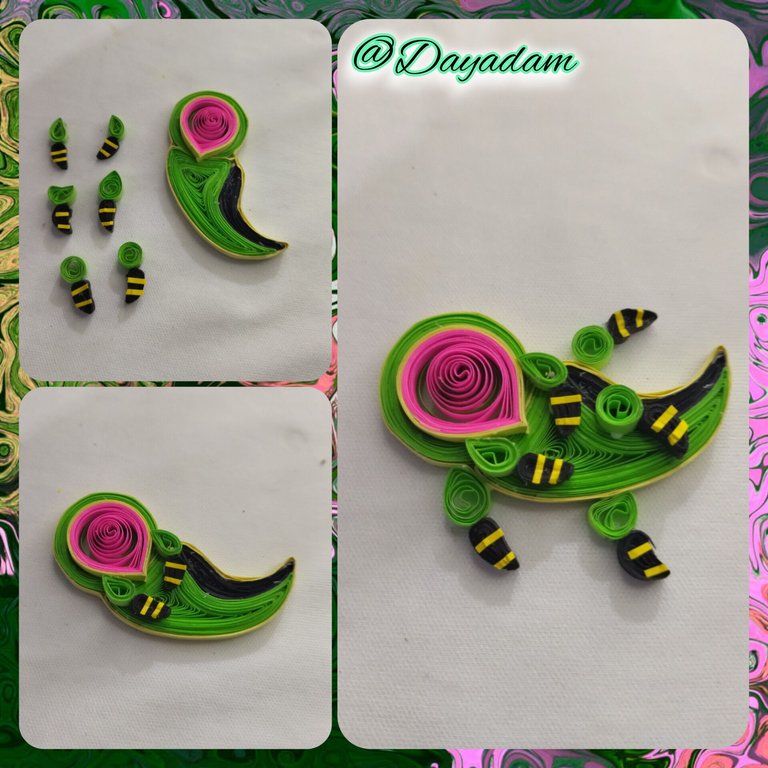
- The tail of Larvie I made a small line with green and fuchsia tape on the tip, these molded them in a rounded way when finished I glued them to the central piece.
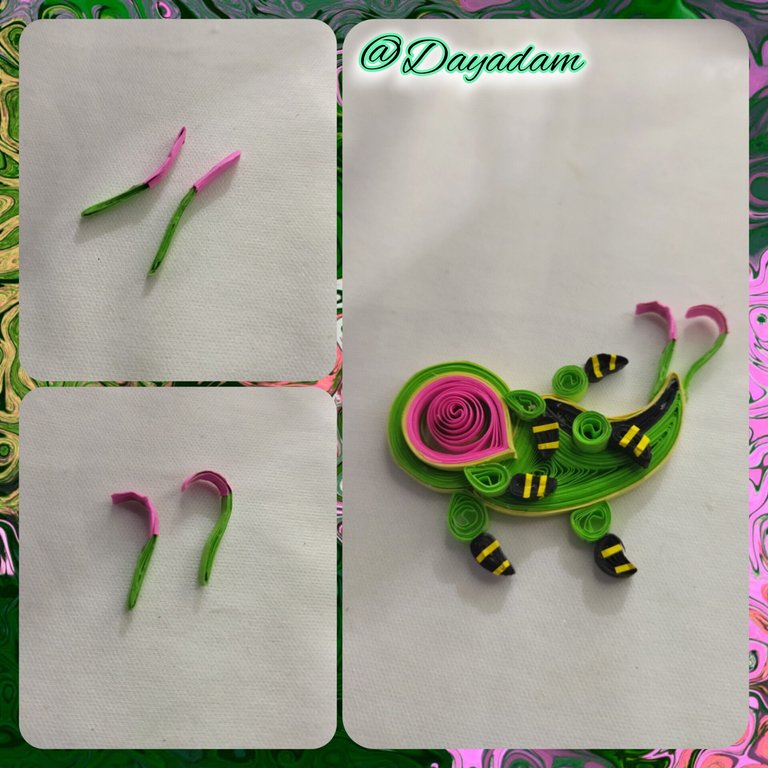
- For the last part of the head I made a circle but this time closed with green quilling tape 2mm wide, and for the antennae I made 2 small closed circles, which I molded and glued fuchsia tape on their tips, I added with glue to the central piece.
- Finally I made the eyes by cutting out a small piece of black cardboard, to which I painted with cold paint two round lights with the help of a rounded embosser, for the mouth I cut out a fuchsia ribbon, at the end I glued it to the face of the Larvie.
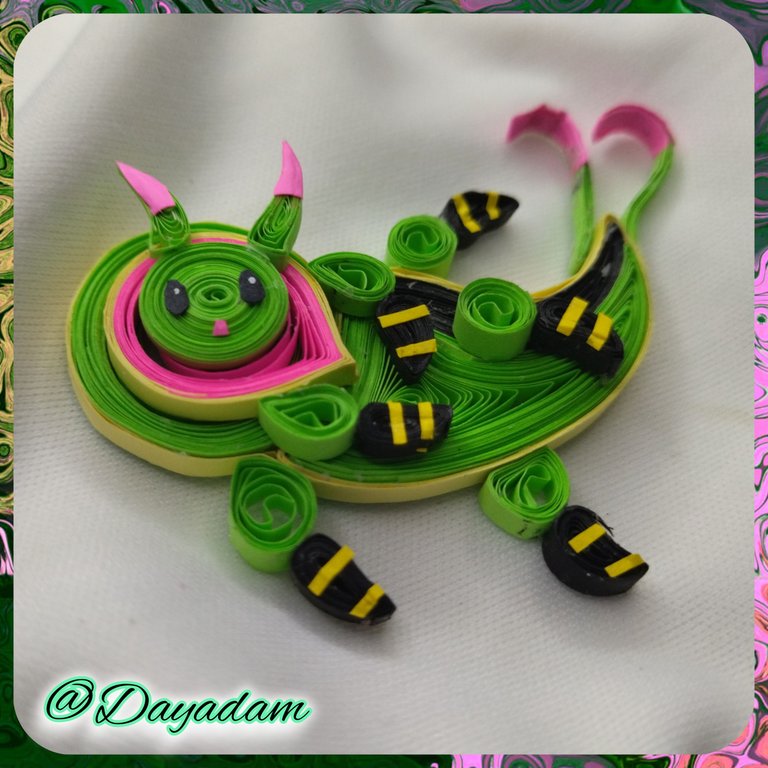
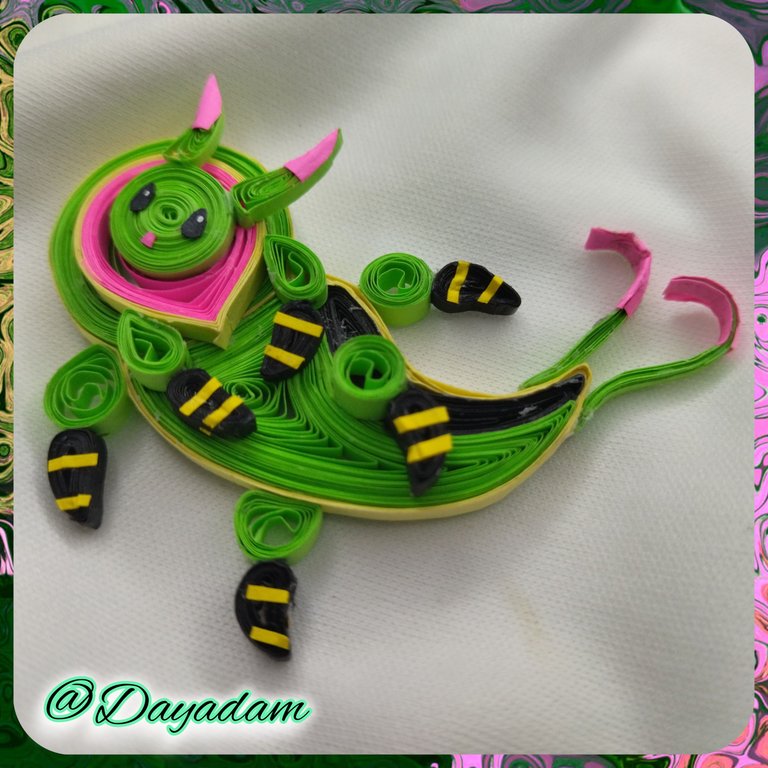
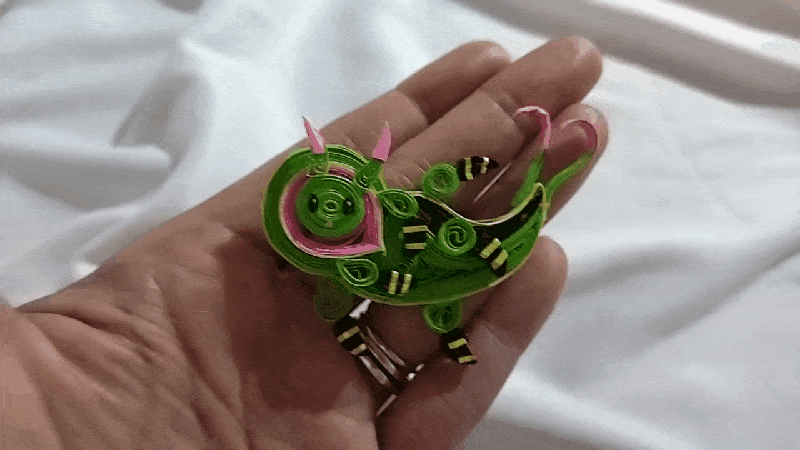
This way this 2D decorative figure of the beautiful creature "Larvie " is ready.
• Para las patitas lleve a cabo 6 círculos abiertos de color verde de 3mm de ancho, y otras 6 de color negro de 3mm de ancho. Moldee todos los círculos según como quería que quedaran las patas tal como pueden ver en las imágenes, uní las piezas verdes a las negras y le realice los detalles de las lineas con cinta amarilla pálida de 0.5mm de ancho, listas las patas pegue en diversas partes de la pieza central.
• La cola de Larvie la realice haciendo una pequeña linea con cinta verde y fucsia en la punta, estas las moldee de manera redondeada al finalizarlas pegue de la pieza central.
• Para la ultima parte de la cabeza realice un circulo pero esta vez cerrado con cinta para quilling de color verde de 2mm de ancho, y para las antenas realice 2 círculos pequeños cerrados, los cuales moldee y pegue cinta fucsia en sus puntas, añadí con pega a la pieza central.
• Para finalizar realice los ojos recortando un pequeño trozo de cartulina negra, a la cual le pinte con pintura al frio dos luces redondas con ayuda de un repujador redondeado, para la boca recorte una cinta de color fucsia, al culminar pegue a la cara del Larvie.
De esta manera esta listo esta figura decorativa en 2D de la bonita criatura "Larvie".

What did you think, did you like it?
I hope you did, I hope you liked my explanation, procedure and photos, I made them with love for you.
"Let out that muse that inspires you, and let your imagination fly".
Thank you all, see you next time.🐱

¿Qué les pareció, les gustó?
Espero que sí, que les haya gustado mi explicación, procedimiento y fotos, los hice con mucho cariño por y para ustedes.
"Deja salir esa musa que te inspira, y deja volar tu imaginación".
Gracias a todos, nos vemos en la próxima.🐱


wow it is a really nice quilling Work
Ains, thank you very much for your words. They are appreciated 🤗
You are wellcome
Great work🤩
Thanks a lot. A pleasure that you liked it 💕
WOW! what a quiller artist you are
Thank you very much, how nice. I am very pleased with your words. Have a nice day.
Te quedó muy linda... Mi parte favorita es la expresión Kawaii...un abrazo infinito 😘💜...
!LUV
!PIZZA 🍕
Ains tan bella. Me alegra mucho que te haya gustado, este es un Larvie Kawaii. Abrazos de vuelta para ti mi hermosa 💗
$PIZZA slices delivered:
@dayadam(4/5) tipped @danzocal
danzocal tipped dayadam
chacald.dcymt tipped dayadam
!PIZZA
!PIZZA