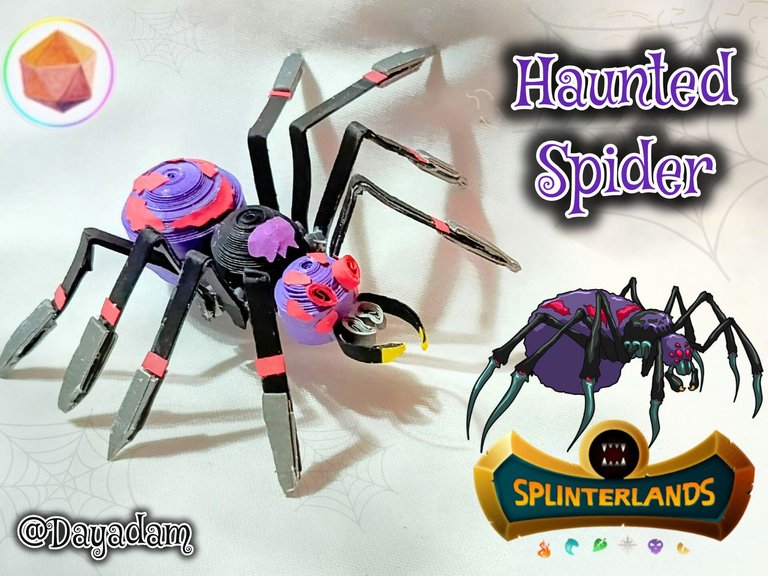
Haunted Spider in 3D Quilling Technique [Eng-Esp]
Hello everyone... ✨
Hello to my dear Hivers and the dear community of artists Diyhub, as always very pleased and excited to be here again, showing you my work made with love and especially for you.
Greetings to the Splinterlands community, and everyone who lives there, I'm here to join the Splinterlands Art Contest
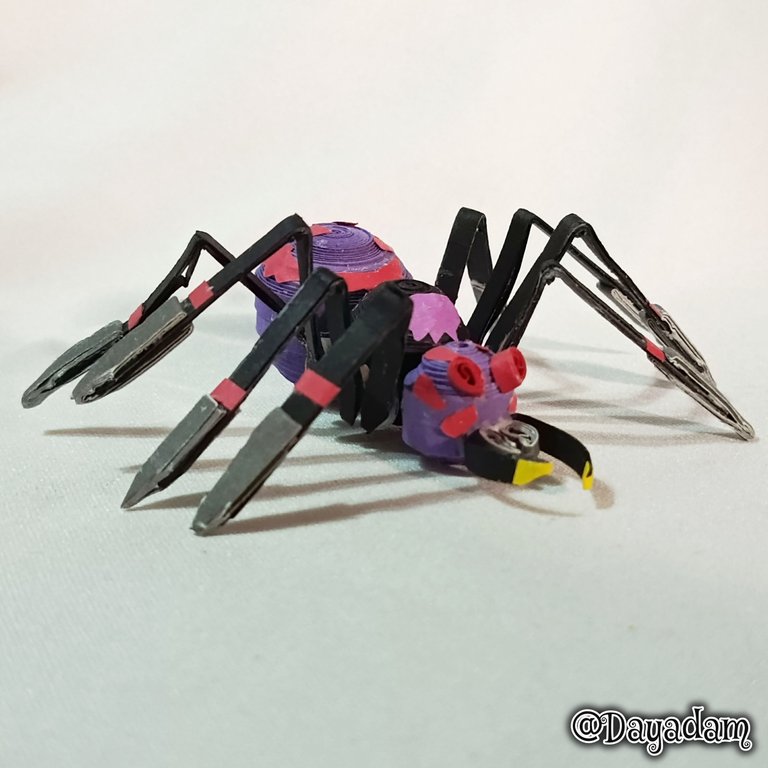
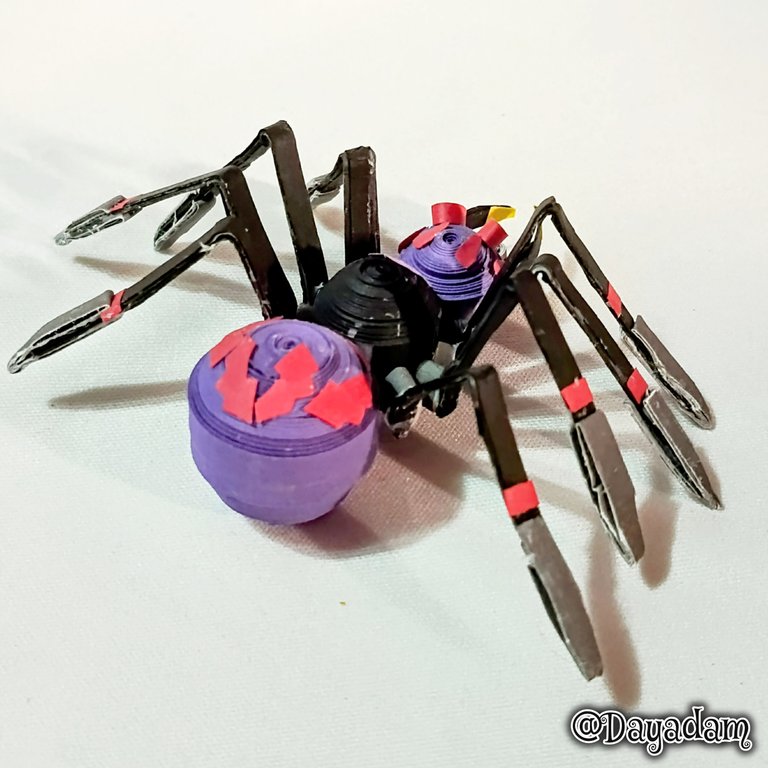
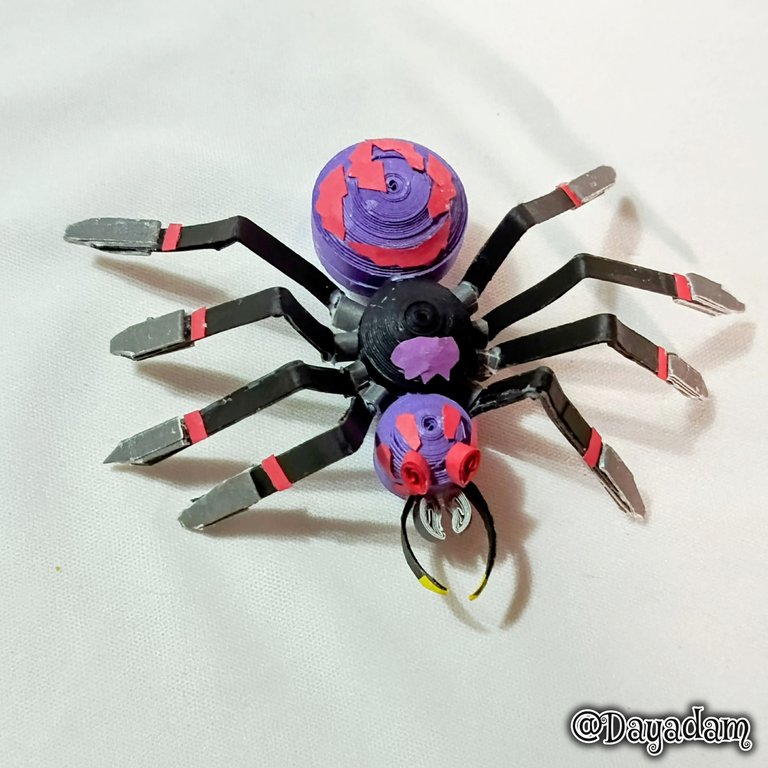
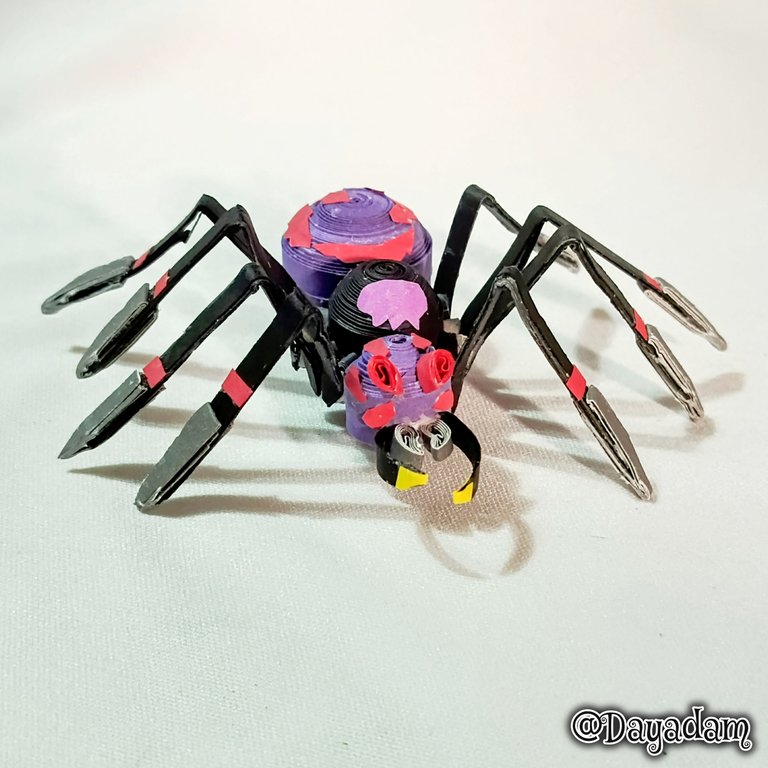
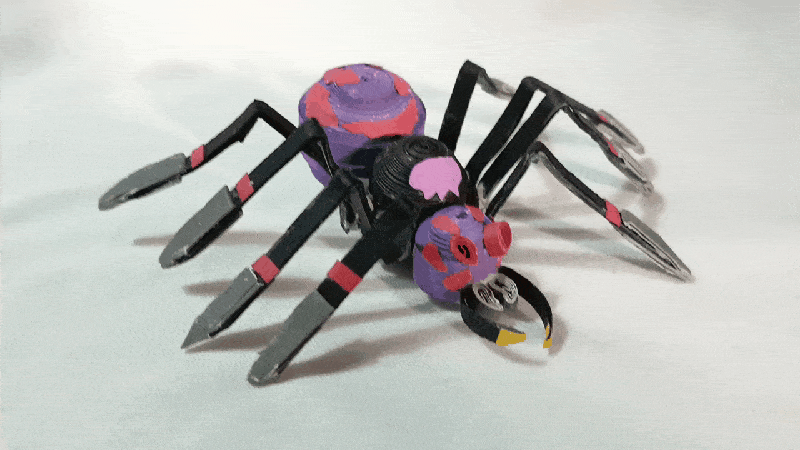
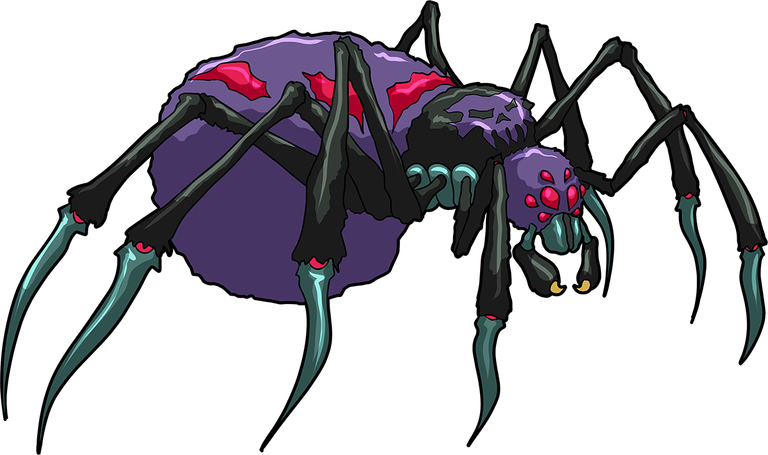
For this week I bring you a new work, in which I wanted to materialize a 3D decorative figure inspired by the letter Haunted Spider in the quilling technique.
For this week's contest I decided to finish the set of accessories, materializing a pair of hanging tendrils with some elements of the same card.
If you want to know more about the game, I leave you my reference link to enter it and navigate through this wonderful world: https://splinterlands.com?ref=dayadam
Hoping you like my work, without further ado, I leave you with my creative process.
Let's start:😃

Hola a Todos...✨
Hola a mis queridos Hivers y a la querida comunidad de artistas Diyhub, como siempre muy complacida y emocionada de encontrarme por acá, mostrándole mi trabajo hecho con mucho amor y especialmente para ustedes.
Un saludo para la comunidad de Splinterlands, y todos los que hacen vida por allí, estoy por acá para unirme al Splinterlands Art Contest.
Para esta semana les traigo un nuevo trabajo, en el cual quise materializar una figura decorativa en 3D inspirada en la carta Haunted Spider en la técnica de quilling.
Si quieren saber más con respecto al juego les dejo mi enlace de referencia para que ingresen en él, y naveguen por este maravilloso mundo: https://splinterlands.com?ref=dayadam
Esperando les guste mi trabajo, sin más preámbulos, les dejo mi proceso creativo.
Comencemos:😃
 |
 |

• Cintas de quilling.
• Cartulinas,
• Guillotina.
• Pega blanca extra fuerte (de carpintería).
• Tijera.
• Pincel.
- Quilling ribbons.
- Cardboard,
- Guillotine.
- Extra strong white glue (carpentry glue).
- Scissors.
- Paintbrush.

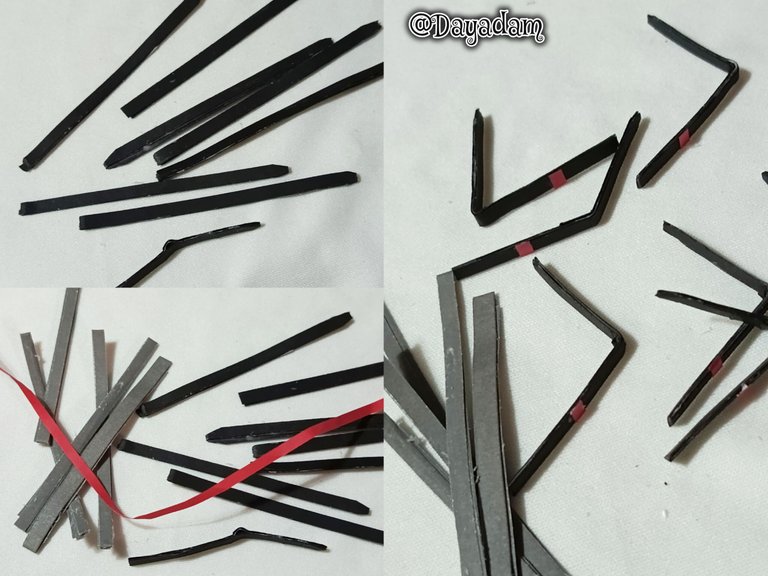
To make this work I bought some cardboard and cut them with a guillotine according to the size I needed.
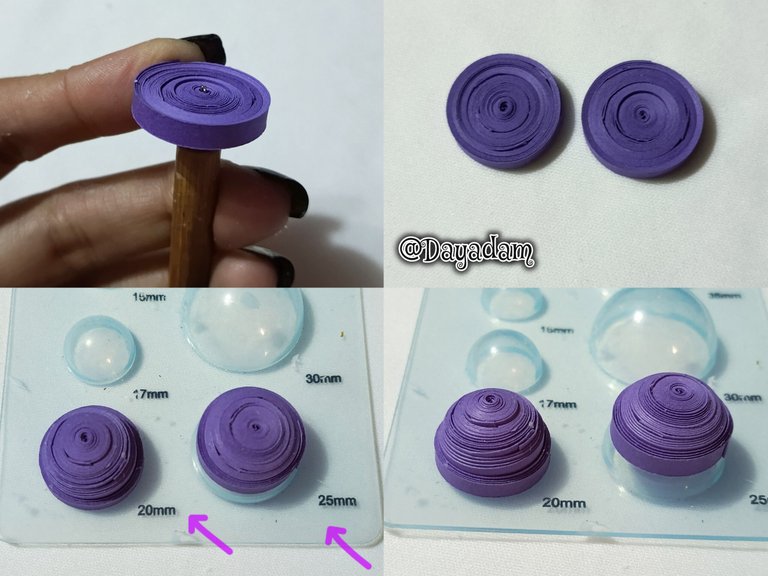
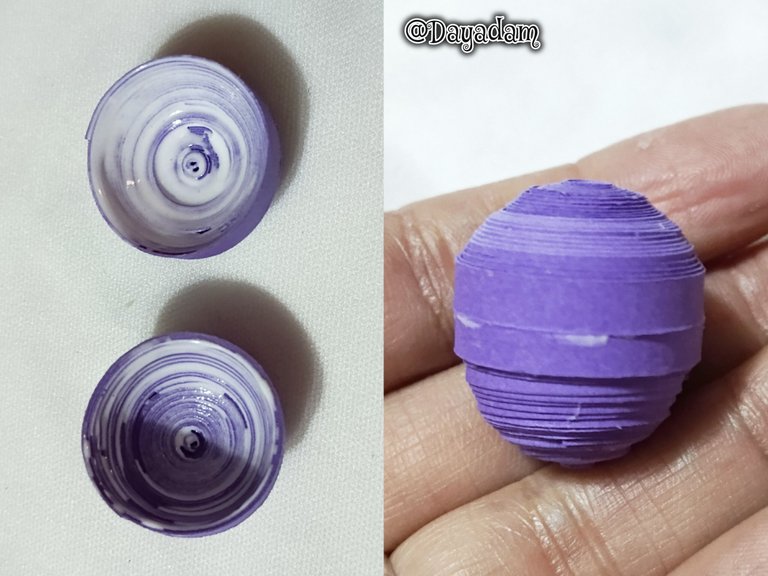
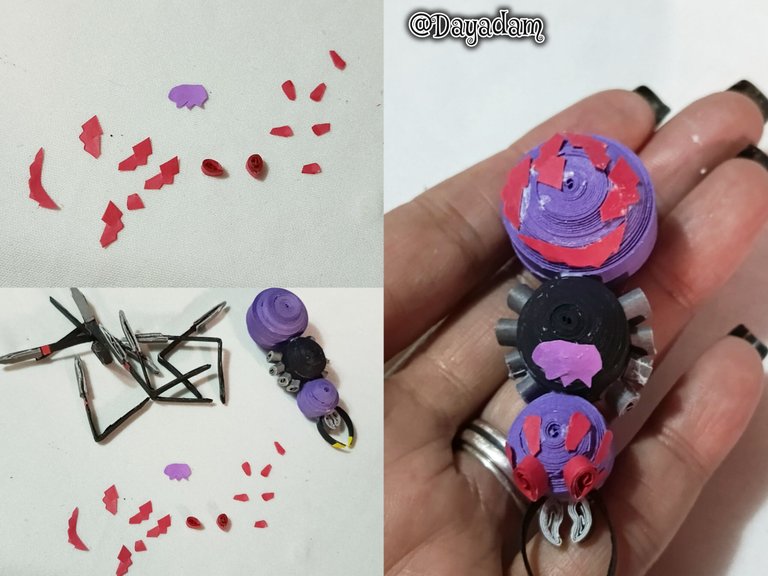
- I started by taking strips of purple color of approximately 4 mm wide, with the quilling needle, I made 2 closed circles of the same size, these I molded in a template for circles in the measures that you can see in the images.
- Molded the circles I took out of the template, applied glue on the inside to prevent them from moving or deforming, I let them dry very well. Then I took the circles, and joined them with white glue.
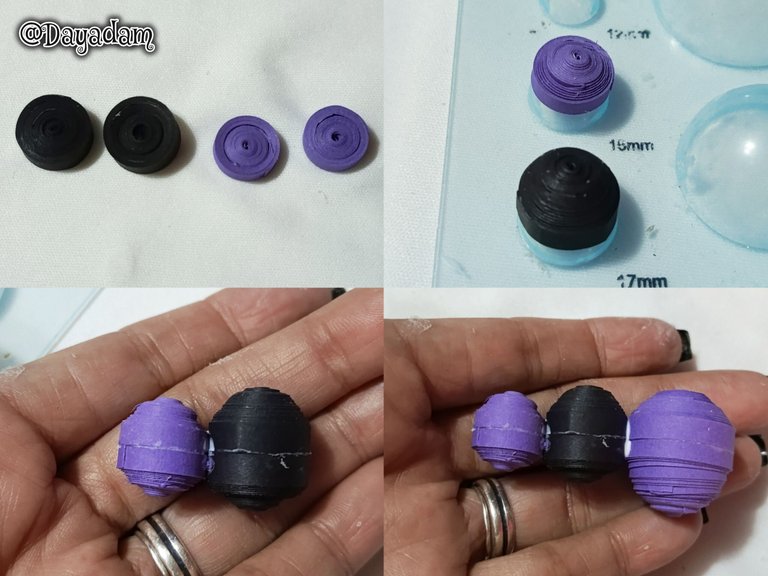
- Under the same parameters I made 2 black closed circles a little smaller than the previous ones, and 2 purple ones smaller than the black ones, I followed the same process molding them on the template and then I joined them. In this way I obtained 3 spheres of different sizes.
- I joined the three spheres in descending order, horizontally.

Para realizar este trabajo compré algunas cartulinas y las corté con una guillotina según la medida que me hiciera falta.
• Comencé tomando tiras de color morado de aproximadamente 4 mm de ancho, con la aguja para quilling, realicé 2 círculos cerrados del mismo tamaño, estos lo moldee en una plantilla para círculos en las medidas que pueden ver en las imágenes.
• Moldeados los círculos saqué de la plantilla, apliqué pega por la parte interna para evitar que los mismos se movieran o se deformen, dejé secar muy bien. Luego tome los círculos, y los uní con pega blanca.
• Bajo los mismos parámetros anteriores realicé 2 círculos cerrados negros un poco más pequeños que los anteriores, y 2 morados más pequeños que los negros, seguí el mismo proceso moldeando en la plantilla y luego los uní. De esta manera obtuve 3 esferas de diversos tamaños.
• Uní las tres esferas en orden descendente, de manera horizontal.
 |  |
 |  |
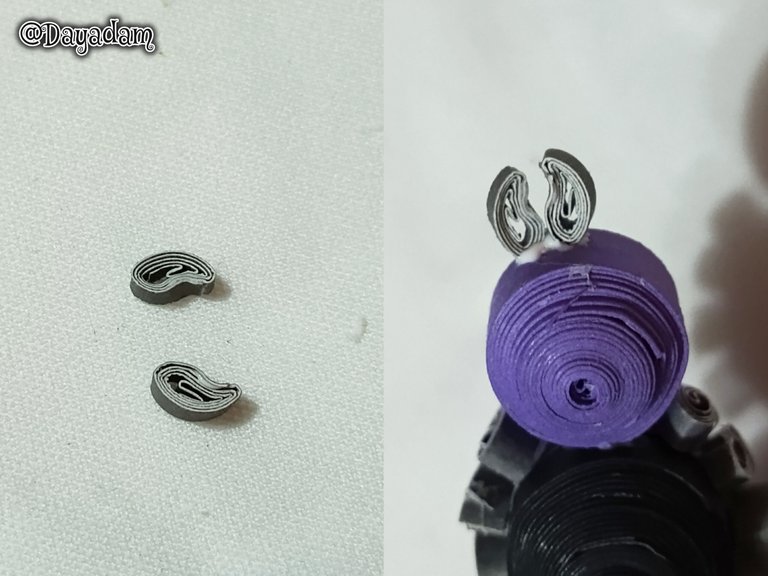
- With 3 mm wide gray ribbons, I made several small ovals. These I glued to the sides of the black circle.
• Con cintas grises realicé 2 gotas algo inclinadas, pegué en la parte delantera de la esfera más pequeña.
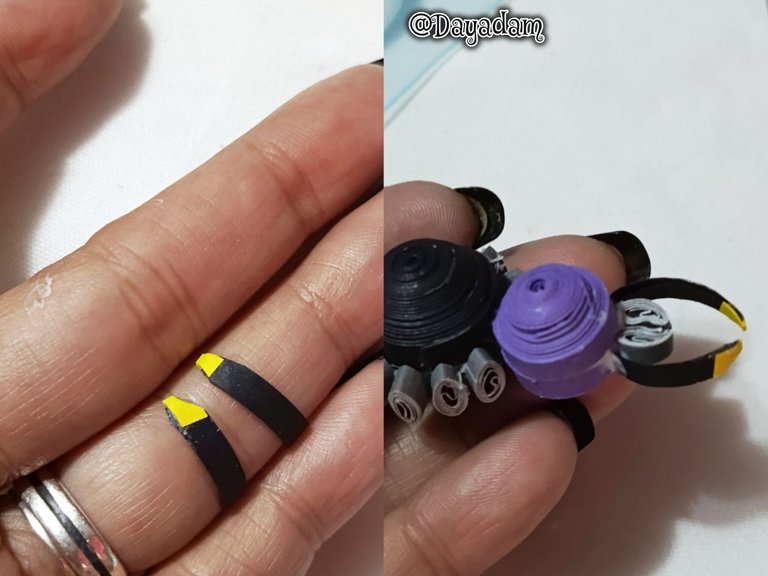
- I made 2 small pointed pieces with black and yellow cardboard at the tip, I glued them to the sides of the previous pieces, these will be the pincers of the spider.
- With black, gray and red ribbons, I made the legs of the spider.
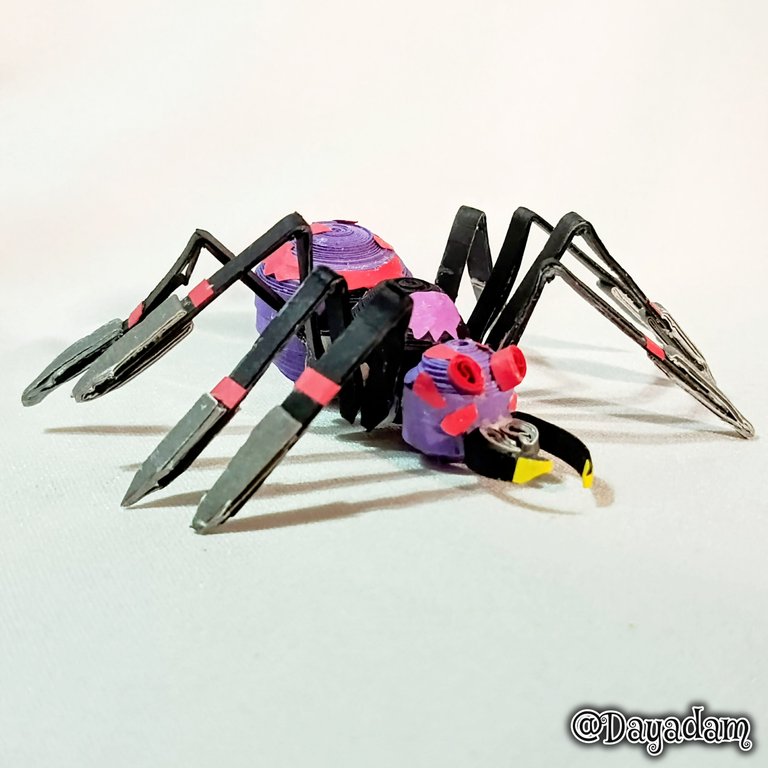
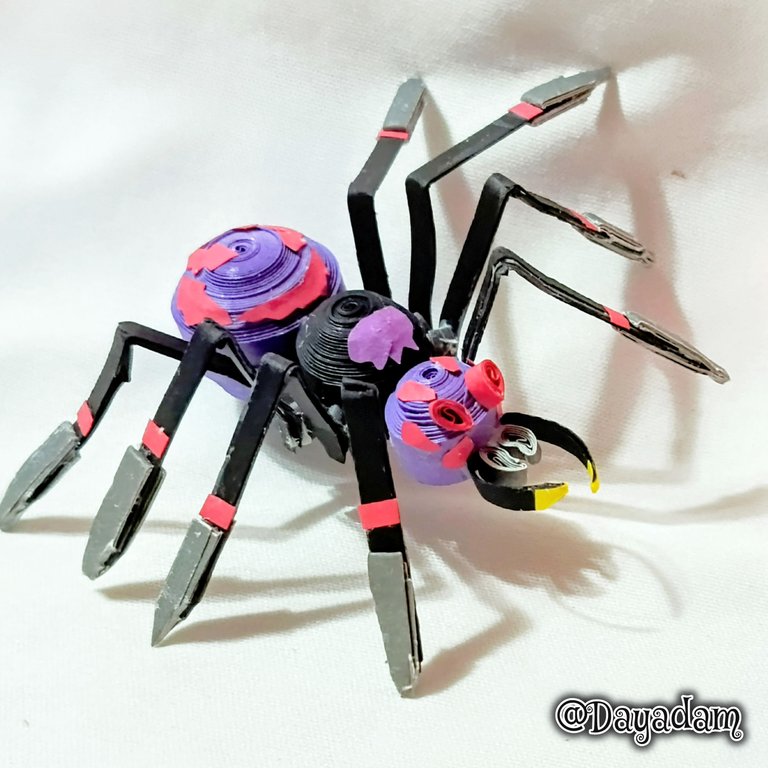
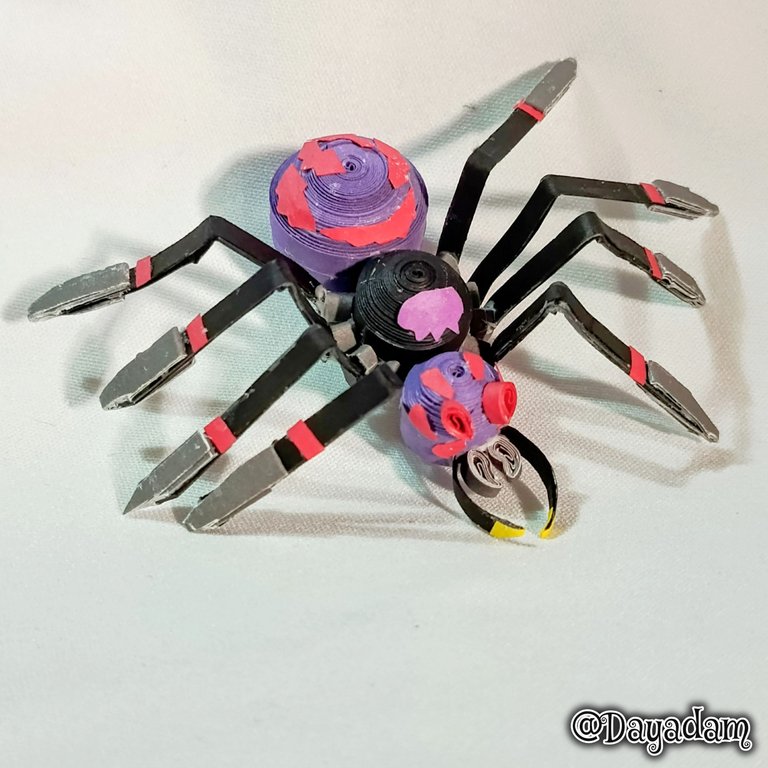
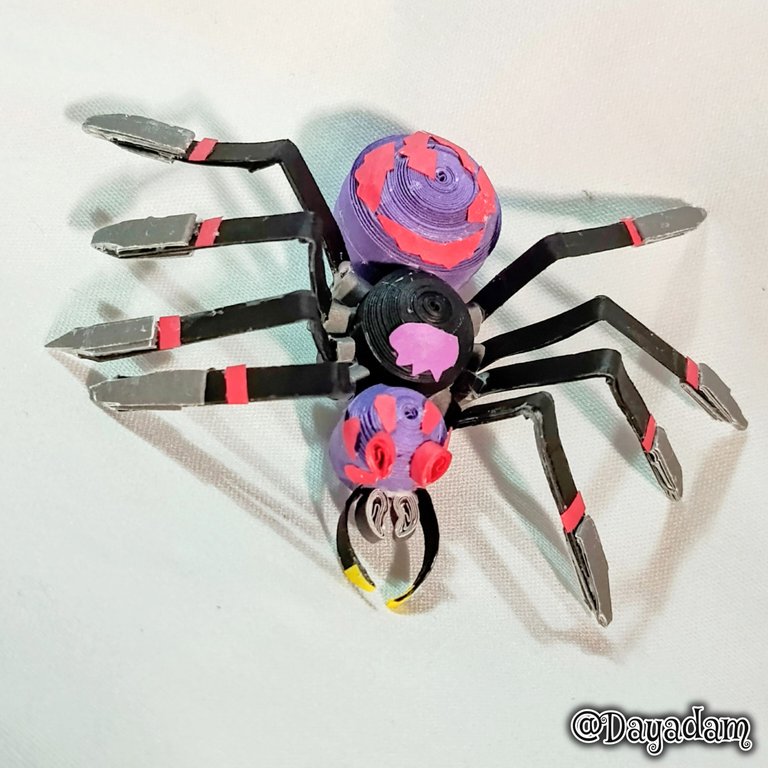
- Finally I cut the details with black and purple ribbons, I glued them in harmony on the body of the spider, finally I glued 4 legs on each side of the spider, let dry very well.
- Thus we have ready this decorative figure in 3D, which materializes inspired by the card "Haunted Spider"..
• Con cintas grises de 3 mm de ancho, realicé varios óvalos pequeños. Esto los pegué a los lados del círculo negro.
• Con cintas grises realicé 2 gotas algo inclinadas, pegué en la parte delantera de la esfera más pequeña.
• Luego realicé 2 pequeñas piezas puntiagudas con cartulina negra y amarilla en la punta, pegué a los lados de las piezas anteriores, estas serán las tenazas de la araña.
• Con cintas negras, grises y rojas, realicé las patas de la araña.
• Para finalizar corte los detalles con cintas negras y moradas, pegué en armonía en el cuerpo de la araña, por último pegué 4 patas de cada lado de la araña, deje secar muy bien.
• De esta manera tenemos listo esta figura decorativa en 3D, que materialice inspirada en la carta "Haunted Spider".
 |  |
 |  |  |

|
|
 |  |
 |
 |  |
 |  |
 |
 |
What did you think, did you like it?
I hope you did, I hope you liked my explanation, procedure and photos, I made them with love for you.
"Let out that muse that inspires you, and let your imagination fly".
Thank you all, see you next time.
¿Que les pareció, les gustó?
Espero que sí, que les haya gustado mi explicación, procedimiento y fotos, los hice con mucho cariño por y para ustedes.
"Deja salir esa musa que te inspira, y deja volar tu imaginación".
Gracias a todos, nos vemos en la próxima.
Banner y separador hecho por mí en Canva

Que preciosidad de araña! ❤️ Tus creaciones como siempre, una belleza,.mi bella amiga. Me ha encantado tu completísima descripción del proceso de elaboración, sin duda alguna, una técnica meticulosa que dominas a perfección. No conozco mucho del arte manual, lo único que puedo decir es que, te quedó de lujo! 🌺😘 Un abrazo grande y gracias por compartir tu talento! Me agradó mucho pasar por aquí... 🤗❤️
Hola mi preciosa @marybellrg, de verdad que me complace muchísimo leer tus hermosas palabras dedicadas a mi trabajo.
En lo personal me encantó el resultado final, y realmente hive y mucha de su gente han sido los que me han motivado e inspirado a cada día superarme más, logrando cosas que ni yo misma pensé en hacer, he superado mis propias expectativas.
Comentarios como los tuyos me hacen seguir retándome, e intentar superarme más.
Un abrazo, bendiciones, y mil cariños para ti...
!LADY
!LUV
!HUG
!PIZZA
@marybellrg, @dayadam(1/3) sent you LUV. | tools | discord | community | HiveWiki | <>< daily
@dayadam, sorry! You need more to stake more $PIZZA to use this command.
The minimum requirement is 20.0 PIZZA staked.
More $PIZZA is available from Hive-Engine or Tribaldex
Tus posts son hermosísimos! 😘🤗
WOW! This is stunning and really creative. Making a spider out of paper is totally superb and very impressive of you. Your creativity is wonderful and am thanks for sharing with us
Thank you so much for your kind words about this work I created with so much love for everyone. I'm so glad you liked it. Greetings and blessings. 💖
Congratulations, your post has been curated by @dsc-r2cornell. You can use the tag #R2cornell. Also, find us on Discord
Felicitaciones, su publicación ha sido votada por @ dsc-r2cornell. Puedes usar el tag #R2cornell. También, nos puedes encontrar en Discord
Thank you for the support @dsc-r2cornell 🥰
From Venezuela, our witness drives decentralization and the adoption of Web3 technology, creating opportunities for the local community and contributing to the global ecosystem. // Desde Venezuela, nuestro testigo impulsa la descentralización y la adopción de la tecnología Web3, generando oportunidades para la comunidad local y contribuyendo al ecosistema global.
Sigue, contacta y se parte del testigo en: // Follow, contact and be part of the witness in:
Gracias por el apoyo @hispapro 💞
quedó muy muy hermosa! un gran trabajo de tus bendecidas manos!
Gracias amigo tan bello 🥰💕
!PIZZA
@dayadam, sorry! You need more to stake more $PIZZA to use this command.
The minimum requirement is 20.0 PIZZA staked.
More $PIZZA is available from Hive-Engine or Tribaldex
Love this technique. Your work looks amazing
Thank you so much, my heart is so glad that the technique caught your attention. A hug and thanks for your comment 💖
!PIZZA
@dayadam, sorry! You need more to stake more $PIZZA to use this command.
The minimum requirement is 20.0 PIZZA staked.
More $PIZZA is available from Hive-Engine or Tribaldex
Hugs of light!!! Thanks to you
Se parece mucho a la original, hermosa araña. Me encantó lo elaborada que está, saludos.
Gracias cariño por tu bonito comentario. Abrazos 💖
!HUESO
!LUV
!PIZZA
!HUG
!MEME
@dayadam, sorry! You need more to stake more $PIZZA to use this command.
The minimum requirement is 20.0 PIZZA staked.
More $PIZZA is available from Hive-Engine or Tribaldex
Credit: rickonthemoun10
Earn Crypto for your Memes @ HiveMe.me!
Thank you for the support @seckorama and @ecency ☺️
You're welcome.
Thanks for sharing! - @isaria

quedo genial, buen trabajo!
great job!
Gracias mi corazón 💕