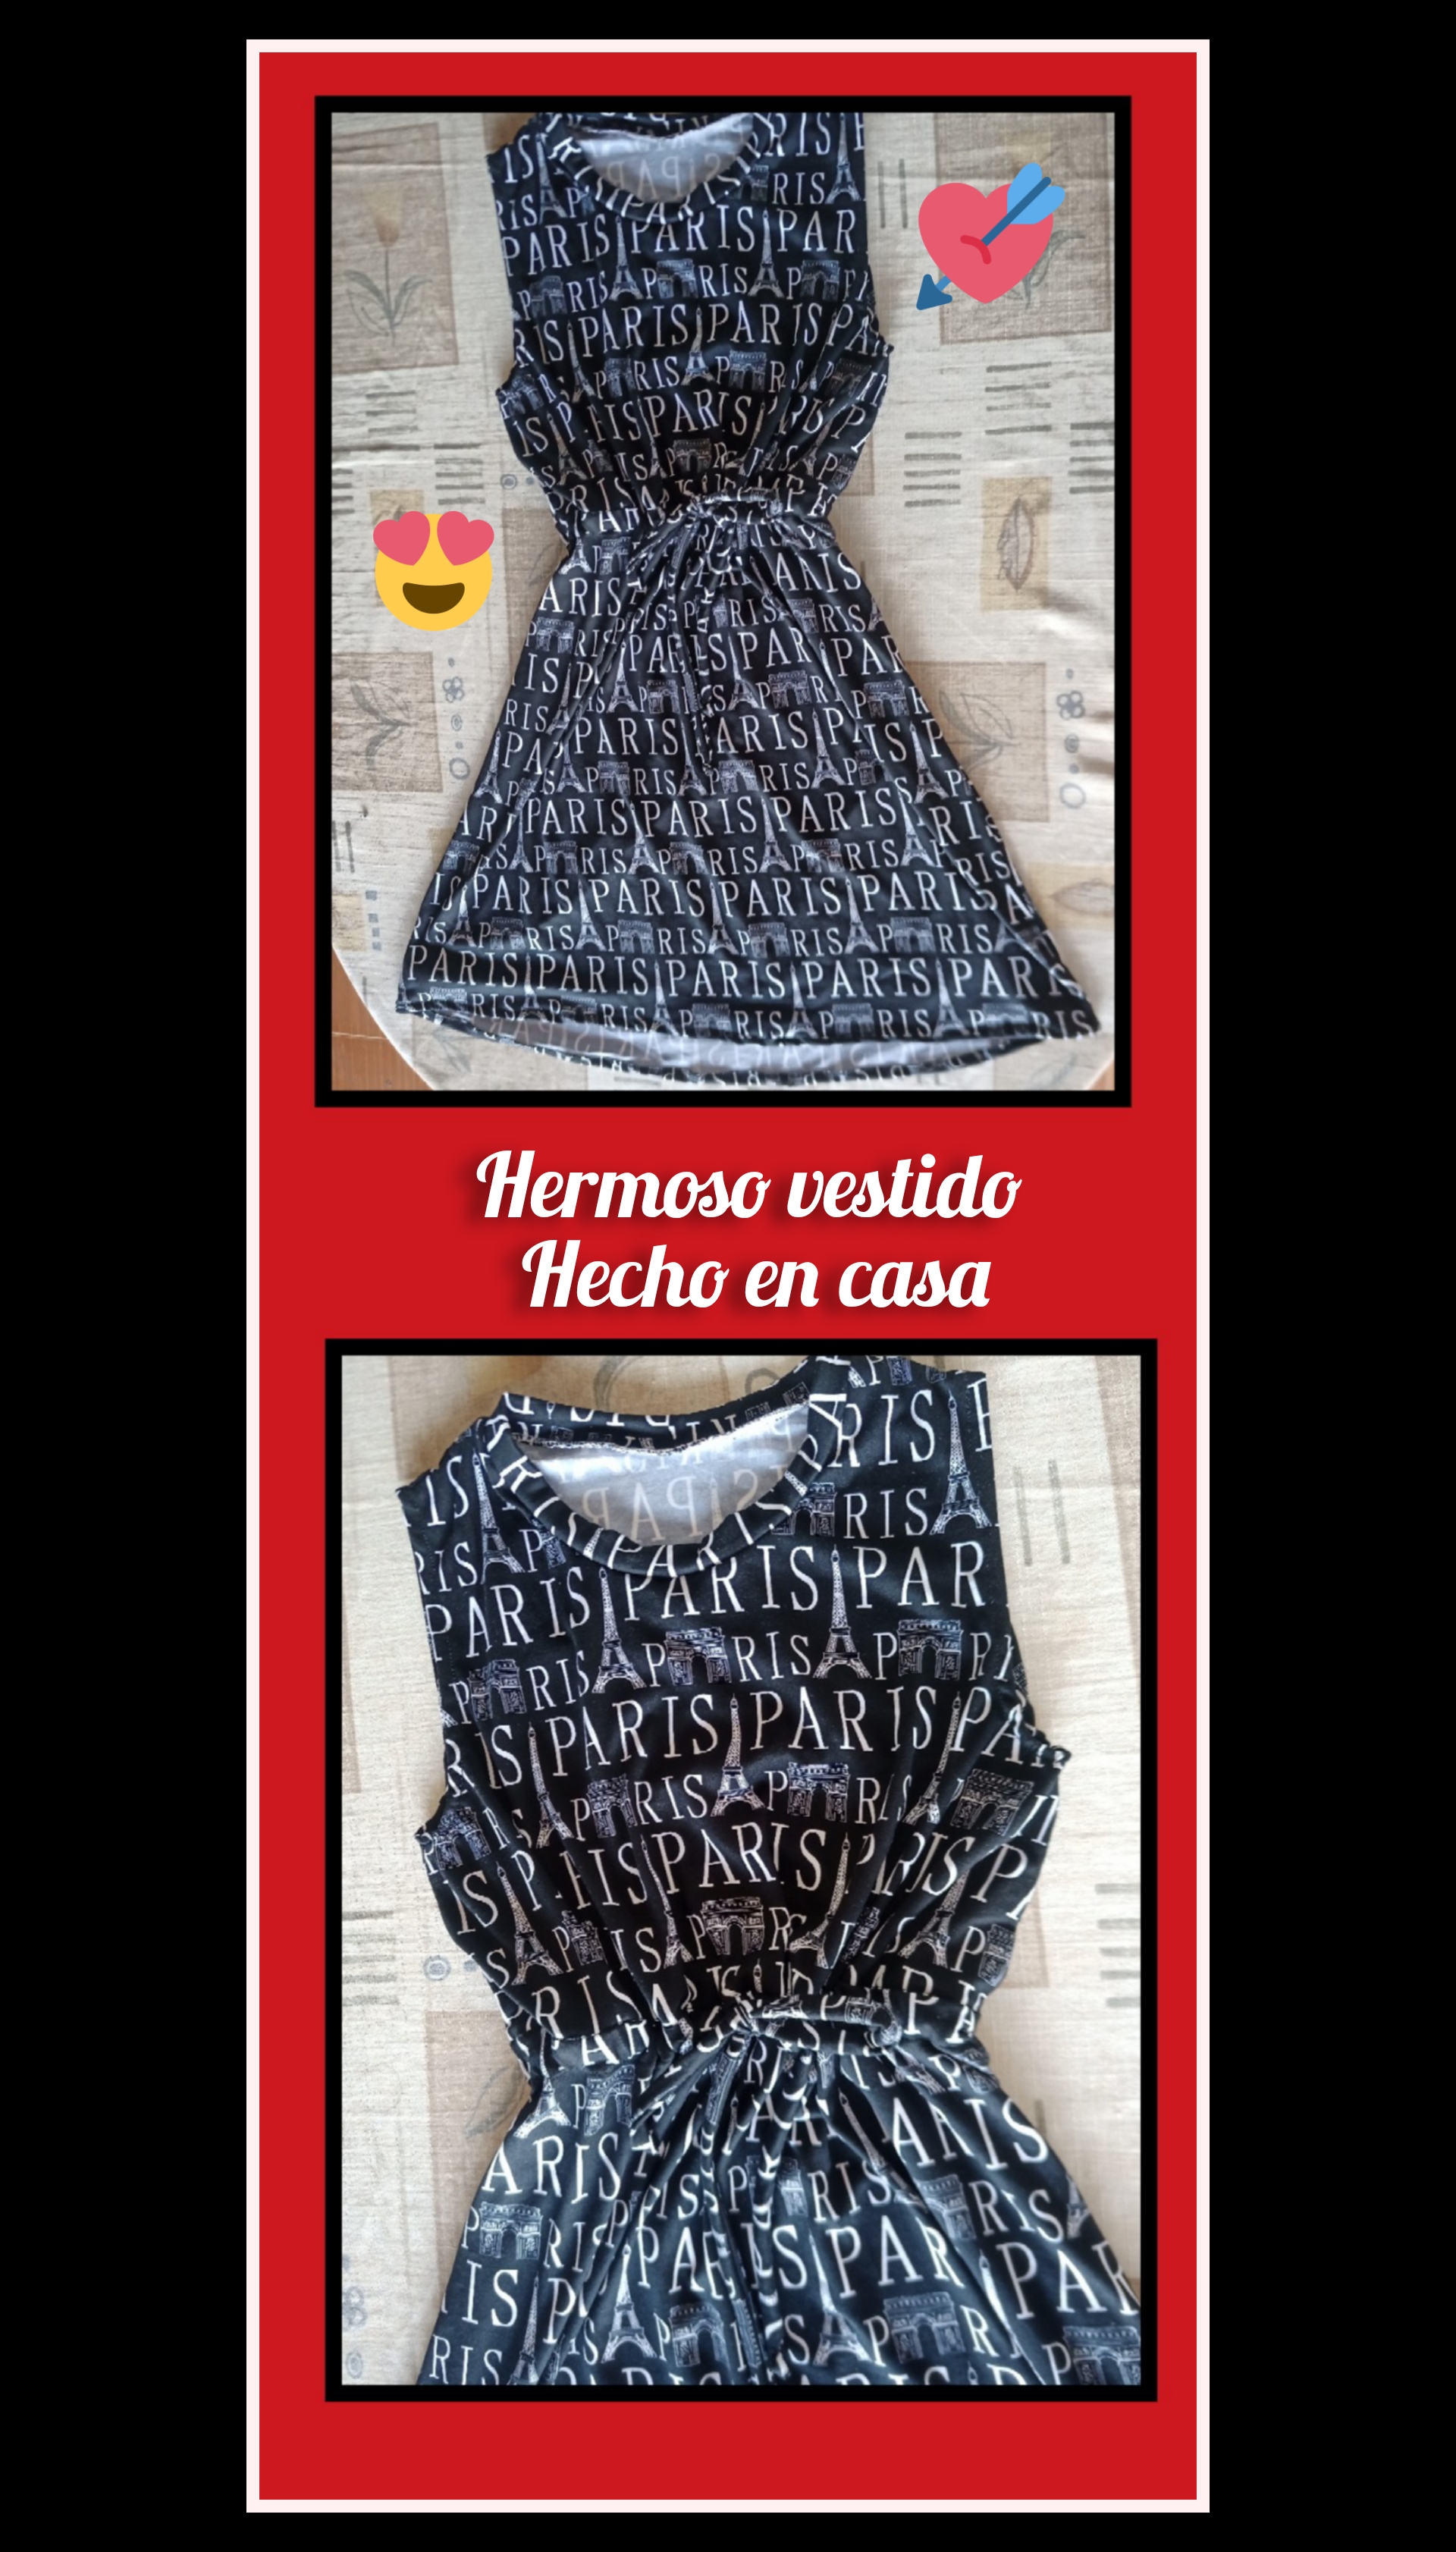
Haciendo un hermoso vestido tipo playero en tela de algodón para mi cuñada ❤️ // Making a beautiful beach dress in cotton fabric for my sister-in-law ❤️
Hace poco descubrí esta comunidad aquí en Hive ya que soy nueva publicando, y al descubrirla me encantó tanto y me puse muy feliz porque yo amo la costura y trabajo con ella, tengo unas máquinas caseras en mi casa las cuales me compré para poder trabajar, ya tengo aproximadamente dos años desde que me cree una cuenta en instagram llamada @fashiondani22, allí público las piezas que confecciono y los pedidos de mis clientes, pero hoy les mostraré un poco del trabajo que le hice a mi cuñada quien me pidió un vestido sencillo.
Greetings to all the members of this beautiful NeedleWorkMonday community, I'm Daniela Arenas "@danieela" and this is my first post for you 😊.
I recently discovered this community here on Hive since I am new posting, and when I discovered it I loved it so much and I got very happy because I love sewing and I work with it, I have some homemade machines in my house which I bought myself to be able to work, I already have about two years since I created an account on instagram called @fashiondani22, there I publish the pieces I make and the orders of my customers, but today I will show you a little of the work I did to my sister in law who asked me for a simple dress.

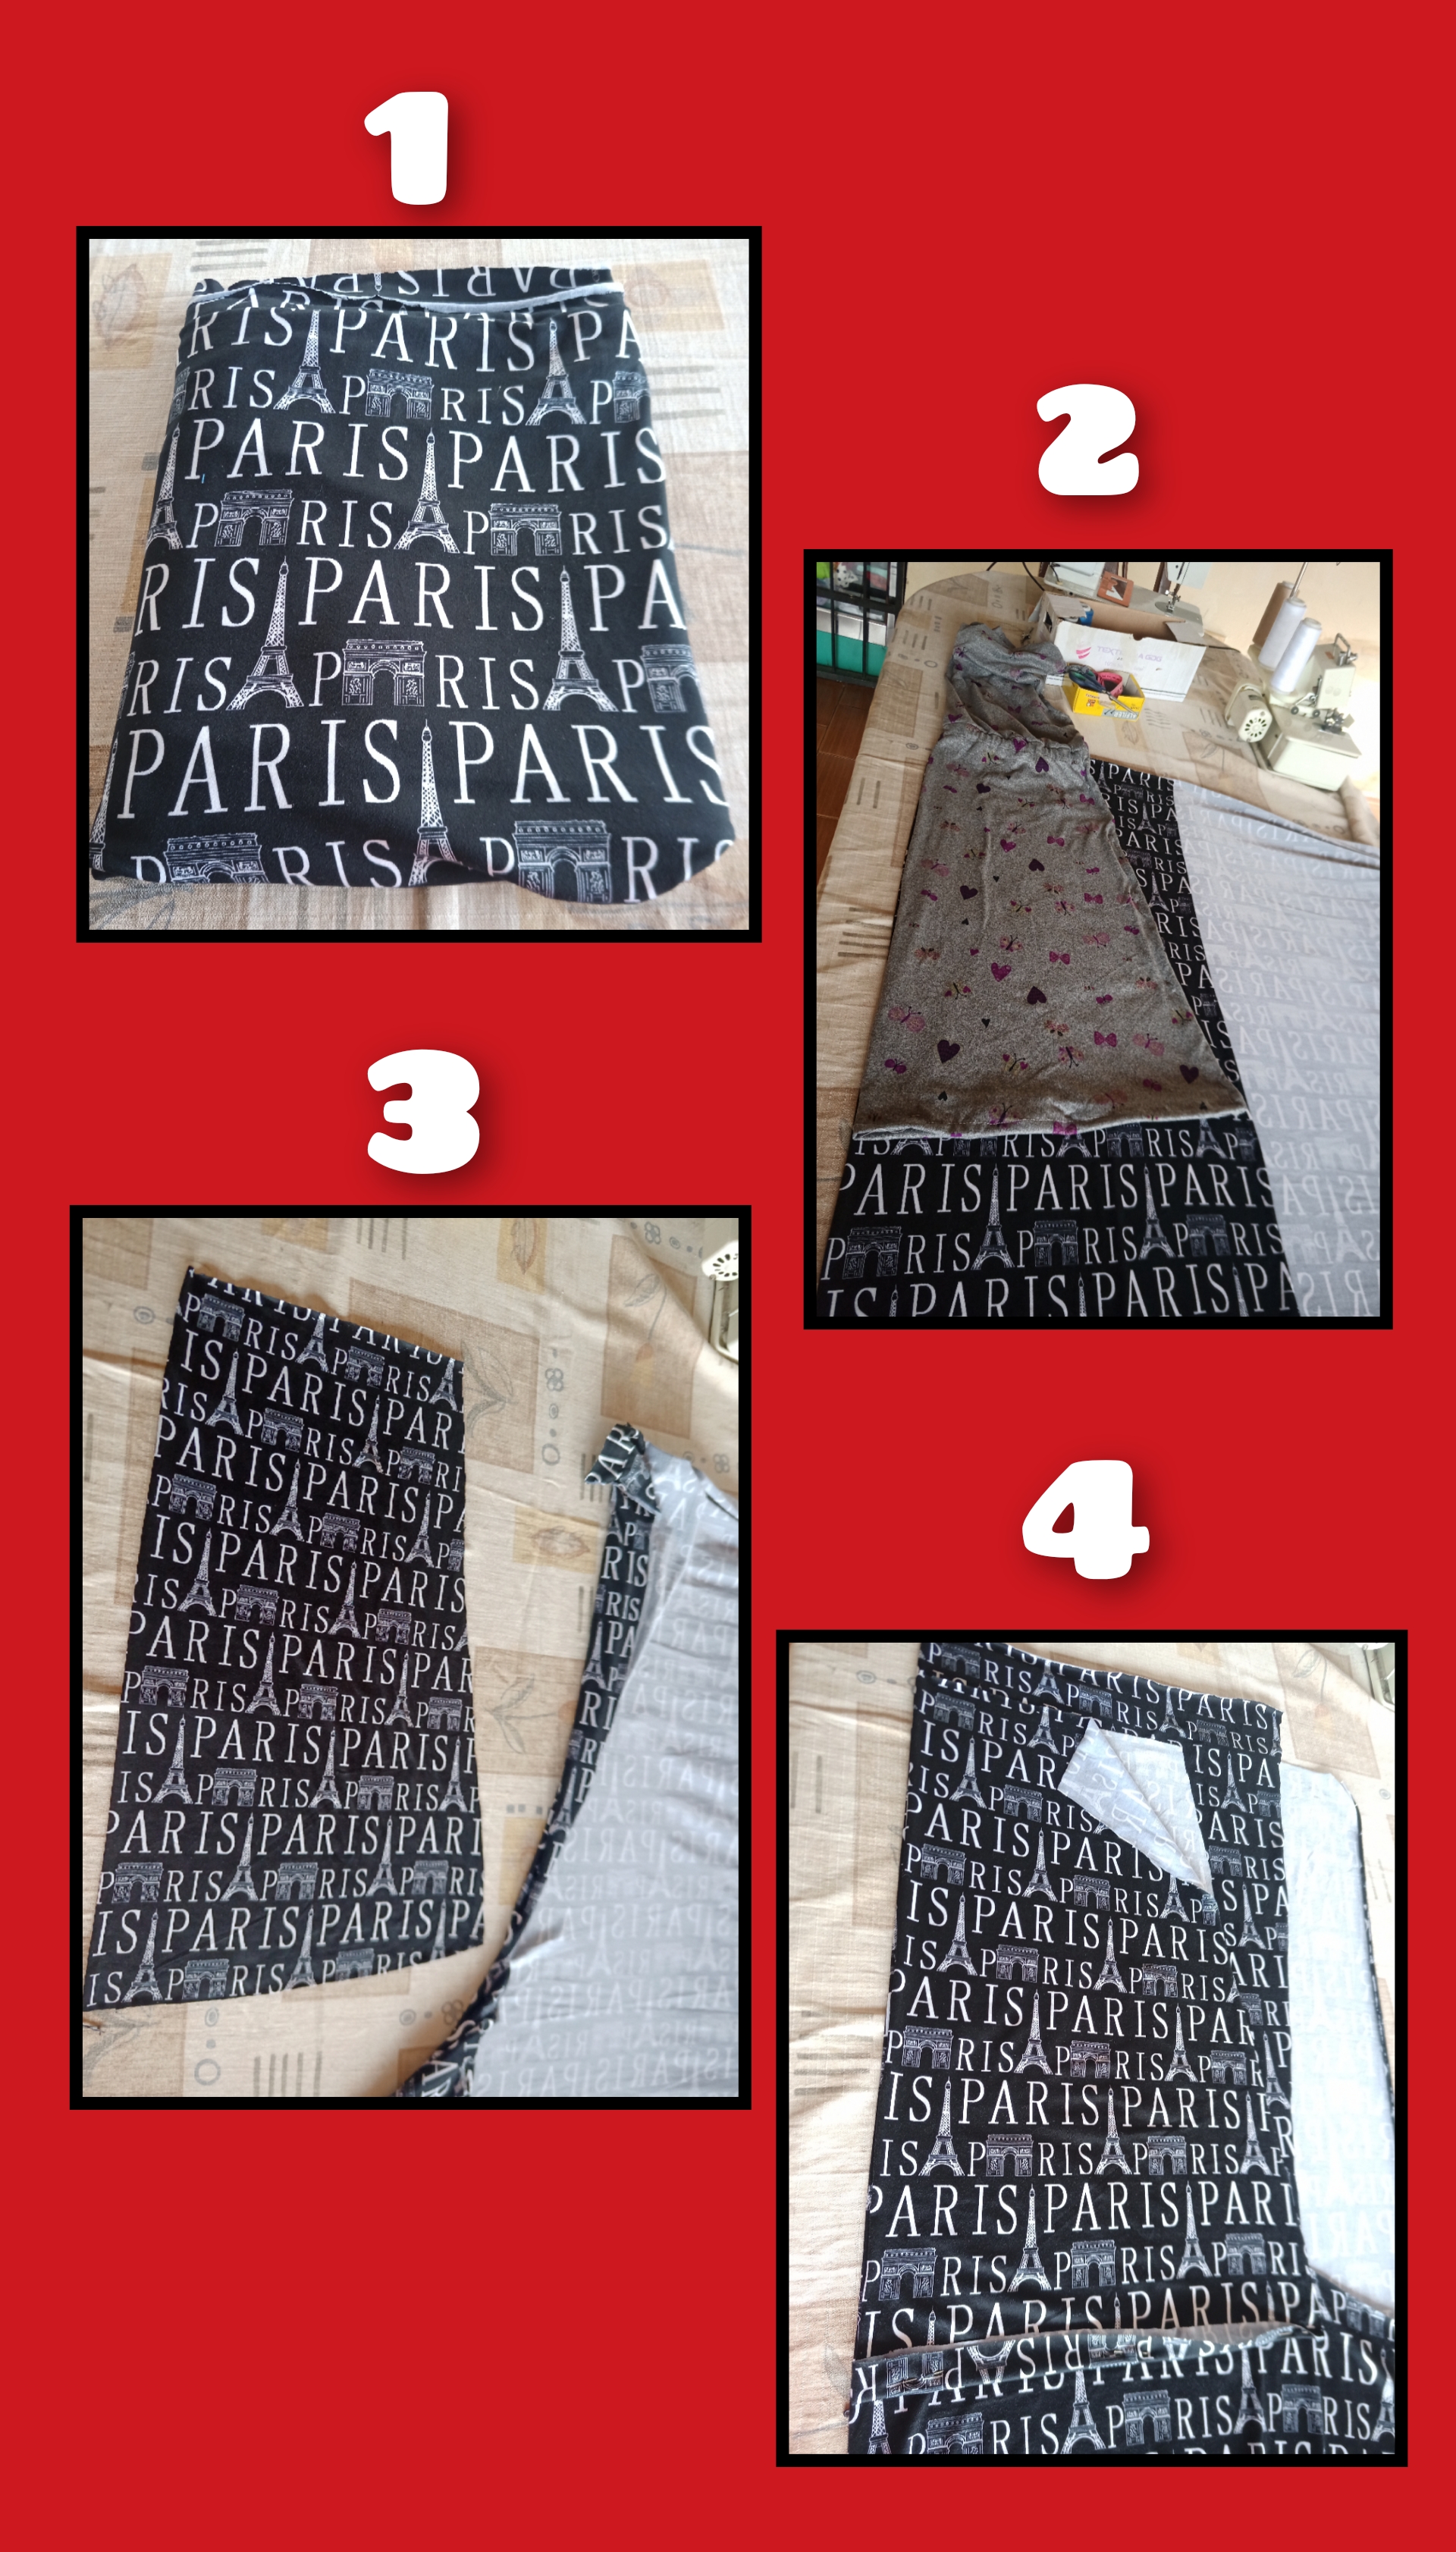
Para este trabajo utilicé los siguientes materiales:
- Un metro de Tela micro durazno estampada.
- Hilo negro.
- Tijeras.
- Alfileres.
- Tiza.
Lo confeccioné con mi máquina casera
Tegrup y mi Overlok.
For this work I used the following materials:
- One meter of printed micro peach fabric.
- Black thread.
- Scissors.
- Pins.
- Chalk.
I made it with my homemade machine
Tegrup and my Overlok.

Doble mi tela por la parte donde iba a hacer la falda y coloque el vestido encima de la tela para sacar lo que sería la parte delantera, y así nuevamente con ese pedazo ya cortado lo coloqué encima de la tela y corte lo que sería la parte trasera del vestido, siempre la parte de atrás debe ser unos centímetros más largo que la del patrón delantero.
In the first image you can see that first I selected the fabric to use and for the pattern I used a dress that I had already made and had already made on another occasion.
I folded my fabric where I was going to make the skirt and placed the dress on top of the fabric to get what would be the front part, and so again with that piece already cut I placed it on top of the fabric and cut what would be the back part of the dress, always the back part should be a few inches longer than the front pattern.

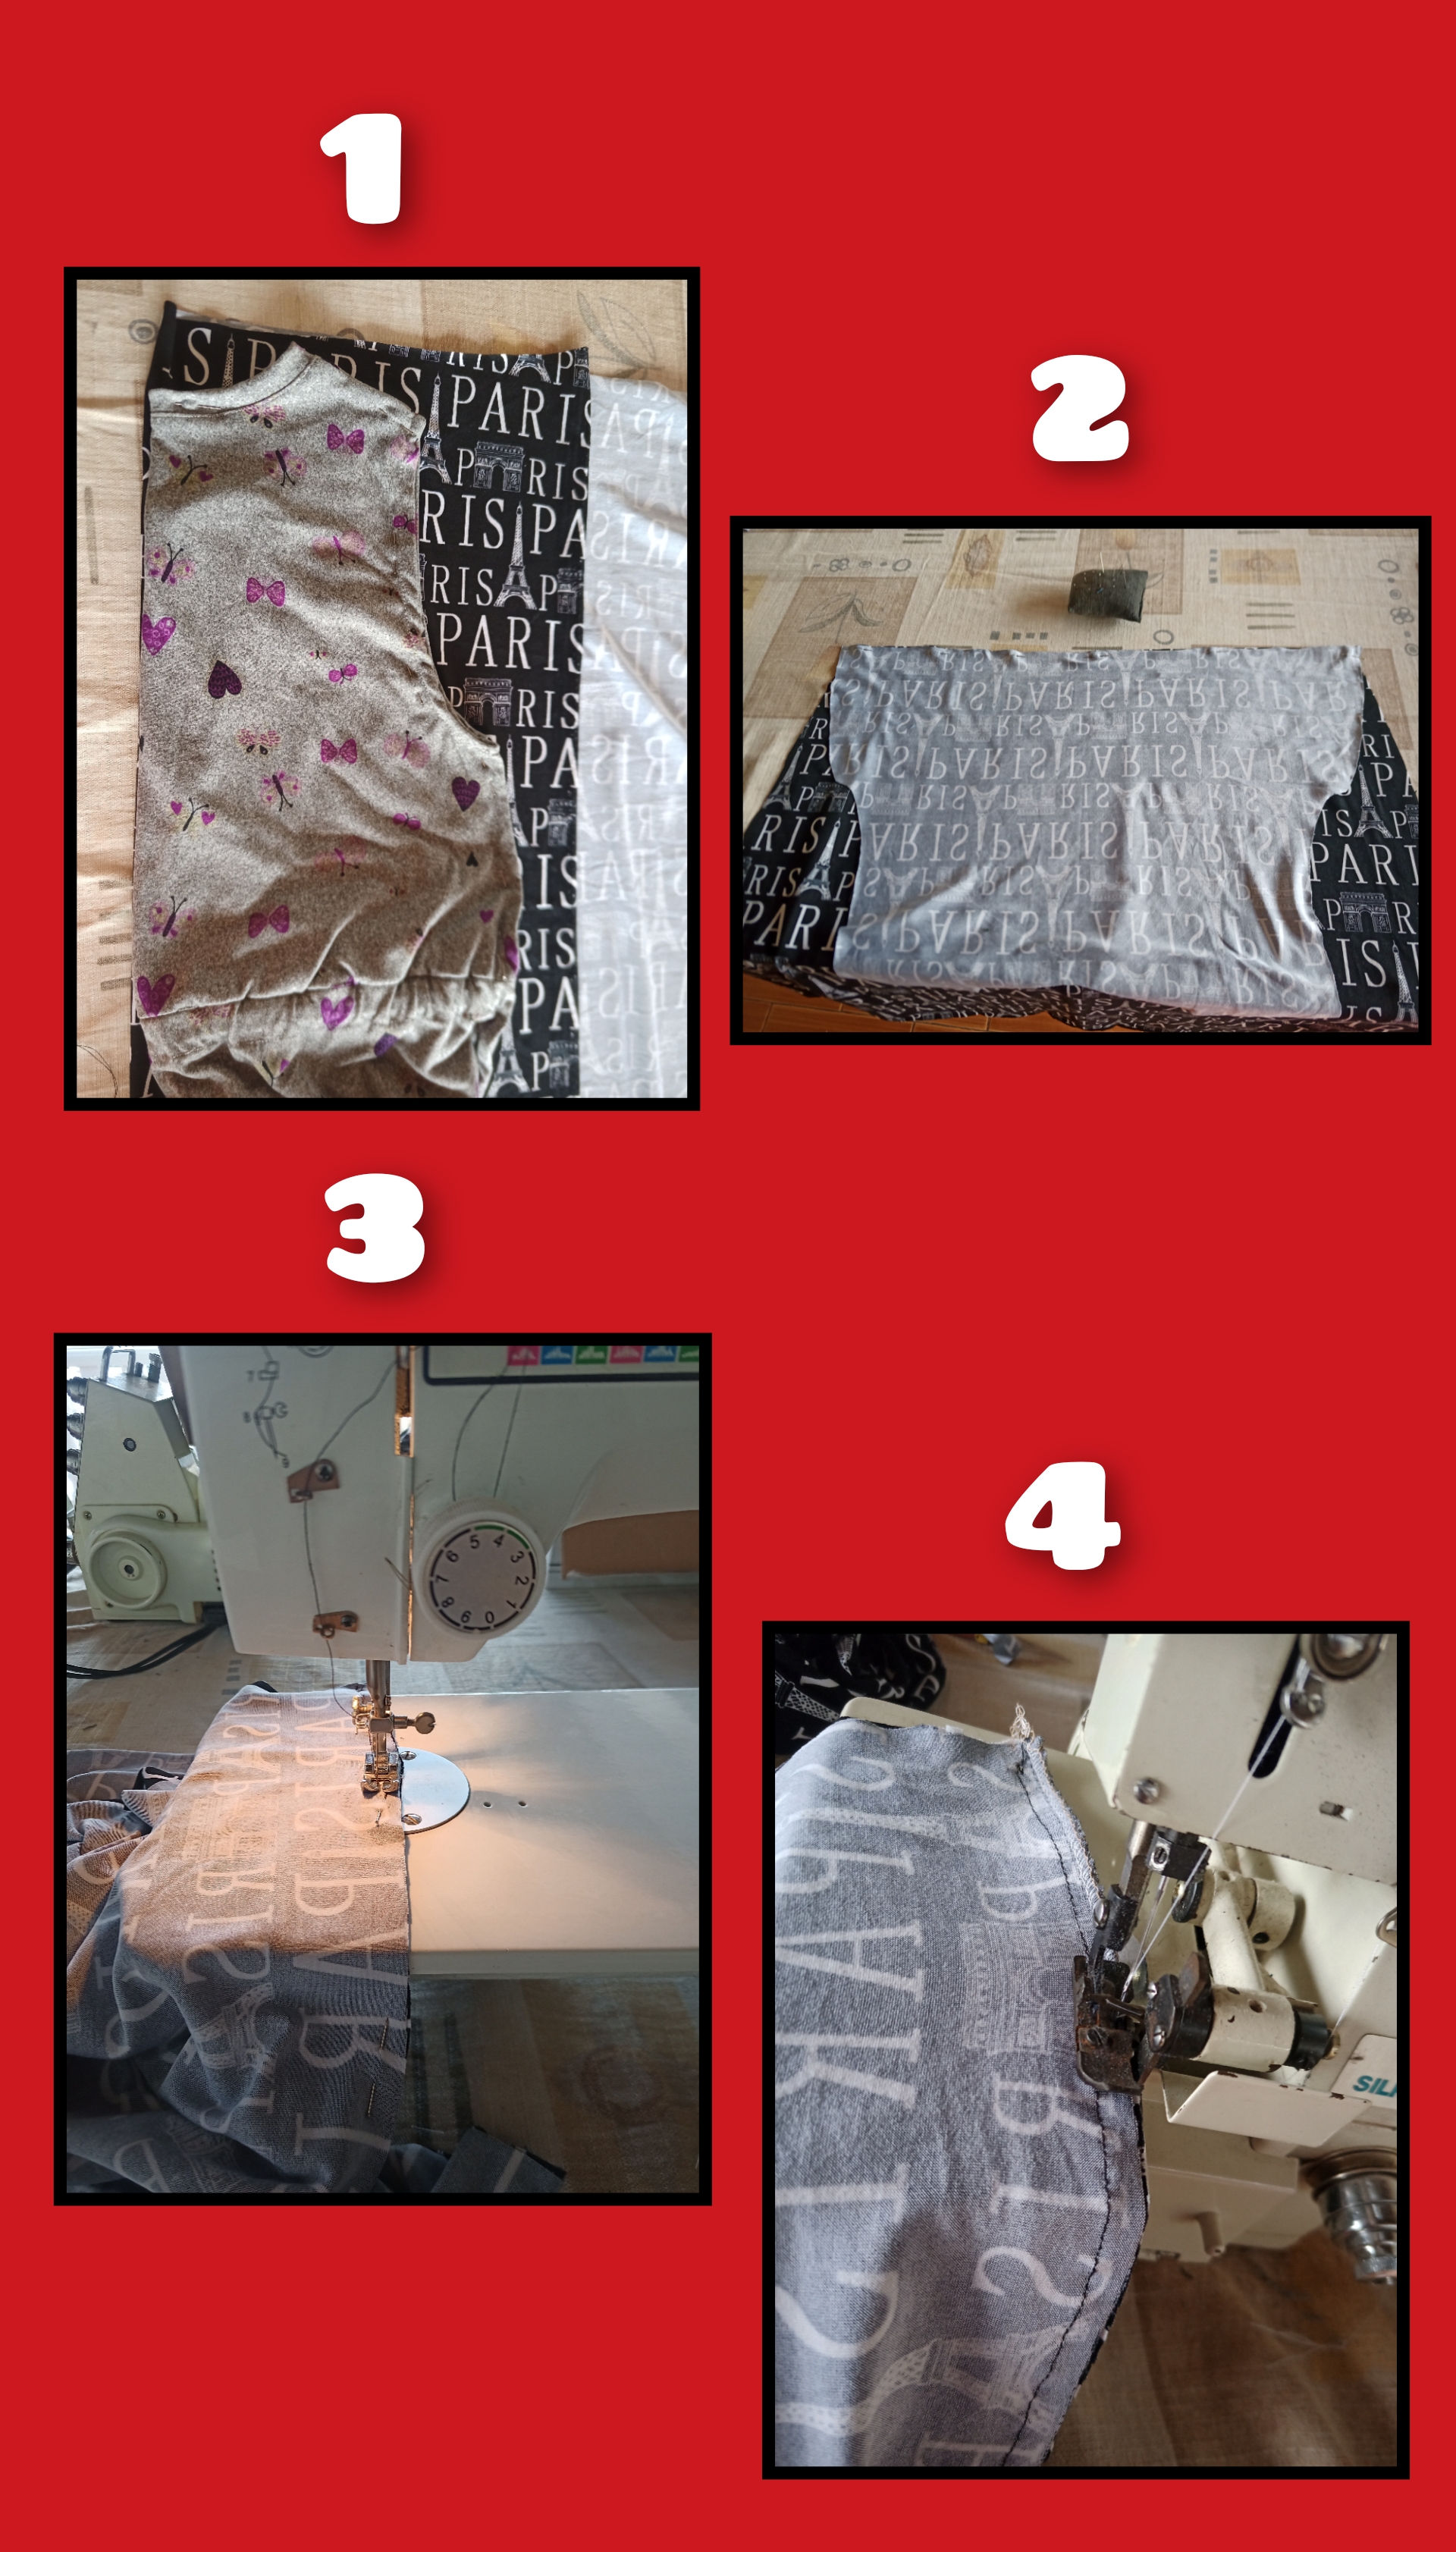
En la segunda imagen ya venía con la parte superior, doble nuevamente la tela por el pedazo que iba a cortar la blusa y coloque el vestido para sacar el patrón de la blusa del los lados delantero y trasero, después que los corte agarré la parte delantera de la falda y la uni en la cintura con la blusa de la parte delantera colocando derecho con derecho, y así mismo hice con la falda y la blusa del lado trasero, luego los pase por la máquina con costura recta y overlok.
I placed the dress to take out the blouse pattern from the front and back sides, after I cut them I took the front part of the skirt and joined it at the waist with the front blouse placing it right sides together, and I did the same with the skirt and the back blouse, then I put them through the machine with a straight seam and overlok.

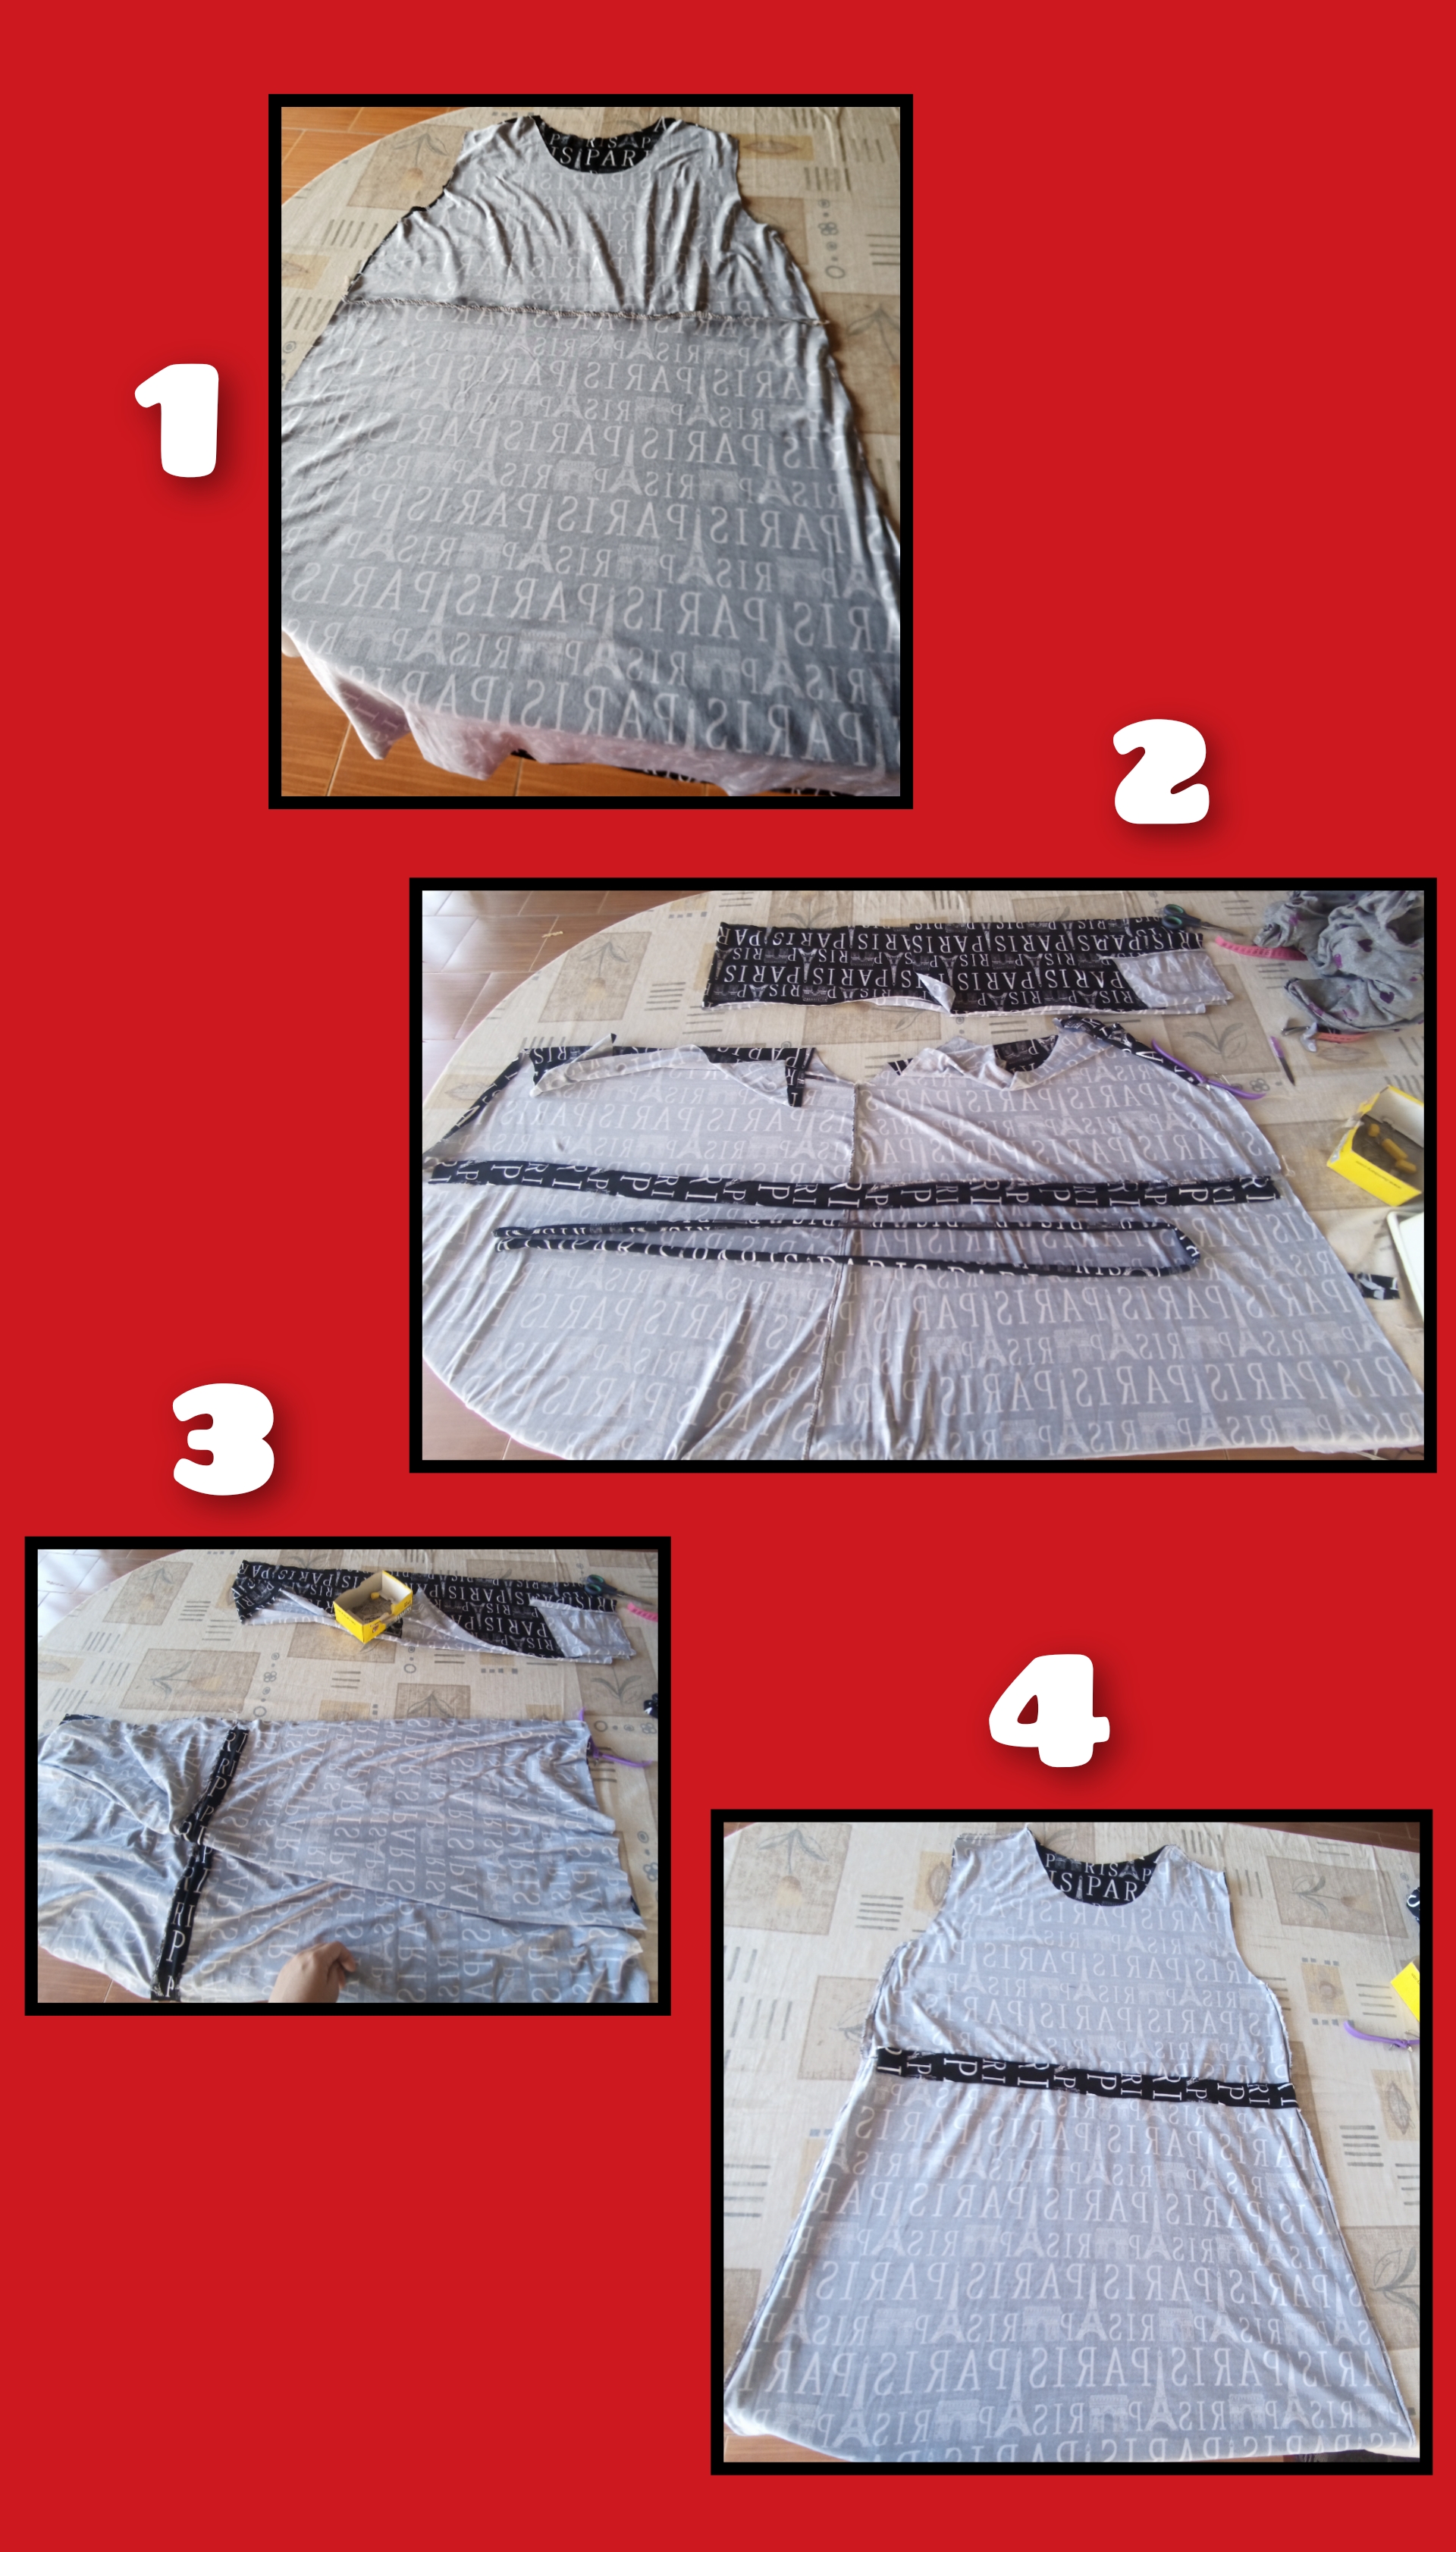
Ya en la siguiente foto uní las dos piezas ya cocidas, es decir el delantero y el trasero del vestido cara con cara y le coloqué alfileres en un solo lado para solamente coser un lateral del vestido.
Luego corté dos tiras, una para utilizarla de cordón a la cintura colocándola como lazo, y la otra para hacerle el pasillo donde pueda pasar el cordón, la que corte para el lazo en la cintura la cosí, y la que corté para hacerle el pasillo la utilice para la cintura.
Primero abriendo el vestido y colocándolo con la parte del revés para arriba, en la parte de la cintura cosí la tira para el pasillo ajustando la con alfileres, sin coser hasta el final en ambos lados dejando un espacio para que no se selle con la costura lateral del vestido.
Terminando eso coloqué nuevamente el vestido cara con cara y cosí la parte lateral que faltaba y arriba en la parte de los hombros y le pase la overlok para sellar.
In the next picture I joined the two pieces already sewn, that is to say the front and back of the dress face to face and I put pins on one side only to sew only one side of the dress.
Then I cut two strips, one to be used as a drawstring at the waist as a bow, and the other to make the corridor where I can pass the drawstring, the one I cut for the bow at the waist I sewed it, and the one I cut to make the corridor I used it for the waist.
First opening the dress and placing it with the back side up, in the waist part I sewed the strip for the aisle adjusting it with pins, without sewing until the end on both sides leaving a space so that it does not seal with the side seam of the dress.
After that I placed the dress face to face again and sewed the missing side seam and the top shoulder seam, and then I sewed the overlok to seal it.

Por último le agarre el ruido a la falda, le agarre el ruedo también a las mangas doblándolas en un centímetro y corté una tira para hacerle el cuello.
Por supuesto le pasé el cordón del lazo por el pasillo que le había hecho por el revés y lo prense un poco para darle forma y ajuste a la cintura, y aquí pueden ver el resultado final 😍.
Un hermoso vestido muy sencillo y muy cómodo para usar 👗.
Lastly, I grabbed the ruching on the skirt, grabbed the hem of the sleeves, folded them in one centimeter and cut a strip to make the neckline.
Of course I passed the lace of the bow through the corridor that I had made on the back and pressed it a little to give it shape and fit to the waist, and here you can see the final result 😍.
A beautiful dress very simple and very comfortable to wear 👗.
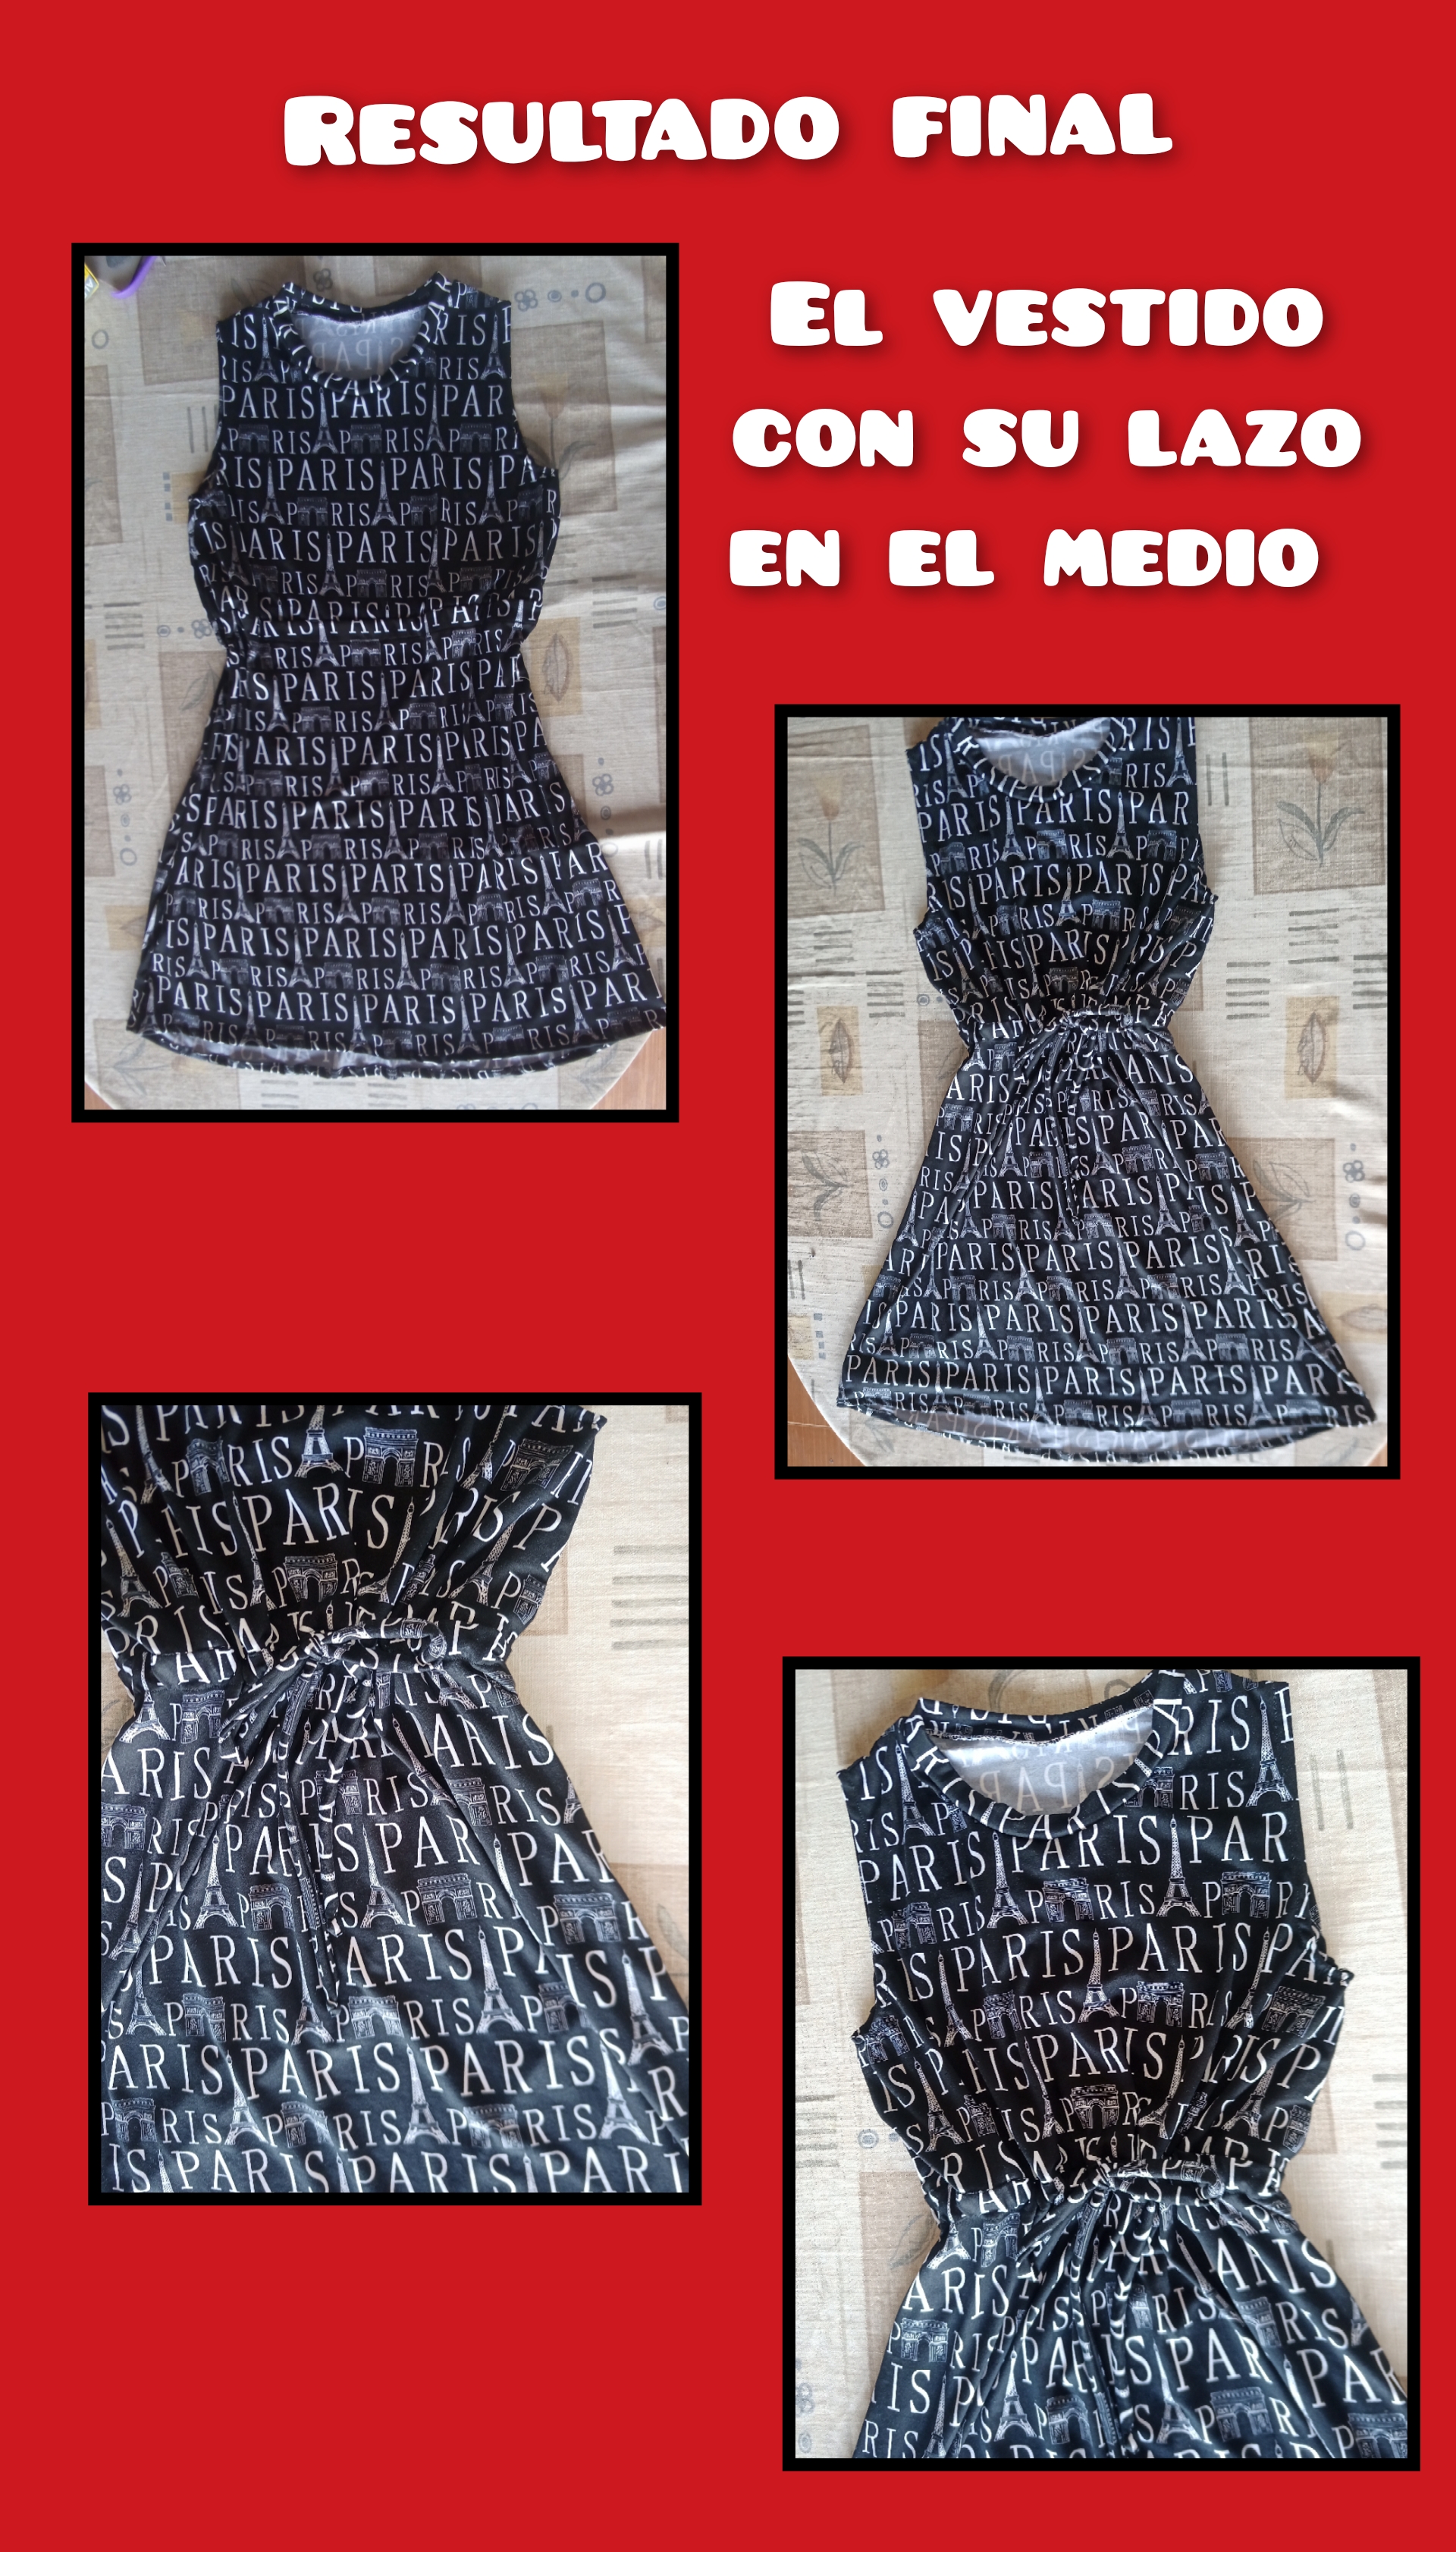

Todas las fotos fueron de mi autoría editadas con el editor "Photo Collage Maker".
Para traducir a inglés utilice " Deelp Traductor".
El vestido tarde dos días en hacerlo por algunas diligencias que tenía pendiente 😊, muchas gracias por leer mi post y espero les haya gustado nos vemos en uno próximo.
All photos were taken by me and edited with the editor "Photo Collage Maker".
To translate to English use " Deelp Translator".
The dress took two days to make because of some errands I had pending 😊, thank you very much for reading my post and I hope you liked it, see you in the next one.

Wow these is a beautiful dress you made, your sister in-law is gonna love it.
¡Hola amiga, bienvenida a la comunidad Needle Work Monday! Espero que te sientas cómoda aquí :). Me gustó mucho este vestido y como lograste replicar el patrón. Tu cuñada si que tiene suerte de tener una costurera en la familia 😃.
Todos los lunes compartimos nuestro trabajo con fotos y usamos el hashtag #needleworkmonday y el resto de los días usamos la etiqueta #needlework. Te invito a que nos compartas el paso a paso de tu trabajo para acompañarte en tu proceso creativo ❤️. Si tienes alguna duda sobre la comunidad, puedes consultar las FAQ o también preguntarme a mí y con gusto te ayudo 😃.
Espero verte por acá de nuevo 😃.
Que tengas buen día. Saludos desde Argentina ❤️.
Bienvenida Daniela a nuestro hogar, te saludo desde Margarita aunque tambien soy de Barquisimeto na´guara, espero ver todas tus bellas creaciones por aca, este vestido te quedo bellisimo, bienvenida 😘
Ay me encantó, voy a replicar, buena técnica para coser el cordón gracias por compartir 💐
Pero que hermosura de vestido 😮 cuánto tiempo le tardo en hacerla? Realmente quedó espectacular,buen trabajo amiga @danieela .
This is really beautiful thanks for sharing
That's a unique fabric choice. Bravo on the dress!