[ESP/ENG] Bello Mono para Médicos hecho en casa 👩🏻⚕️👨🏻⚕️😇 / Beautiful homemade Doctor's jumpsuit 👩🏻⚕️👨🏻⚕️😇
Saludos a todos mis queridos amigos de esta hermosa comunidad NeedleWorkMonday ❤️ aquí les traigo mi segunda publicación para ustedes, en este día les mostraré cómo realicé un mono para un médico, este es un regalo de mi suegra para una señora que le hizo una operación y ella está muy agradecida con ella y me mandó hacerle un conjunto, en esta publicación les mostraré como realice el mono.
Greetings to all my dear friends of this beautiful NeedleWorkMonday community ❤️ here I bring you my second post for you, in this day I will show you how I made a monkey for a doctor, this is a gift from my mother in law for a lady who made her an operation and she is very grateful to her and she sent me to make her a set, in this post I will show you how I made the monkey.

Los materiales que utilice fueron los siguientes:
- 1 metro y 20 centímetros de tela antifluidos quirúrgica, color turquesa claro.
- Hilo color turquesa.
- Goma.
- Tijeras.
- Alfileres.
- Maquinas de coser: Zig zag recta y overlock.
- Cinta métrica.
- Tiza
The materials I used were the following:
- 1 meter and 20 centimeters of surgical anti-fluid fabric, light turquoise color.
- Turquoise thread.
- Rubber band.
- Scissors.
- Pins.
- Sewing machines: Zig zag straight and overlock.
- Tape measure.
- Chalk

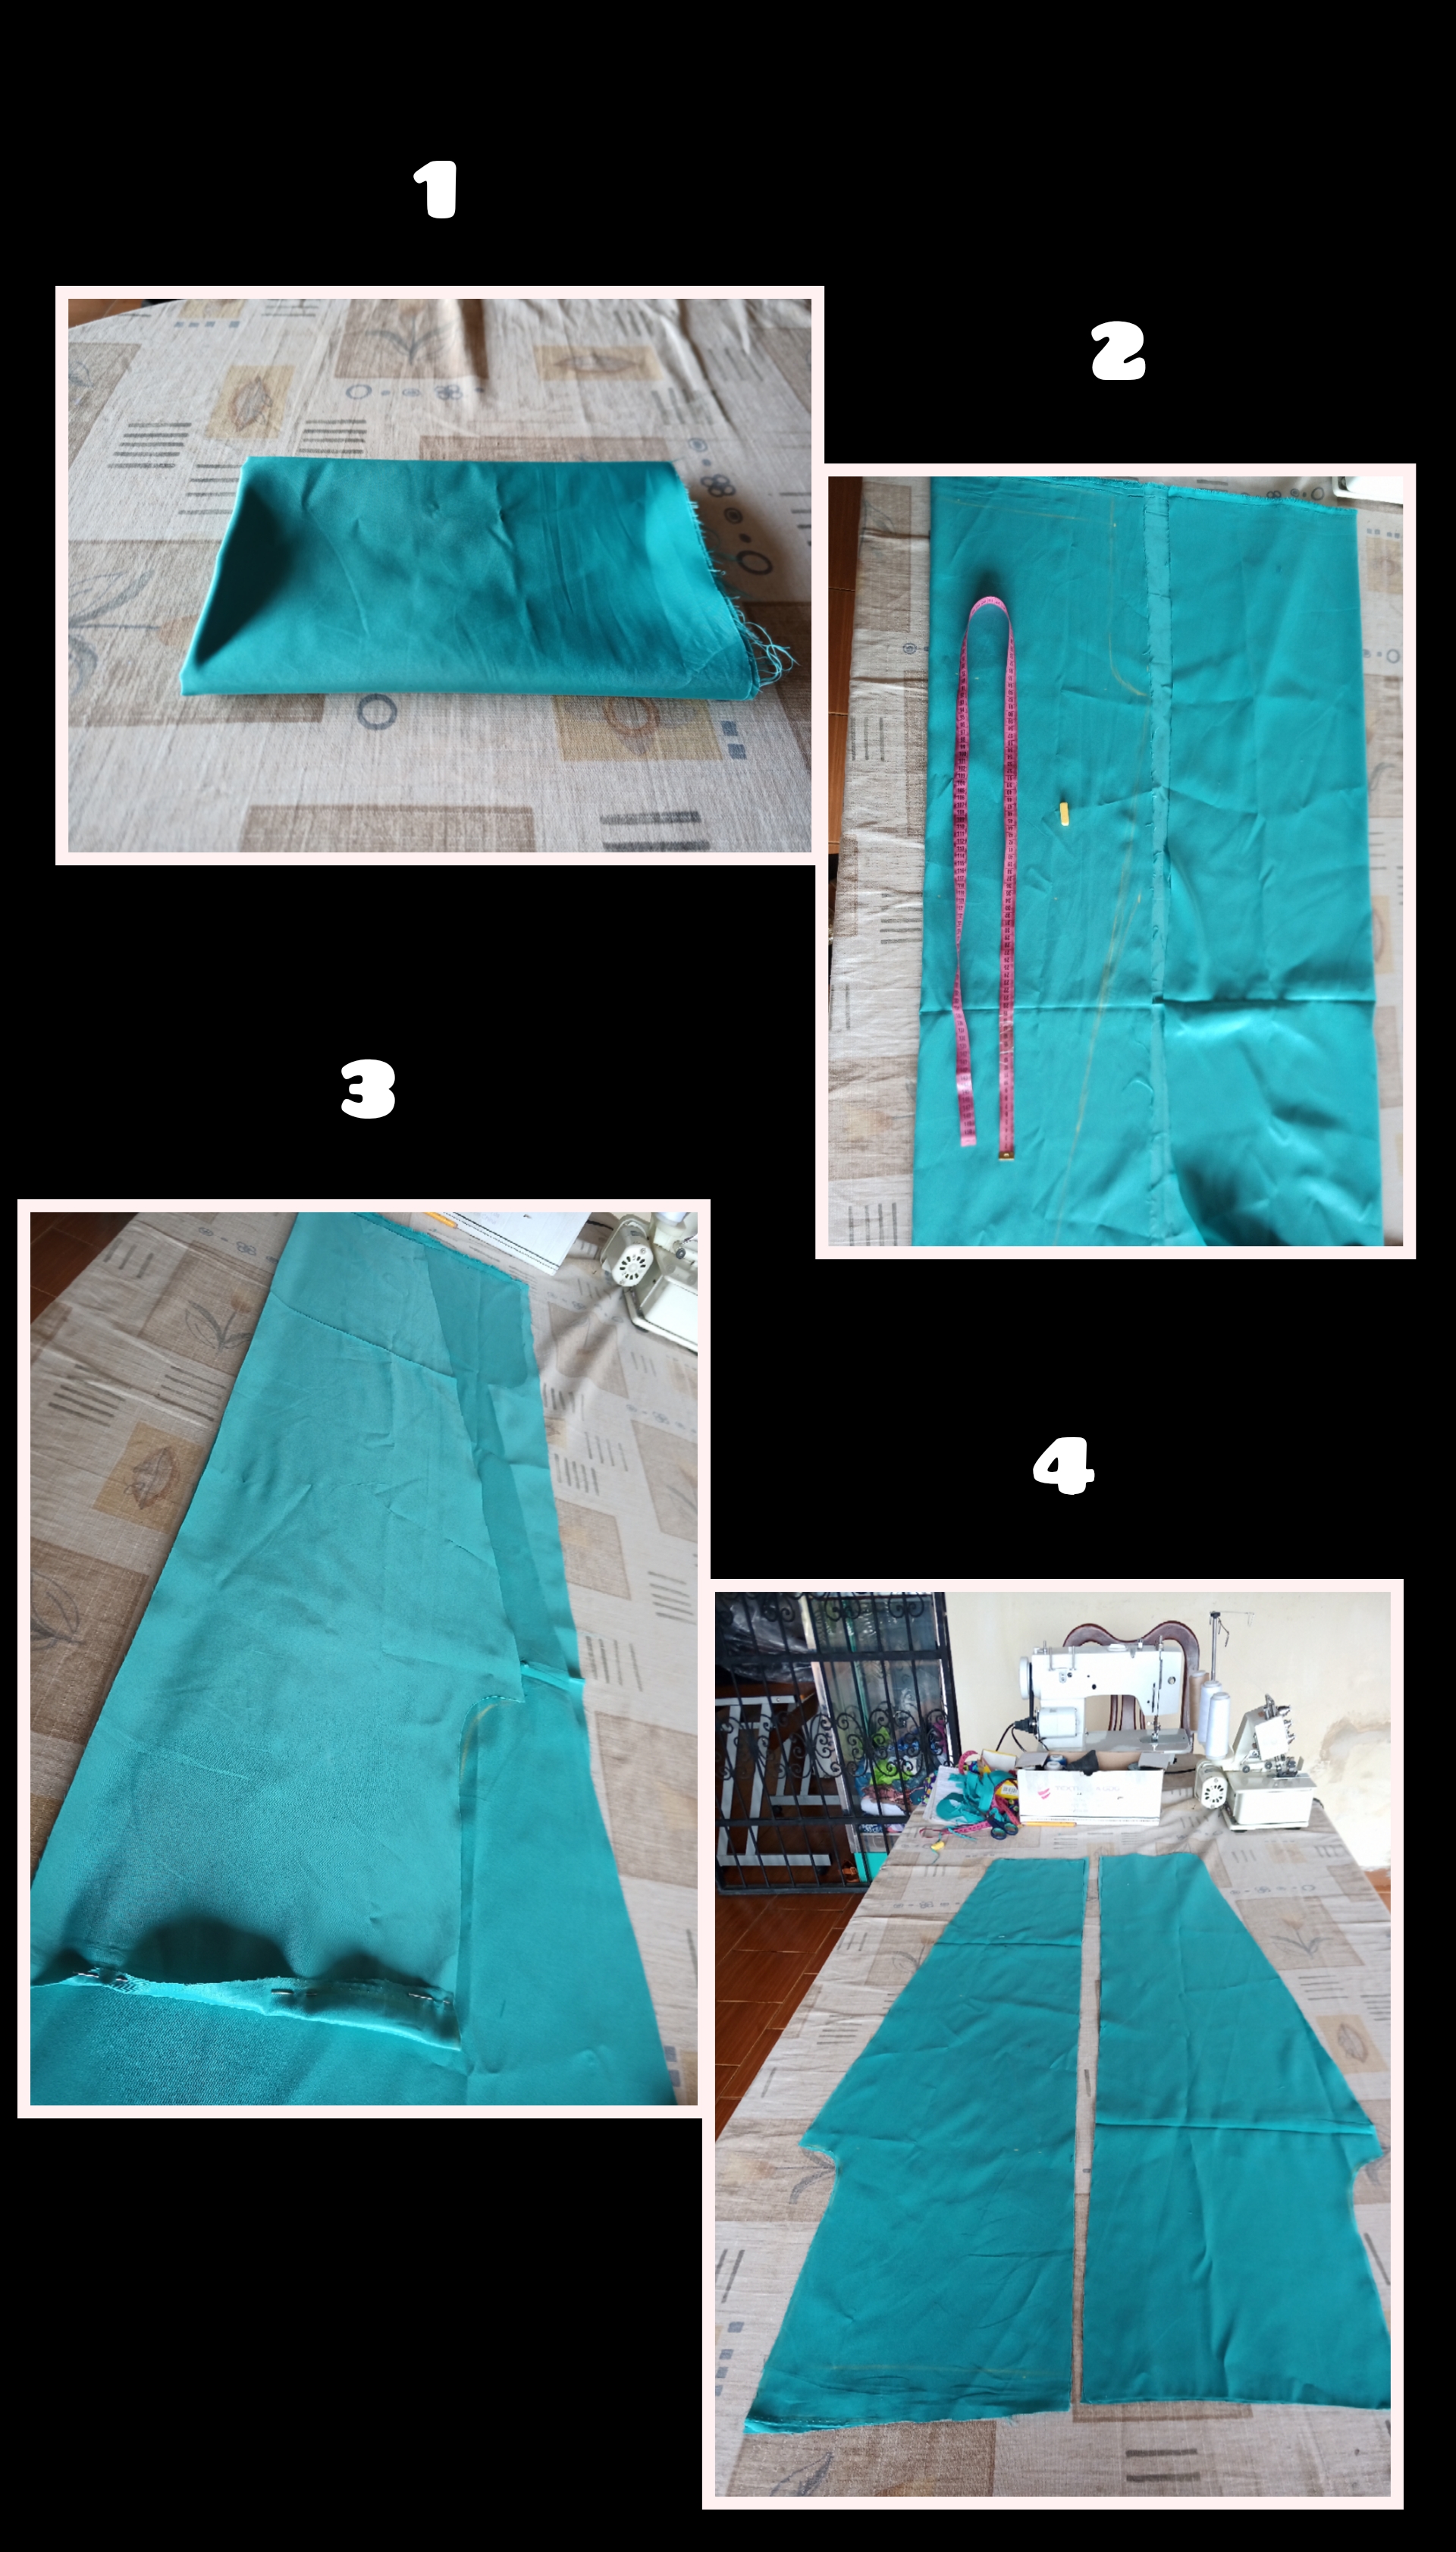
Lo primero que hice fue buscar la cinta métrica con la tiza y los alfileres, luego doble mi tela por donde iba a comenzar a dibujar las medidas.
The first thing I did was to get the tape measure with the chalk and pins, then I folded my fabric where I was going to start drawing the measurements.
Las medidas que utilice para realizar el mono fueron:
- Contorno de cadera.
- Alto de talle.
- Alto de rodilla.
- Largo de mono
- Contorno de pierna.
- Contorno de Ruedo.
The measurements I used to make the jumpsuit were:
- Hip circumference.
- Waist height.
- Knee height.
- Jumpsuit length.
- Leg contour.
- Wheel circumference.
Comencé marcando todas las medidas correctamente hasta hacer el patrón sobre la tela y luego lo recorte.
I started by marking all the measurements correctly until I made the pattern on the fabric and then cut it out.
Cuando comencé a recortar corte fue el patrón de la parte trasera, y luego con ese mismo patrón lo utilice para cortar el patrón de la parte delantera haciéndole los cambios que se requiere, allí puede ver los cuatro pedazos, los de a lante y los de atrás.
When I started to cut out the pattern for the back part, and then with that same pattern I used it to cut out the pattern for the front part making the changes required, there you can see the four pieces, the front and the back ones.

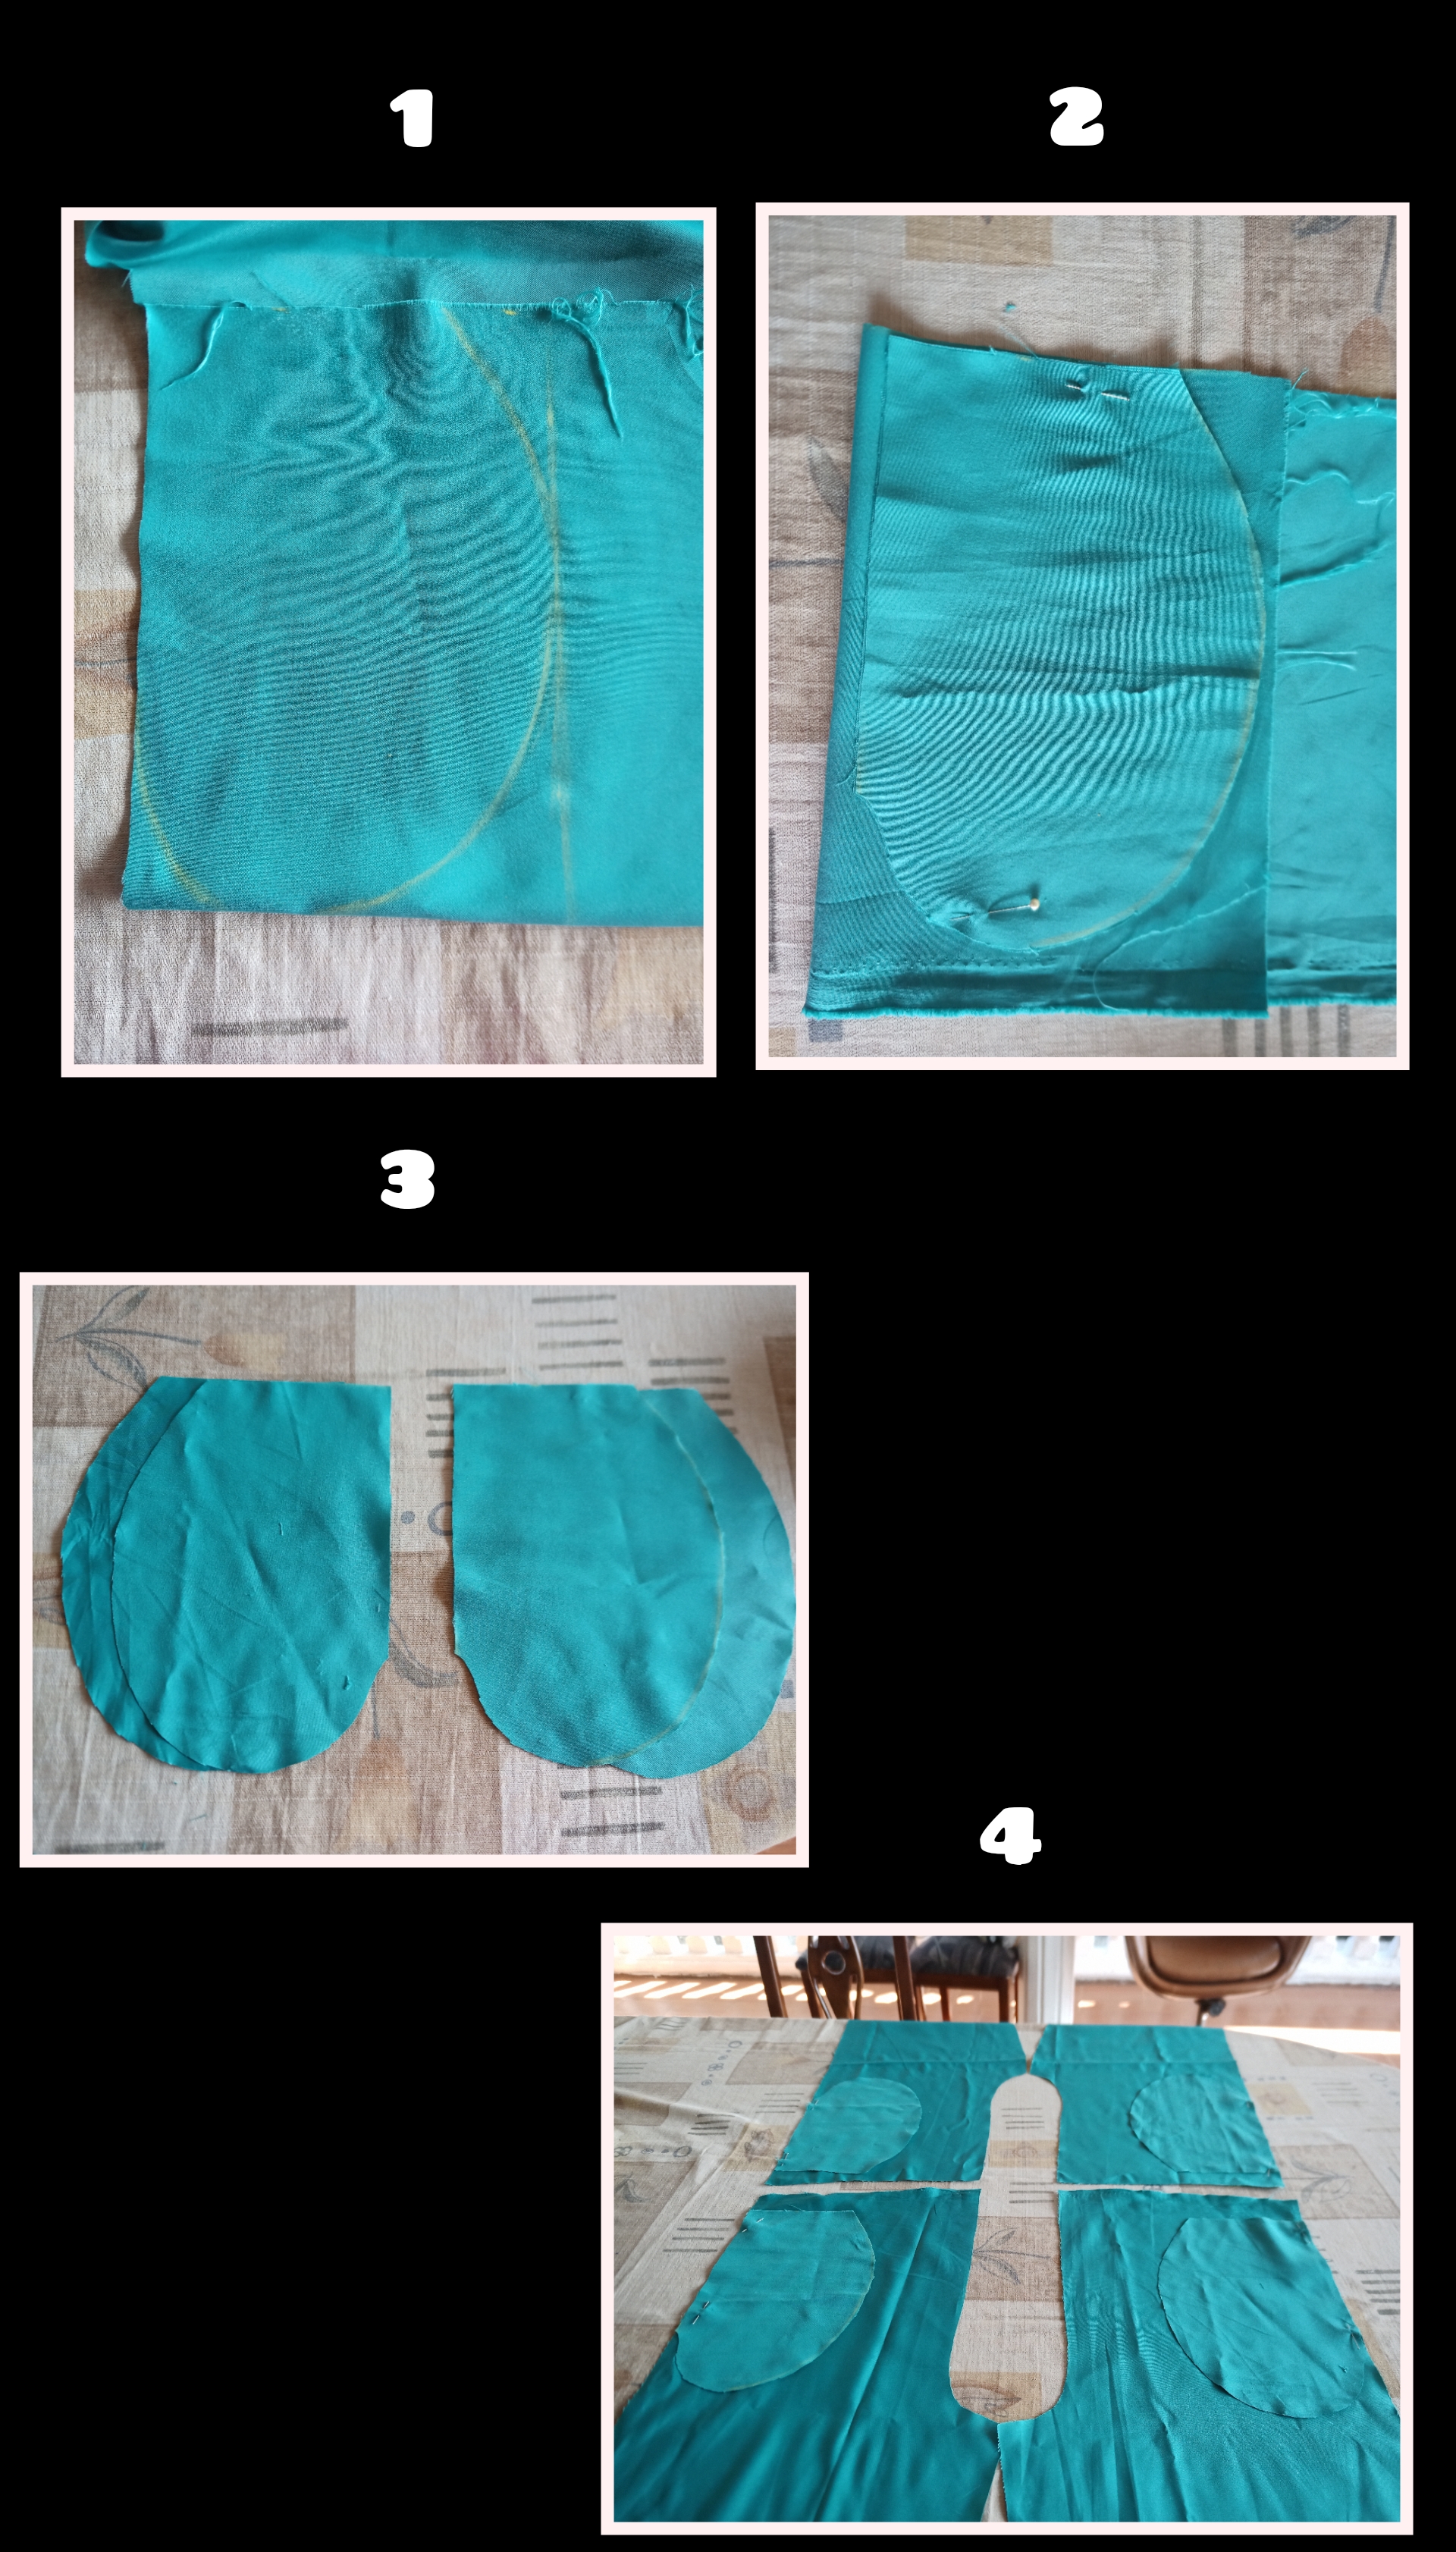
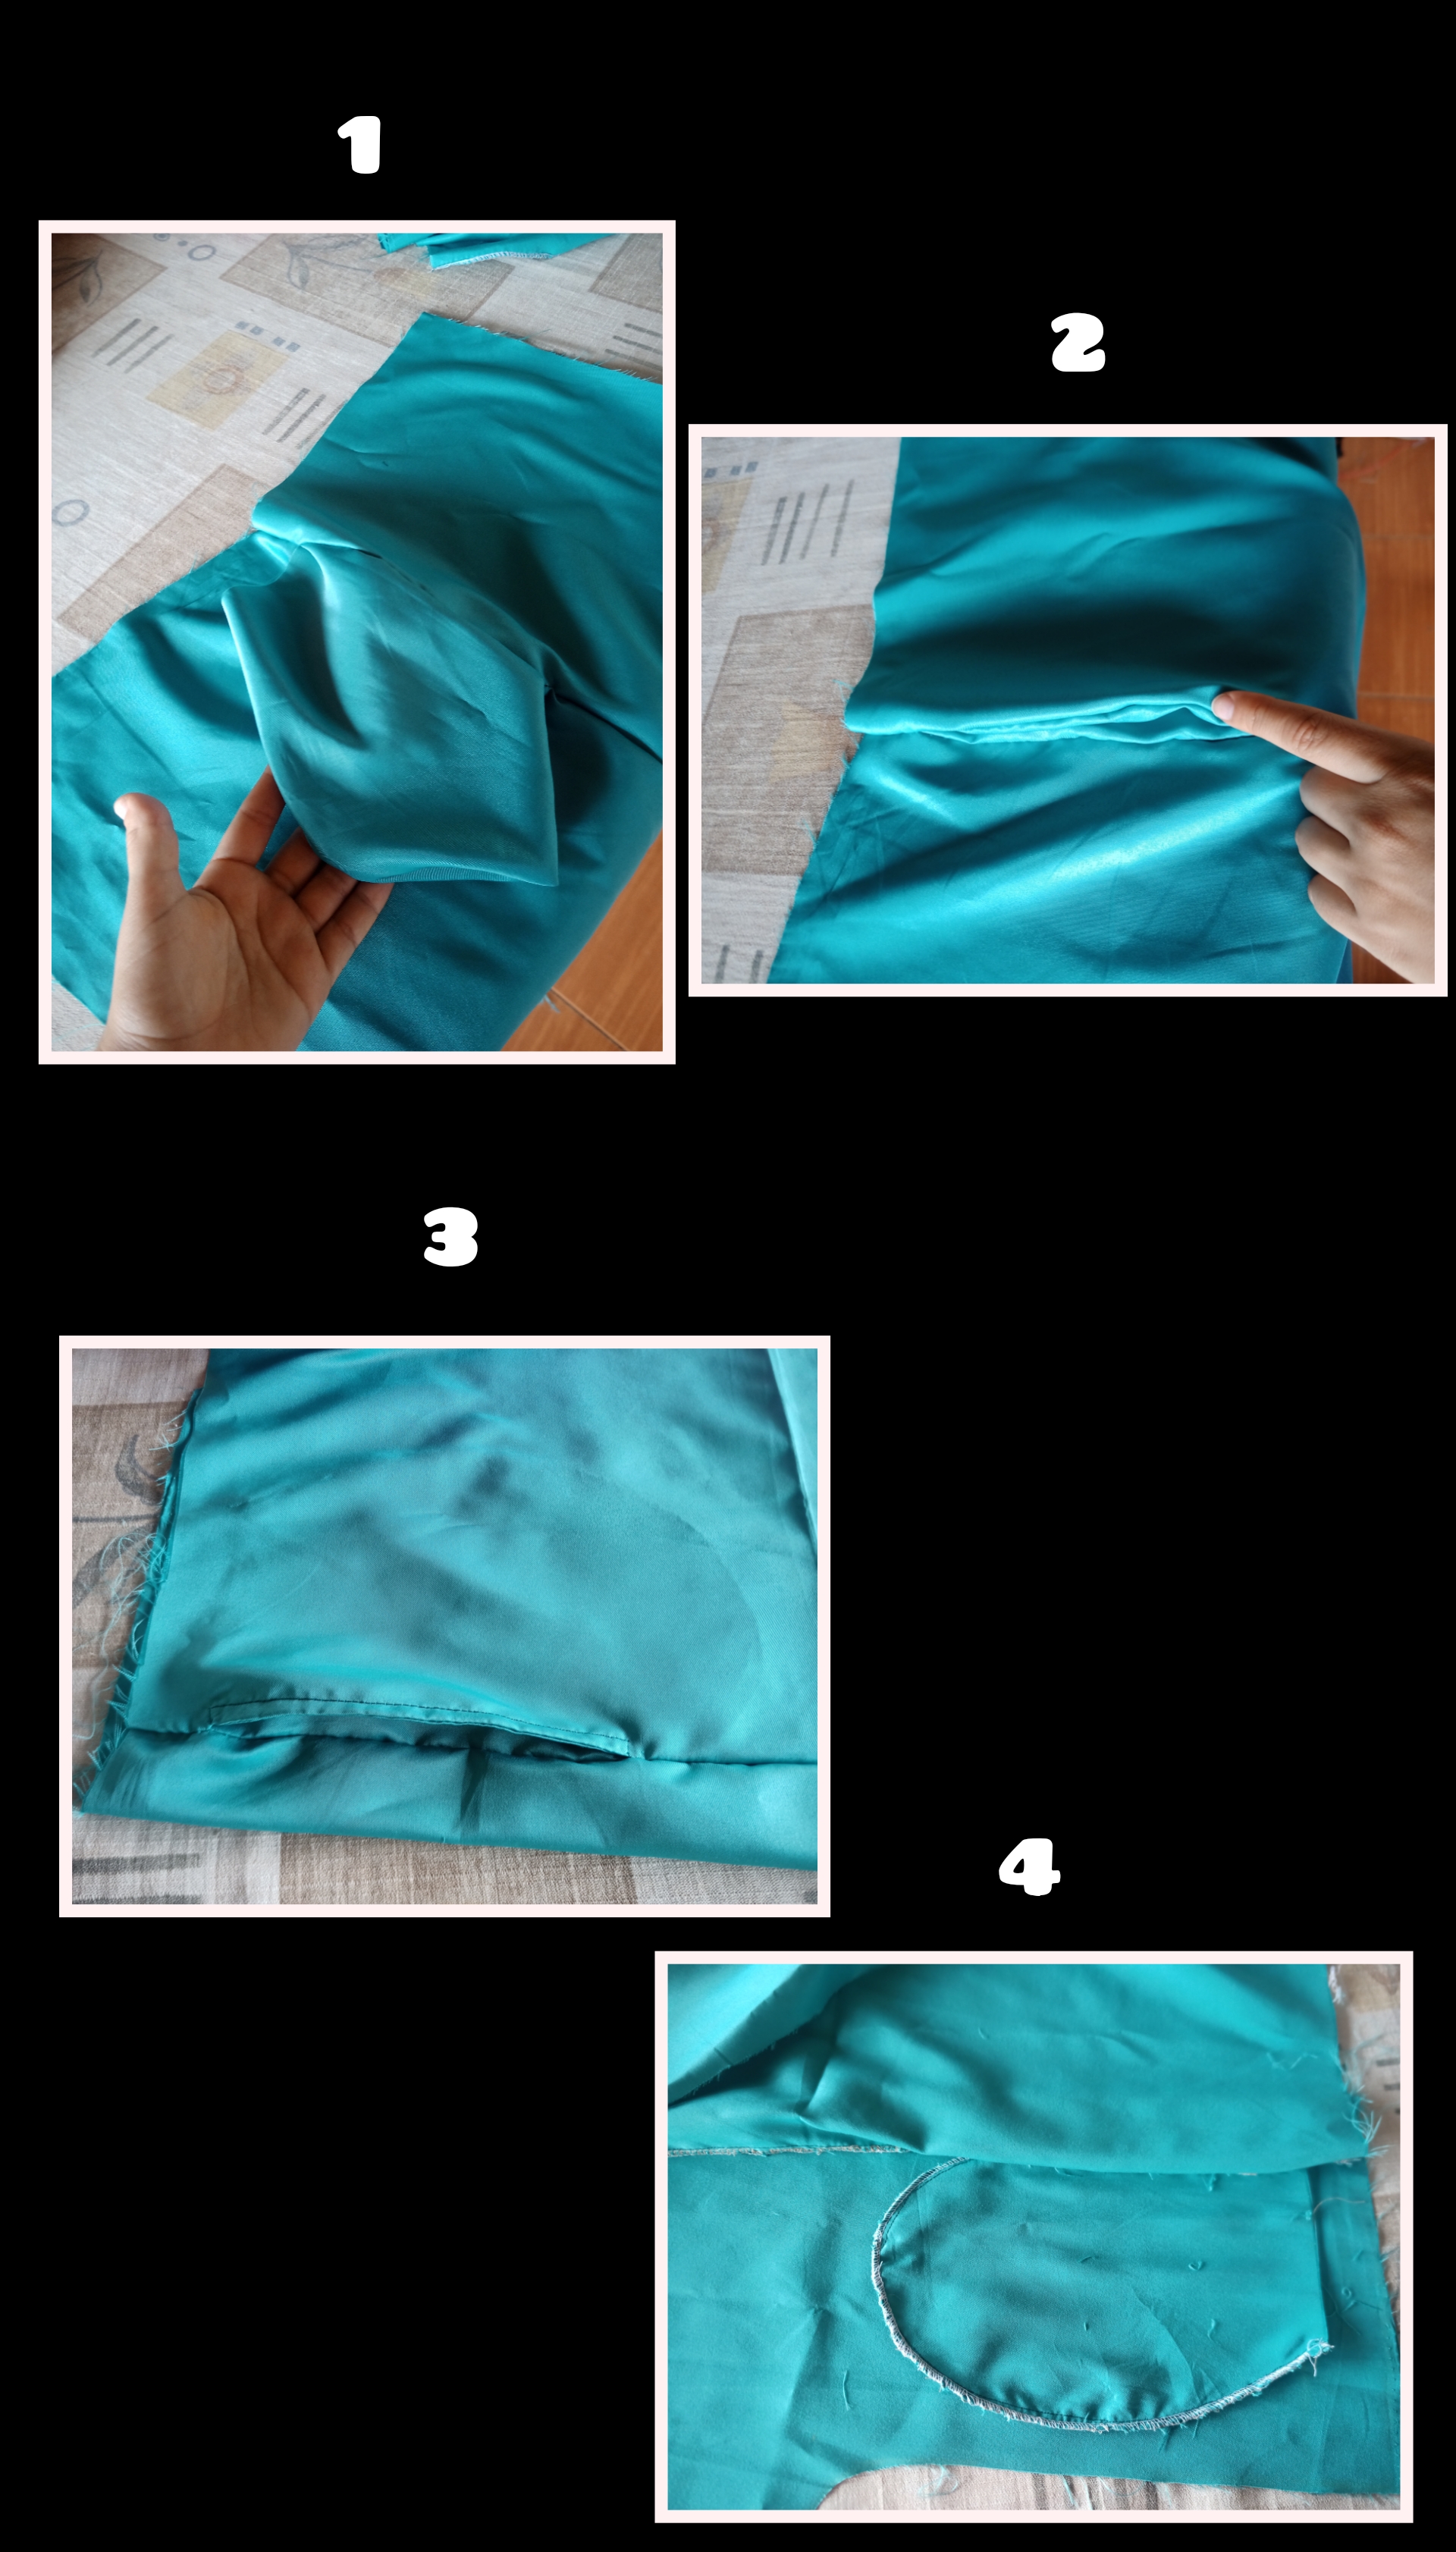
Luego seguí con la parte de los bolsillos, en una parte de la tela la doble y dibuje un rectángulo de 25 centímetros de largo por 17 centímetros de ancho, al terminar de hacer el rectángulo le hice la forma de el bolsillo y corte, luego ese mismo patrón del bolsillo lo utilice para hacer el otro que me faltaban, doblando la tela nuevamente y colocando el patrón encima con alfileres y corte, ya tenía los cuatro pedazos de los bolsillos, el delantero y el trasero del derecho y el delantero y el trasero de la izquierda.
Then I continued with the part of the pockets, in a part of the fabric I folded it and drew a rectangle of 25 centimeters long by 17 centimeters wide, when I finished making the rectangle I made the shape of the pocket and cut, then that same pocket pattern I used to make the other that I was missing, folding the fabric again and placing the pattern on top with pins and cut, I already had the four pieces of the pockets, the front and back right and front and back of the left.
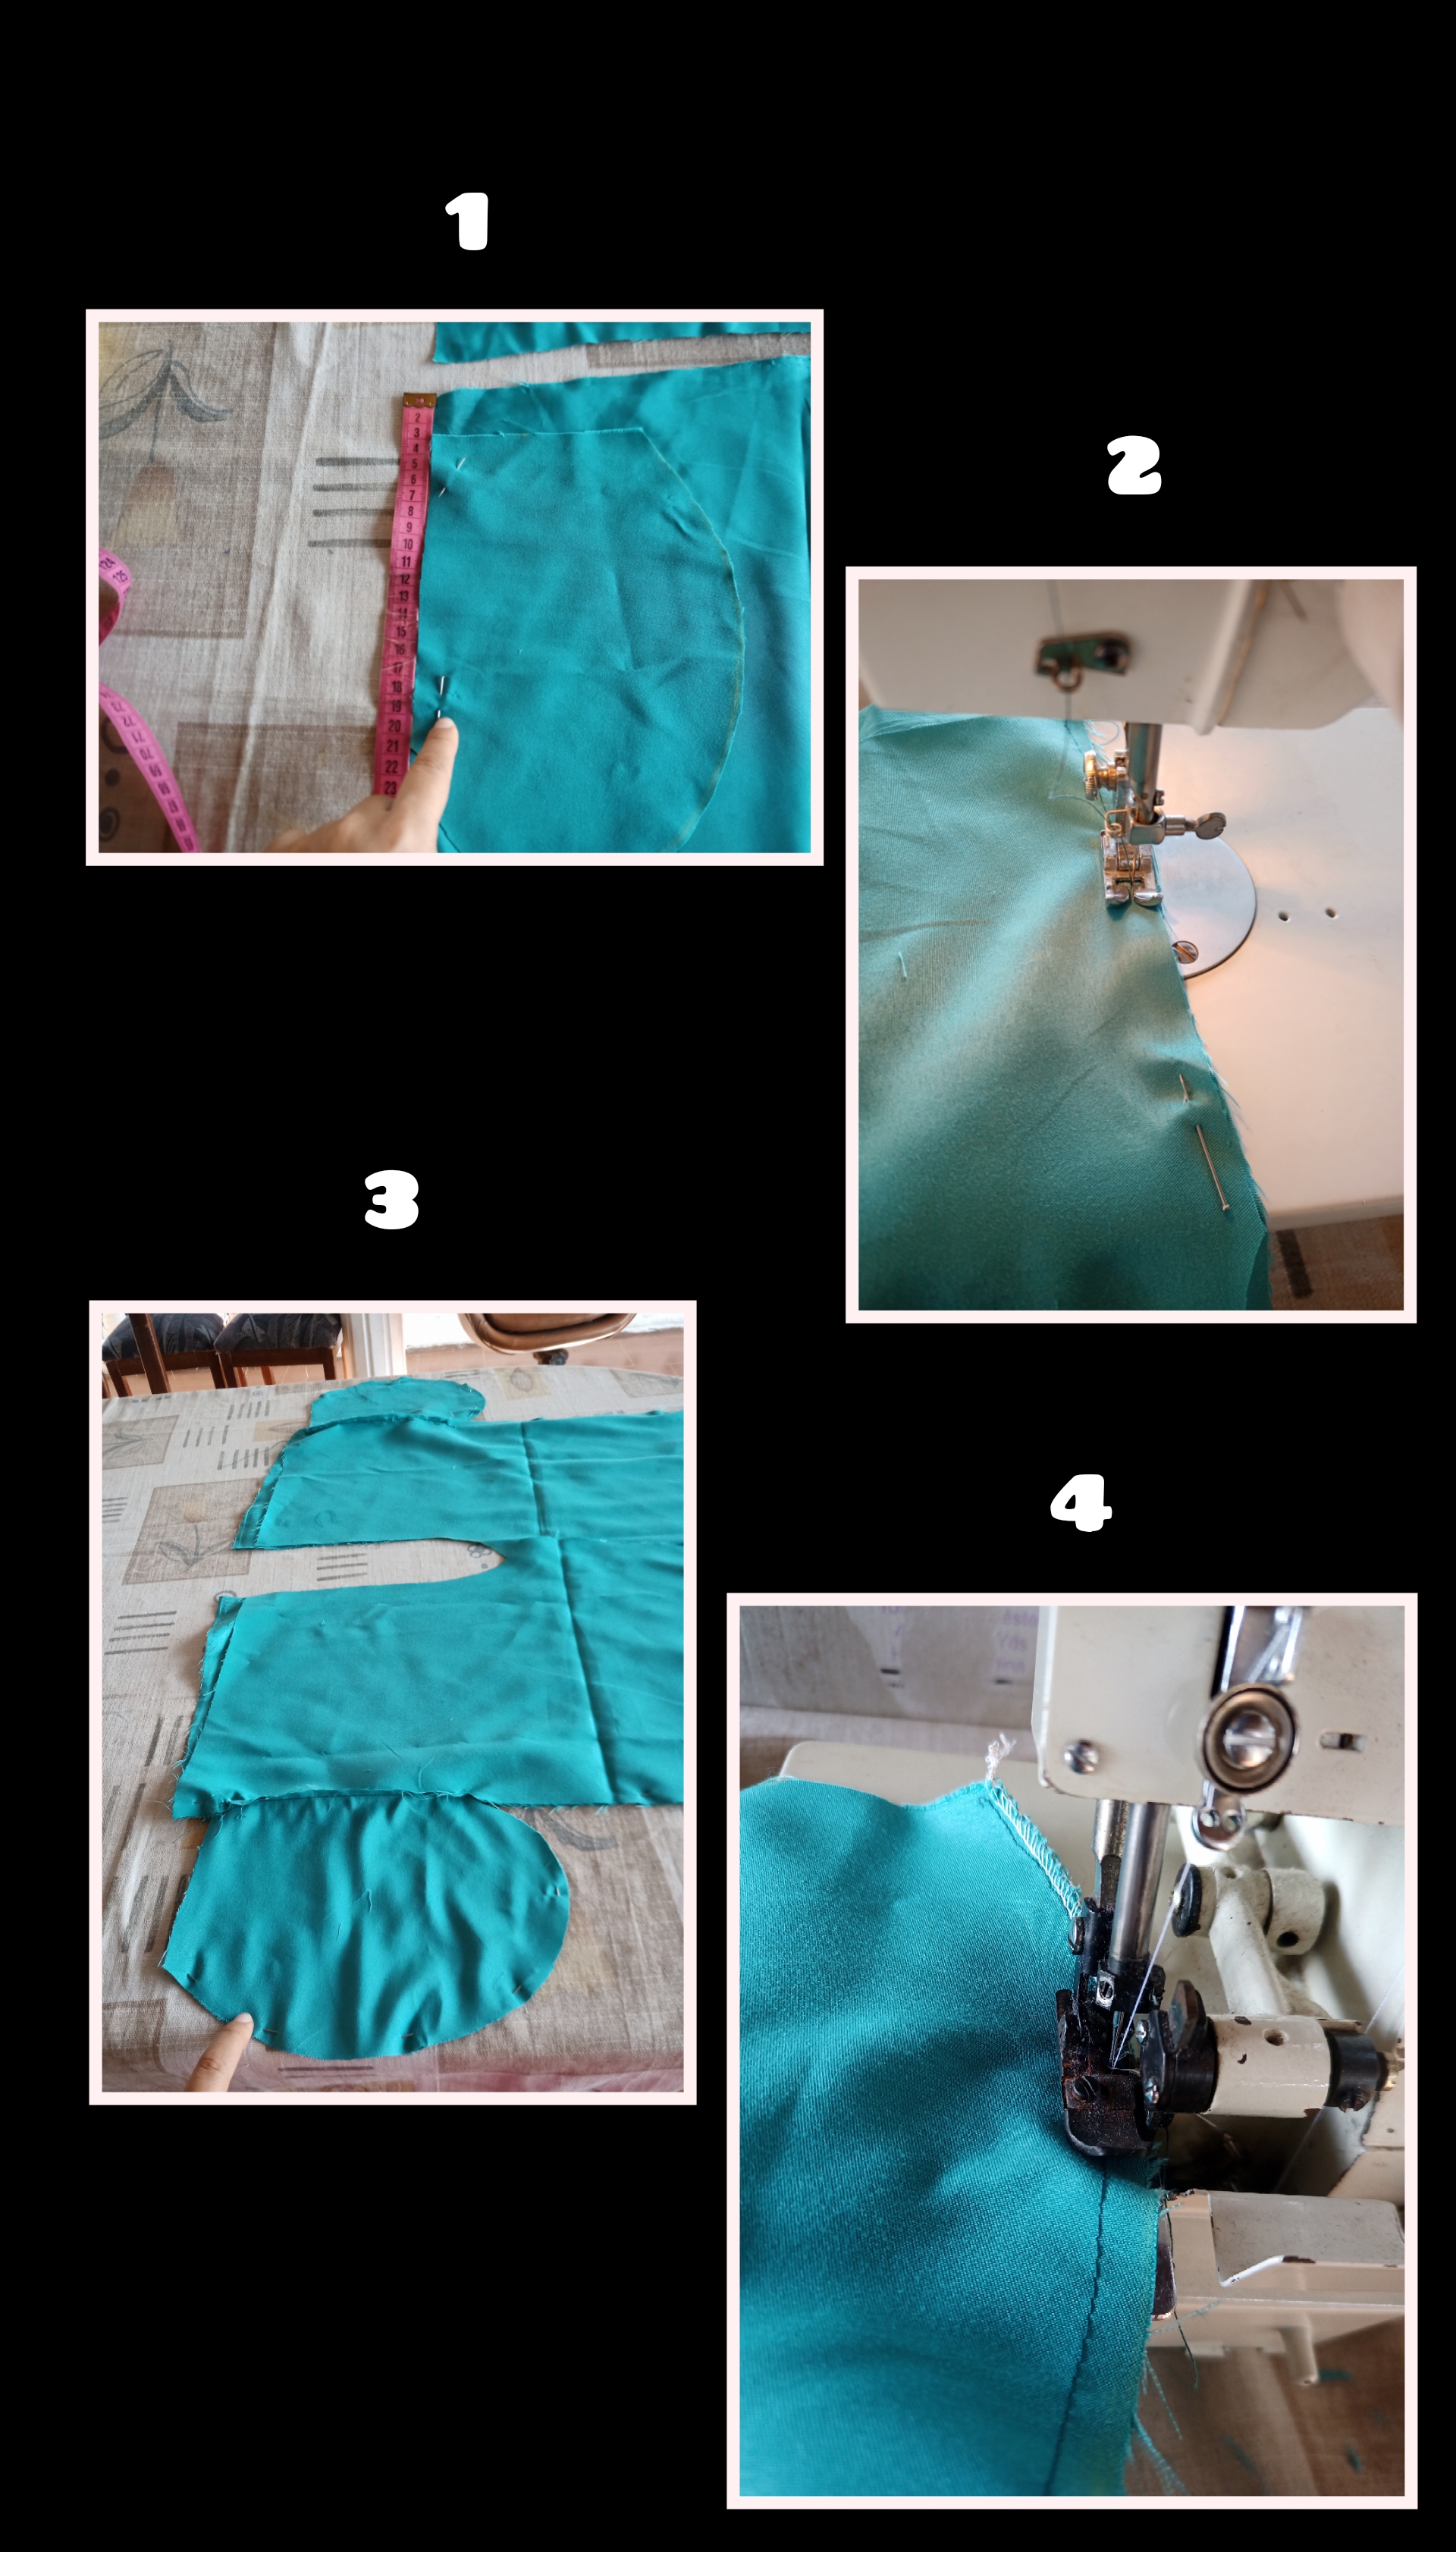
Lo siguiente fue colocar las dos partes delanteras del mono una a lado de la otra, tal como se ve en la imagen con su frente hacía arriba y encima coloque una tapa del bolsillo con su frente hacía abajo y a si mismo hice con el otro lado, de manera que queden las telas frente con frente, lo mismo hice con las partes traseras del mono.
The next step was to place the two front parts of the jumpsuit side by side, as shown in the picture with the front facing up and on top I placed a pocket cover with the front facing down and the same I did with the other side, so that the fabrics are facing each other, the same I did with the back parts of the jumpsuit.

Como se ve en la imagen número 1 cosí por donde estaban los alfileres en la parte del bolsillo, por toda la orilla dejando un centímetro para la costura, los mismo hice con los 4 pedazos.
Ya después junte una tapa del mono de la parte trasera con una tapa del mono de la parte delantera, las junté de manera que se vean cara con cara y que los bolsillos calcen cara con cara, les coloque alfileres por toda la orilla del bolsillo y cosí dejando un centímetro de costura, también cosí de una vez las partes laterales del mono, juntando el lado delantero con el lado trasero.
As you can see in the image number 1, I sewed where the pins were in the pocket part, all around the edge leaving a centimeter for the seam, the same I did with the 4 pieces.
Then I joined a coverall cover of the back part with a coverall cover of the front part, I joined them so that they are face to face and that the pockets fit face to face, I put pins all around the edge of the pocket and sewed leaving a centimeter of seam, I also sewed at once the side parts of the coverall, joining the front side with the back side.

En la imagen número 1 y número 2 pueden ver como queda el bolsillo ya cocido, como se ve por fuera y como se ve si sacan el bolsillo por dentro, ya que estaban listo los 2 bolsillos lo que hice fue coser a un centímetro de costura el bolsillo que tiene la parte delantera del mono para que se diferencie la parte delantera con la parte trasera.
In the image number 1 and number 2 you can see how the pocket is already cooked, how it looks on the outside and how it looks if you take out the pocket on the inside, since the 2 pockets were ready, what I did was to sew a centimeter of seam in the pocket that has the front part of the overall so that the front part is differentiated from the back part.

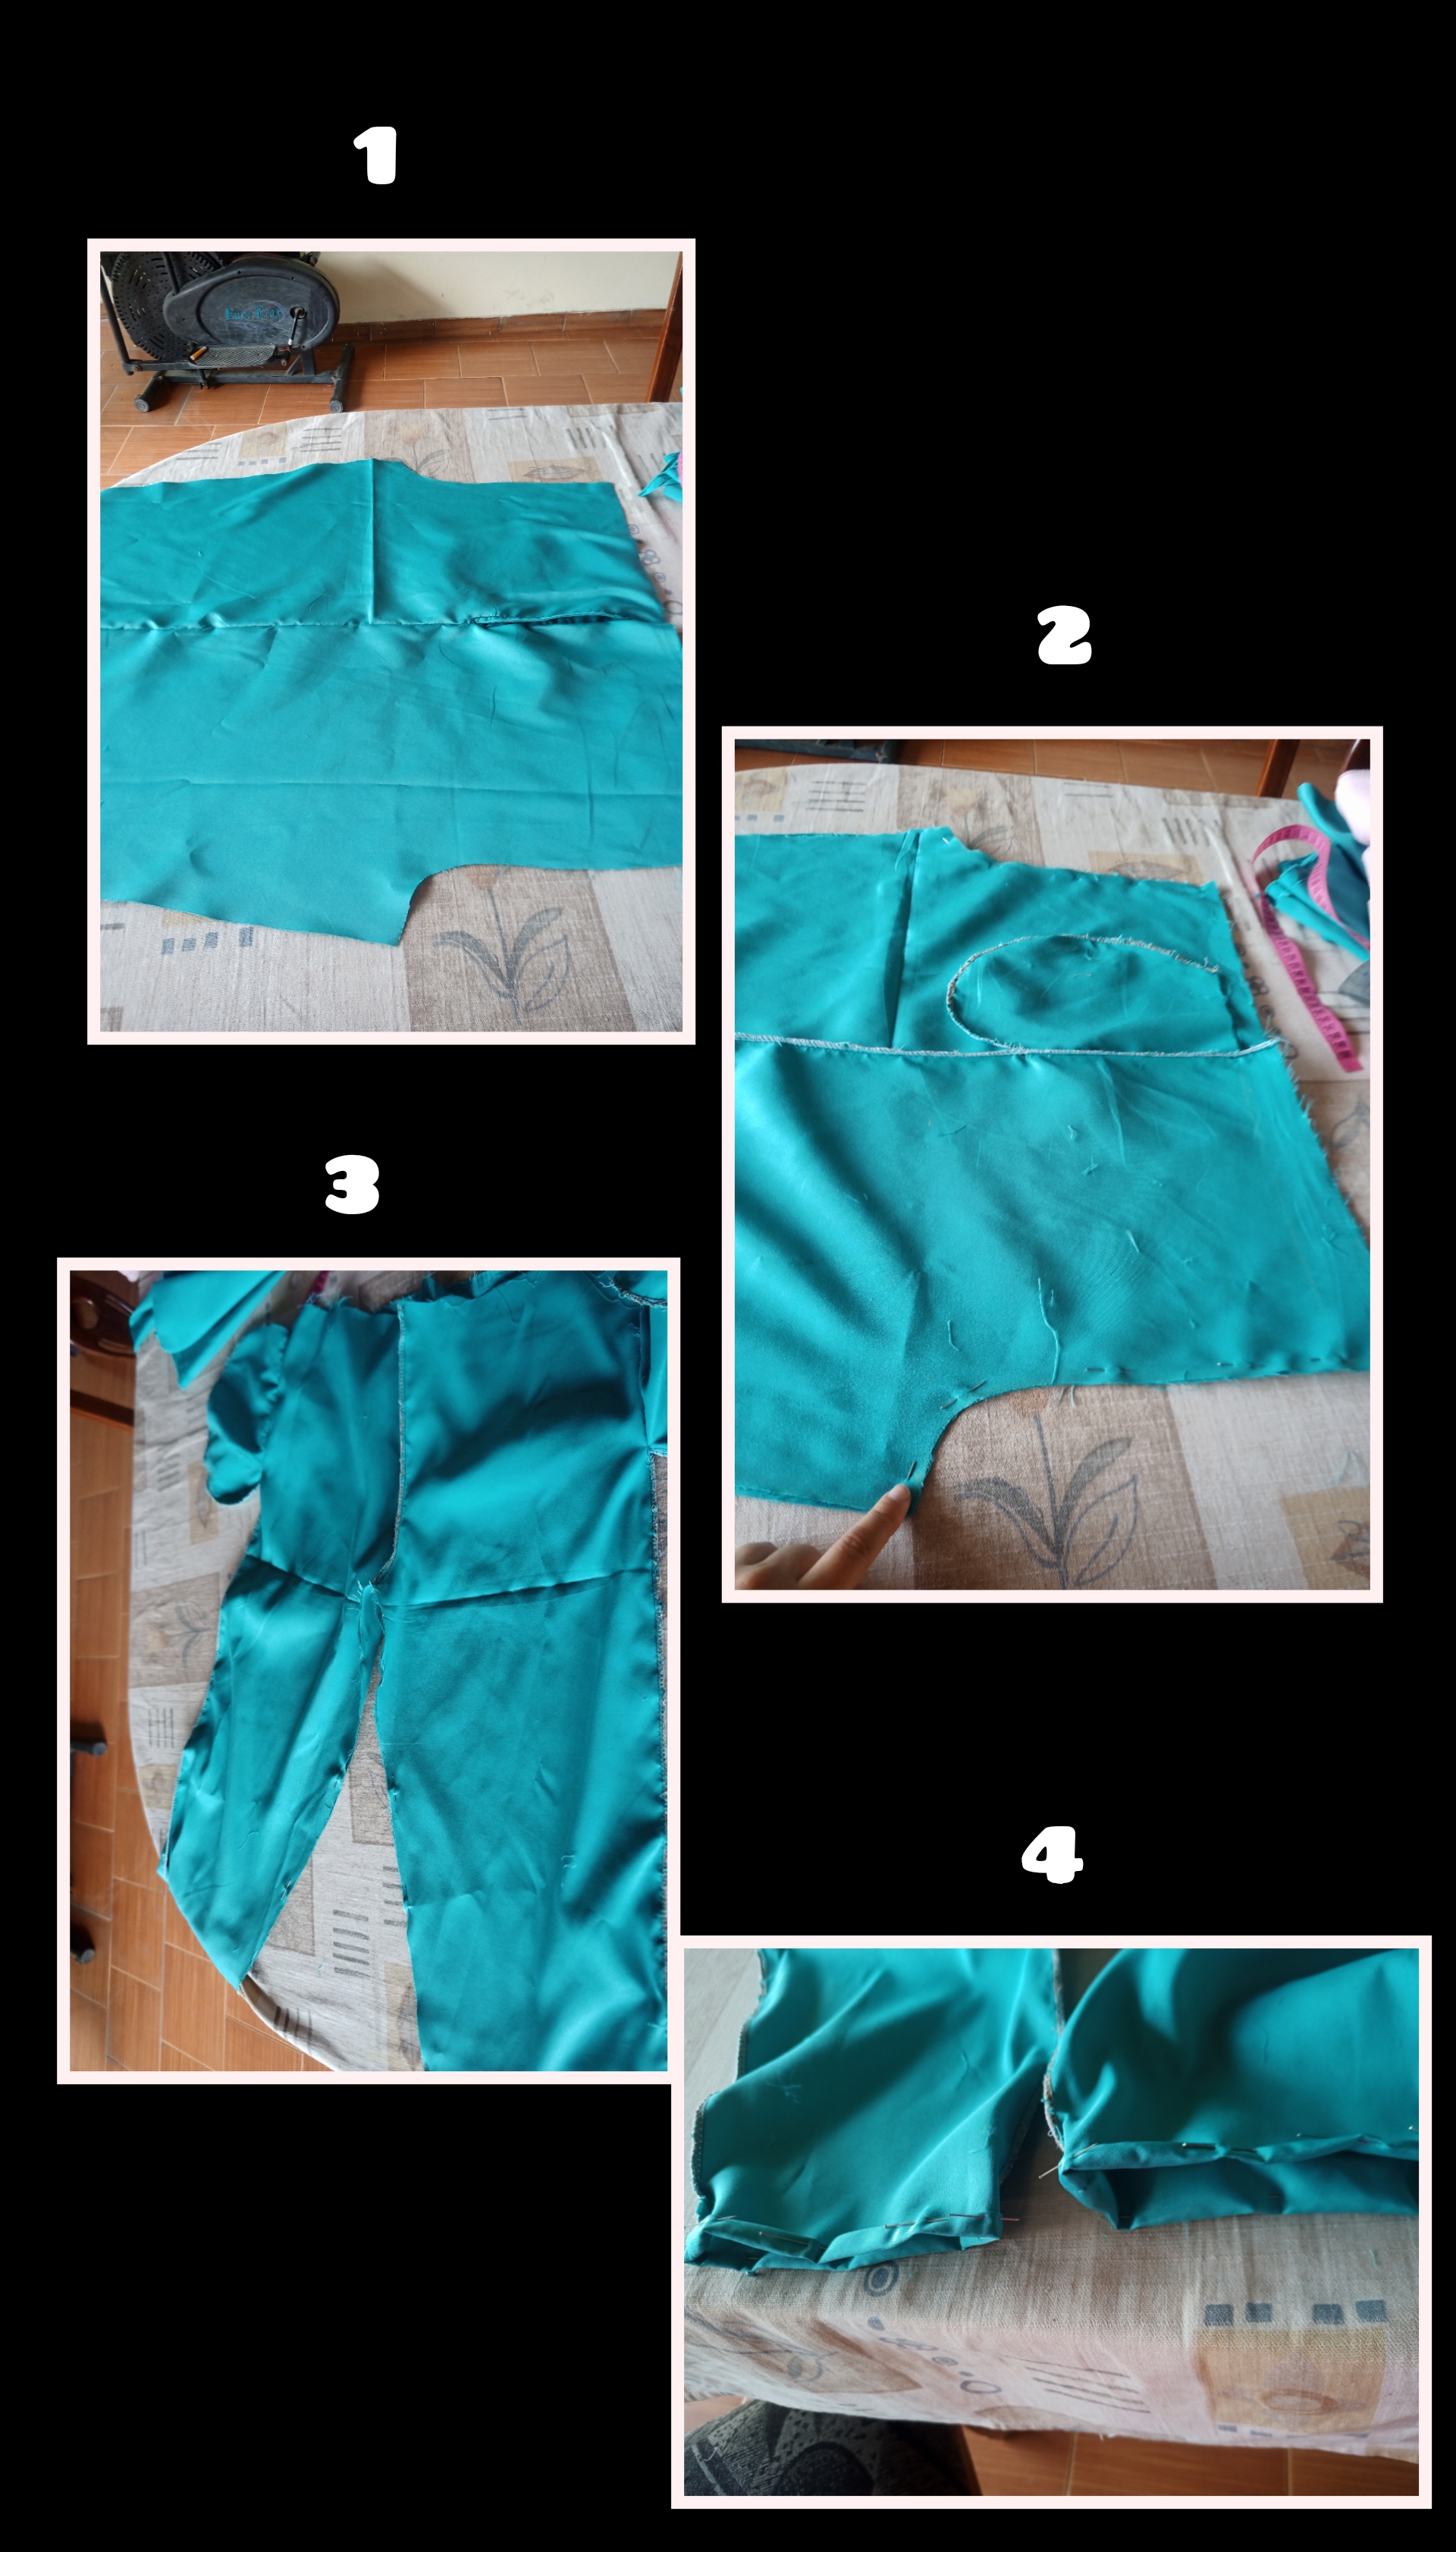
Ya terminé con los bolsillos ahora voy con las costuras del mono, abrí el mono así como se puede apreciar en la imagen, que la parte delantera ya está cosida con la parte trasera y busqué la otra parte y las junté cara con cara y cosí, solo cosí por la parte de el fundillo de ambos lados dejando un centímetro de costura pasándole la recta y la overlok.
Al terminar de coser la parte del fundillo ya podría abrir el mono y solamente faltaba cocer la parte de adentro de las piernas, cosí esa parte le pase la overlock y ya puedo hacerle el ruido correctamente, le hice dos dobladillo de un centímetro y cosí el ruedo.
I'm done with the pockets now I'm going with the seams of the jumpsuit, I opened the jumpsuit as you can see in the picture, the front part is already sewn with the back part and I looked for the other part and joined them face to face and sewed, I only sewed on the side of the pocket on both sides leaving a centimeter of seam passing the straight and the overlok.
When I finished sewing the sleeve part I could open the jumpsuit and I only had to sew the inside part of the legs, I sewed that part with the overlock and now I can make the noise correctly, I made two hems of one centimeter and sewed the hem.

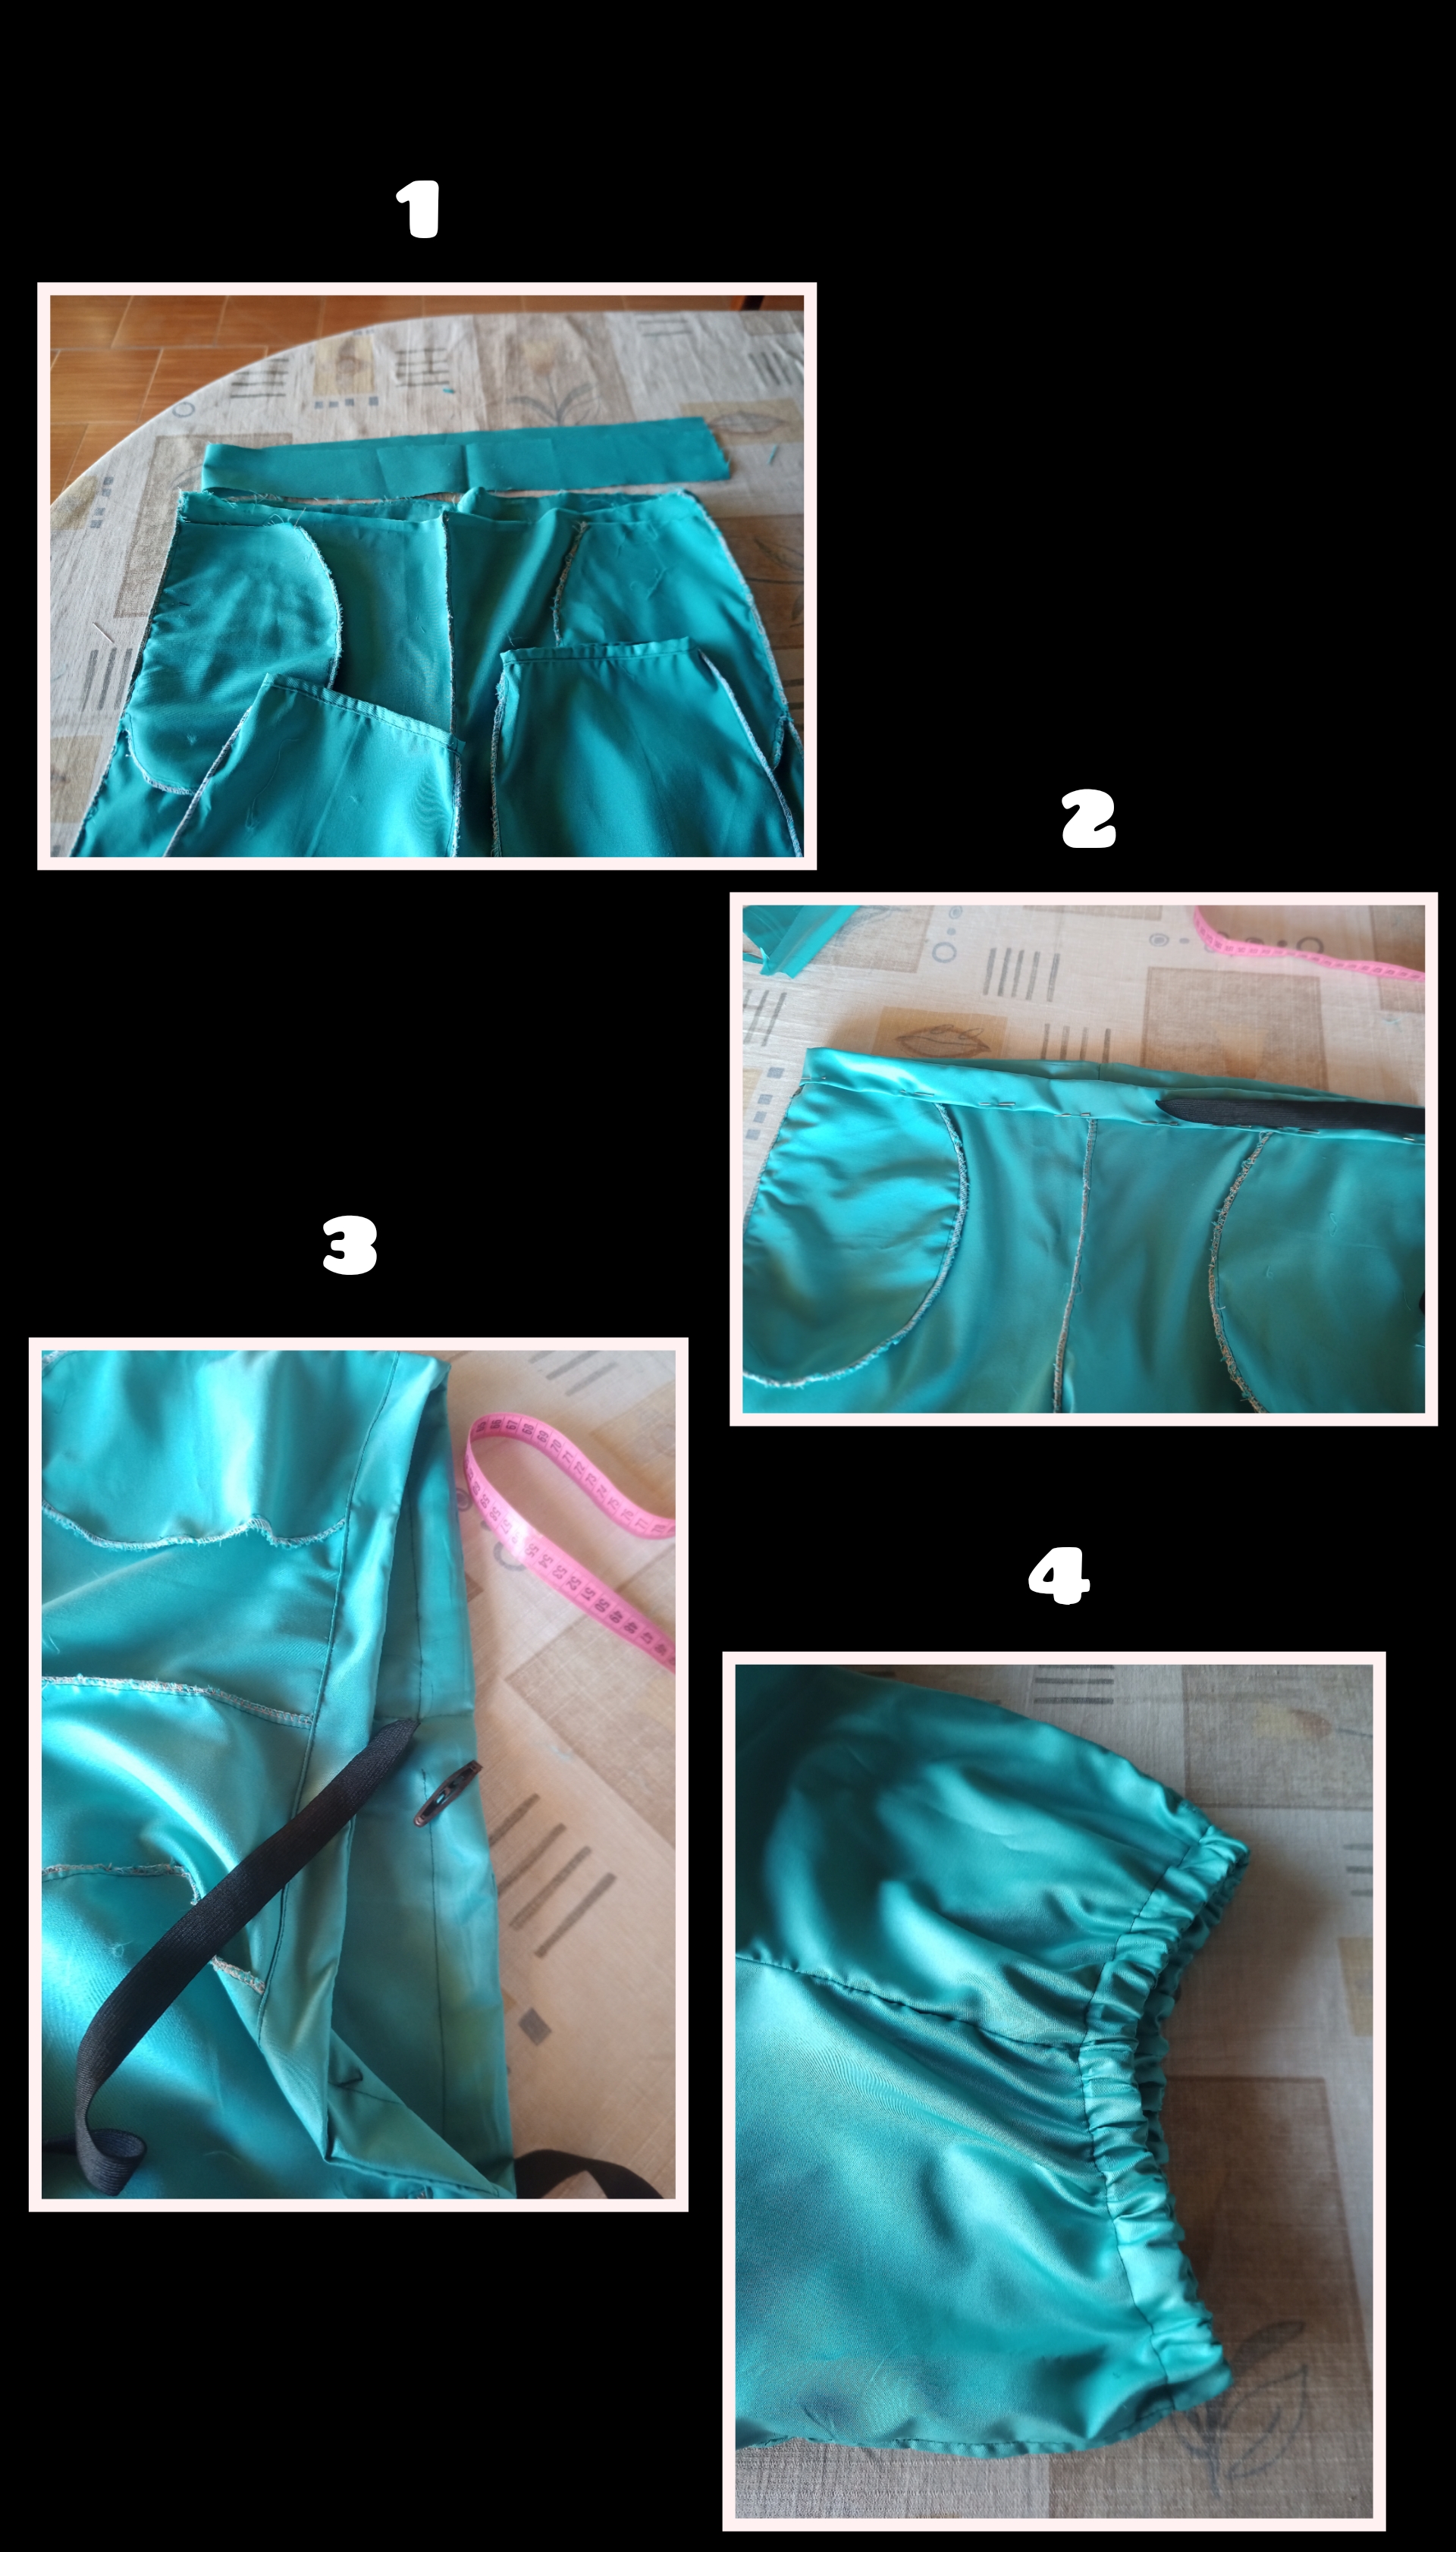
Por último corte una tira del mismo tamaño del contorno de la cintura con 8 centímetros de ancho, pegué esa pretina a la cintura y le hice dos dobladillos hacia adentro, haciendo un espacio para que pase la goma.
Luego de coser la pretina metí la goma con un gancho y le pase una costura por todo el medio para que quedara de una forma más profesional.
Finally I cut a strip of the same size as the waist with 8 centimeters wide, I glued that waistband to the waist and made two hems inwards, making a space for the elastic to pass through.
After sewing the waistband, I put the elastic in with a hook and sewed a seam all around the middle to make it look more professional.

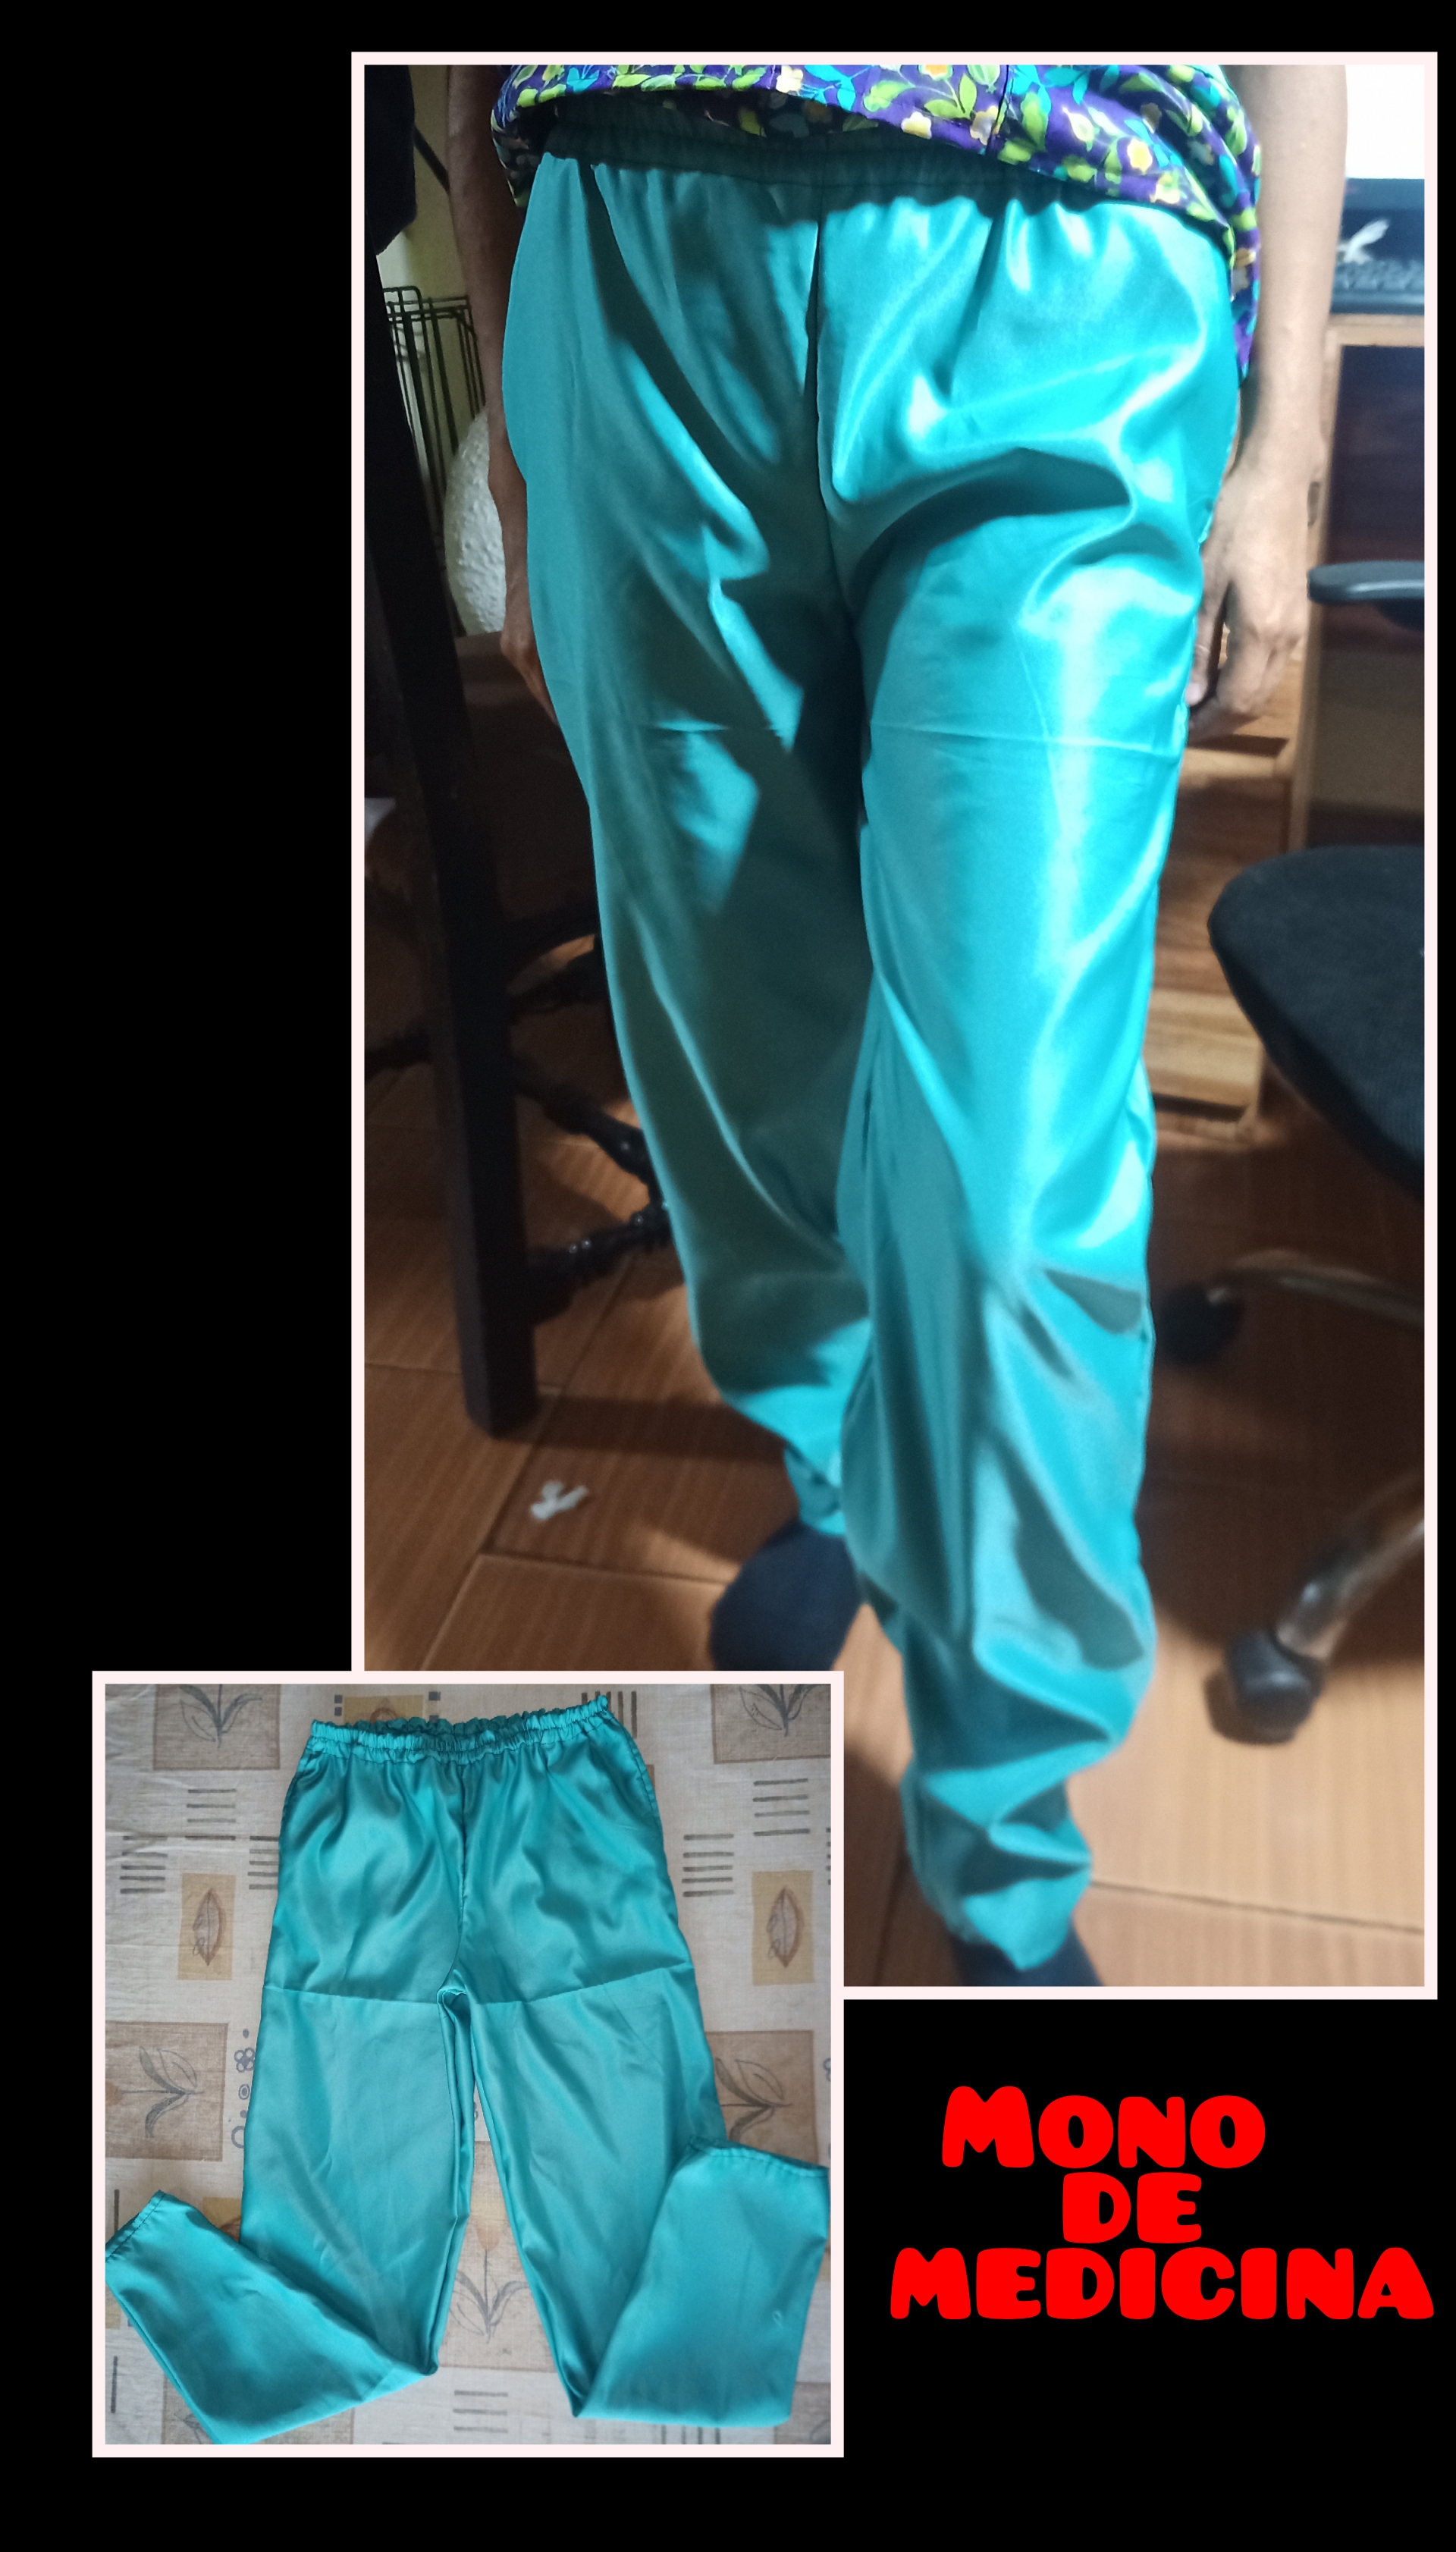
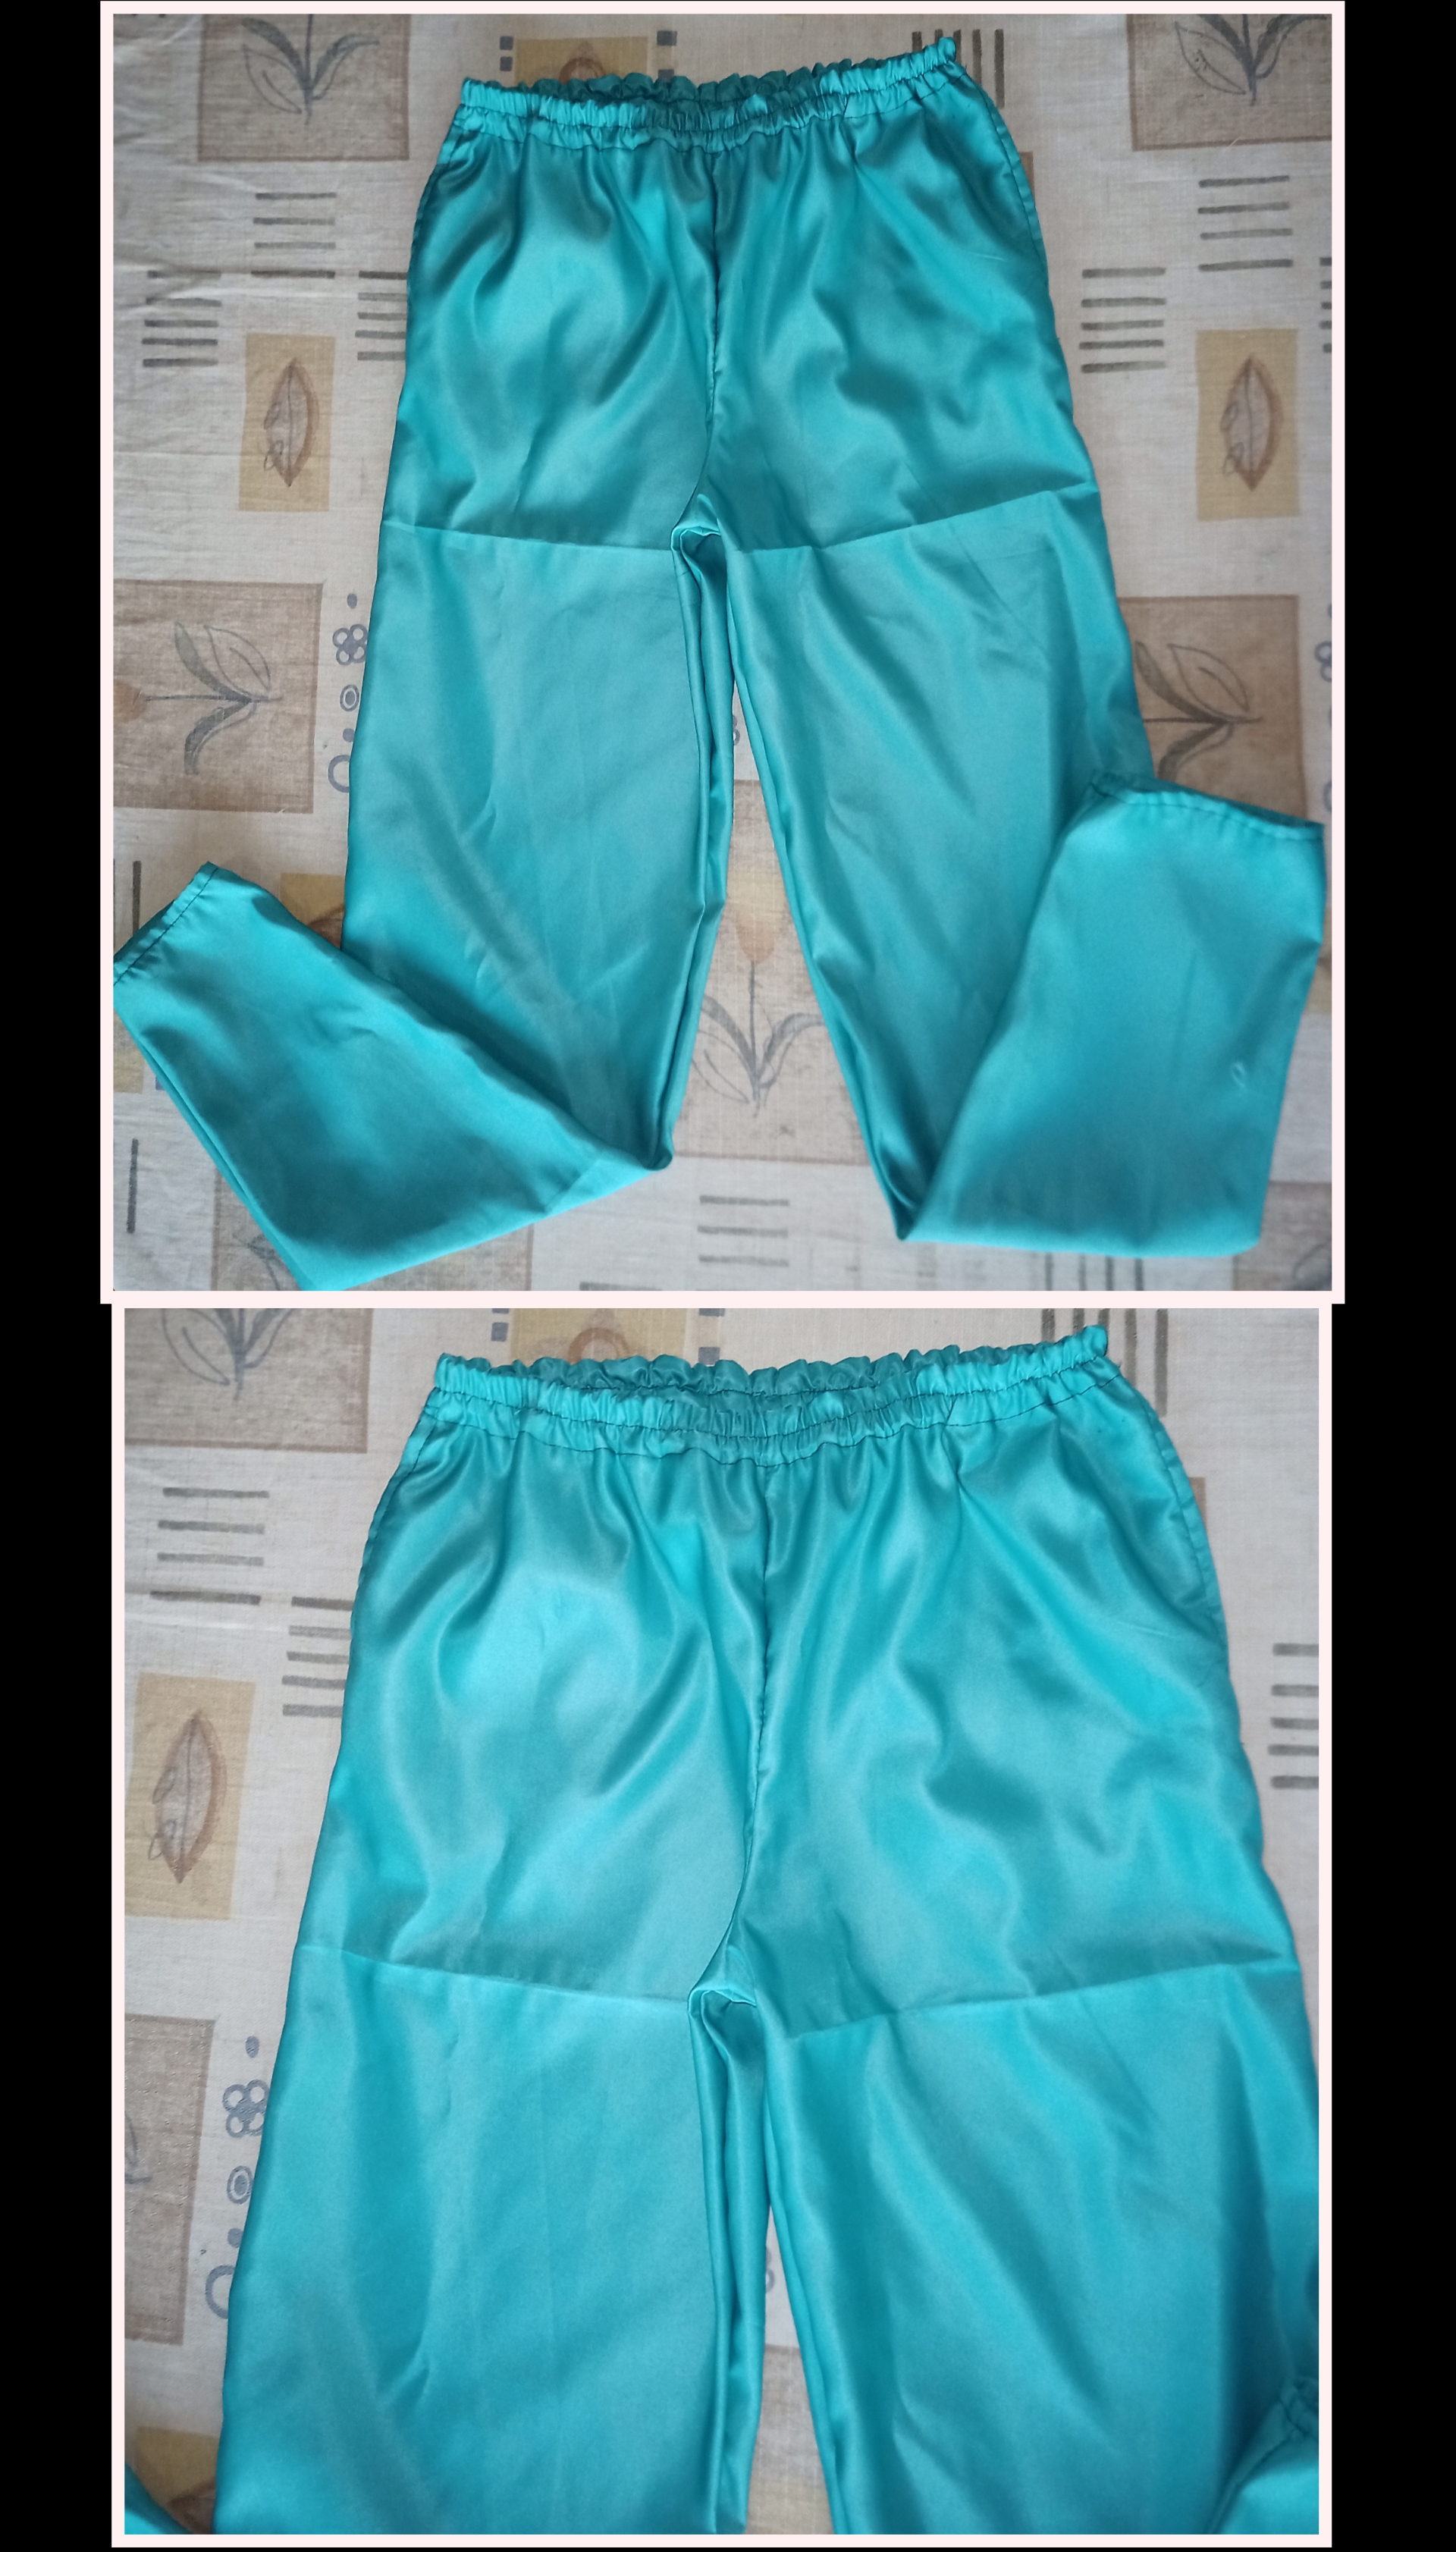
Y allí pueden ver el espectacular mono de Doctora que le hice a una amiga de mi suegra, quedó muy bonito y mi suegra quedó encantada con el resultado espero le guste a la persona que se lo va a regalar 😇.
And there you can see the spectacular Doctor monkey that I made for a friend of my mother-in-law, it was very nice and my mother-in-law was delighted with the result I hope the person who is going to give it to her likes it 😇.

Todas las fotos fueron de mi autoría
tomadas con mi teléfono Umigidi Bison y editadas con el editor "Photo Collage Maker".
Para traducir a inglés utilice " Deelp Traductor".
All photos were taken with my Umigidi Bison phone
taken with my Umigidi Bison phone and edited with the editor "Photo Collage Maker".
To translate to English use "Deelp Translator".

This is beautiful 😍
Weldone friend!
Amiga, este trabajo te quedó muy bien y la costura y detalles muy prolijos, TE FELICITO y saludos a tu suegra
Buen día amiga 😃 Tu suegra debe estar feliz de tener una costurera en su familia, este "ambo" como le decimos por acá quedó genial ❣️. Gracias por compartirlo, que tengas buen día 💚
Congratulations @danieela! You have completed the following achievement on the Hive blockchain and have been rewarded with new badge(s):
Your next target is to reach 1000 upvotes.
You can view your badges on your board and compare yourself to others in the Ranking
If you no longer want to receive notifications, reply to this comment with the word
STOPCheck out the last post from @hivebuzz:
Support the HiveBuzz project. Vote for our proposal!
Hola, me gustó la mucho la forma de los paso a paso que le has sido se ve fácil.