(🇬🇧)Do it Yourself; Hidden Electrical Sockets and Headboard Led (🇹🇷) Do it Yourself; Gizli Elektrik Prizleri ve Yatak Başlığı Ledi⚒️
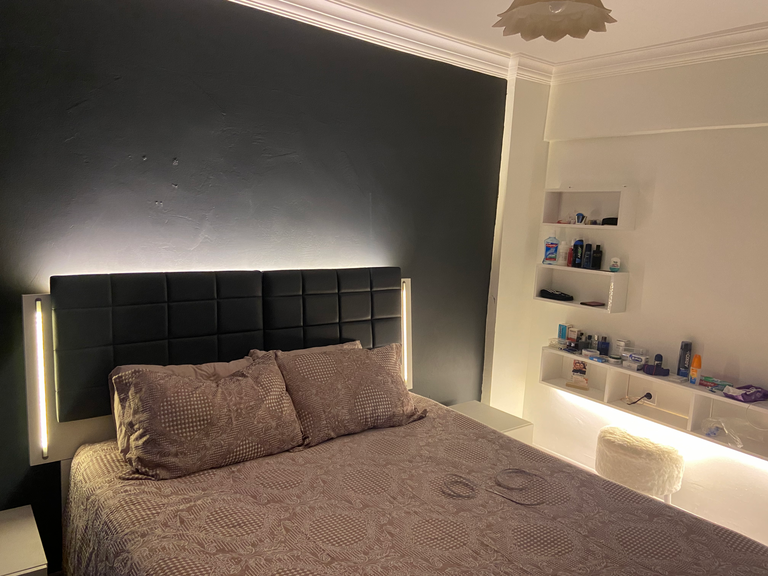
Hello Hive Family. I'm here for a great DIY project for you. After some shopping I came home and made this awesome diy project you see in the picture. Let's see how I did this awesome DIY project. ☺️
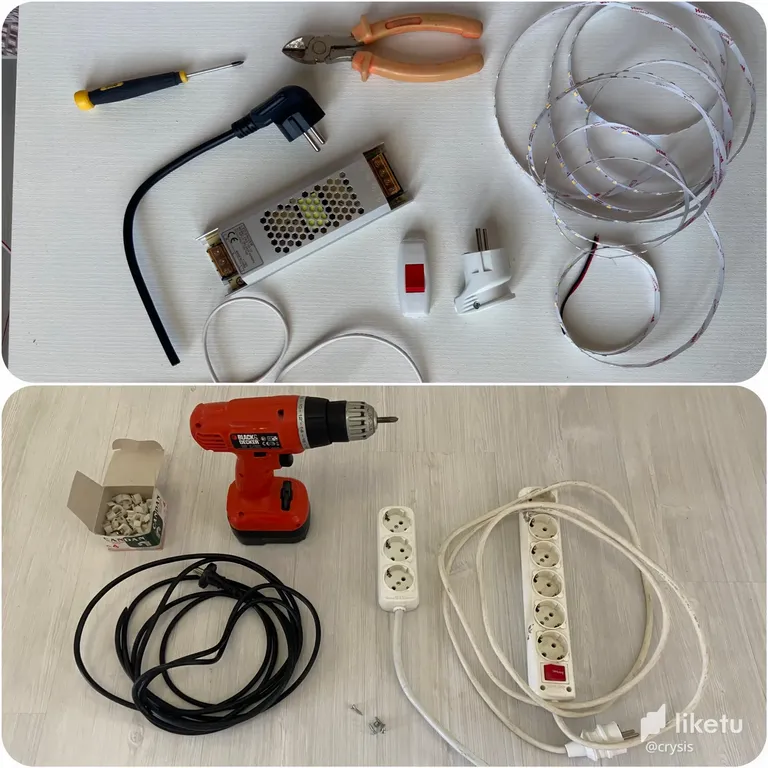
First of all, our materials; electrical transformer for led, some cable, plug, side cutter, led strip, screws, sockets, concrete nail clips, cordless drill, screwdriver. The materials are ready, let's see how it was made. ☺️
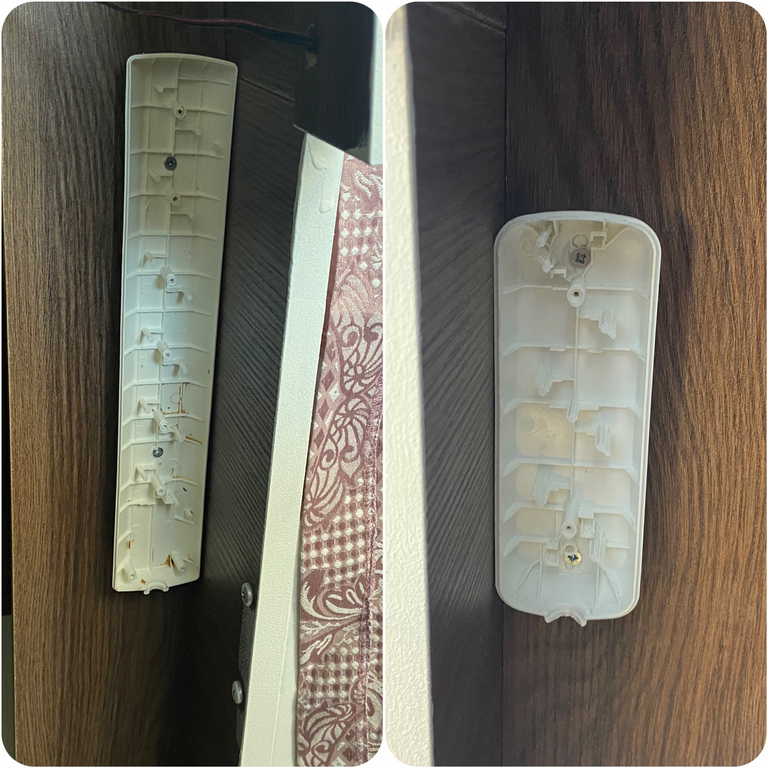
First of all, we remove the sockets and mount the lower covers in the hidden part of the bed. During the assembly process, I used 2 screws for each cover. We installed our covers. Let's see, what's the next action? ☺️
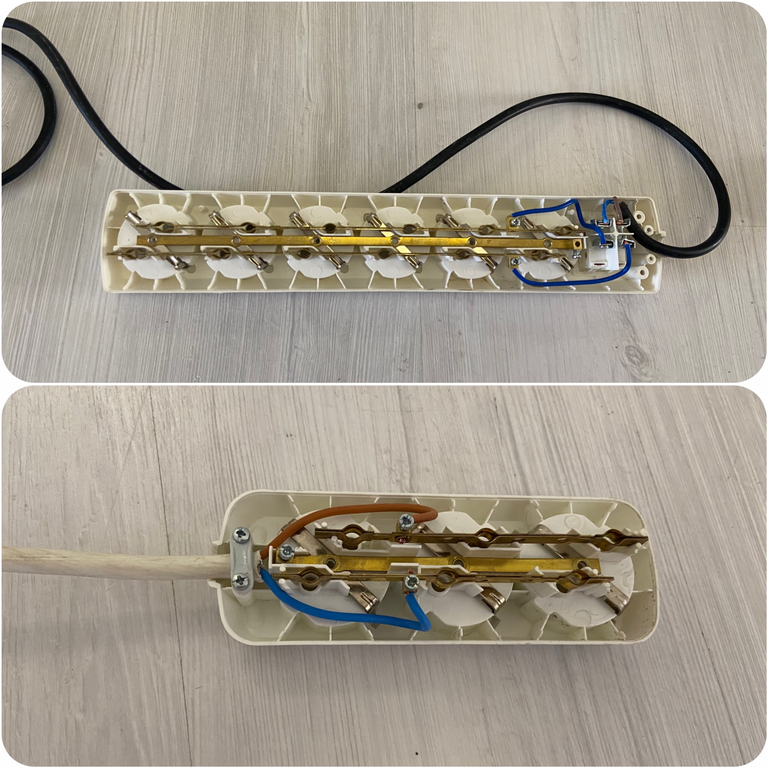
As you can see in the picture, I make the electrical cable connection of the sockets. We will use the sockets to charge the phone, so I do not connect the ground wire. Because there is no ground connection in the chargers. ☺️
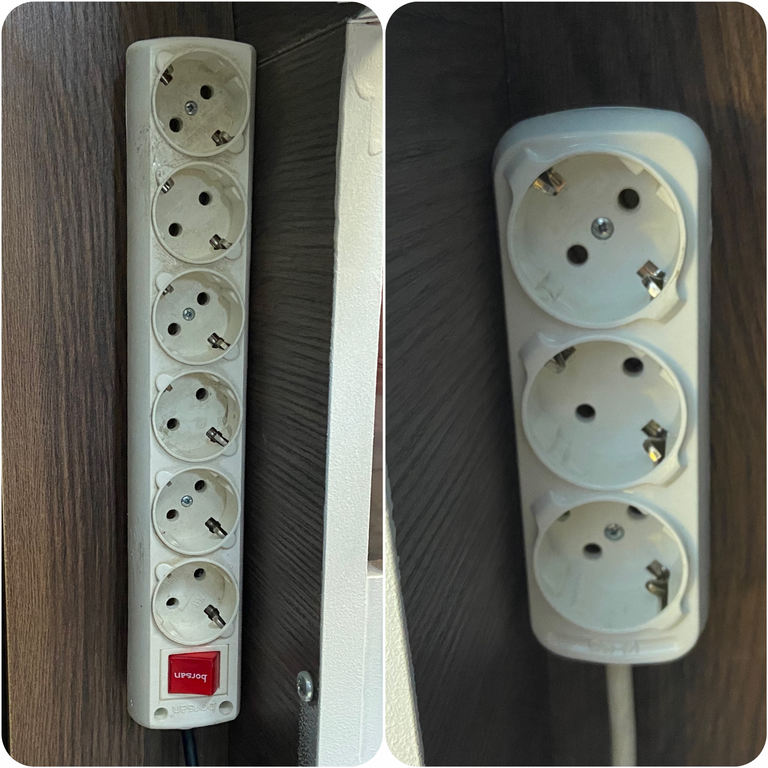
After connecting the sockets, I assemble them to the lower covers in the hidden part of the bed. Our socket assembly is complete. Let's see how the LED assembly is done? ☺️
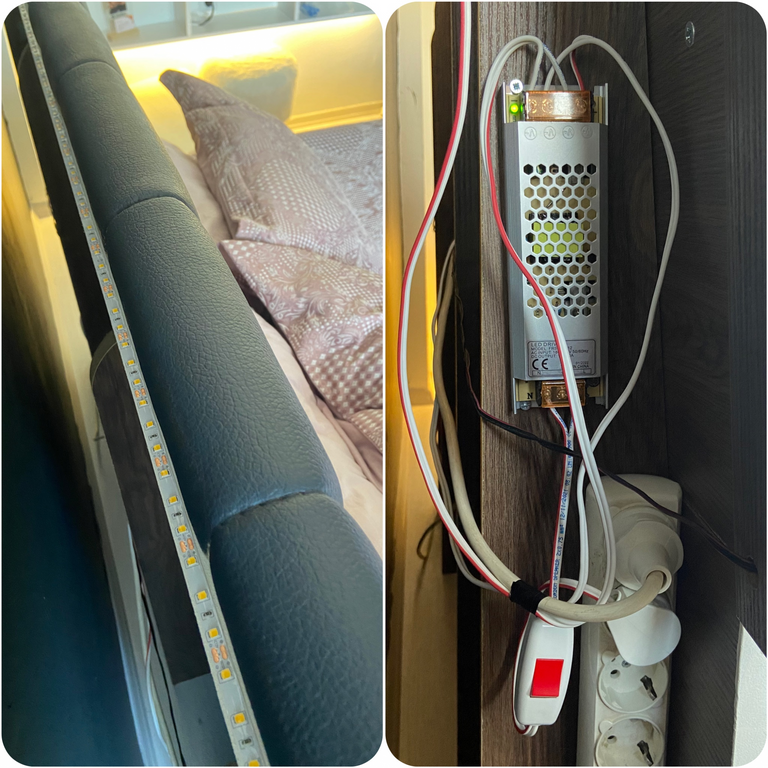
I mounted the LED's electrical transformer to the hidden part of the bed. I made the electrical wiring. I glued the led strip to the headboard of the bed. All transactions are finished. Now we are ready for the great visual. ☺️
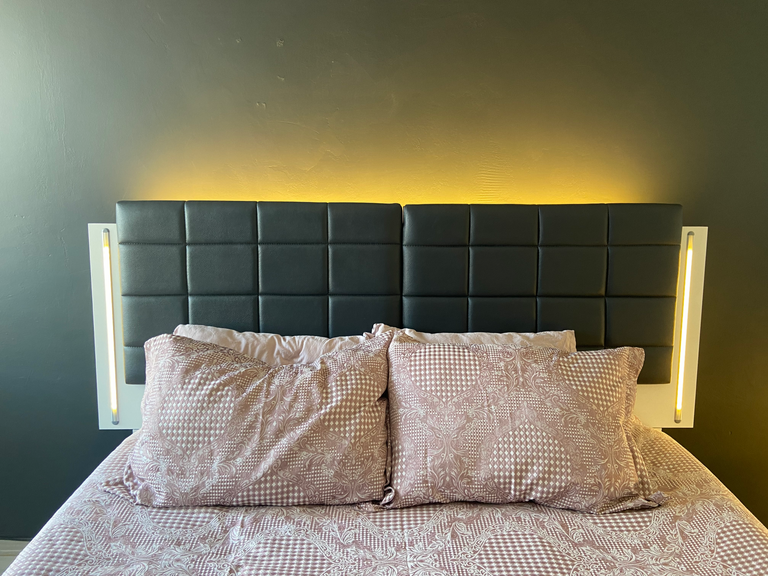
Yes Friends, our diy project has been completed today. It was a bit of a tedious DIY project, but the result is excellent. ☺️ See you in my new DIY projects. Thank you for reading. ☺️
🇹🇷 Postun Türkçe Versiyonu;
Merhaba Hive Ailem. Sizler için harika bir diy projesi için buradayım. Biraz alışveriş yaptıktan sonra eve geldim ve resimde gördüğünüz bu harika diy projesini yaptım. Bakalım bu harika diy projesini nasıl yaptım? ☺️
Öncelik olarak, malzemelerimiz; led için elektrik trafosu, biraz kablo, fiş, yan keski, şerit led, vidalar, prizler, beton çivili kroşeler, şarjlı matkap, tornavida. Malzemeler hazır bakalım nasıl yapıldı? ☺️
Öncelik olarak prizleri sökerek, alt kapaklarını yatağın gizli bölümüne monte ediyoruz. Monteleme işlemi sırasında her kapak için 2 tane vida kullandım. Kapaklarımızı monte ettik. Bakalım sıradaki işlem ne? ☺️
Resimde gördüğünüz gibi prizlerin elektrik kablo bağlantısını yapıyorum. Prizleri telefon şarj etmek için kullanacağız onun için topraklama kablosunun bağlantısını yapmıyorum. Çünkü şarj aletlerinde topraklama bağlantısı yok. ☺️
Prizlerin bağlantısını yaptıktan sonra yatağın gizli bölümündeki alt kapaklara montajını yapıyorum. Priz montajımız tamamlandı. Bakalım led montajı nasıl yapılıyor? ☺️
Evet Arkadaşlar, diy projemiz bugün de tamamlandı. Biraz uğraştırıcı bir diy projesi oldu ama sonuç mükemmel. ☺️ Yeni diy projelerimde görüşmek üzere. Okuduğunuz için teşekkür ederim. ☺️
For the best experience view this post on Liketu
@tipu curate
Upvoted 👌 (Mana: 3/33) Liquid rewards.
Uğraştırmış ama sonuca değişmiş çok beğendim :)
Teşekkürler ☺️
Yay! 🤗
Your content has been boosted with Ecency Points, by @crysis.
Use Ecency daily to boost your growth on platform!
Support Ecency
Vote for new Proposal
Delegate HP and earn more
Congratulations @crysis! You have completed the following achievement on the Hive blockchain and have been rewarded with new badge(s):
Your next target is to reach 40000 upvotes.
You can view your badges on your board and compare yourself to others in the Ranking
If you no longer want to receive notifications, reply to this comment with the word
STOPCheck out the last post from @hivebuzz:
Support the HiveBuzz project. Vote for our proposal!
Farklı bir hava katmış. Çok güzel görünüyor. Ellerinize sağlık. :)
Teşekkürler ☺️
Aa çok güzel olmuş. Elinize, emeklerinize sağlık.
Çok teşekkürler ☺️
anahtar fazı kessin :D :D
Fazı sen yapacaksın. Elektrikçi kuzenimiz var diyoruz herkese 😂
Kablo kalabaligi acisindan iyi olmus ;)
Teşekkürler ☺️