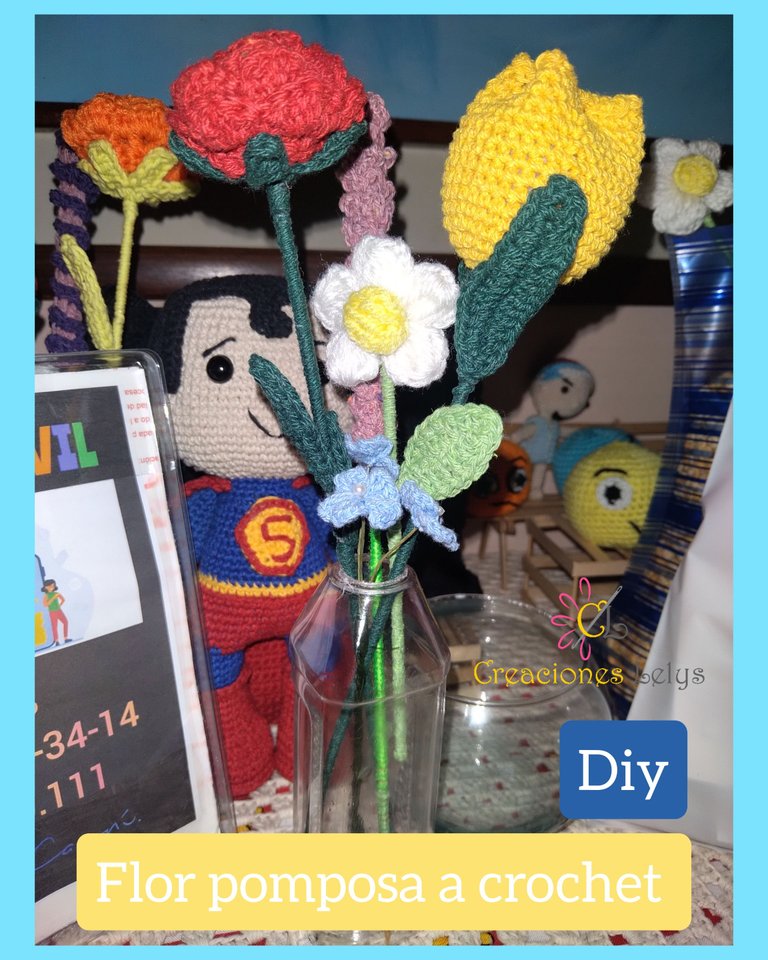
FLORES POMPOSAS TEJIDAS A CROCHET. [ESP-ENG]
Hola amigos, espero que estén muy bien. No deja de llover. Me encanta porque el clima está espectacular en las mañanas y parte de la noche, sin embargo el frío me entumece un poco y se me dificulta estar de pie a la hora de costumbre, provoca pasar el día envuelta en las sábanas esperando el desayuno en la cama 😃 ¡Se vale soñar!
Hello friends, I hope you are very well. It keeps on raining. I love it because the weather is spectacular in the mornings and part of the night, however the cold makes me a little numb and it's hard for me to stand up at the usual time, it causes me to spend the day wrapped in the sheets waiting for breakfast in bed 😃 It's ok to dream!
Sigo haciendo flores tejidas porque quiero aprender y tener elaboradas muchos diseños para preparar ramos. Sé que algunas flores son más solicitadas que otras, pero mientras tenga más variedad habrá más de dónde escoger. En esta oportunidad les quiero mostrar el paso a paso para realizar unas flores pomposas muy bonitas y súper fáciles de hacer. Solo necesitas conocer los puntos básicos del crochet y ser creativo al momento de combinar los colores. Recuerda que en las manualidades la creatividad garantiza el 90% de tu éxito.
I continue to make woven flowers because I want to learn and have many elaborate designs to prepare bouquets. I know that some flowers are more requested than others, but as long as I have more variety there will be more to choose from. This time I want to show you the step by step to make some very pretty and super easy to make pompous flowers. You just need to know the basic crochet stitches and be creative when combining colors. Remember that in crafts creativity guarantees 90% of your success.
FLORES POMPOSAS TEJIDAS A CROCHET.
POMPOUS FLOWERS CROCHETED.
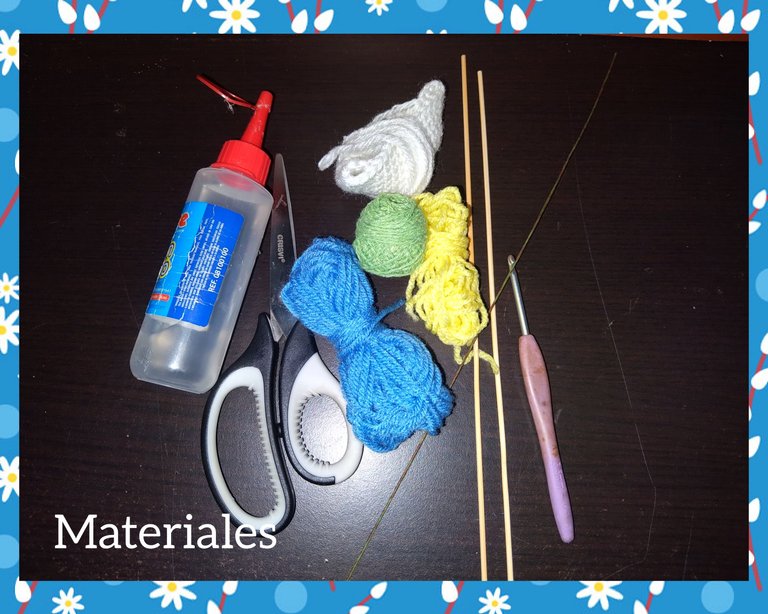
Para hacer estas flores elegí hilos acrílicos, ya que deseo que las flores tengan algo de brillo y sean más o menos grandecitas. Cuando les hablo de hilo acrílico me refiero, en este caso, a un hilo de más o menos 3mm de grosor, en mi país lo conocemos como estambre escolar. Viene en presentaciones desde 10 hasta 15 gramos.
Materiales:
🏵️ Hilos estambres.
🏵️ Hilos pabilos.
🏵️ Aguja de 3,25mm.
🏵️ Tijeras.
🏵️ Alambre de floristería.
🏵️ Palito de altura.
🏵️ Pegamento.
To make these flowers I chose acrylic yarn, since I want the flowers to have some shine and be more or less big. When I talk about acrylic yarn I mean, in this case, a yarn of about 3mm thick, in my country we know it as school yarn. It comes in presentations from 10 to 15 grams.
Materials:
🏵️ Stamen yarns.
🏵️ Threads wicks.
🏵️ Needle of 3,25mm.
🏵️ Scissors.
🏵️ Florist wire.
🏵️ Height stick.
🏵️ Glue.
Procedimiento:
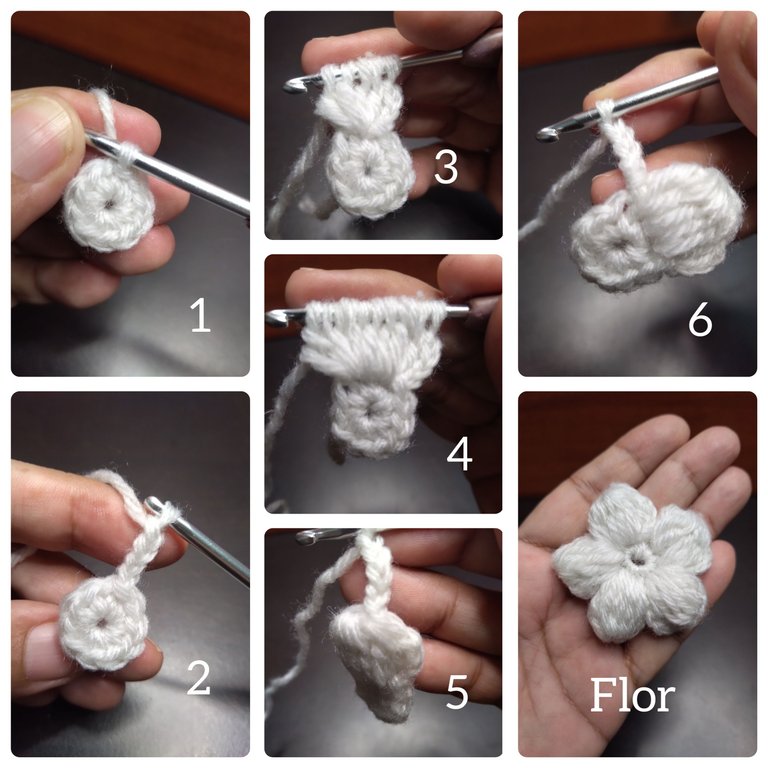
🏵️ Para hacer estas lindas flores tomé el hilo de estambre color blanco. Inicié con 10 puntos bajos dentro de un anillo mágico. Sobre ese anillo tejí 5 pétalos de 8 puntos altos alargados cerrados juntos. Es decir. Para la segunda vuelta tomé el hilo, hice cuatro cadenas y dentro de ese mismo punto levanté 4 puntos altos alargados sin terminar, pasé al siguiente punto bajo y levanté allí 4 puntos altos alargados sin terminar (tejí 8 en total) todos estos los cerré juntos. Luego tejí 4 cadenas y realicé un punto deslizado en el punto donde tejí el último punto alargado.
🏵️ Desde ese mismo punto donde terminé el primer pétalo inicié la elaboración del segundo repitiendo exactamente todos los pasos. De esta manera hice los cinco pétalos.
🏵️ Al finalizar hice un punto deslizado y escondí la hebra.
Procedure:
🏵️ To make these cute flowers I took the white colored worsted yarn. I started with 10 low stitches inside a magic ring. On that ring I knit 5 petals of 8 tall elongated stitches closed together. That is to say. For the second round I took the yarn, made four chains and inside that same stitch I knitted 4 elongated high stitches without finishing, went to the next low stitch and knitted there 4 elongated high stitches without finishing (I knitted 8 in total) all these I closed together. Then I knit 4 chains and knit a slip stitch in the stitch where I knitted the last elongated stitch.
🏵️ From that same stitch where I finished the first petal I started the elaboration of the second one repeating exactly all the steps. In this way I made the five petals.
🏵️ At the end I made a slip stitch and hid the yarn.
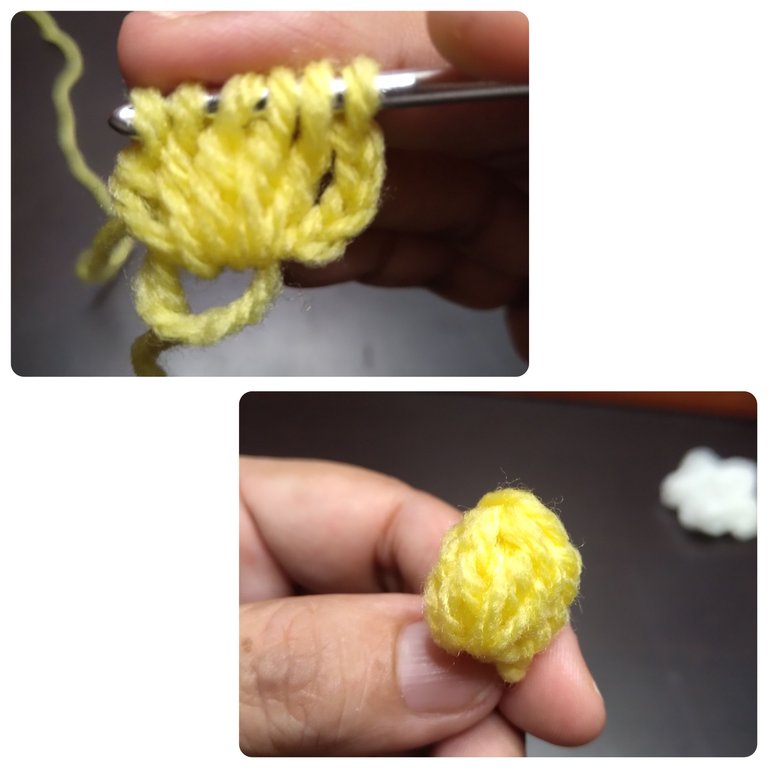
🍀 Tomé ahora el estambre color amarillo. Inicié con un am. En el anillo tejí 4 cadenas, luego 5 puntos altos alargados sin terminar cerrados juntos, finalicé con levantar 4 cadenas y hacer 1 pd. Corté la hebra. Este pétalo adicional lo pegué en el centro de la flor.
🍀 I took now the yellow colored yarn. I started with an am. In the ring I knitted 4 chains, then 5 elongated high stitches without ending closed together, I finished by lifting 4 chains and making 1 pd. I cut the strand. This additional petal I glued in the center of the flower.
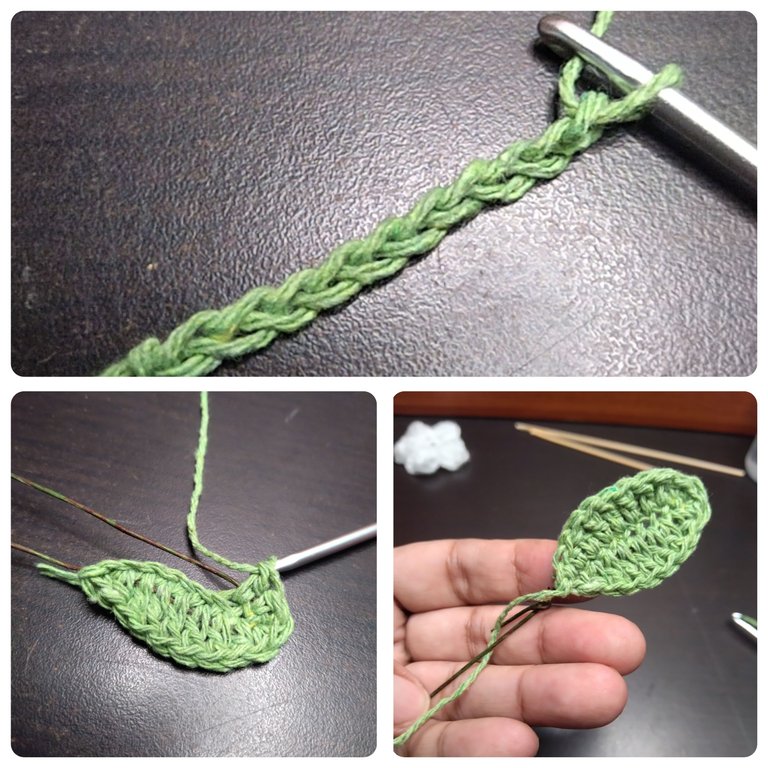
🏵️ Tomé ahora el hilo verde para tejer la hoja. Inicié con 10 cadenas. Luego sobre esas cadenas y un trocito de alambre tejí 1pb-1pma-7pa-3pbj-1pma-7pa-2pbj. Corté el hilo.
🏵️ I now took the green yarn to weave the leaf. I started with 10 strings. Then over those chains and a small piece of wire I wove 1pb-1pma-7pa-3pbj-1pma-7pa-2pbj. I cut the yarn.
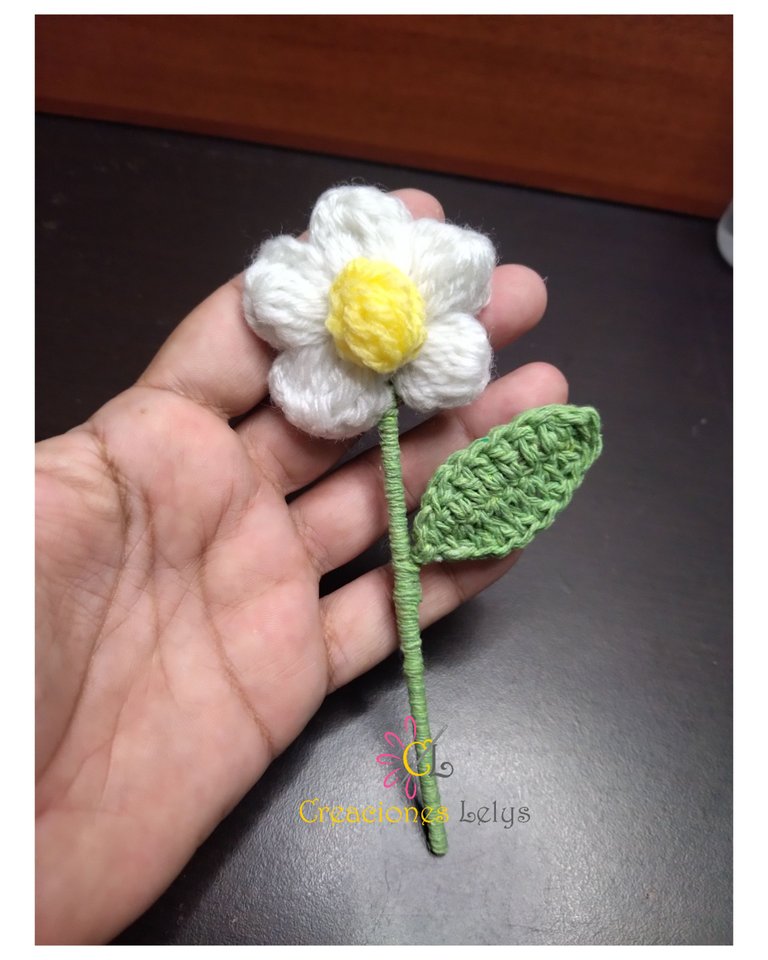
🏵️ Tomé el palito de altura, medí y corté unos 12 cm. Pasé una de las puntas por entre la parte trasera de la flor untando primero un poco de pegamento. Luego forré el palito con hilo pabilo color verde y añadí de una vez la hoja. Terminé de forrar el palito y al finalizar coloqué un punto de pegamento y corté el hilo. En el centro de la flor pegue el pétalo color amarillo.
🏵️ I took the height stick, measured and cut about 12 cm. I passed one of the ends through the back of the flower, first smearing a little glue on it. Then I lined the stick with green wick twine and added the leaf all at once. I finished lining the stick and at the end I put a dot of glue and cut the thread. In the center of the flower glue the yellow petal.

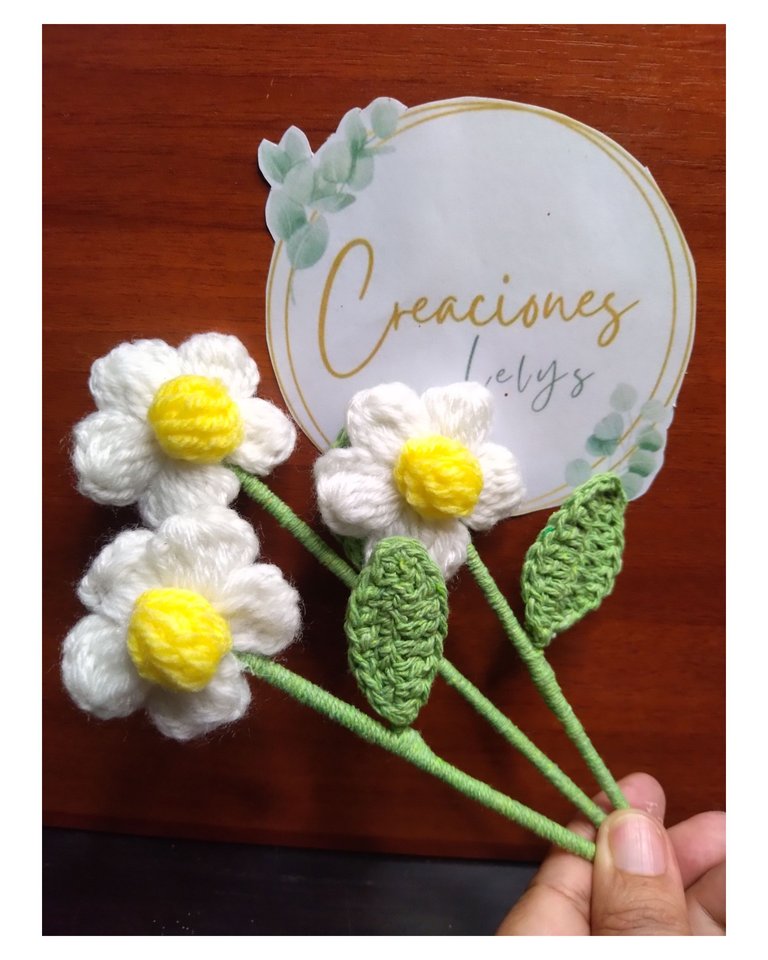
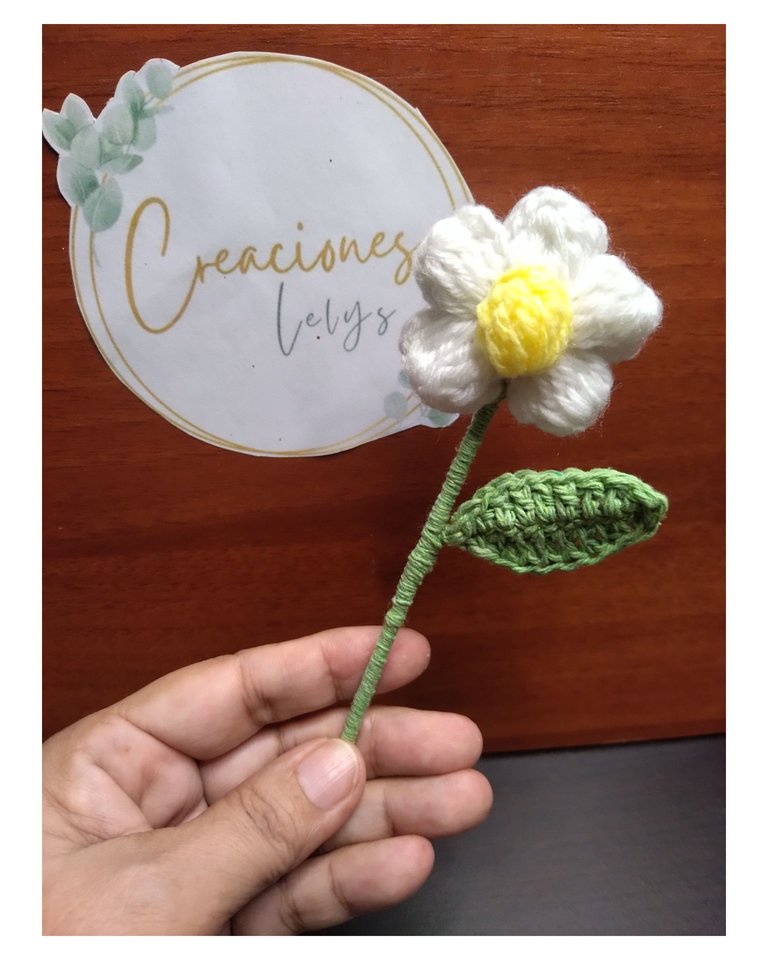
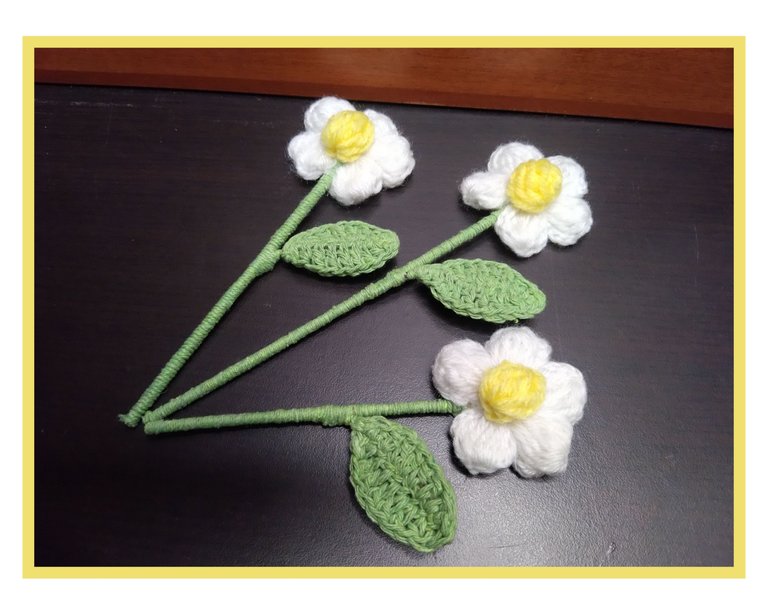
🍀🏵️🍀 De esta manera se ve terminada la flor. Pueden tejerse de los colores que más gustes o necesites incorporar en los ramos.
🍀🏵️🍀 This is how the flower looks finished. They can be woven in any color you like or need to incorporate in the bouquets.
Me encanta como se ven las flores pomposas. Si te gustó 😊 no dejes de seguirme para que no te pierdas de los próximos proyectos tutoriales. Suscríbete a la comunidad y deja tu comentario. Muchísimas gracias por el apoyo. Todas las fotos son de mi propiedad. Edité con Polish. Usé el traductor de Deelp. Bendiciones 🙏🏽 Hasta pronto.
I love how the pompom flowers look. If you liked it 😊 be sure to follow me so you don't miss out on the next tutorial projects. Subscribe to the community and leave a comment. Thanks so much for the support. All photos are my property. I edited with Polish. I used Deelp translator. Blessings 🙏🏽 See you soon.
Parecen pompones de nubes.... dios que bonitas!! Mi amiga es fan de las margaritas!!! Gracias Lelys!🌼
Hola amiga. Feliz día para ti. Por aquí lloviendo fuerte. Hace frío.
Me alegra que a tu amiga le gusten las flores.
Muchas gracias por tu visita ☺️ lo aprecio 🫂🙋🏽♀️😃
Que tengas un hermoso día!!😃
Igualmente ❤️
Hola amiga, buen dia, están hermosas tus flores, felicitaciones.
Buen día. Muchísimas gracias 🫂 que bueno saber que te gustan.
wow that looks so beautiful, you are amazing. thanks a lot for sharing. keep up the good work. have a great day and week ahead.
Thanks a lot. I'm so glad you like my work.
🫂🙋🏽♀️😃❤️
¡Felicidades! Esta publicación obtuvo upvote y fue compartido por @la-colmena, un proyecto de Curación Manual para la comunidad hispana de Hive que cuenta con el respaldo de @curie.
Si te gusta el trabajo que hacemos, te invitamos a darle tu voto a este comentario y a votar como testigo por La Colmena.
Si quieres saber más sobre nuestro proyecto, te invitamos a acompañarnos en nuestro servidor de Discord.
Muchas gracias por su apoyo 😊
Te quedaron preciosas amiga 😉
Muchas gracias.
Wooow amiga sinceramente tus tejidos son hermosos, ame estás flores y el paso a paso excelente. 🎉🥰
Hola. Me agrada que te gusten. Son sencillas de hacer como puedes ver.
Siempre es un gusto tenerte de visita. Ven cuando quieras ☺️ ☕ 🙋
wow. this looks so beautiful. It wants to resemble a sunflower.
Thank you 😌
Qué hermosas y detalladas flores pomposas has tejido! Me encanta cómo has explicado paso a paso el proceso para hacerlas. Admiro mucho tu perseverancia y dedicación a este hobby. 👋
Hola @jessuses1381 me da gusto saludarte.
Muchas gracias por tu visita.
Me encanta pasar el rato haciendo manualidades, así que te doy garantía de que lo disfruto. 🙋
Que bonitas están ! Se ven super tiernas , esos ramos de flores tejidas están súper de moda , y como dices hay muchos diseños de flores pero de verdad que cuando es un ramo con muchas flores de diferentes tipos licen aún mas lindas !
Muchas gracias 🫂
Re si 😂 ni ganas de levantarme jaja
Son muy lindas, son re pomposas y adorables 😍
Hola amiguis. Espero que estés teniendo un excelente día. Por aquí ya levantada el día de hoy. Y ya tomé café ☕ que yo misma me hice y me serví 😞
Muchas gracias por apreciar estas florecitas.