Diseño de un Perrito en Inkscape [ESP/ENG]
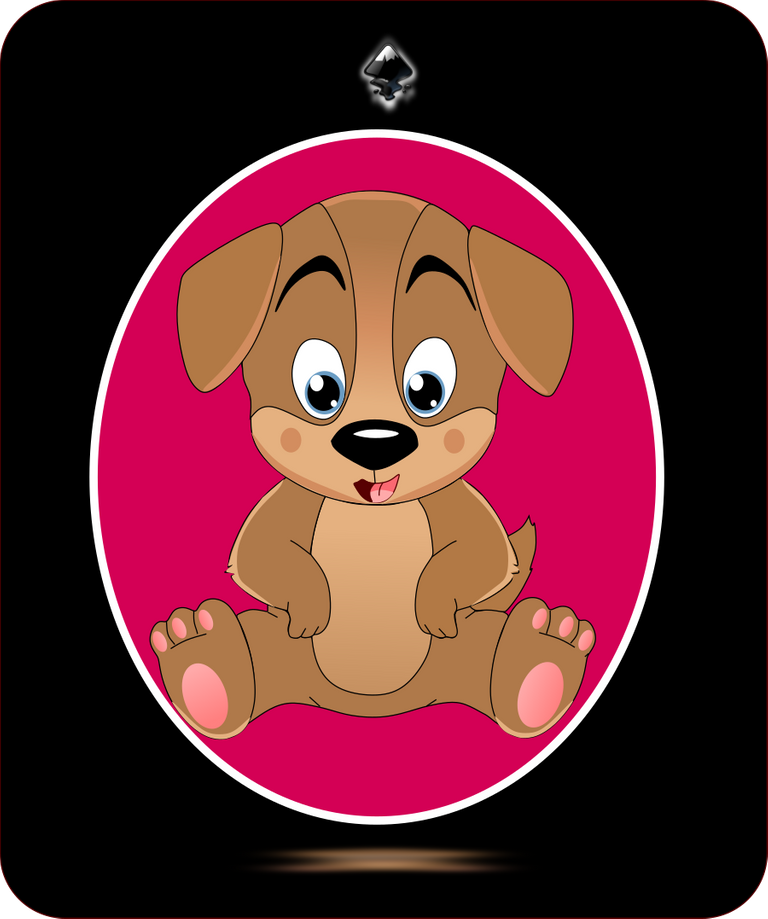
Diseño de un Perrito en Inkscape:
Paso 1:
Se abre programa Inkscape, y desde la barra de herramienta que está en el lado izquierdo presionamos clic en la opción de dibujar curvas Bézier y se traza una figura de forma ovalada que es la cabeza del perrito y dos figuras en ambos lados que son las orejas.
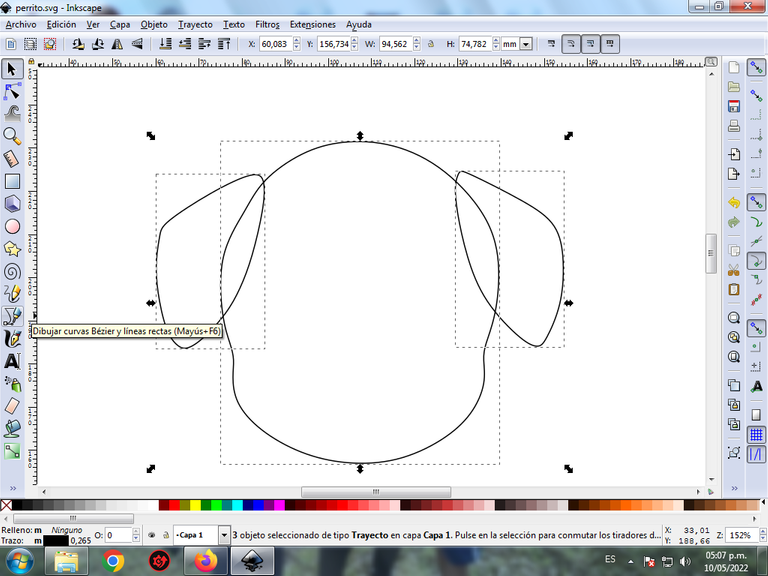
En esta parte de curvas Bézier se selecciona la opción de Crear Trayecto Modo Trayecto BSpline, para que las forma queden de forma curvas.
Paso 2:
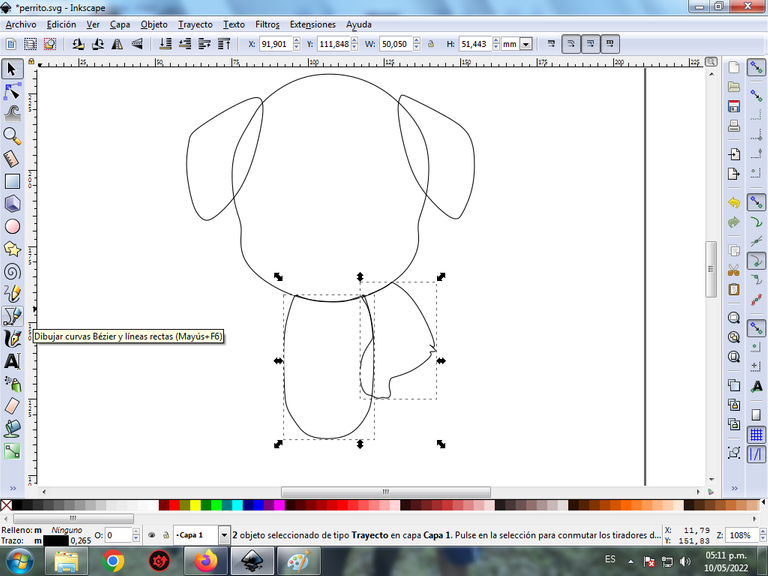
Se trazan dos figuras igualmente en la parte inferior, que es el pecho y una de las patas del perrito, utilizando la misma herramienta.
Paso 3:
Continuamos dibujando una de las patas, la cola y partes del cuerpo, con la herramienta de curvas Bézier.
Paso 4:
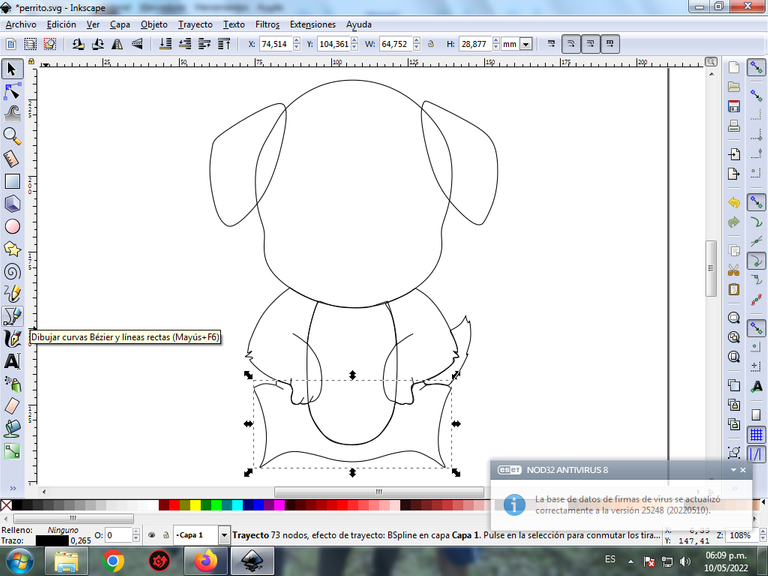
Se traza dos figuras ovaladas que son las patas y luego dibujamos varias figuras ovaladas de diferentes tamaños encimas de estas, con la herramienta de crear círculos.
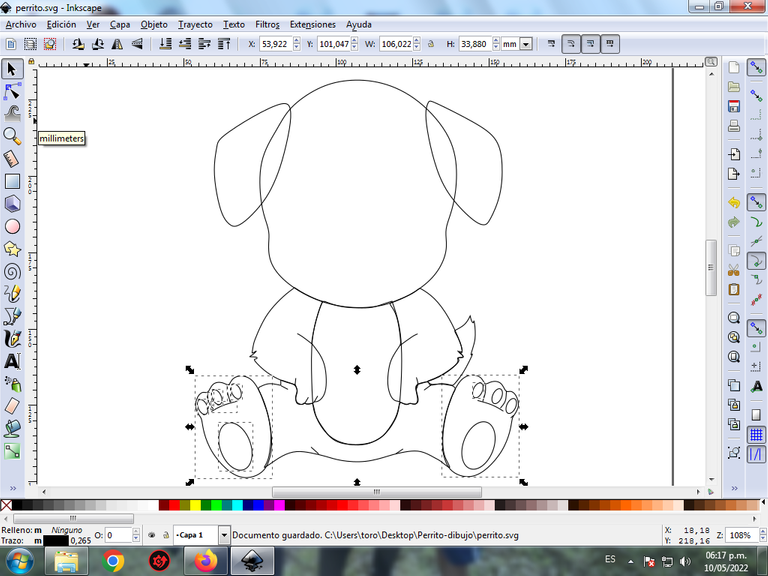
Paso 5:
Ahora procedemos a dibujar la nariz, dos cejas en forma de medialuna y dos figuras encima de la cabeza en forma de una máscara, con la herramienta de curvas Bézier.
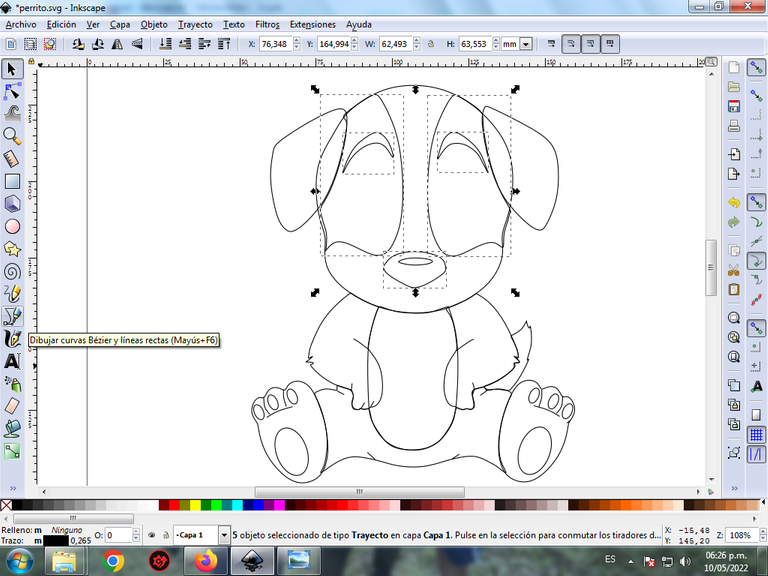
Paso 6:
Se dibujan cuatro círculos con la opción de crear círculo de la barra de herramientas, y después trazamos una figura ovalada para completar el ojo derecho del perrito con la herramienta de curvas Bézier.
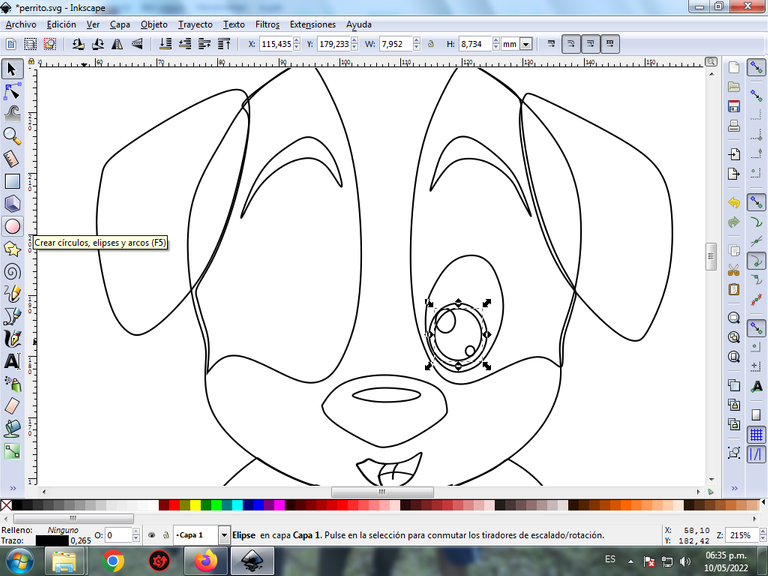
Paso 7:
Se aplica el mismo paso 6, para dibujar el ojo izquierdo del perrito.
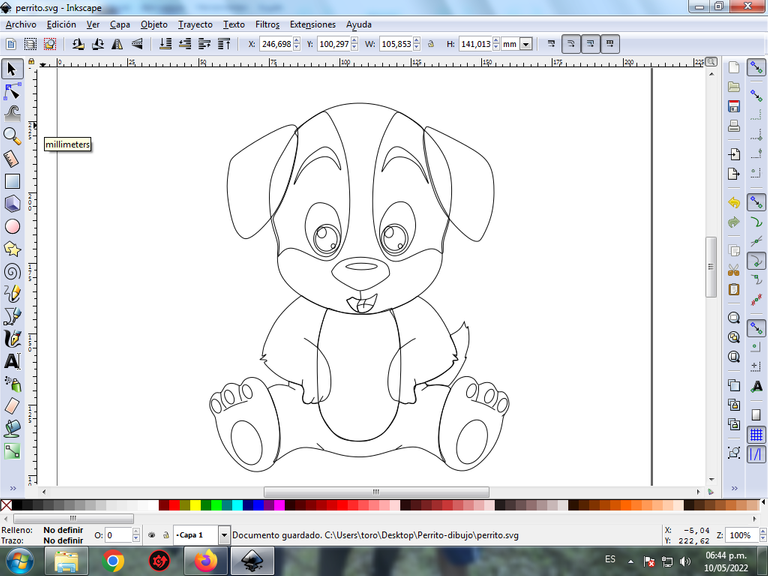
Paso 8:
Se selecciona el color comenzando por el ojo derecho del perrito, para esto hacemos clic en la figura y luego el color azul claro de la paleta de colores, que está en la parte inferior del programa.
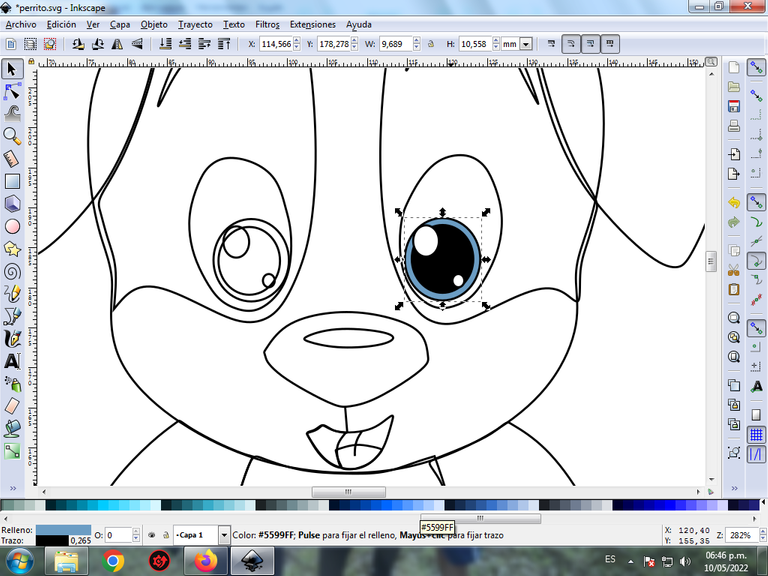
Paso 9:
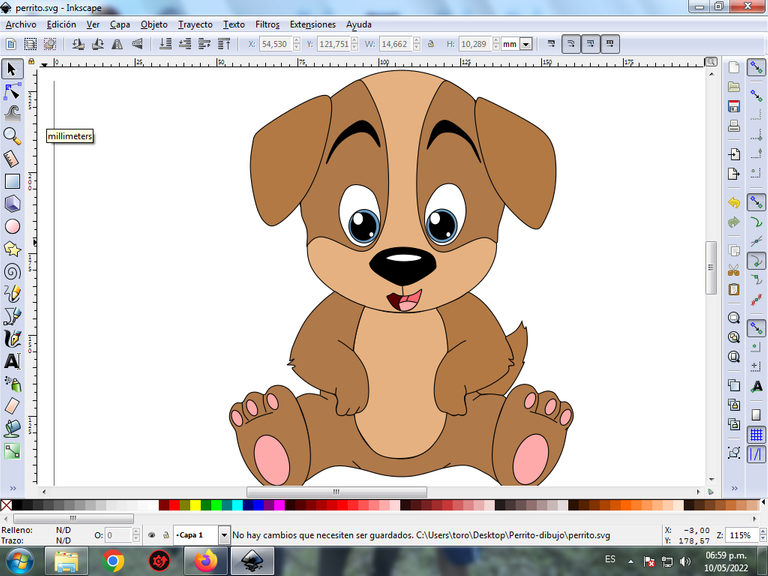
Se aplica el paso 8 en el resto de la figura y este es el resultado de pintar todo el perrito.
Paso 10:
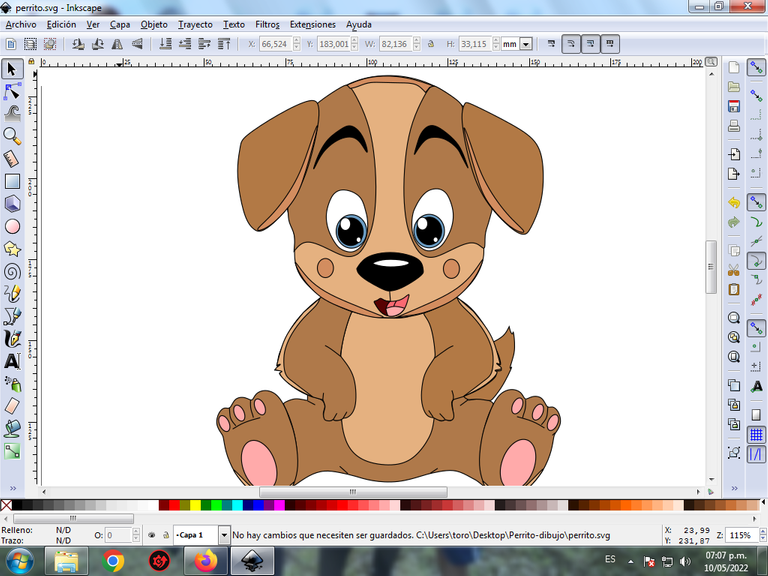
Para darle mayor efecto se realizan varias trazos en diferentes parte del cuerpo del perrito, y le colocamos un color más claro.
Paso 9:
Se eliminan los bordes de algunas figuras del perrito, para esto se seleccionamos una parte y luego nos vamos a la barra de menú Objeto – Rellenos y Bordes.
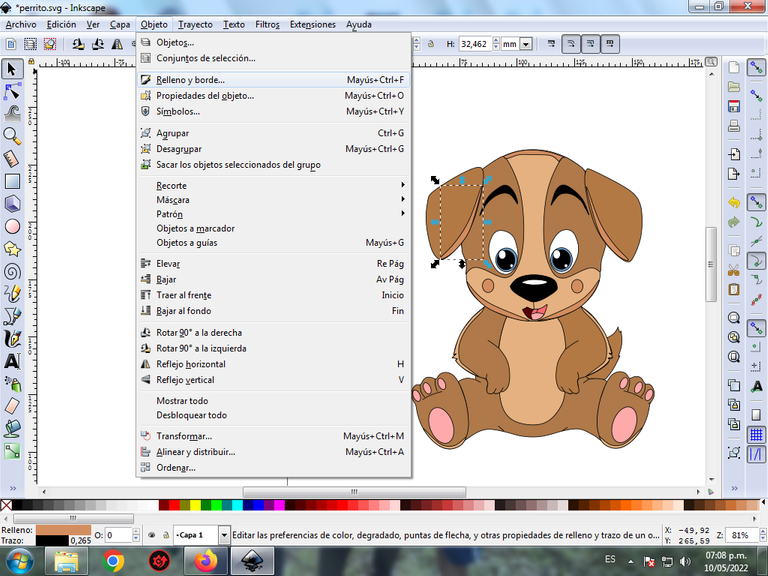
Se visualizará un recuadro, donde vamos a cliquear en la pestaña color de trazo y luego para poder borrar el borde le damos clic en la X para eliminarlo.
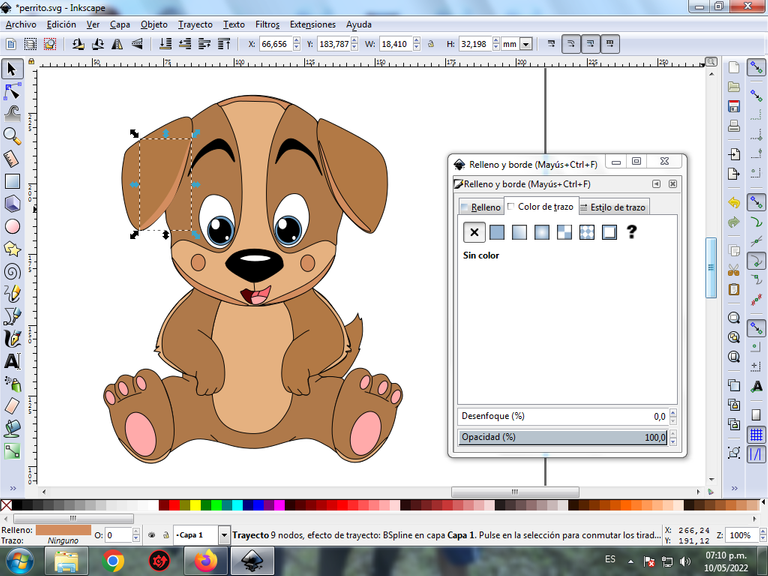
Paso 10:
Ahora procedemos a cambiar los bordes del resto de las figuras, para esto nos vamos a la barra de menú Objeto – Rellenos y Bordes.
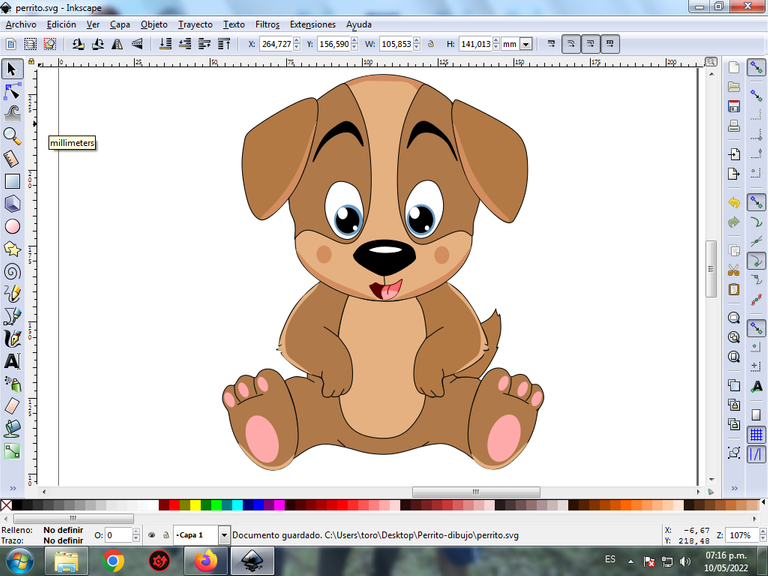
Se visualizará un recuadro, donde vamos a cliquear en la pestaña color de trazo y luego se selecciona el color.
Paso 11:
Para darle un mayor efecto, se aplica un degradado en algunas partes del perrito, se selecciona y luego hacemos clic en la barra de herramienta crear y editar degradado.
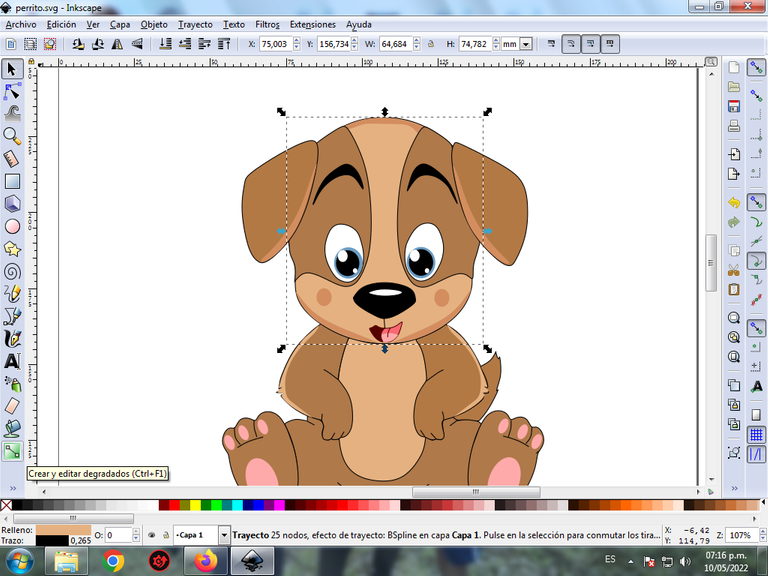
Presionamos clic y se visualiza un punto donde escogemos el segundo color que es marròn más oscuro, luego pulsamos clic y se selecciona otro color, es decir tendrá tres colores que darán el efecto de degradado en la figura.
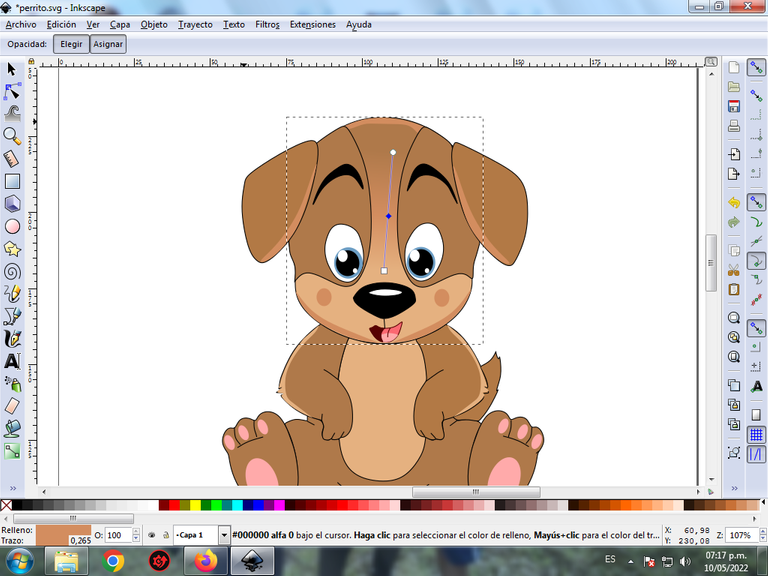
Paso 12:
Se aplica el paso 11, en el resto de las figuras y este es el resultado final.
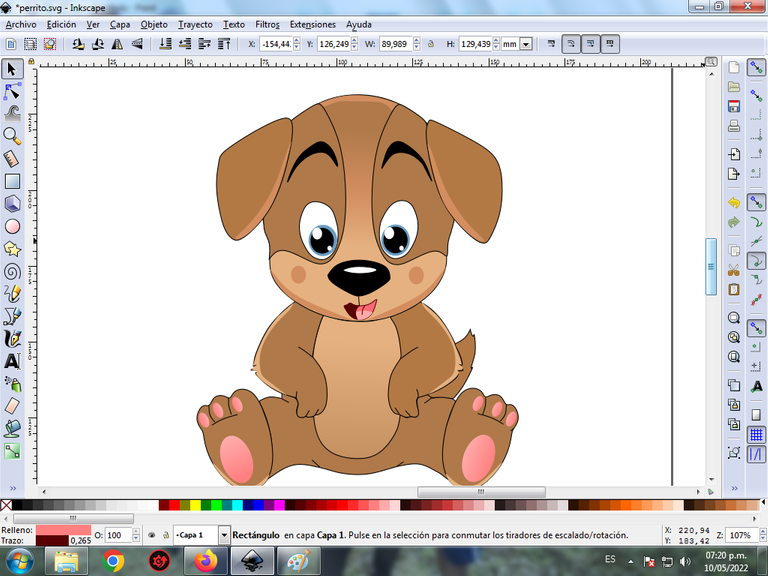
Paso 13:
Para finalizar este diseño agrupamos toda el perrito con las teclas Ctrl + G, la duplicamos con la combinación de teclas Control + D, se reduce el tamaño, se coloca en la parte inferior y se aplica un desenfoque de 10%, quedando como una sombra. Se dibuja un círculo de color fucsia con bordes blancos y luego insertamos un fondo color negro y tenemos listo nuestro diseño.

Imagen de Referencia Fuente
El programa Inkscape se puede descargar en esta dirección Fuente
Espero que les haya gustado mi tutorial, nos vemos en el próximo.
English

Puppy Design in Inkscape:
Step 1:
Inkscape program is opened, and from the toolbar that is on the left side we click on the option to draw Bézier curves and an oval shape is drawn that is the puppy's head and two figures on both sides that are the ears .

In this part of Bézier curves, the Create Path BSpline Path Mode option is selected, so that the shapes are curved.
Step 2:
Two figures are also traced in the lower part, which is the chest and one of the legs of the puppy, using the same tool.

Step 3:
We continue drawing one of the legs, the tail and parts of the body, with the Bézier curves tool.

Step 4:
Two oval figures are drawn that are the legs and then we draw several oval figures of different sizes of these, with the tool to create circles.

Step 5:
Now we proceed to draw the nose, two crescent-shaped eyebrows and two figures on top of the head in the form of a mask, with the Bézier curves tool.

Step 6:
Four circles are drawn using the Create Circle option on the toolbar, and then an oval shape is drawn to complete the puppy's right eye using the Bézier curves tool.

Step 7:
The same step 6 applies, to draw the puppy's left eye.

Step 8:
The color is selected starting with the puppy's right eye, for this we click on the figure and then the light blue color from the color palette, which is at the bottom of the program.

Step 9:
Step 8 is applied to the rest of the figure and this is the result of painting the entire puppy.

Step 10:
To give it a greater effect, several strokes are made in different parts of the puppy's body, and we put a lighter color on it.

Step 9:
The borders of some figures of the puppy are eliminated, for this we select a part and then we go to the menu bar Object – Fills and Borders.

A box will be displayed, where we are going to click on the stroke color tab and then, in order to erase the border, we click on the X to eliminate it.

Step 10:
Now we proceed to change the borders of the rest of the figures, for this we go to the menu bar Object – Fills and Borders.

A box will be displayed, where we are going to click on the stroke color tab and then the color is selected.
Step 11:
To give it a greater effect, we apply a gradient to some parts of the puppy, select it and then click on the create and edit gradient toolbar.

We press click and a point is displayed where we choose the second color that is darker brown, then we press click and another color is selected, that is, it will have three colors that will give the figure a gradient effect.

Step 12:
Step 11 is applied to the rest of the figures and this is the final result.

Step 13:
To finish this design we group the entire puppy with the Ctrl + G keys, we duplicate it with the Control + D key combination, the size is reduced, it is placed at the bottom and a 10% blur is applied, remaining as a shadow . A fuchsia circle with white edges is drawn and then we insert a black background and we have our design ready.

Reference Image Source
The Inkscape program can be downloaded at this address Source
I hope you liked my tutorial, see you in the next one.
Translated with Traductor de Google

https://twitter.com/cbit_roxana_mdh/status/1524417359712333824
The rewards earned on this comment will go directly to the person sharing the post on Twitter as long as they are registered with @poshtoken. Sign up at https://hiveposh.com.
esta muy bonito
Saludos gracias