Diseño Abstracto de un Caballo en Inkscape [ESP/ENG]
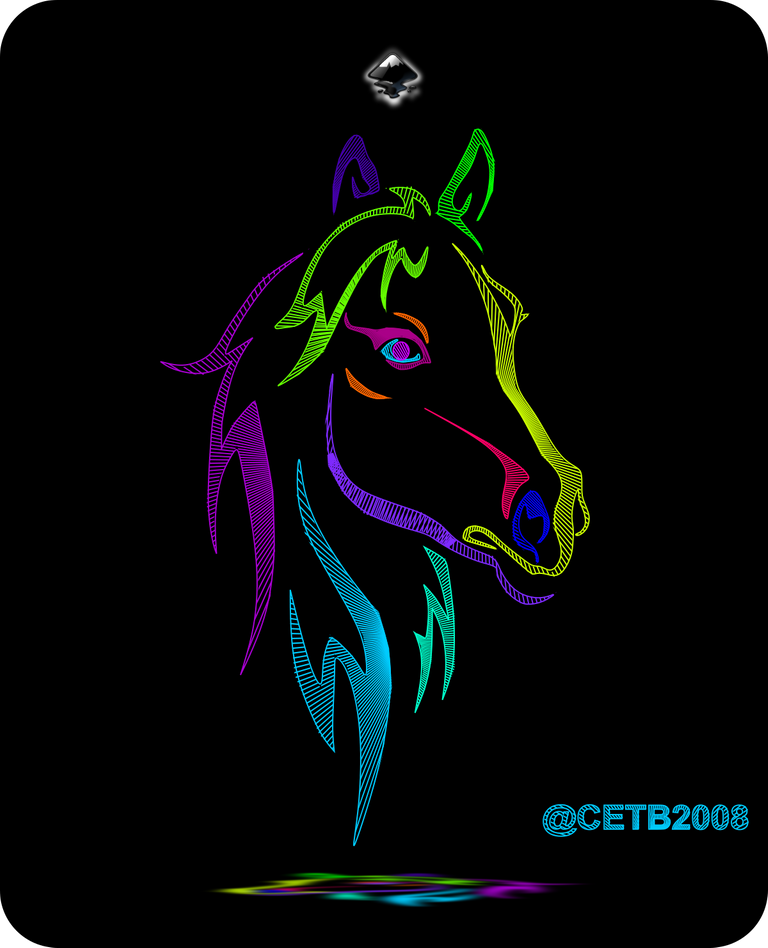
Diseño Abstracto de un Caballo en Inkscape:
Paso 1:
Se abre programa Inkscape, y desde la barra de herramienta que está en el lado izquierdo presionamos clic en la opción de dibujar curvas Bézier y se traza una figura con esta forma como se muestra a continuación.
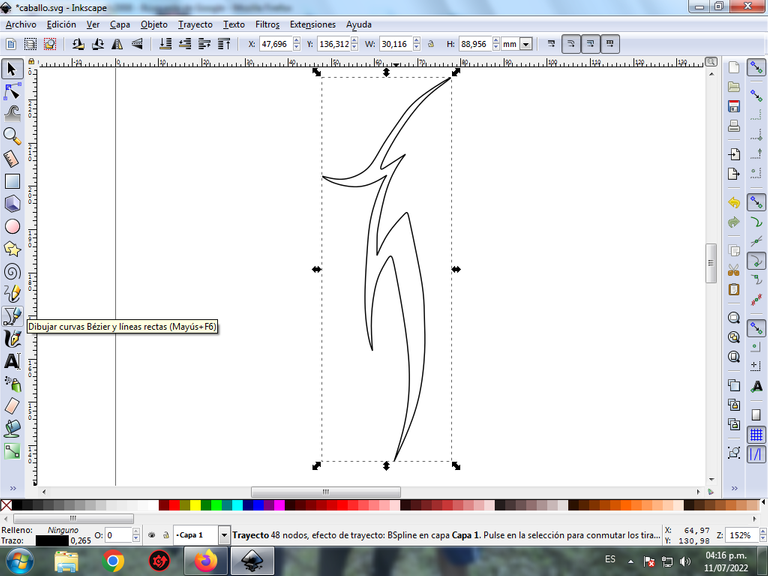
En esta parte de curvas Bézier se selecciona la opción de Crear Trayecto Modo Trayecto BSpline, para que las forma queden de forma curvas.
Paso 2:
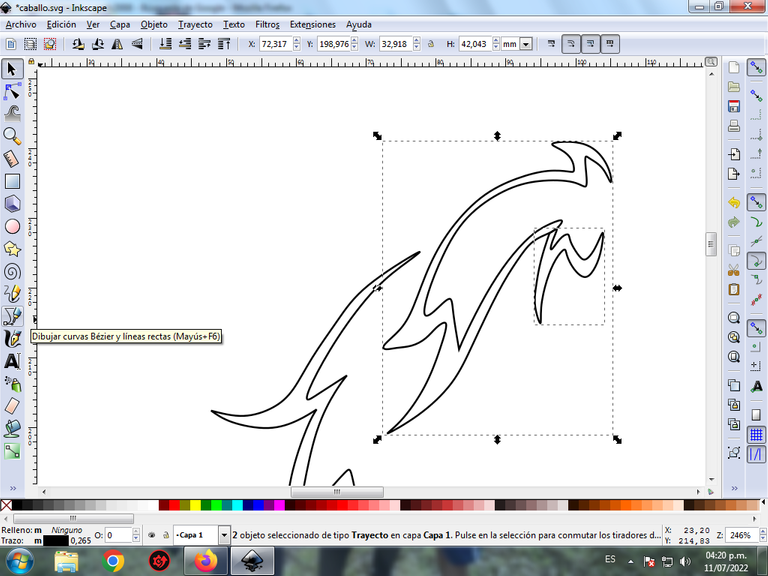
Se trazan dos figuras igualmente con estas formas de diferentes tamaños en esta ubicación, utilizando la misma herramienta.
Paso 3:
Continuamos dibujando dos figuras más, de esta manera podemos ir apreciando la figura de la cabeza caballo, con la herramienta de curvas Bézier.
Paso 4:
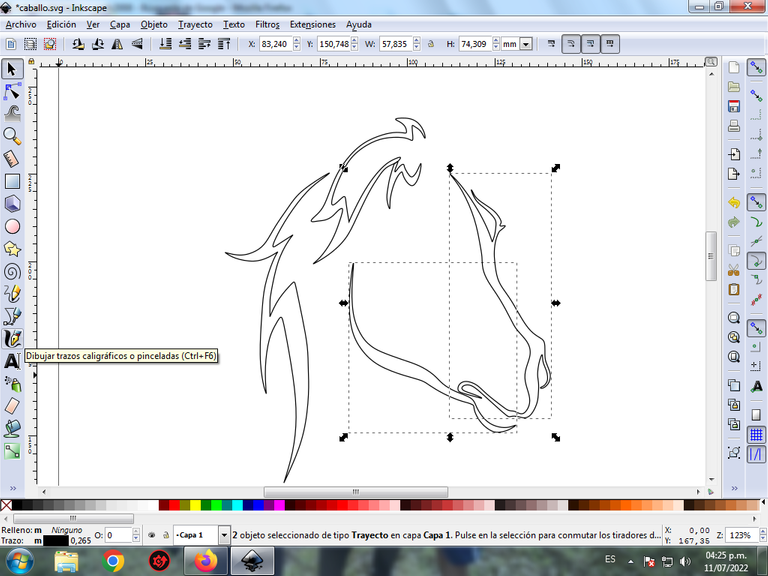
Se traza dos figuras que son el cuello del caballo con la misma herramienta.
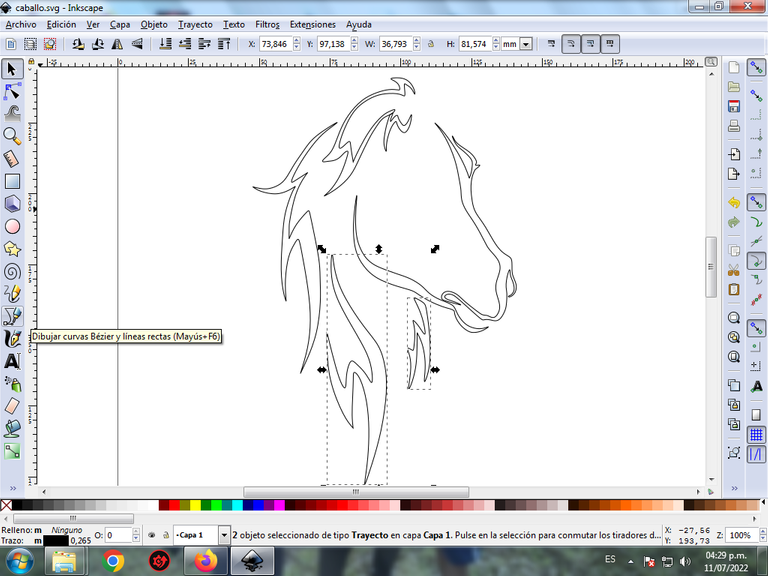
Paso 5:
Ahora continuamos dibujando la nariz del caballo y otra forma con la herramienta de curvas Bézier.
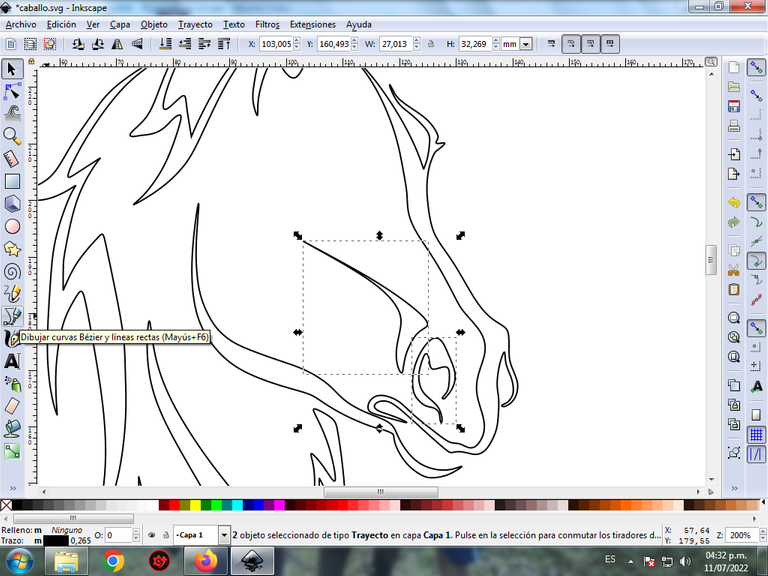
Paso 6:
Se dibujan dos figuras triangulares que son las dos orejas del caballo, utilizando la misma herramienta.
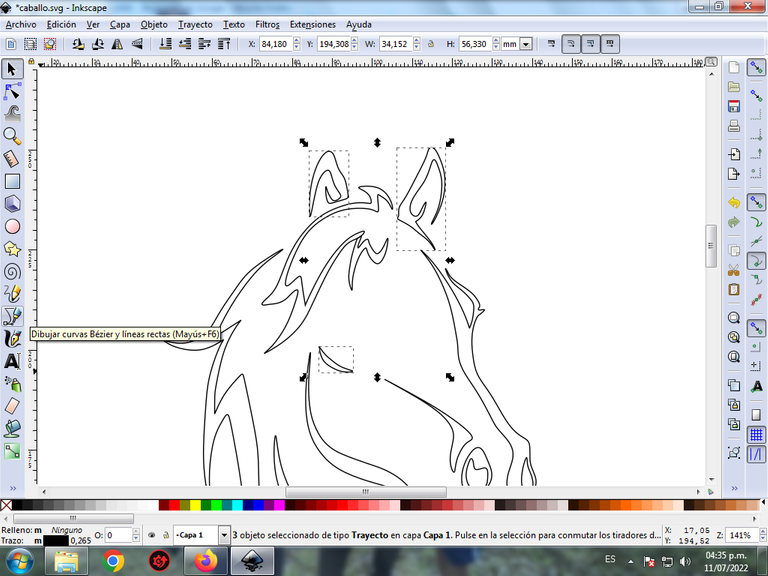
Paso 7:
Trazamos cuatro figuras con la herramienta de curvas Bezier y luego insertamos un círculo con la opción de crear círculo de la barra de herramientas, y terminamos todo el diseño del caballo.
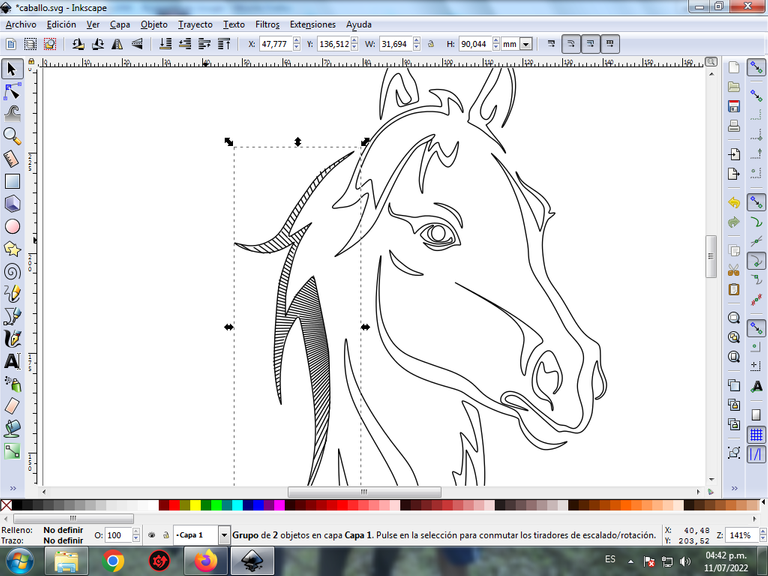
Paso 8:
Se aplica el efecto coser subtrayecto a esta primera figura, en anteriores publicaciones explico cómo se hace el procedimiento en las figuras. Esta opción se encuentra en la barra de menú Trayecto – Efecto de Trayecto, y para poder aplicarlo las figuras se deben combinar.
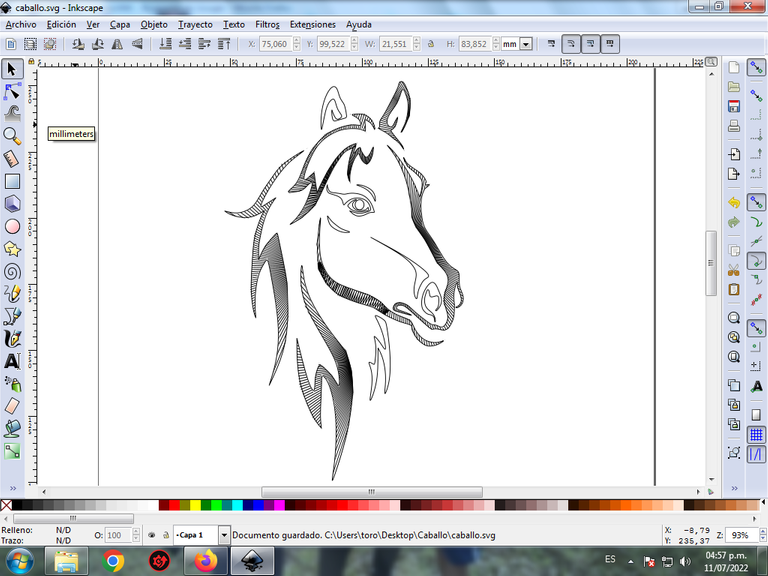
Continuamos aplicando el efecto en otras figuras del caballo.
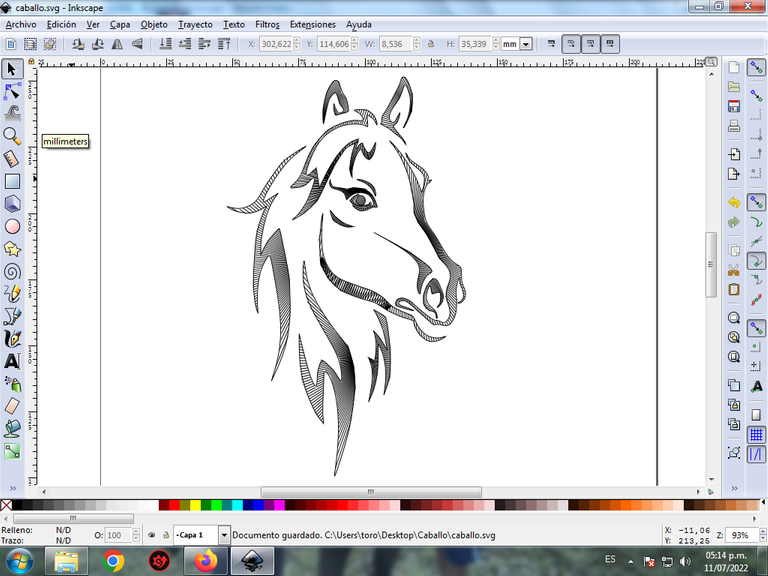
Paso 9:
Aquí finalizamos todo el efecto aplicado en el resto de la figura, y este es el resultado final.
Paso 10:
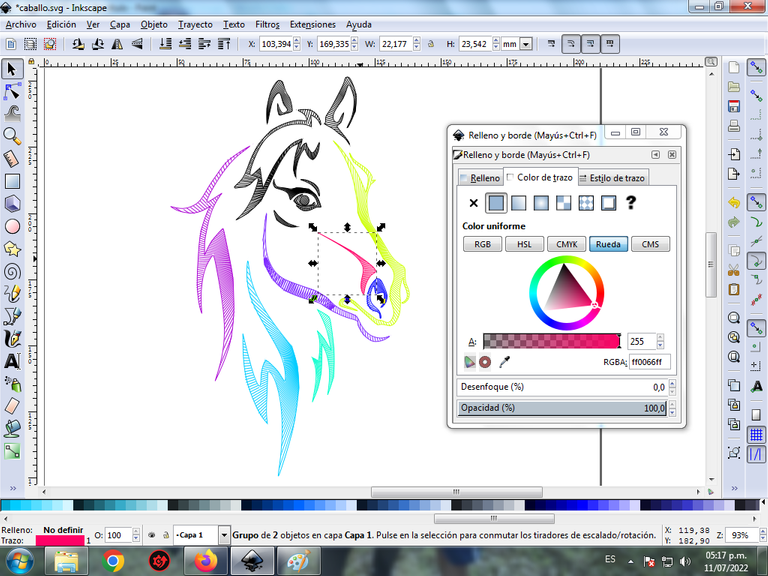
En estas figuras vamos a aplicar el color no el fondo de cada figura, sino en cada uno de los bordes, para estos le damos clic en la barra de menú Objetos – Rellenos y bordes.
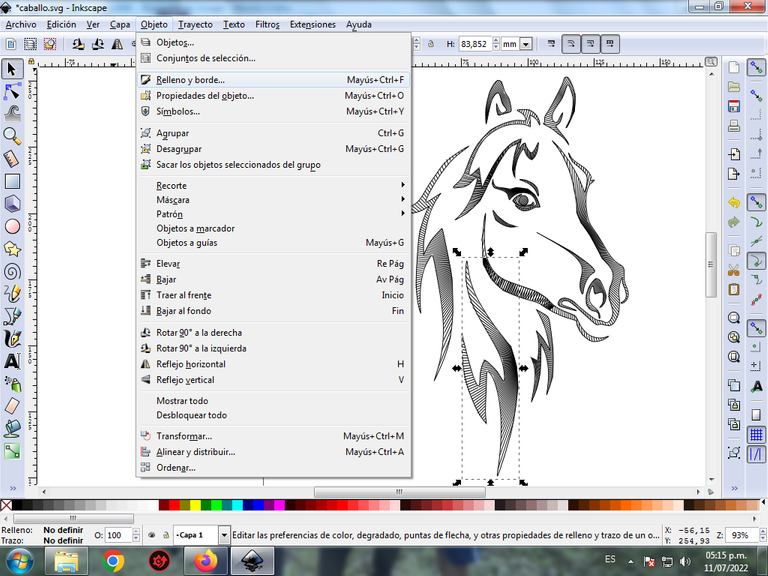
En la pestaña color de trazo, se selecciona el color azul claro de la figura.
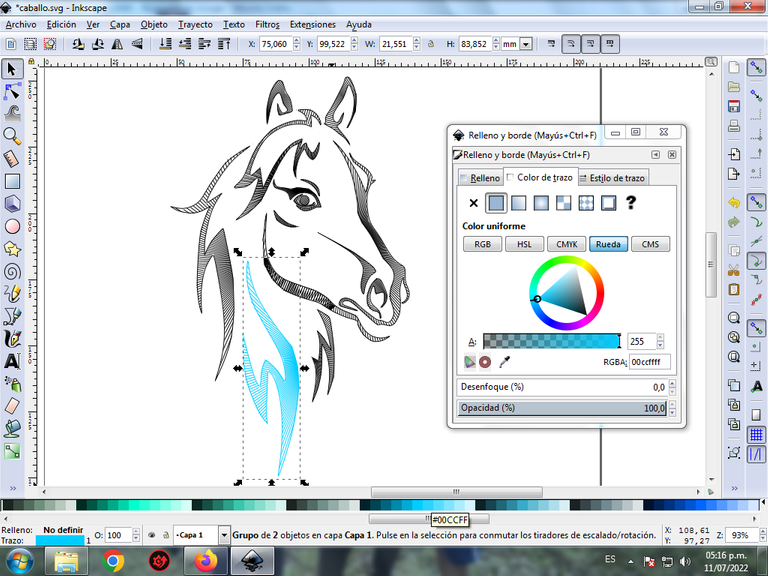
Paso 11:
Continuamos aplicando los colores en las figuras y así va quedando.
Paso 12:
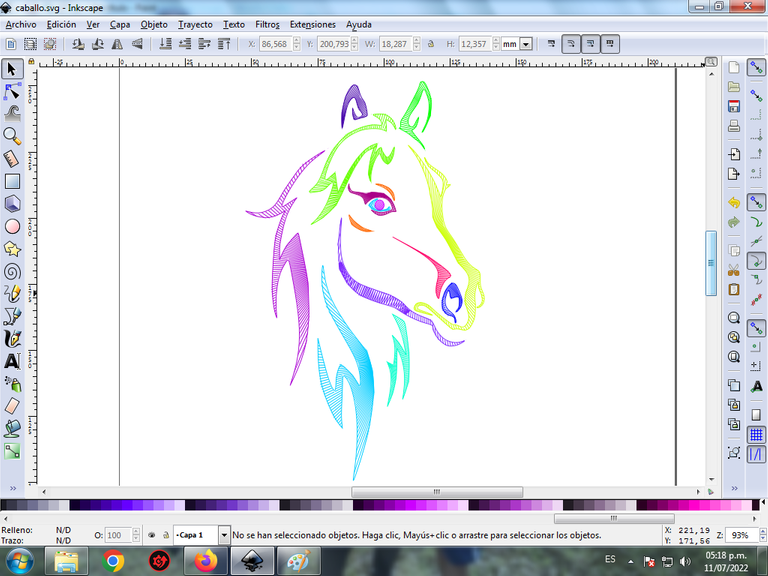
Se aplica el paso 11 en el resto de la figura y este es el resultado final.
Paso 13:
Para finalizar este diseño agrupamos toda el caballo con las teclas Ctrl + G, la duplicamos con la combinación de teclas Control + D, se reduce el tamaño, se coloca en la parte inferior y se aplica un desenfoque de 10%, quedando como una sombra. Luego insertamos un fondo color negro y tenemos listo nuestro diseño de un caballo abstracto.

Imagen de Referencia Fuente
El programa Inkscape se puede descargar en esta dirección Fuente
Espero que les haya gustado mi tutorial, nos vemos en el próximo.
English

Abstract Design of a Horse in Inkscape:
Step 1:
Inkscape program is opened, and from the toolbar below that is on the left side we click on the option to draw Bézier curves and a figure with this shape is drawn as shown a.

In this part of Bézier curves, the Create Path BSpline Path Mode option is selected, so that the shapes are curved.
Step 2:
Two figures are equally traced with these shapes of different sizes at this location, using the same tool.

Step 3:
We continue drawing two more figures, in this way we can appreciate the figure of the horse's head, with the Bézier curves tool.

Step 4:
Two figures that are the horse's neck are drawn with the same tool.

Step 5:
Now we continue to draw the horse's nose and another shape with the Bezier tool.

Step 6:
Two triangular figures are drawn, which are the two ears of the horse, using the same tool.

Step 7:
We traced four shapes with the Bezier curves tool and then inserted a circle with the create circle option on the toolbar, and we finished the whole horse design.

Step 8:
The sew subpath effect is applied to this first figure, in previous publications I explain how the procedure is done in the figures. This option is found in the Path – Path Effect menu bar, and in order to apply it the figures must be combined.

We continue to apply the effect on other figures of the horse.

Step 9:
Here we finish all the applied effect in the rest of the figure, and this is the final result.
Step 10:
In these figures we are going to apply the color not to the background of each figure, but to each of the edges, for these we click on the menu bar Objects – Fills and edges.

In the stroke color tab, the light blue color of the figure is selected.

Step 11:
We continue applying the colors in the figures and so it goes.

Step 12:
Step 11 is applied to the rest of the figure and this is the final result.

Step 13:
To finish this design we group the entire horse with the Ctrl + G keys, we duplicate it with the Control + D key combination, the size is reduced, it is placed at the bottom and a 10% blur is applied, remaining as a shadow . Then we insert a black background and we have our abstract horse design ready.

Reference Image Source
The Inkscape program can be downloaded at this address Source
I hope you liked my tutorial, see you in the next one.
Translated with Traductor de Google

Te quedó hermoso, muy colorido caballo. Gracias por compartir el tutorial paso a paso
Hola @lisbethseijas si quedó muy llamativo, muchas gracias por visitar mi blog.
Saludos amigos de @rutablockchain muchas gracias por valorar mi publicación
Muy buen dibujo amigo
Saludos amigo muchas gracias por visitar mi blog.