Brown Smokey| Step by Step [ESP/ING]
¡Hola, Comunidad de Hive!
Hello, Hive Commnunity!
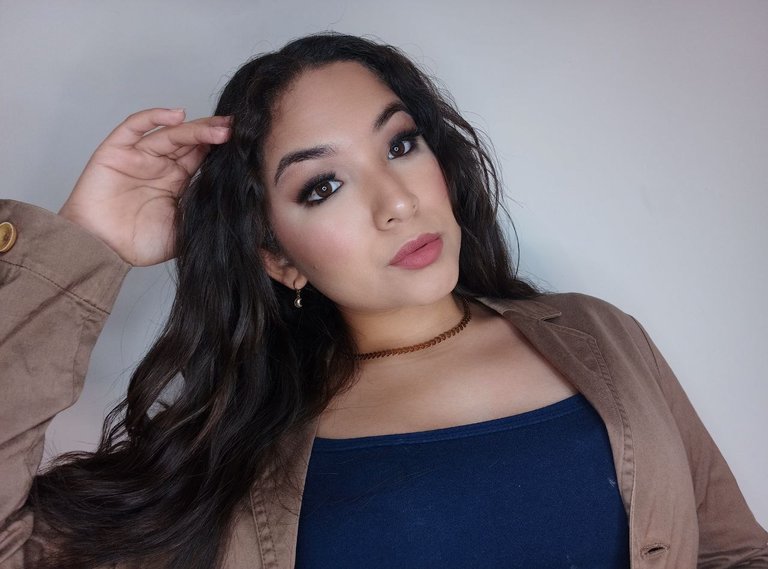
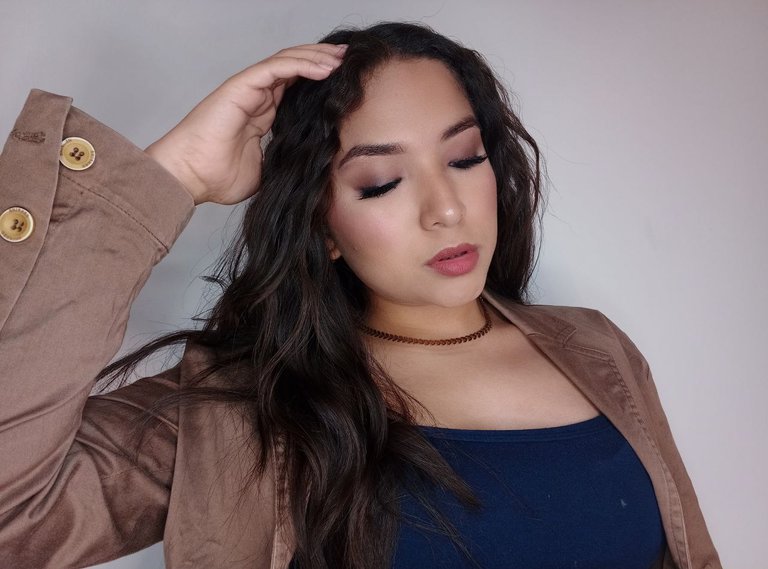
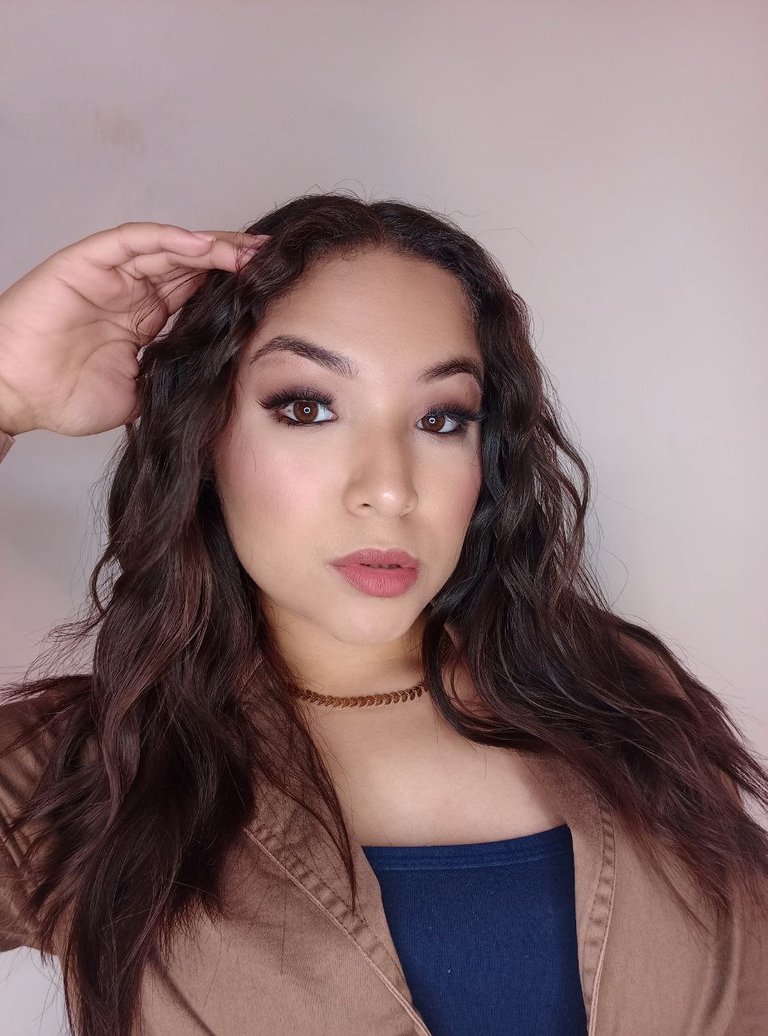
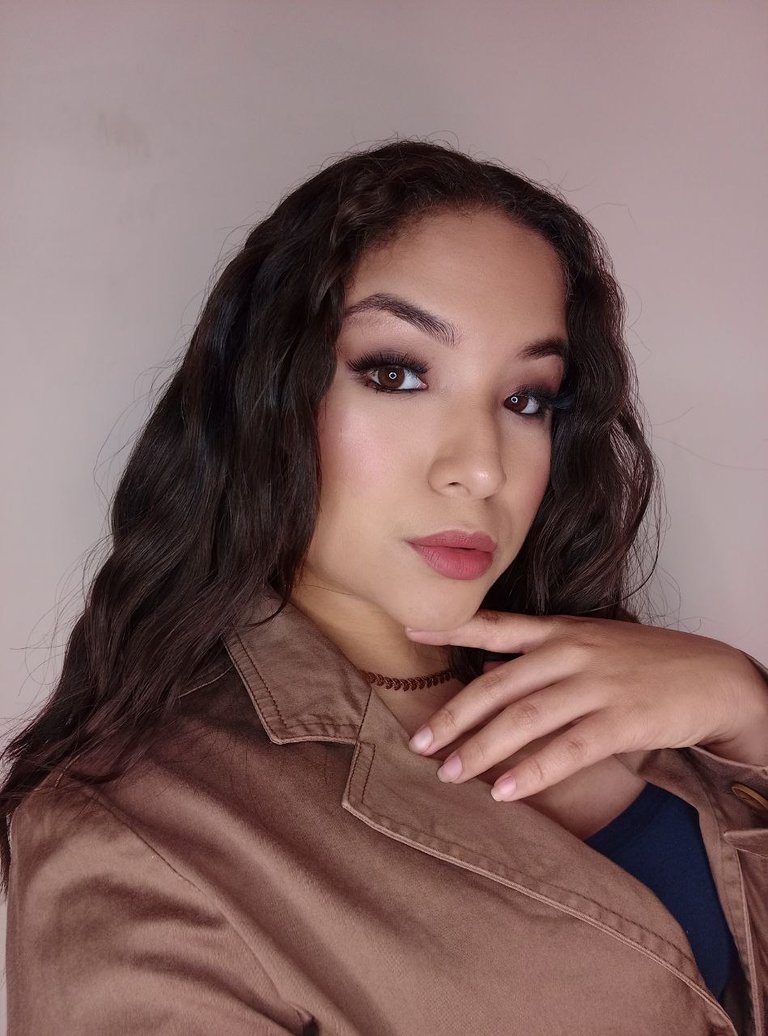
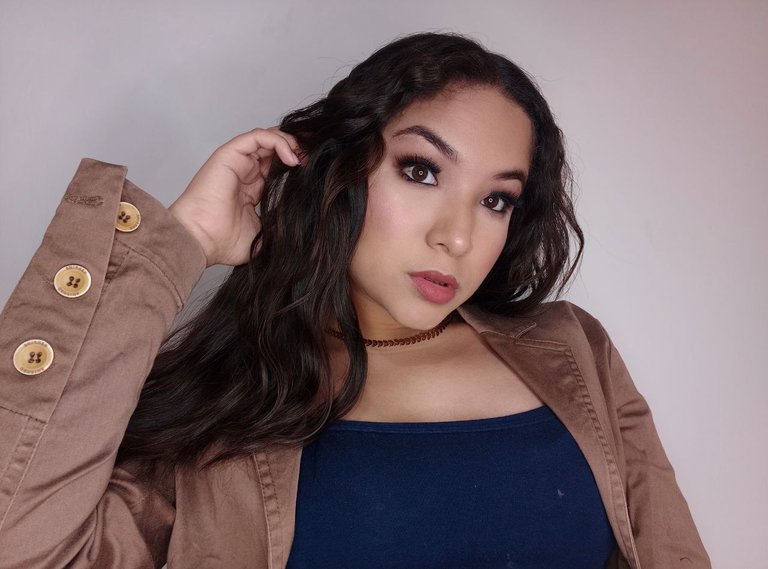
Los maquillajes ahumados son mis favoritos, realmente me encantan porque resaltan mucho mi mirada además que son maquillajes bastantes formales y que aportan presencia; el acabado de los maquillajes ahumados siempre me gustan y esta vez en particular decidí hacer un Smokey Marron. La verdad es que amo los Smokey pero en colores neutrales particularmente me gustan mucho.
The smoky makeups are my favorite, I really love them because they highlight my look and they are quite formal makeups that add presence; the finish of the smoky makeups I always like and this time in particular I decided to do a Brown Smokey. The truth is that I love the Smokey but in neutral colors I particularly like them a lot.
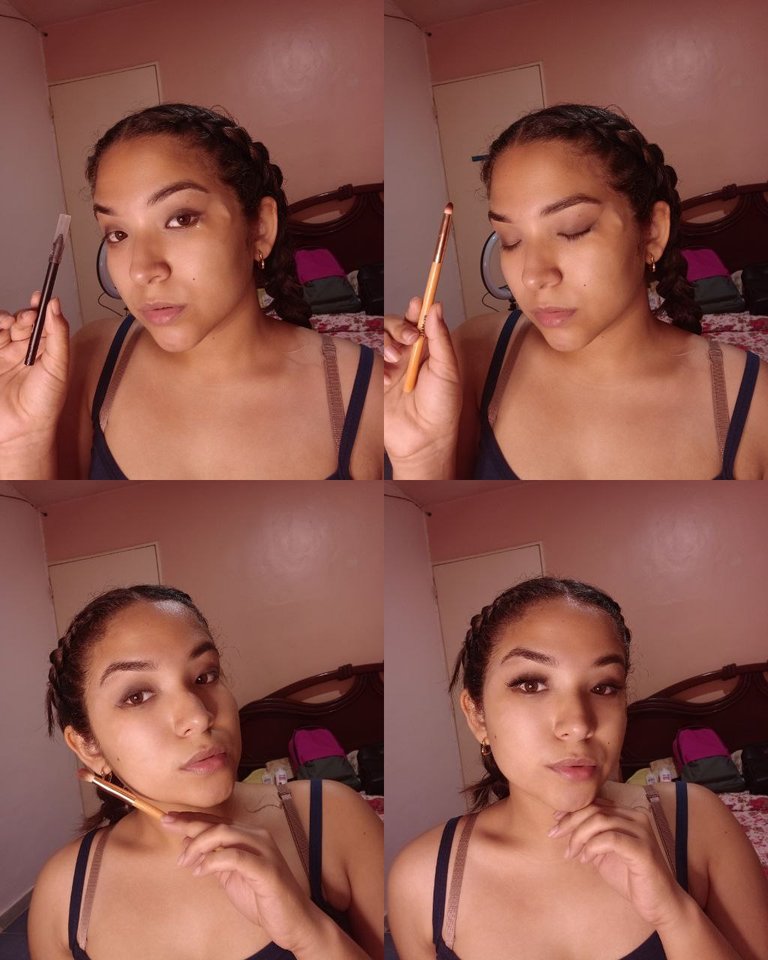
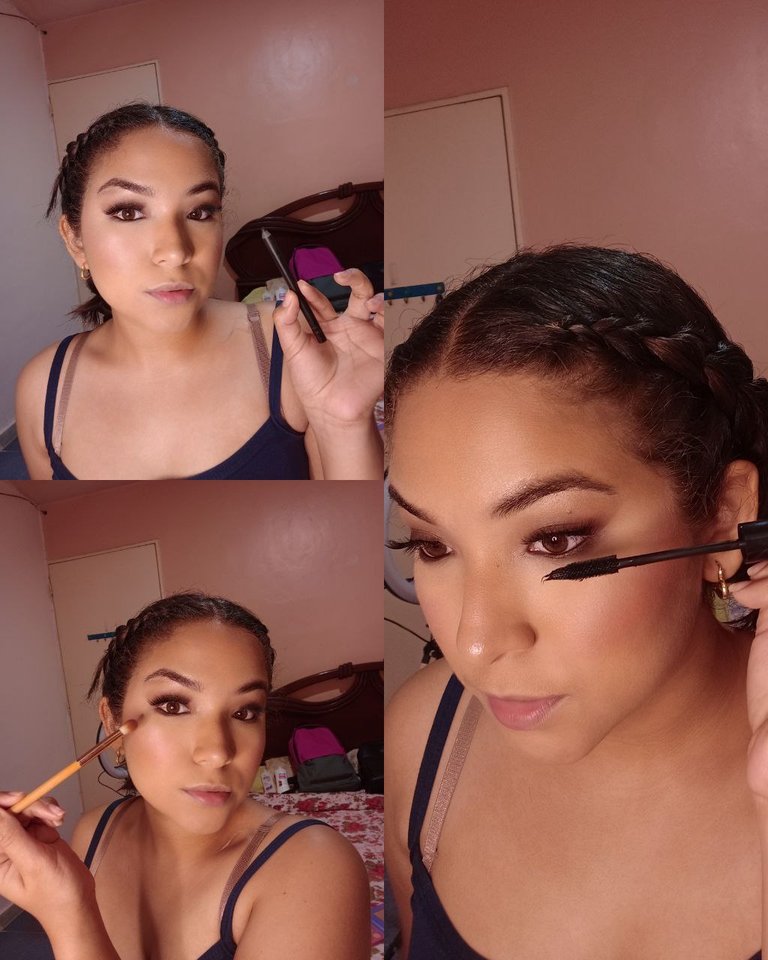
Para este maquillaje decidí comenzar con mis cejas y parpado ya listos; repasando un poco las hice con pomada y prepare el parpado con un corrector matte; con una brocha para posicionar color aplique uno de mis marrones más oscuros y neutros en el centro del parpado, luego lo difumine con una brocha amplia y lo complemente con un marrón más claro que se acerca bastante a mi tono de piel. Con otra brocha plana tome una sombra marrón satinada e ilumine el arco de la ceja.
Para dar el efecto ahumado que tanto me gusta lo que hice fue delinear sin cola con un lápiz en el, luego difumine esto con una brocha de bala y con una brocha para difuminar le coloque sombra marrón arriba. Le di el toque colocando las pestañas postizas.
For this makeup I decided to start with my eyebrows and eyelid ready; I went over them a bit with pomade and prepared the eyelid with a matte concealer; with a color positioning brush I applied one of my darker neutral browns in the center of the eyelid, then I blended it with a wide brush and complemented it with a lighter brown that is close enough to my skin tone. With another flat brush I took a satin brown shadow and illuminated the arch of the eyebrow.
To give the smoky effect that I like so much what I did was to outline without a tail with a pencil on it, then I blended this with a bullet brush and with a blending brush I placed brown shadow on top. I added the finishing touch by placing the false lashes.

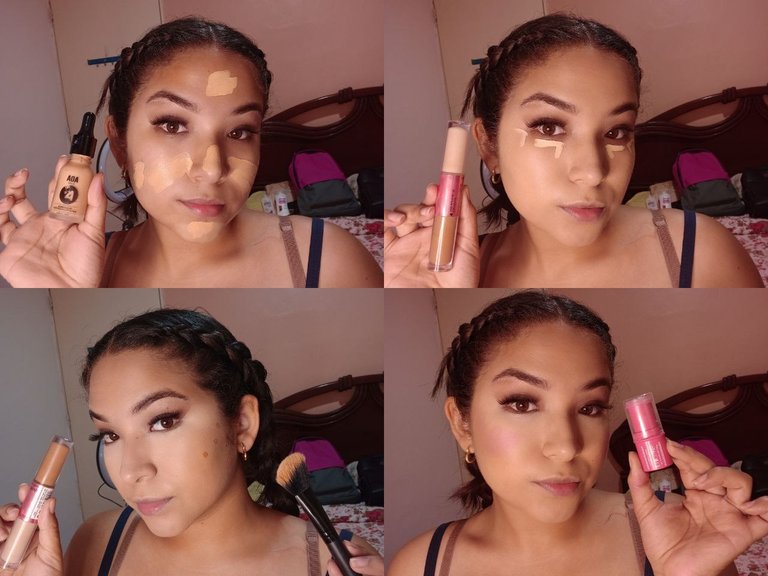
Para mi piel decidí usar la base AOA+, elegi usar el corrector de Ruby Rose del lado claro siempre me ha gustado la manera en la que se complementan esta base y este corrector. Después con el mismo duo, hice los contornos en crema, la verdad es que difumine de forma que se hicieran unos contornos más bien en forma de bronzer. Seguidamente agregue sutilmente un poco de rubor en crema que cuando se difumina y se integra con los contornos da un aspecto bien natural.
For my skin I decided to use the AOA+ foundation, I chose to use the Ruby Rose concealer on the light side, I always like the way this foundation and concealer complement each other. Then with the same duo, I did the cream contouring, the truth is that I blended in a way that made the contours more like a bronzer. Then I subtly added a little cream blush that when blended and integrated with the contours gives a very natural look.
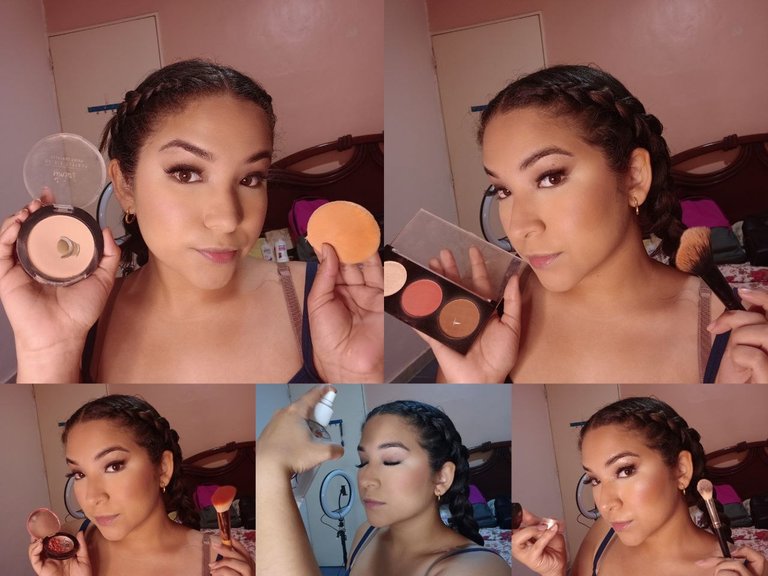
Selle mi maquillaje en crema con el polvo matte de Valmy, este polvo realmente me encanta para sellar porque es bastante liviano pero deja la apariencia de una piel bien matte; pase luego a sellar el trabajo en polvo del contorno y con el rubor de Jadu agregue. Luego refresque mi maquillaje y coloque iluminador en las partes altas del rostro.
I sealed my cream foundation with Valmy's matte powder, I really love this powder for sealing because it's quite light but leaves the look of matte skin; I then went on to seal the powder contour work and with Jadu's blush I added. I then refreshed my makeup and placed highlighter on the high points of my face.
Para el trabajo de las sombras en la parte inferior, rellene entonces la línea del agua y ahumé con un marrón y una brocha para difuminar; de manera que todo lo que hice en la parte superior la repetimos en la inferior. Para dar el mejor aspecto a la mirada también agregue máscara para pestañas en las inferiores.
En los labios quería algo nude pero que al mismo tiempo fuera cálido, por ello decidí delinear mis labios y rellenarlos un poco; luego rellene un poco con el labial nude de salome y para dar el toque cálido puse solo unos puntos del labial de jadu, el cual es un rojo bien saturado y cálido, casi naranja, esto me dio el resultado final.
For the shadow work on the bottom, I then filled in the water line and smoked with a brown and a smudge brush; so everything I did on the top I repeated on the bottom. To give the look the best look I also added mascara to the lower lashes.
On the lips I wanted something nude but at the same time warm, so I decided to outline my lips and fill them in a little bit; then I filled in a little bit with the nude lipstick from salome and to give the warm touch I put just a few dots of jadu lipstick, which is a well saturated and warm red, almost orange, this gave me the final result.
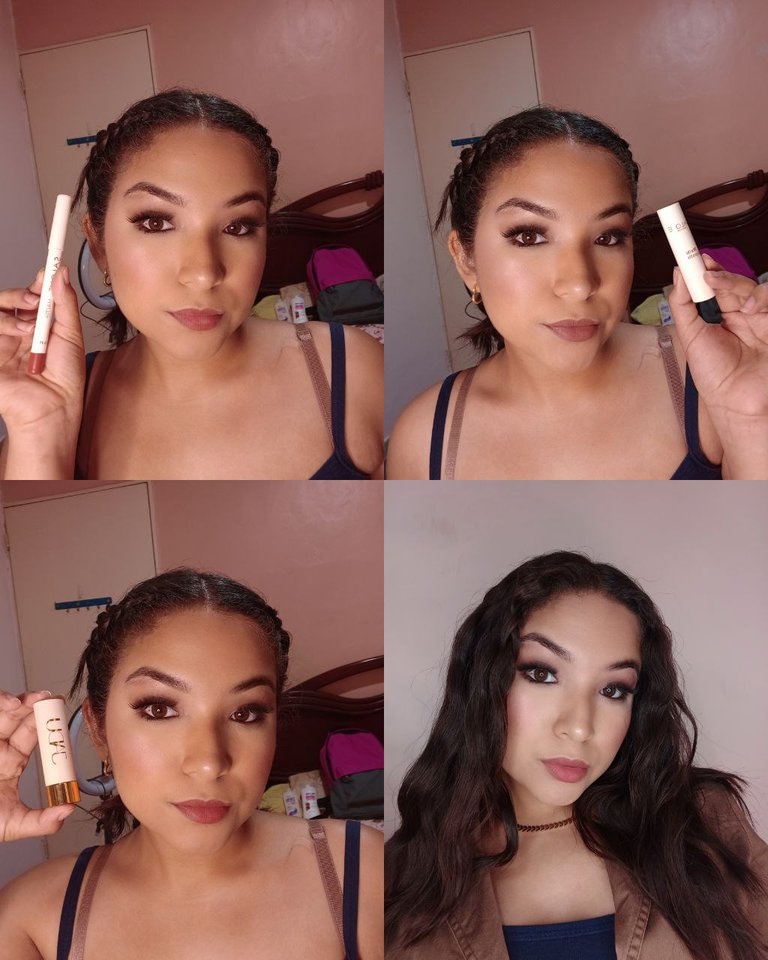
La verdad es que este maquillaje realmente me encanto, quedo bastante sutil pero poderoso; me encanta la manera en la que mis ojos resaltan tanto y la piel se ve bastante nude. Un maquillaje bastante social.
The truth is that I really loved this makeup, it was quite subtle but powerful; I love the way my eyes stand out so much and the skin looks quite nude. Quite a social makeup.
