DIY: Making mini Christmas trees with ribbon 🎄🎄 (Eng - Esp)
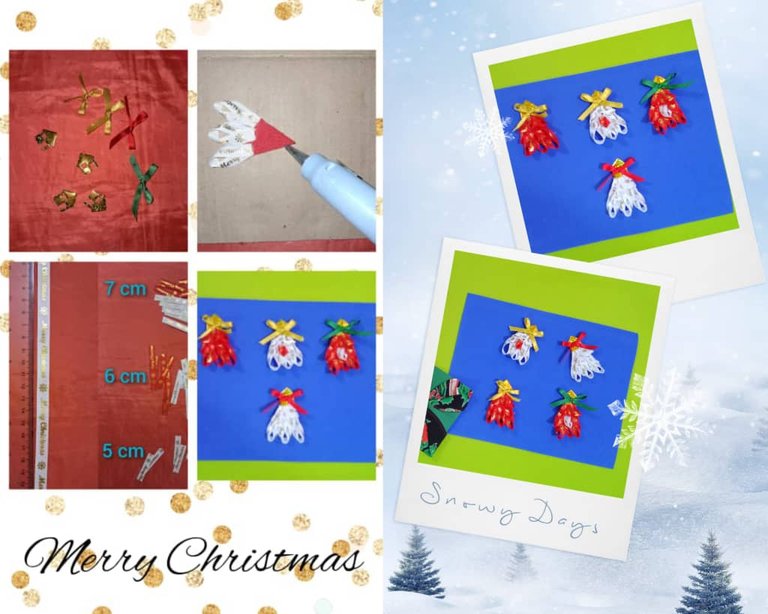
Greetings creative community and artisan friends of #Hive, it is a pleasure to greet you wishing you to have a great weekend together with your loved ones, we are in the last day of November to start the most beautiful month of the year and the celebration of Christmas, a time full of colors, brightness and beautiful decorations, in which we remember and celebrate the birth of Jesus; a few hours before the end of the month I continue to advance in the realization of Christmas decorations, this time I share the development of Mini decorative trees with ribbon, they are a very nice project that I liked since the teacher of the sewing course raised the idea and I was encouraged to make them, it is really simple to do and the materials required are few, I used ribbons and golden Christmas houses to decorate them, which come in a ribbon that I bought in the Castle, these are very useful when decorating because they bring different figures, I invite you to join me in the process of elaboration.
Saludos comunidad creativa y amigos artesanos de #Hive, es un placer saludarles deseando que tengan un excelente fin de semana en unión de sus seres queridos, estamos en el último día del mes de noviembre para dar inicio al mes más hermoso del año y la celebración de la Navidad, una época llena de colores, brillo y hermosas decoraciones, en la cual recordamos y celebramos el nacimiento de Jesús; a pocas horas el terminar el mes sigo avanzando en la realización de los adornos navideños, en esta ocasión comparto la elaboración de Mini árboles decorativos con cinta, son un proyecto muy lindo que me gustó desde que la profesora del curso de costura planteó la idea y me animé a hacerlos, es realmente sencillo de hacer y los materiales que requiere son pocos, además los decoramos al gusto de cada persona, para su decoración usé lazos y casas navideñas doradas, las cuales vienen en una cinta que compré en el Castillo, estas son muy útiles cuando de decorar se trata pues traen diferentes figuras, les invito me acompañan en el proceso de elaboración.

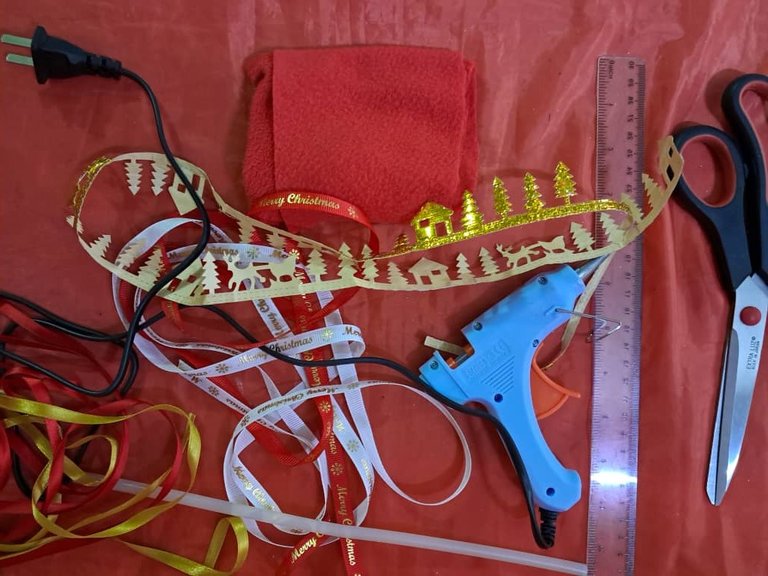
The materials used were:
Printed ribbon (white and red)
Ribbon for the bows (gold, red and green)
Silicone stick
Polar blanket fabric (red)
Scissors
Silicone gun
Pencil
Ruler
Los materiales usados fueron:
Cinta estampada (blanca y roja)
Cinta para los lazos (dorada, roja y verde)
Silicón en barra
Tela manta polar (roja)
Tijera
Pistola de silicón
Lápiz
Regla

Elaboration
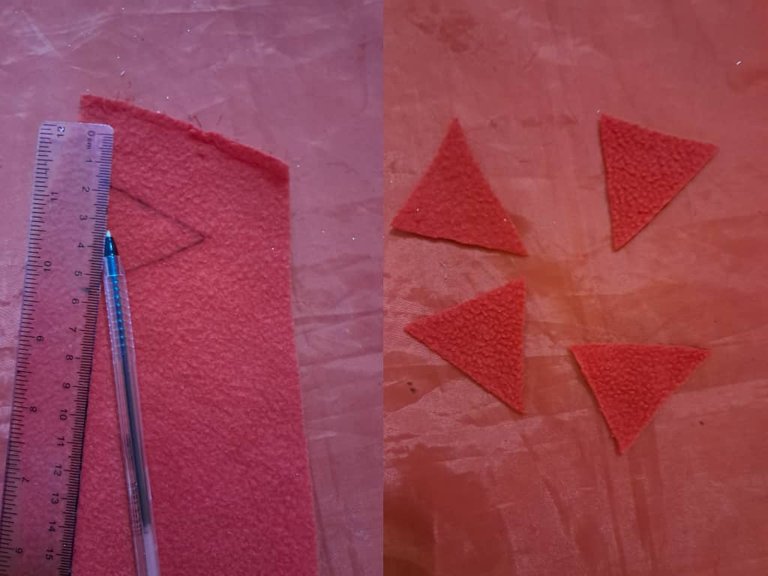
The first step for the elaboration of these beautiful trees was to mark and cut four triangles of approximately 3 * 3.5 centimeters, I marked them in polar blanket fabric, since it is ideal to use silicone, besides it is a very soft material that allows us to work comfortably.
Elaboración
El primer paso para la elaboración de estos hermosos árboles fue marcar y cortar cuatro triángulos de aproximadamente 3 * 3.5 centímetros, los marqué en tela manta polar, ya que es ideal para usar silicón, además es un material muy suave que nos permite trabajar cómodamente.

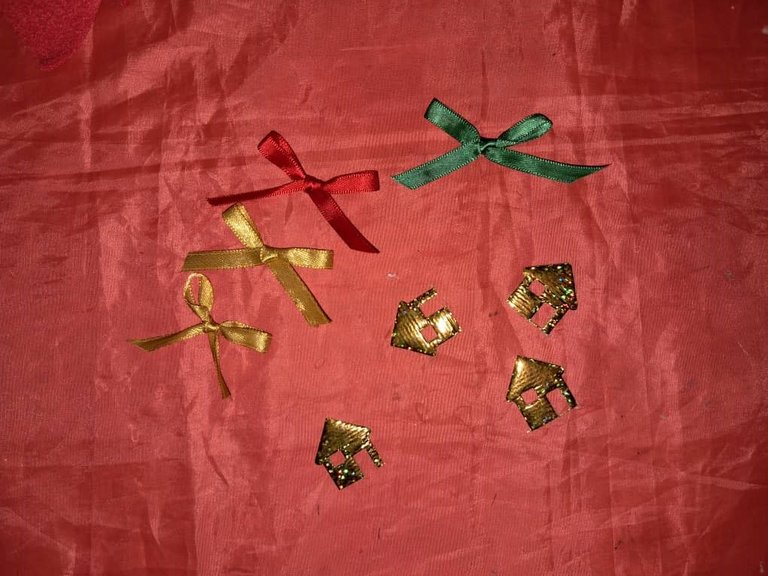
Once the triangles were cut, which will be the base of the trees, the next step was to make the ribbons in various colors, I used; gold, red and green, with the idea of contrasting with the colors of the ribbons of the trees which are red and white, I also cut four houses that will go on top of the trees, regularly a star or bow is placed at the top of the tree, this time I decided to add a house and a bow.
Cortados los triángulos, que serán la base de los arbolitos, el siguiente paso fue hacer los lazos en cinta de varios colores, utilicé; dorado, rojo y verde, con la idea de contrastar con los colores de las cintas de los arbolitos que son roja y blanca, también corté cuatro casas que irán en la parte superior de los árboles, regularmente se coloca en la punta del árbol una estrella o lazo en esta oportunidad decidí agregar una casita y un lazo.

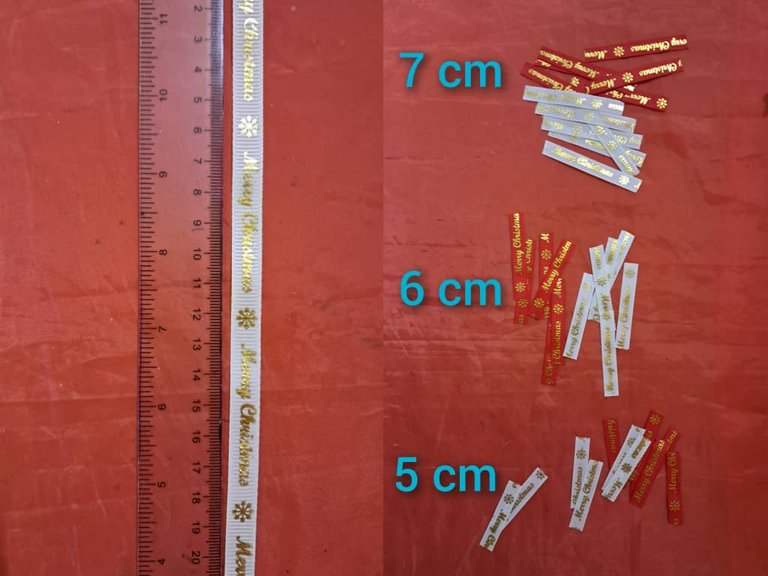
Then I cut strips of seven (7), six (6) and five (5) centimeters long, in white and red colors, these will be used to assemble the trees.
Luego corté tiras de siete (7), seis (6) y cinco (5) centímetros de largo, en colores blanco y rojo, estas servirán para armar los arbolitos.

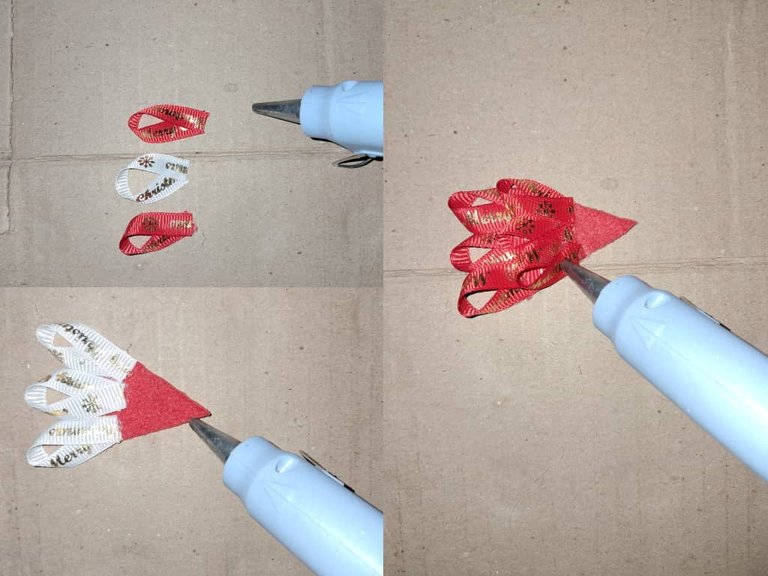
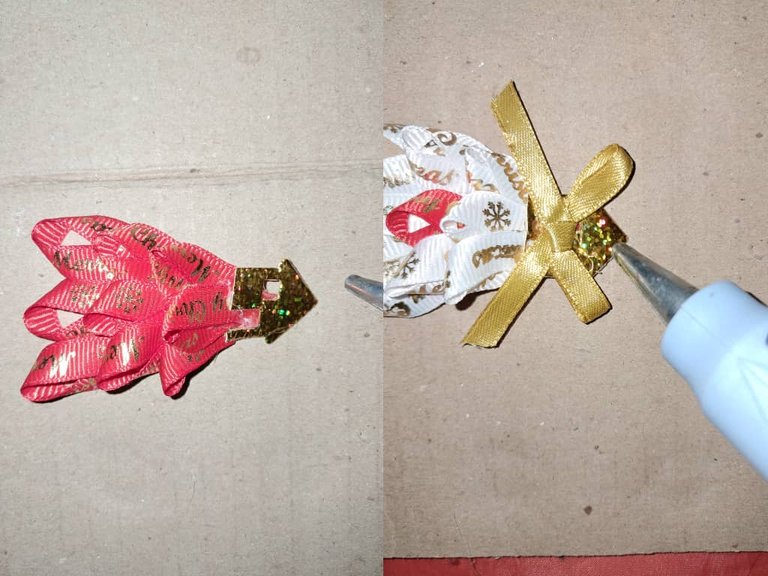
Then I joined the ribbons facing back to front, added a silicone stitch and in the triangle I placed the larger ribbons at the bottom, in the middle the six (6) centimeters and at the bottom the small ribbons, when placing the ribbons it is important to cover the joints of the previous ones to give a better finish to the tree.
Seguidamente uní las cintas enfrentando revés con derecho, agregué un punto de silicón y en el triángulo coloqué las cintas más grandes la parte de abajo, en el medio las de seis (6) centímetros y en la parte inferior las cintas pequeñas , al colocar las cintas es importante que cubra las uniones de las anteriores para darle un mejor acabado al arbolito.

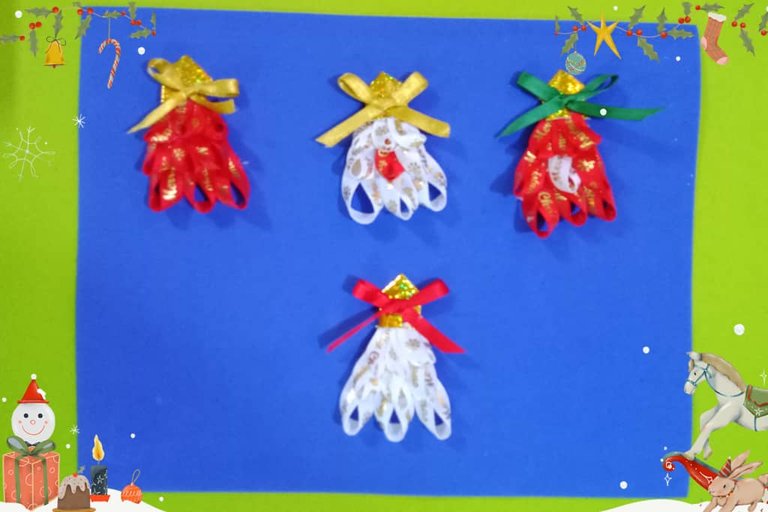
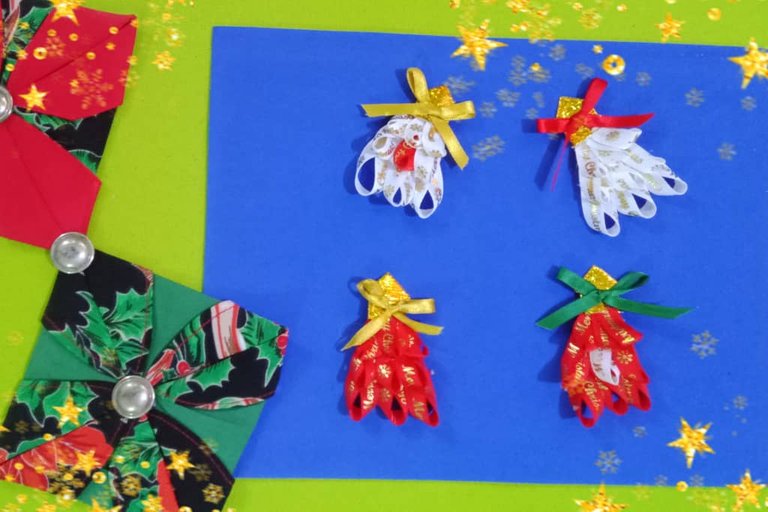
Glued the ribbons on the triangle and assembled the mini tree, I added the little house at the tip and on top of it a bow, as I mentioned I used three color ribbon for the bows, I loved the result because they create a nice contrast with the ribbons of the tree, these have the word Merry Christmas and some decorations like snowflakes written on them.
Pegadas las cintas en el triángulo y armado el mini árbol, agregué la casita en la punta y encima de esta un lazo, como ya lo mencioné utilicé para los lazos cinta de tres colores, el resultado me encantó porque crean un lindo contraste conde la cintas del árbol, estas traen escrita la palabra Feliz Navidad y algunas decoraciones como copos de nieve.

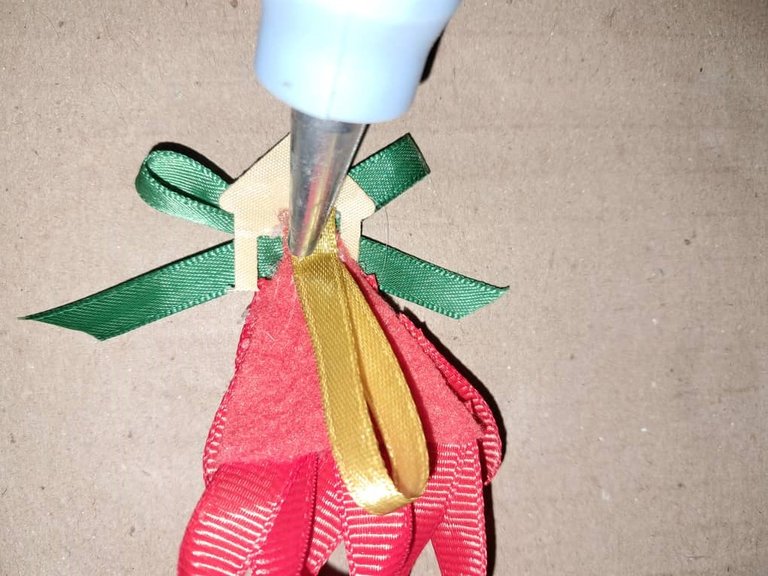
To finish I placed a ribbon on the back that will serve as a hanger for the trees and with these simple steps I finished a nice mini Christmas trees.
Para finalizar coloqué en la parte de atrás una cinta que servirá de colgadero para los arbolitos y con estos sencillos pasos terminados unos lindos mini árboles navideños.

I loved this project, the mini trees look great and the bows of different colors make them stand out, its elaboration is simple and can be used to decorate the tree, also to decorate boots bells, among other Christmas decorations, I hope the tutorial will be useful.
This is my entry to the Get Active! Initiative Hive DIY N° 22 / Christmas Decoration
Este proyecto me encantó, los mini árboles se ven muy bien y los lazos de diferentes colores los hacen resaltar, su elaboración es sencilla y se pueden usar para decorar el árbol, también para adornar botas campanas, entre otras decoraciones navideñas, espero el tutorial les sea de utilidad.
Esta es mi entrada a la Get Active! Initiative Hive DIY N° 22 / Decoración navidad


¡Bendiciones!
Blessings!


Translated with https://www.deepl.com/translator
          All images are my own, captured by a Síragon LC-3000 camera.

   Todas las imágenes son de mi autoría, capturadas por una cámara Síragon LC-3000.
These are so cute decorative items for the Christmas. Little christmas trees! #Lovely :)
I loved the result, they look great and are useful for decorating the tree and other Christmas ornaments, thanks for the support 😊🎄
Christmas is indeed a time of colors, decorations, and fun. Your mini Christmas trees look amazing and are perfect for home decorations for the festive season. Well done.
Hi @diyhub, at first I wasn't sure if they would look good, but I liked the result, they look spooky and are perfect to decorate the tree, plus they are simple to make. 😍🎄🎄
Happy weekend!
@belkyscabrera saludos, están genial los mini árboles de navidad.
Hola amiga me alegra que te hayan gustado, es un proyecto sencillo de hacer y requiere pocos materiales. ❤️😍🎄
Saludos!
Congratulations @belkyscabrera! You have completed the following achievement on the Hive blockchain And have been rewarded with New badge(s)
You can view your badges on your board and compare yourself to others in the Ranking
If you no longer want to receive notifications, reply to this comment with the word
STOPCheck out our last posts:
Wow! thank you so much.
Happy start of the month!
Well-deserved @belkyscabrera! Your commitment to daily blogging is a shining example of what it means to be a dedicated Hive user.
Fantastic idea! I should try it with my niece!