🌻🧺Cesta tejida de papel reciclado 🧺🌻//🌻🧺Recycled paper woven basket🌻🧺

Que feliz y hermoso día mis amigos de está linda comunidad trabajadora 😍es un placer para mi poder saludarlos y volver con mis trabajos de reciclaje los que más amo realizar entre otras cosas ,como se dieron cuenta hoy traje un trabajito muy bonito que quise compartir con ustedes ...
Como se dieron cuenta en la foto del principio se trata de una linda cesta para colocar tus cosas ,yo la hice para decorar mi rinconcito de costura ,ya que tenía mis tijeras y otras herramientas desordenadas asi que dije vamos a realizar una cesta ,años atrás yo había hecho una pero se dañó ahora que tengo la oportunidad de hacerla no lo pensé dos veces y hoy les he traído el proceso ,no requiere de muchos materiales ya que usé papel de alguna revista que ya no servía y cartón es muy sencilla y práctica de realizar,te va a encantar el resultado ,🥰.
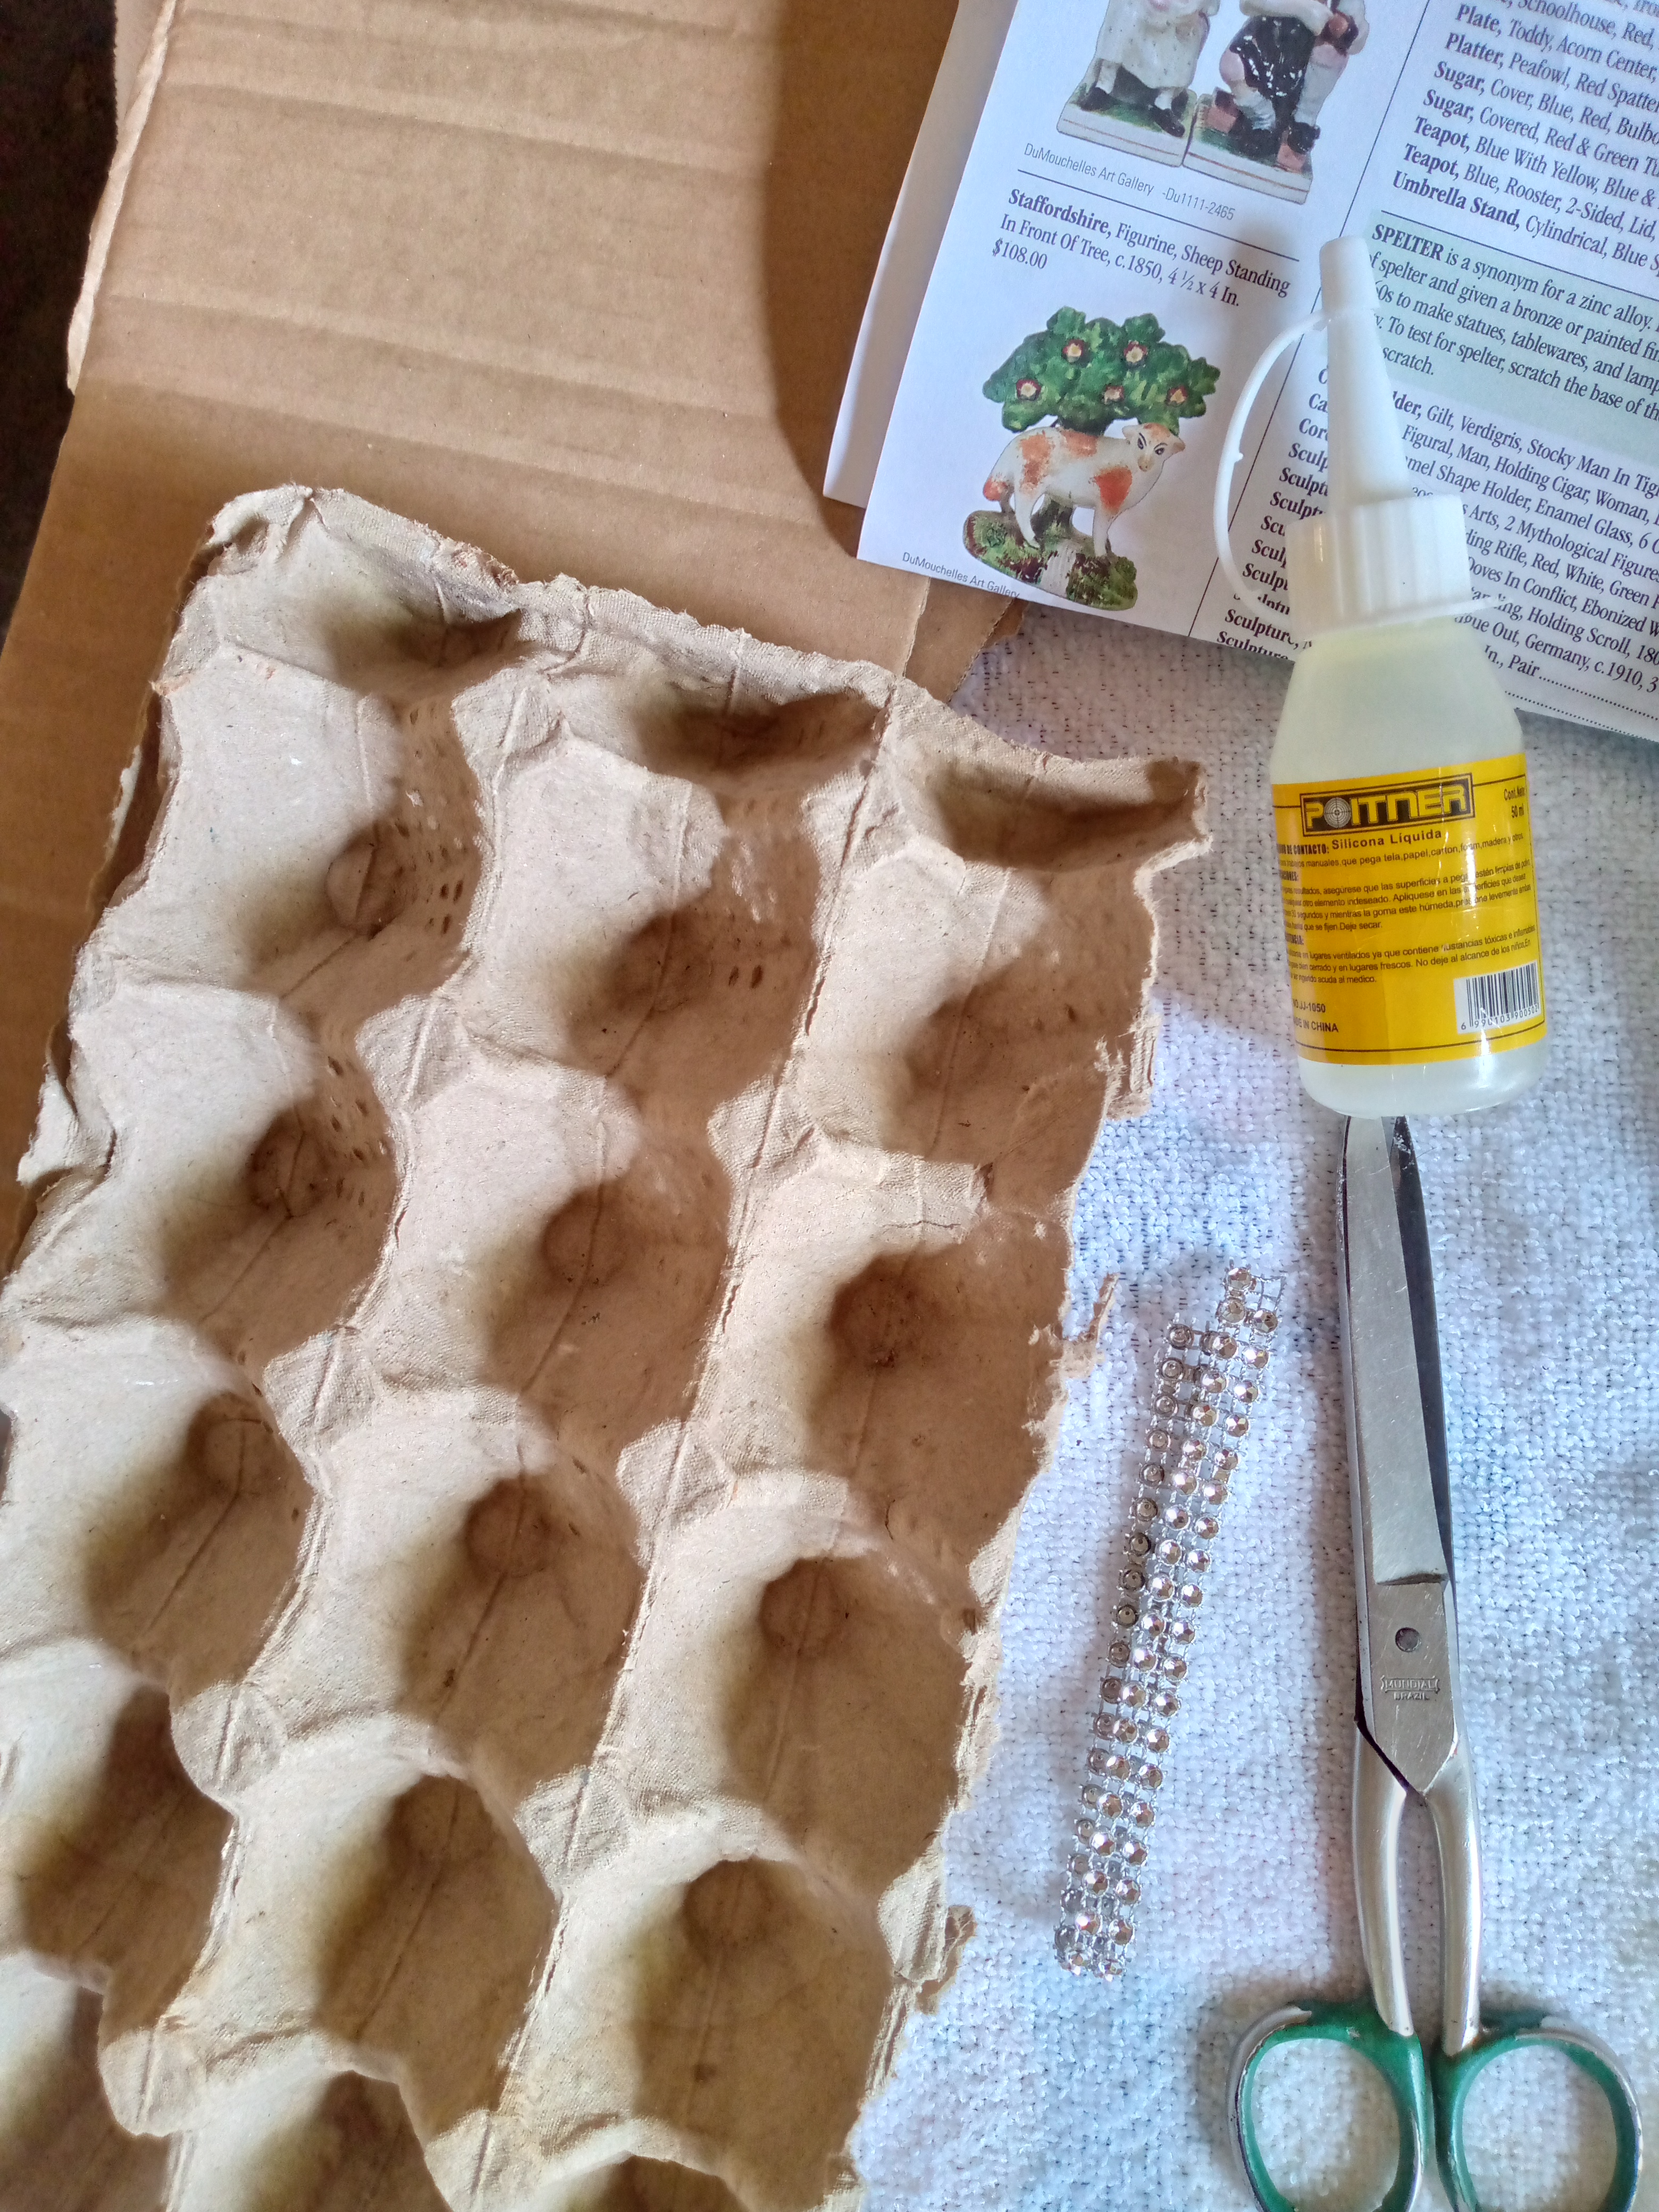
Materiales:
- Cartón
- Silicón
- Cartón de huevos
- Decoración plateada
- tijeras
- Papel de revista o periódico
(Pasos a seguir.)
Paso 01
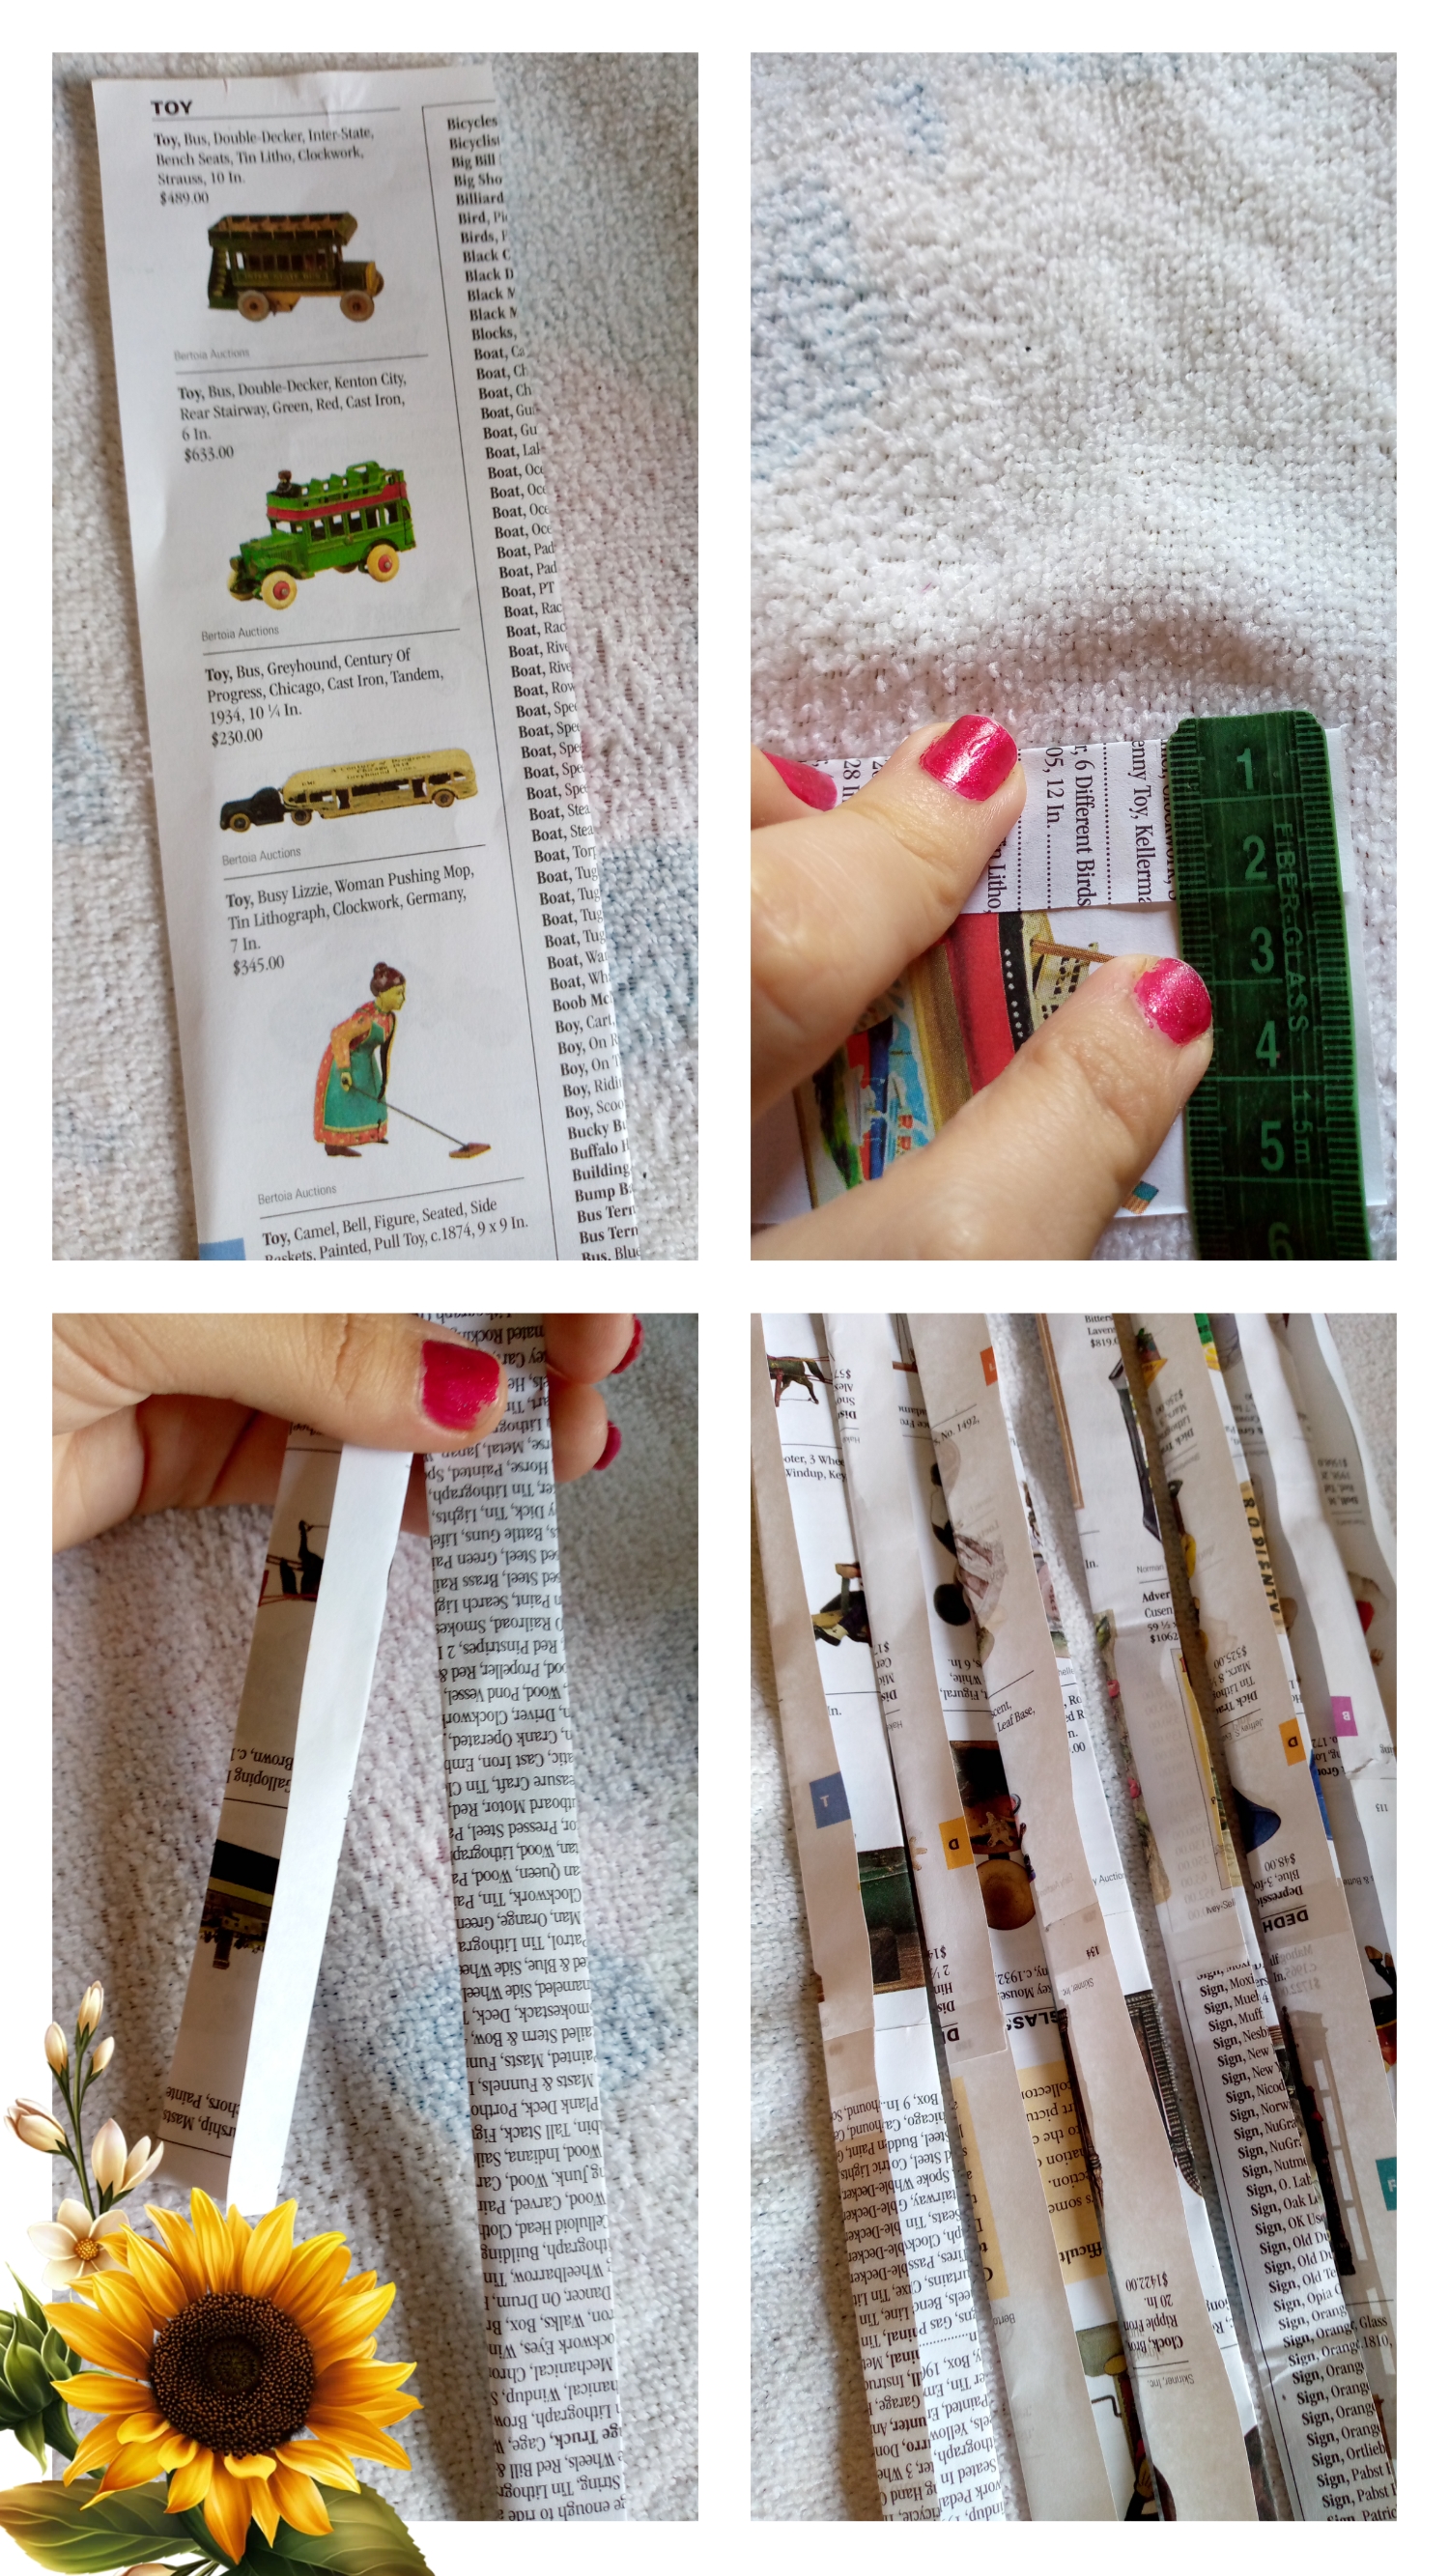
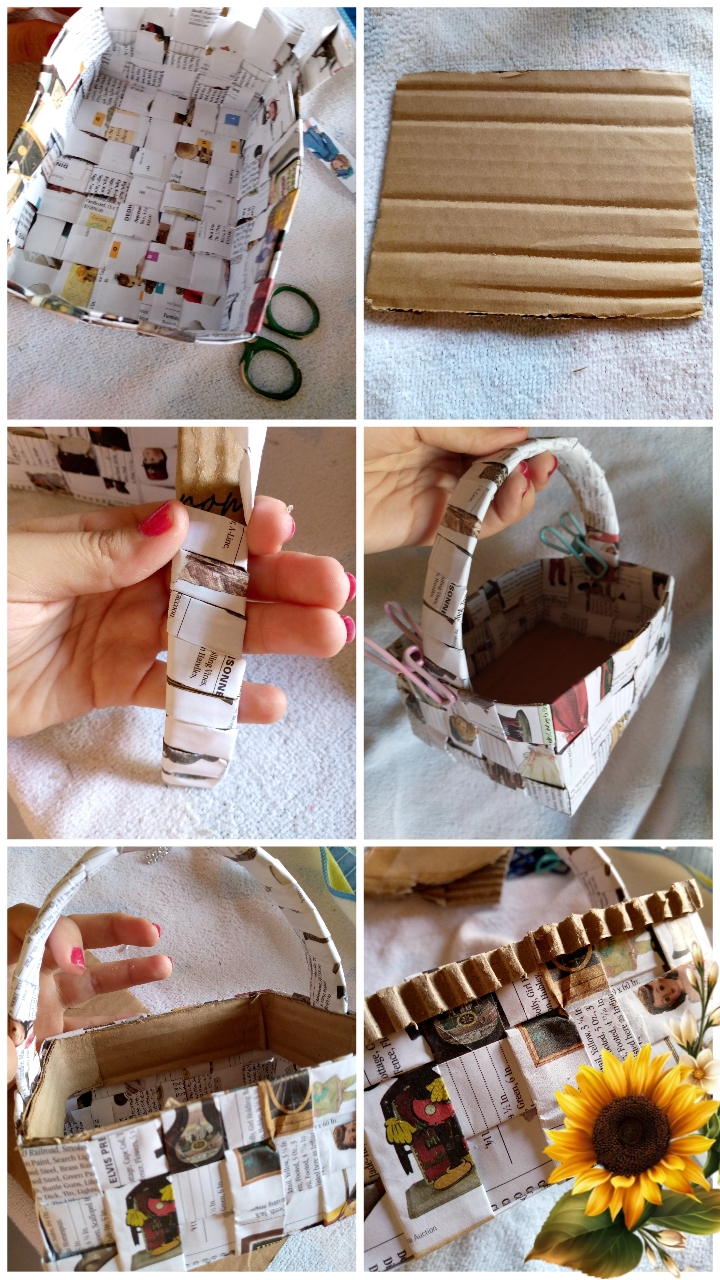
Para empezar amigos comencé cortando tiras de papel de 30 cm de largo x 7 cm de ancho to corté 14, 7 horizontales y 7 verticales para tejer mi cesta si ustedes quieren su cesto mas grande pueden aumentar las tiras,después que las tenía listas procedí a doblarlas de unos 2 cm de grosor ,y asi hice con todas .
Paso 02
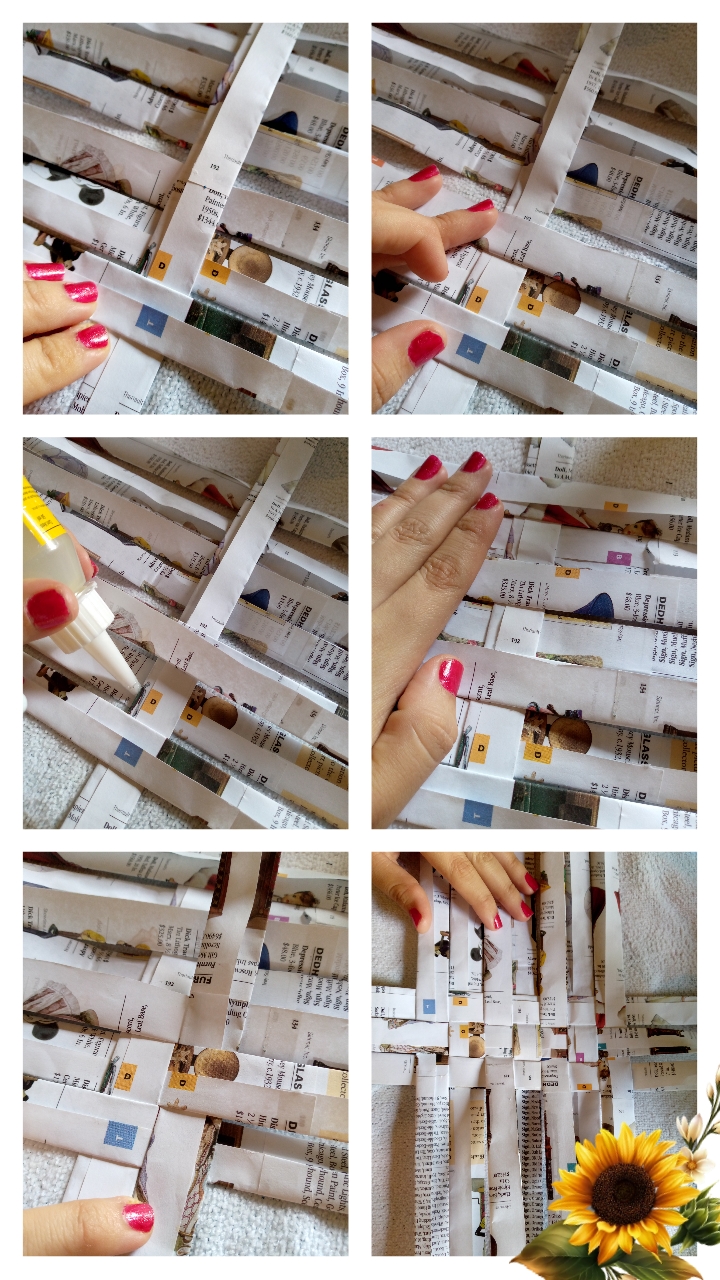
Ya listas nuestras tiras de papel vamos a empezar a tejer ,esto es algo sencillo porque empezamos introduciendo una tira en medio de las otras y vamos a ir tejiendo poco a poco pasando esa tira por arriba y por abajo de las otras horizontales y repetimos este proceso con las otras y vamos pegando con silicón para que no se nos suelte el tejido.
Paso 03
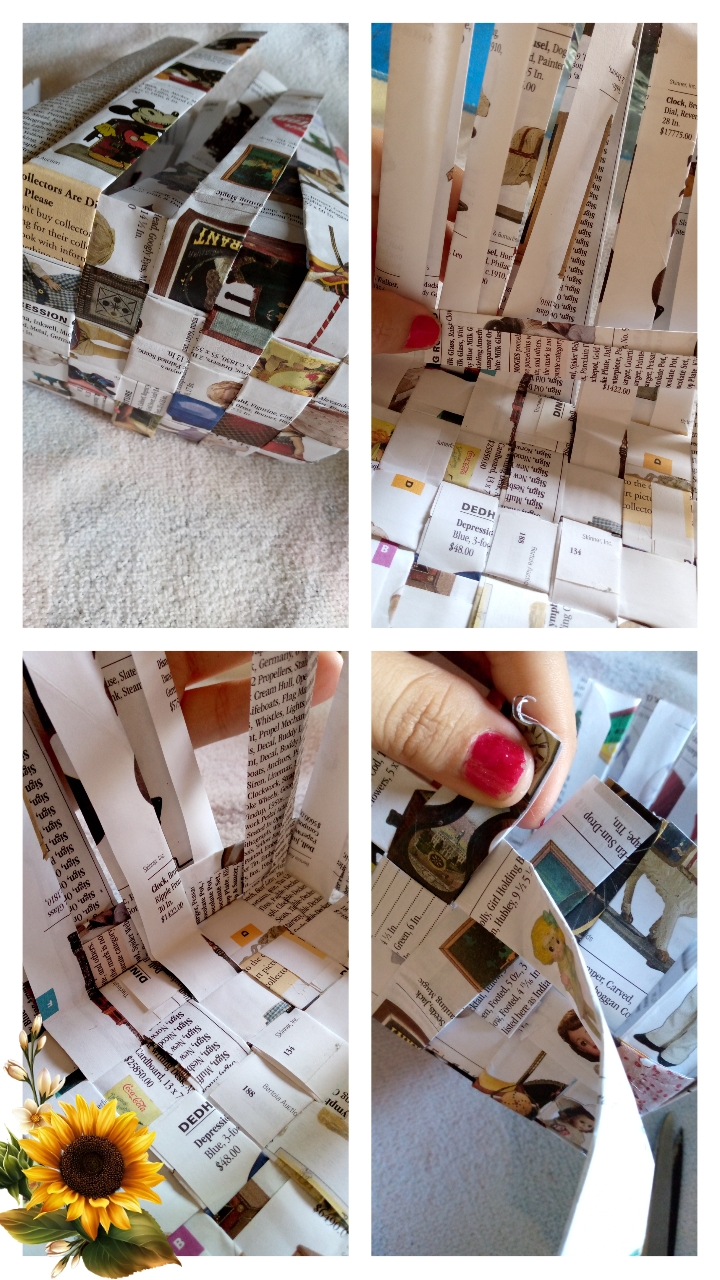
Para el siguiente paso vamos a doblar nuestras tiras de papel hacia arriba para darle forma a la cesta y empezamos a tejer el contorno aquí yo usé tres tiras y fui haciendo el mismo procedimiento que hice abajo con mi base.
Paso 04
Luego procedemos a hacer la base por dentro de la cesta de cartón para hacerla usé las siguientes medidas 14 cm de largo x 10 de ancho ,lo corté y lo pegué adentro de la cesta, corte una cinta de cartón para mí asa y otra para el contorno de arriba de la cesta para sostener bien mi cesta ( asa de la cesta 5.5 cm de largo x 2 cm ancho , Cinta del contorno de la cesta 29 cm de largo x 4 cm de ancho)despues de tener esto listo forré mi asa con una tira de papel y lo pegué de ambos lados de la cesta,con unos ganchos de ropa lo presioné para que no se despegara y adorné el contorno por fuera de mi cesta con una tira delgada de cartón corrugado.
Paso 05
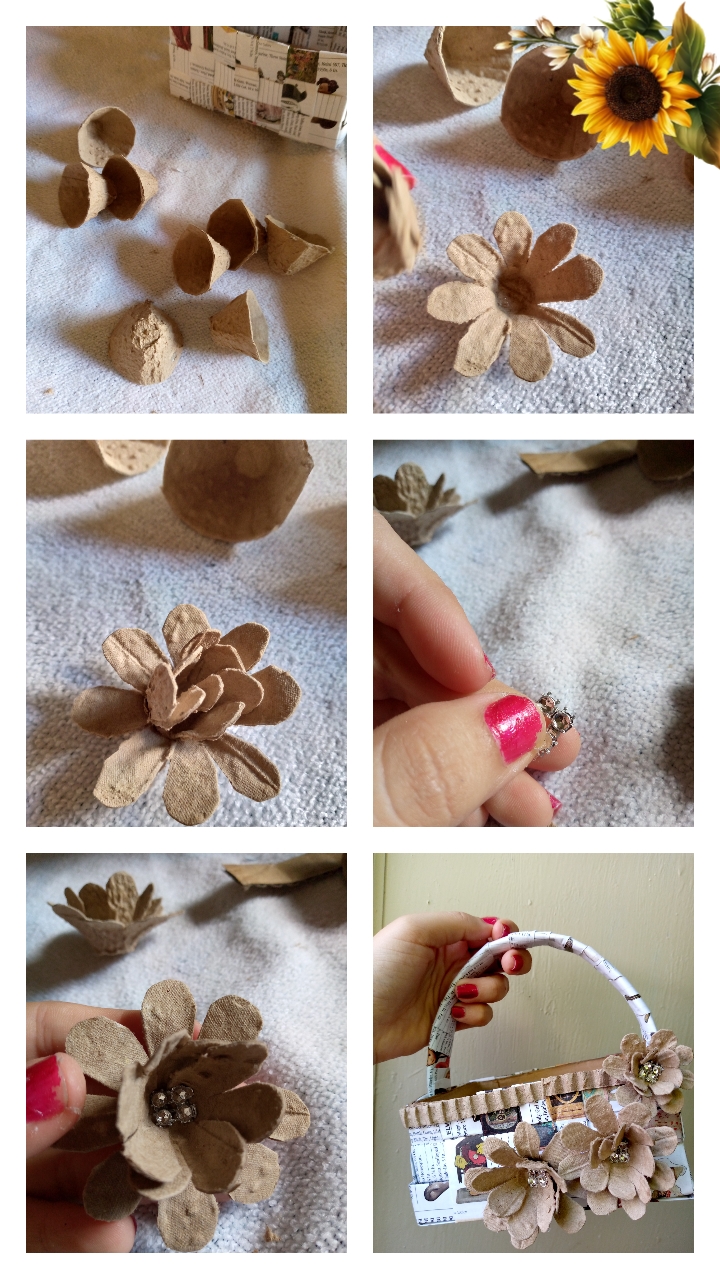
Como último paso hice unas flores con cartón de huevo les di forma de cono y procedí a hacer los pétalos por cada flor hice dos una de base y otra que formará el capullo para que se viera más lindo le coloqué un detalle plateado de trabajo anteriores luego las ubiqué donde más se veian y las pegué con mi silicón así quedó mi trabajo terminado .
Resultado!
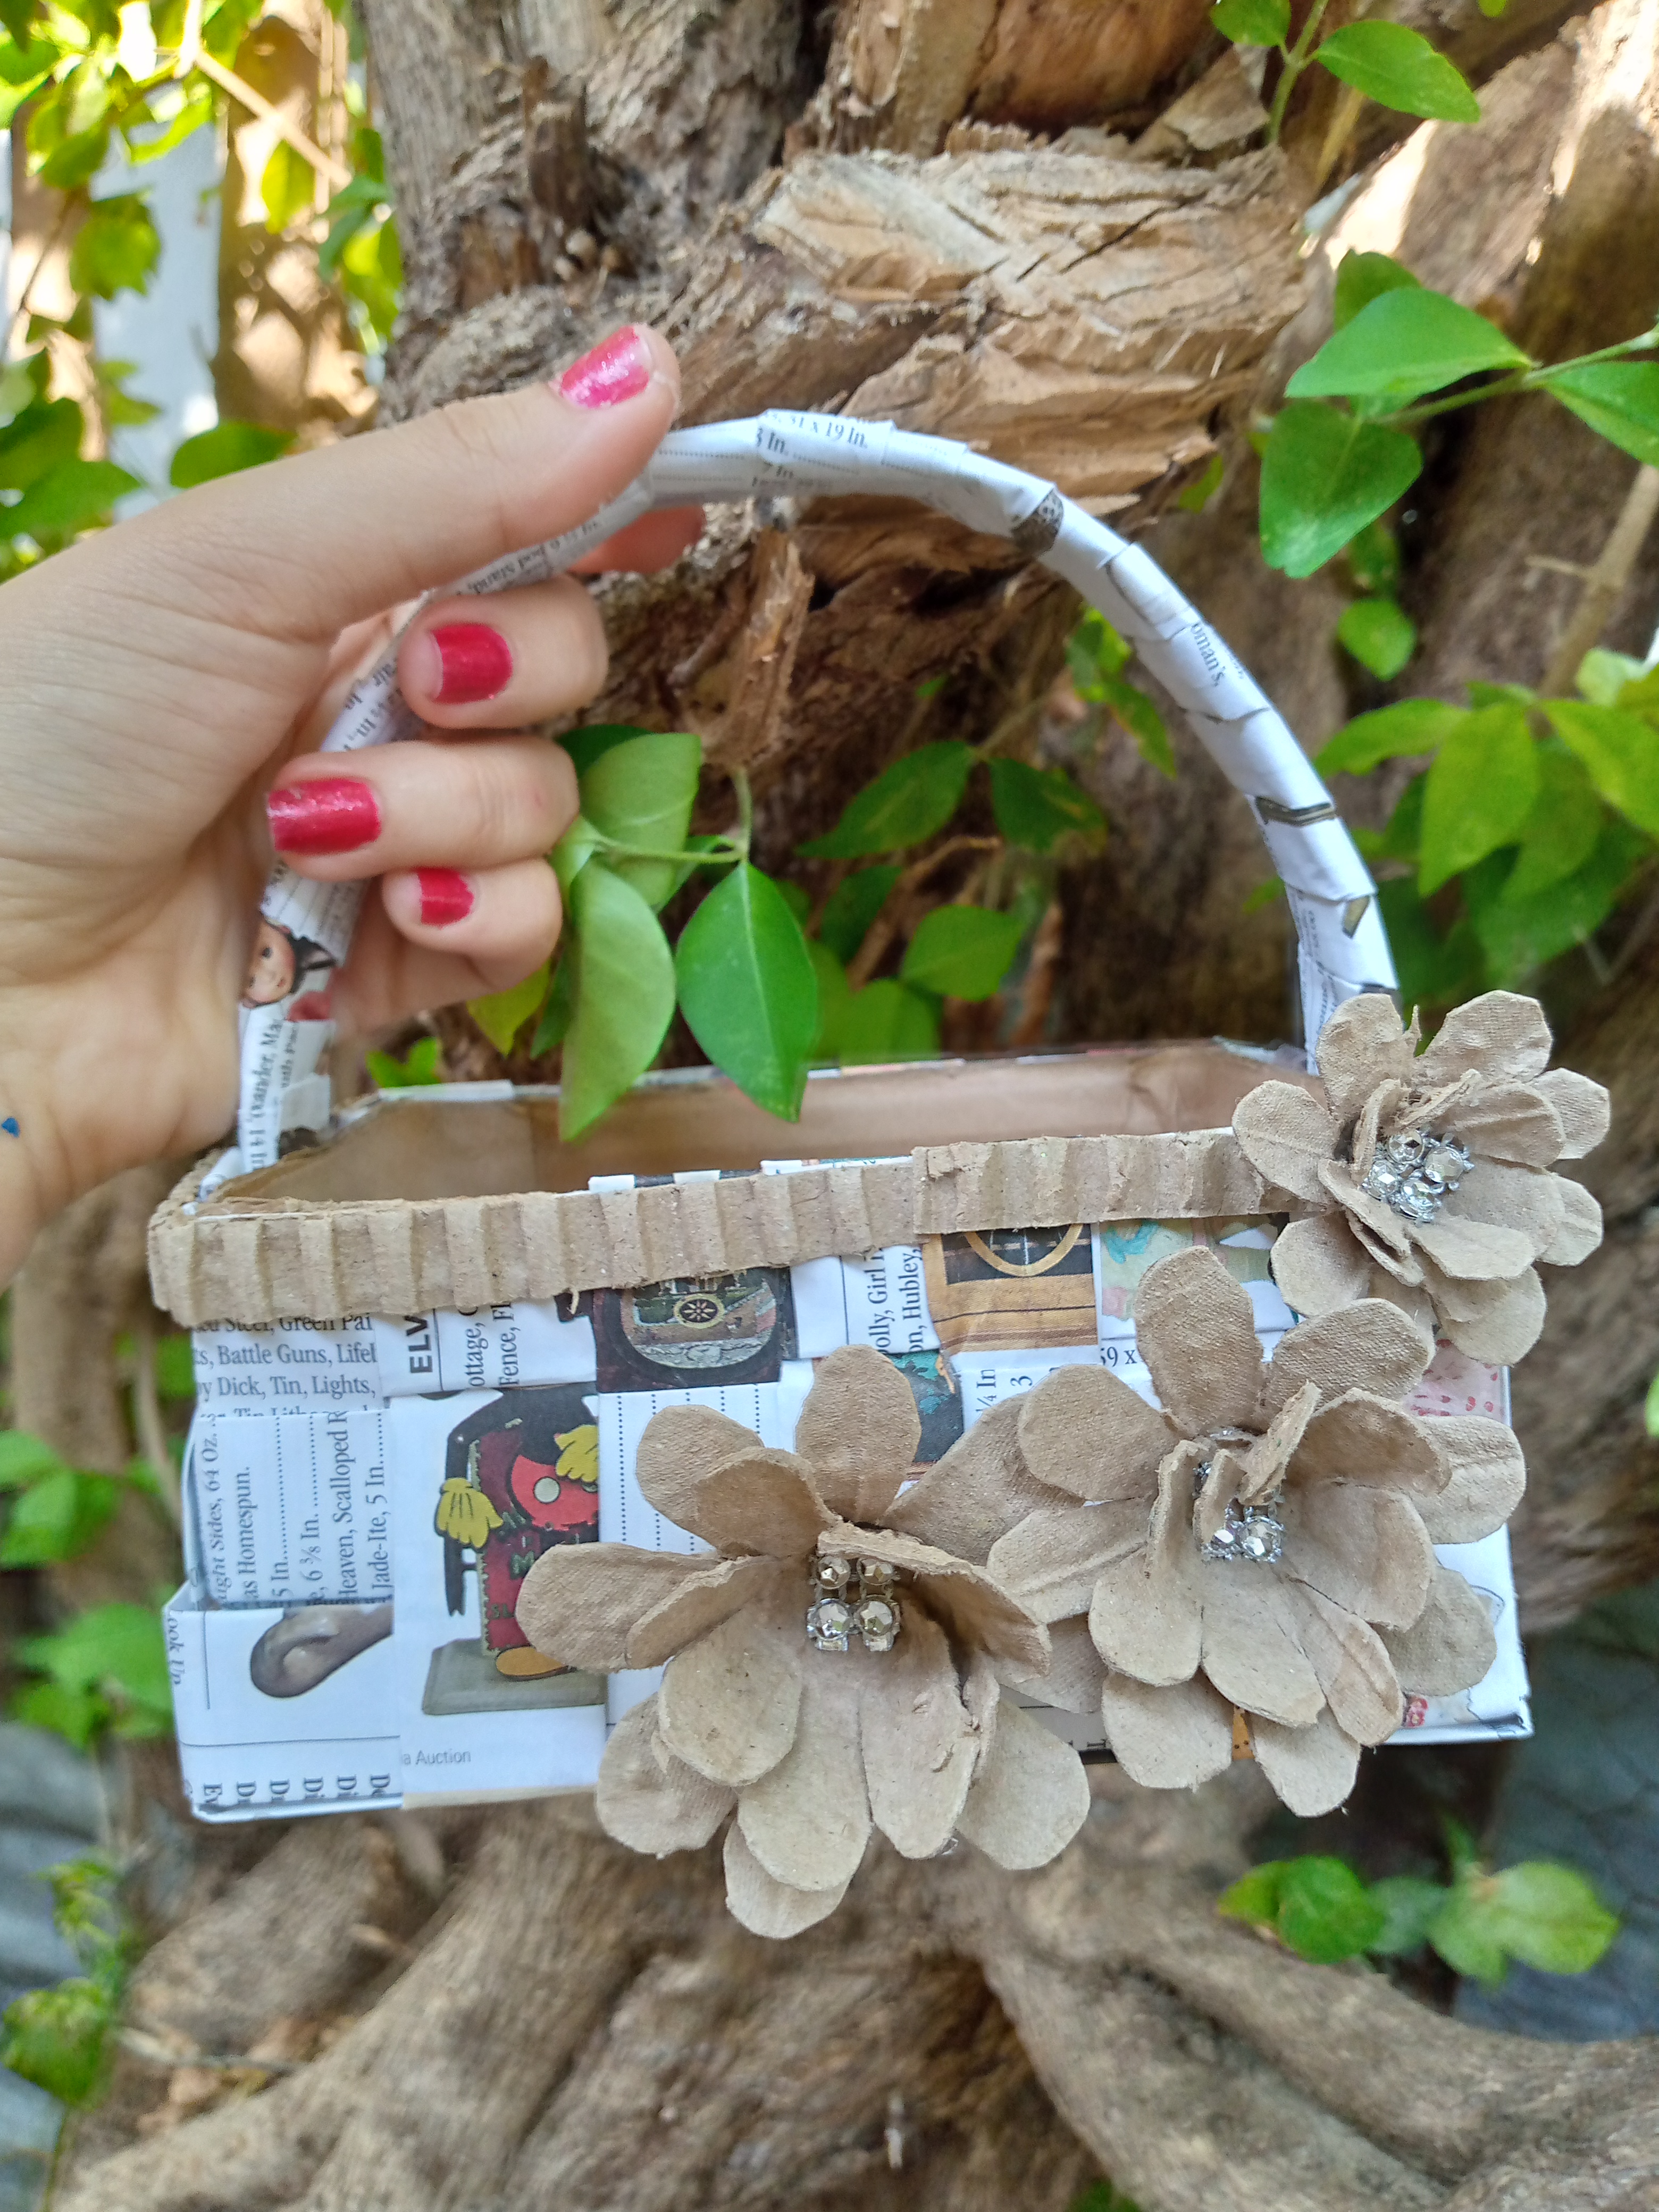
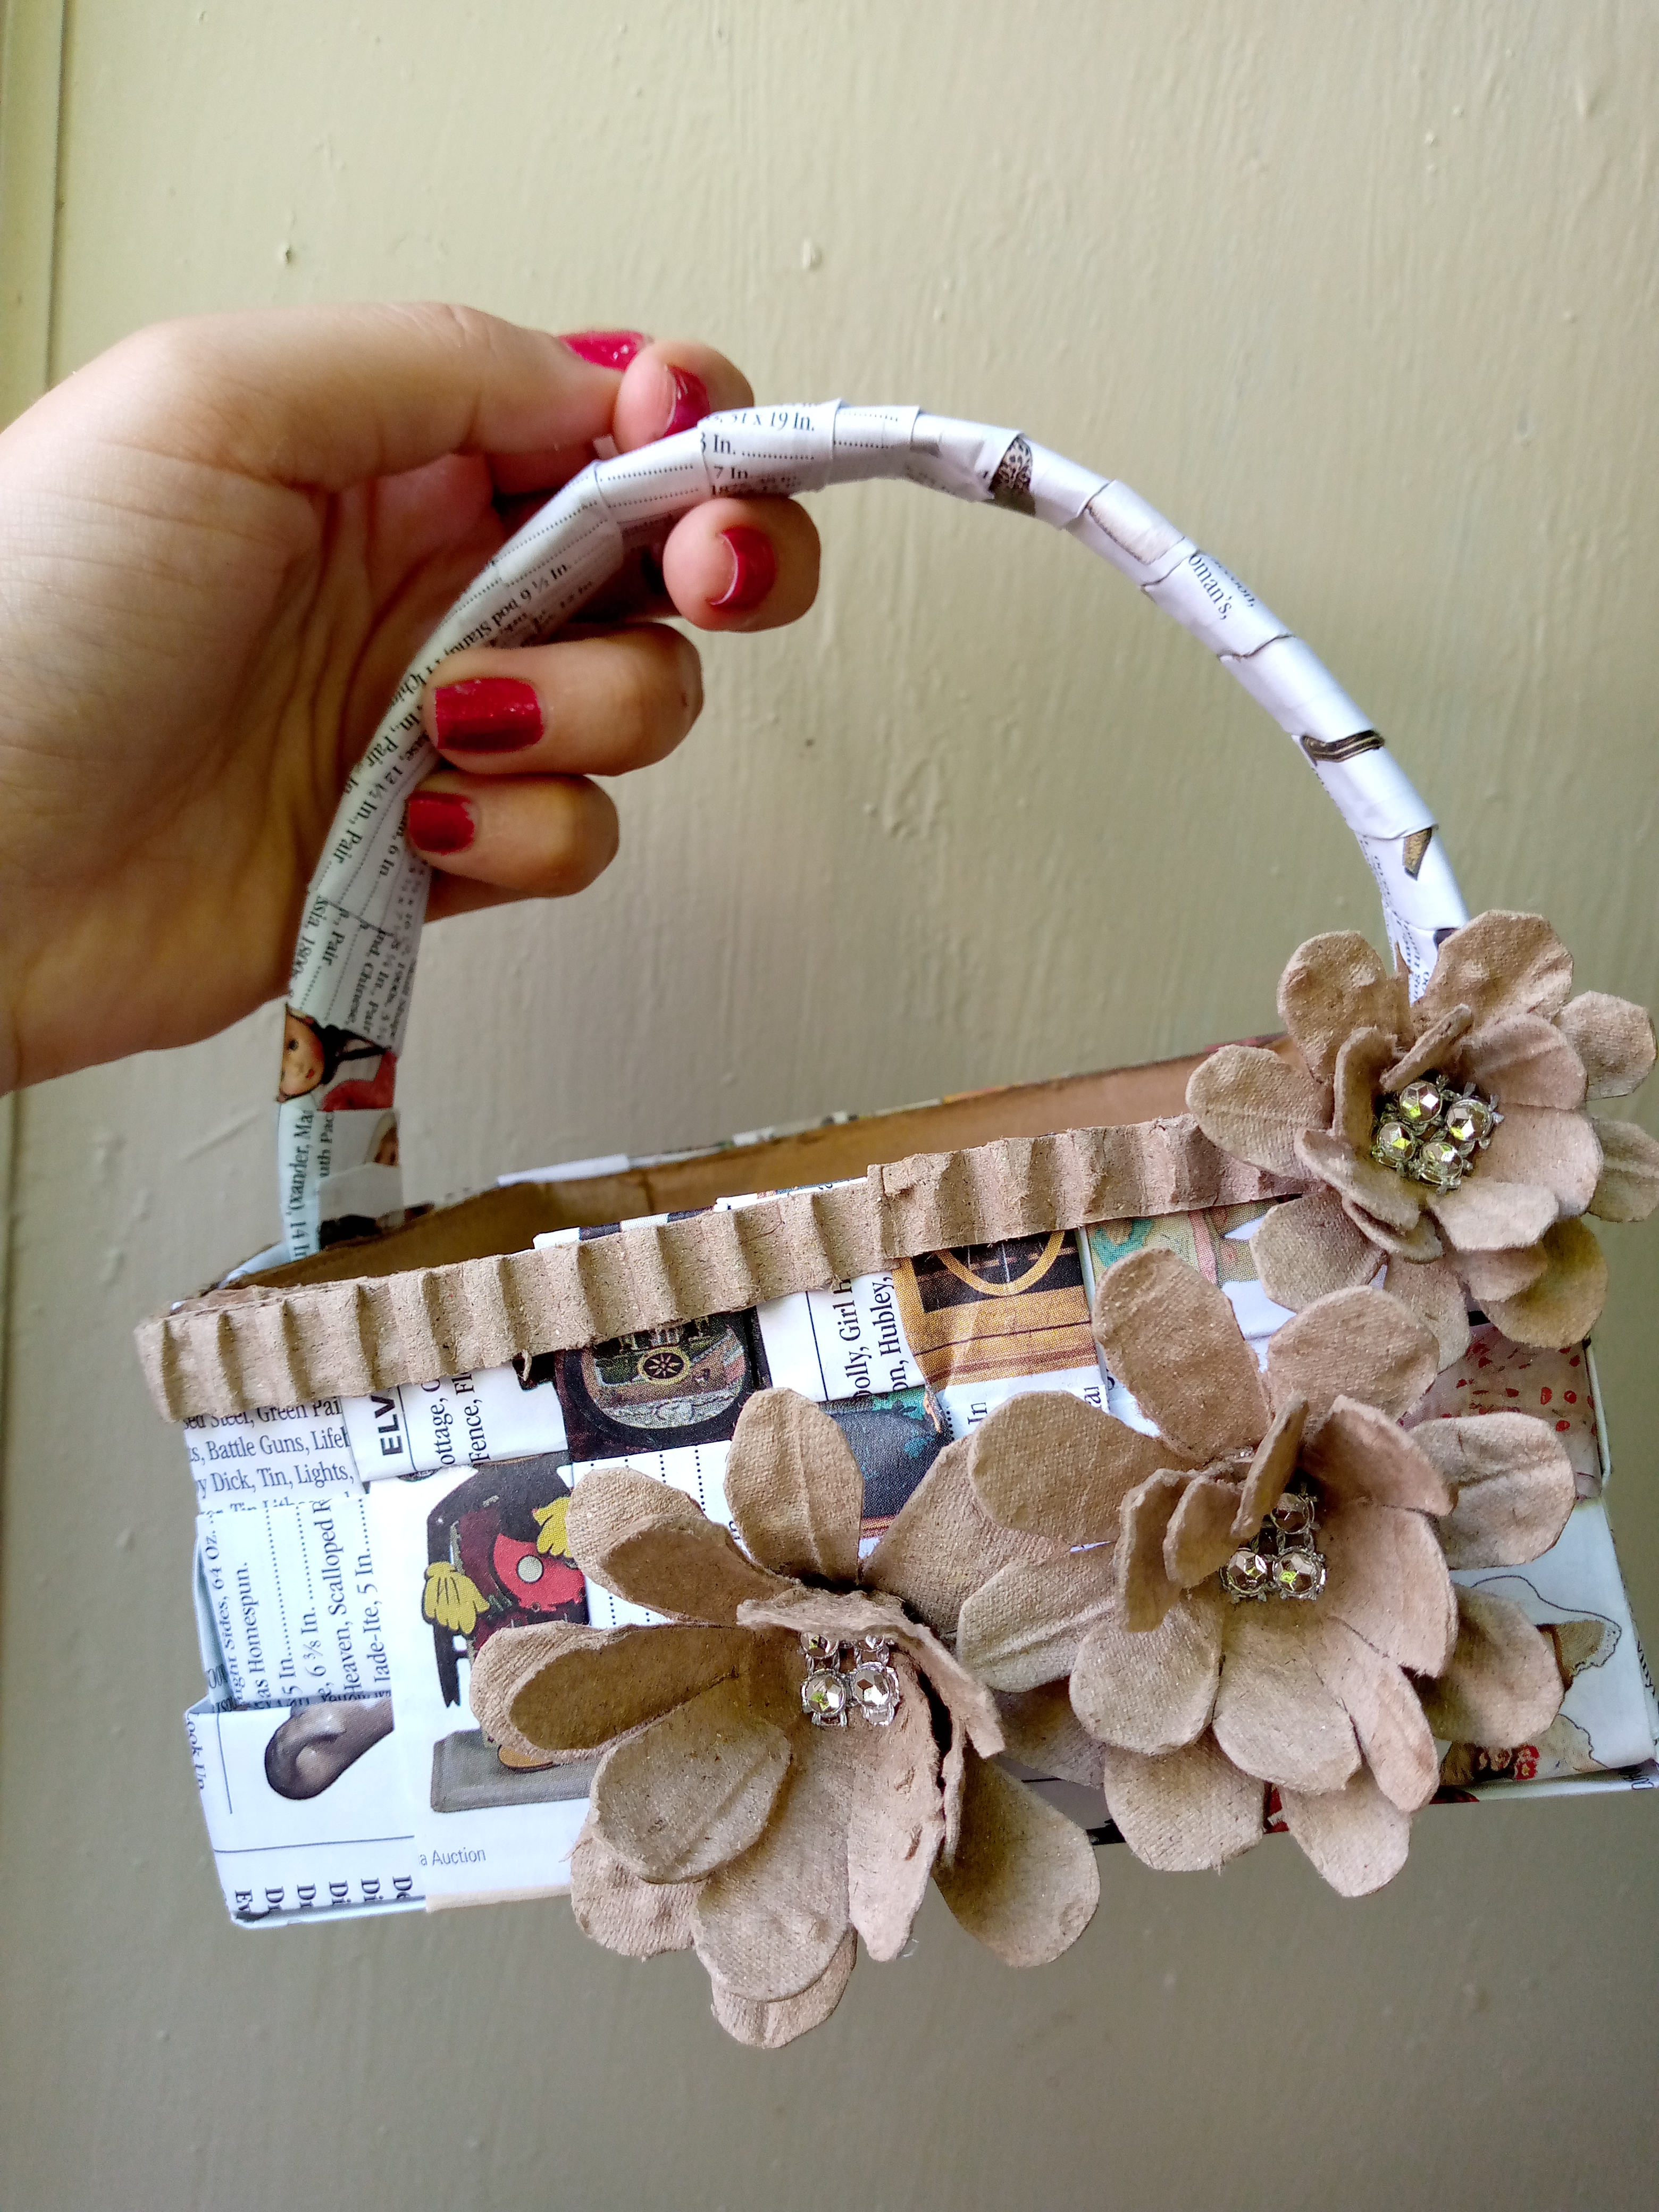
Que tal les pareció amigos de Hive 🥰 este trabajo que realicé puede servir para regalar con dulces adentro y decorarlo con globos todo queda en su imaginación amigos ,espero disfruten mucho mi tutorial que fue hecho con cariño para todos ustedes,les deseo un feliz fin de semana y espero ver sus bonitos trabajos en esta hermosa comunidad,me despido de ustedes , gracias por leer mi blog de todo corazón 💕


What a happy and beautiful day my friends from this beautiful hard-working community 😍 it is a pleasure for me to be able to greet you and return with my recycling jobs, which I love to do the most, among other things, as you realized today I brought a very nice little job that I wanted to share with you ...
As you noticed in the photo at the beginning, it is a nice basket to put your things in, I made it to decorate my sewing corner, since I had my scissors and other tools in disarray, so I said let's make a basket, years ago I had made one but it was damaged now that I have the opportunity to make it, I didn't think twice and today I have brought you the process, it does not require many materials since I used paper from a magazine that was no longer useful and cardboard, it is very simple and practical do it, you will love the result.

Materials:
- Cardboard
- Silicone
- Egg carton
- Silver decoration
- scissors
- Magazine or newspaper paper
(Steps to follow.)
Step 01
To start, friends, I started by cutting strips of paper 30 cm long x 7 cm wide. I cut 14, 7 horizontal and 7 vertical to weave my basket. If you want your basket larger, you can increase the strips. After I had them ready, I proceeded to Fold them about 2 cm thick, and that's what I did with all of them.

Step 02
Once our strips of paper are ready, we are going to start weaving, this is something simple because we start by introducing a strip in the middle of the others and we are going to weave little by little, passing that strip above and below the other horizontal ones and we repeat this process with the others and we stick with silicone so that the fabric does not come loose.

Step 03
For the next step we are going to fold our strips of paper upwards to shape the basket and we begin to weave the outline here. I used three strips and did the same procedure that I did below with my base.

Step 04
Then we proceed to make the base inside the cardboard basket to make it I used the following measurements 14 cm long x 10 wide, I cut it and glued it inside the basket, cut a cardboard ribbon for my handle and another for the top contour of the basket to hold my basket well (basket handle 5.5 cm long x 2 cm wide, basket contour ribbon 29 cm long x 4 cm wide) after having this ready I lined my handle with I took a strip of paper and glued it on both sides of the basket, with some clothespins I pressed it so it wouldn't come off and I decorated the outside of my basket with a thin strip of corrugated cardboard.

Step 05
As a last step, I made some flowers with egg carton, I shaped them into a cone and proceeded to make the petals for each flower. I made two, one as a base and another that will form the cocoon so that it would look prettier. I added a silver detail from previous work. I placed them where they were most visible and glued them with my silicone so my work was finished.

Result!
How did you like it, friends of Hive this work that I did can be used to give gifts with sweets inside and decorate it with balloons, everything is in your imagination friends, I hope you really enjoy my tutorial that was made with love for all of you, I wish you a happy end of the year week and I hope to see your beautiful works in this beautiful community, I say goodbye to you, thank you for reading my blog with all my heart 💕


0
0
0.000
Congratulations @anne002! You have completed the following achievement on the Hive blockchain And have been rewarded with New badge(s)
Your next target is to reach 100 replies.
You can view your badges on your board and compare yourself to others in the Ranking
If you no longer want to receive notifications, reply to this comment with the word
STOPCheck out our last posts:
Manualidades como está son las que me inspiran a seguir creando ya que en ella veo la importancia de reciclar.
Así muchas Gracias ✨
Te quedó muy linda!
Gracias por compartirlo.
Que hermosa manualidad, me encanto como hiciste las flores, estos posts motivan a reciclar y de paso activan la creatividad de uno para hacer estas bonitas manualidades ❤️