Hoy le traigo; Bello organizador vertical multiuso (ESP/ENG) Today I bring you; Beautiful multipurpose vertical organizer.
Mi versión Español.
¡Bienvenido a mi blog!
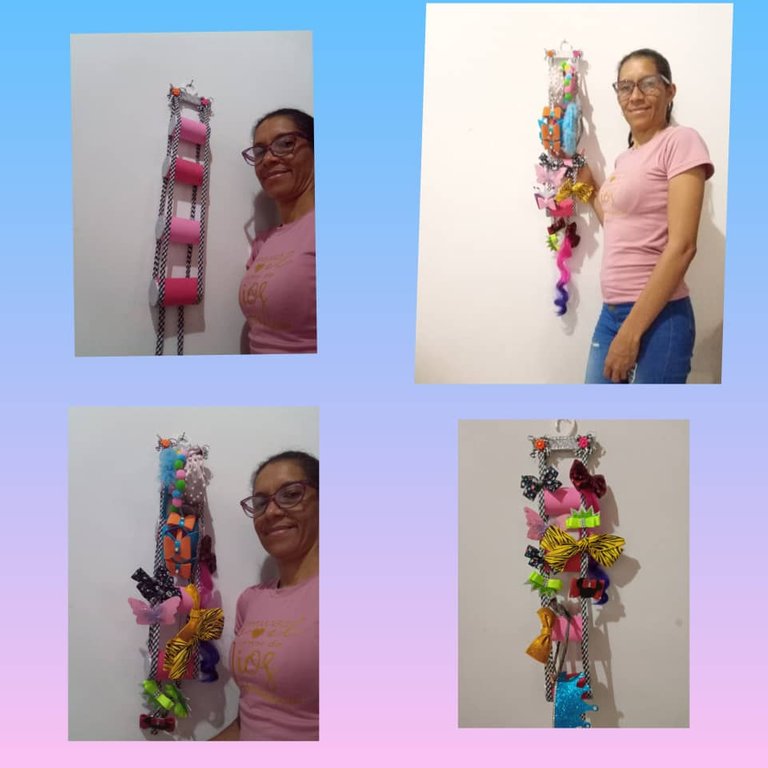
Hola a toda mi gente de esta comunidad, @hive Diy, este tutorial le muestro una idea fácil súper linda que puede hacer con rollo de cartón del papel higiénico, se trata de un organizador vertical multiuso, para elaborar este organizador se utilizó rollo de papel higiénico, foami de color rosado, fucsia y plateado, cinta de color negro con blanco y cinta de encaje decorativa color plateada una percha plástica pequeña. Este tipo de idea de reciclaje y recreativos son fácil de hacer, útiles, perfectas para organizar nuestra casa, para decorar, vender o regalar, son ideales para la niñas de la casa para que organice sus pinza, diadema, también sirve la colocar las correas o bufanda son ideas sencillas de organización sin gastar mucho para tu hogar.
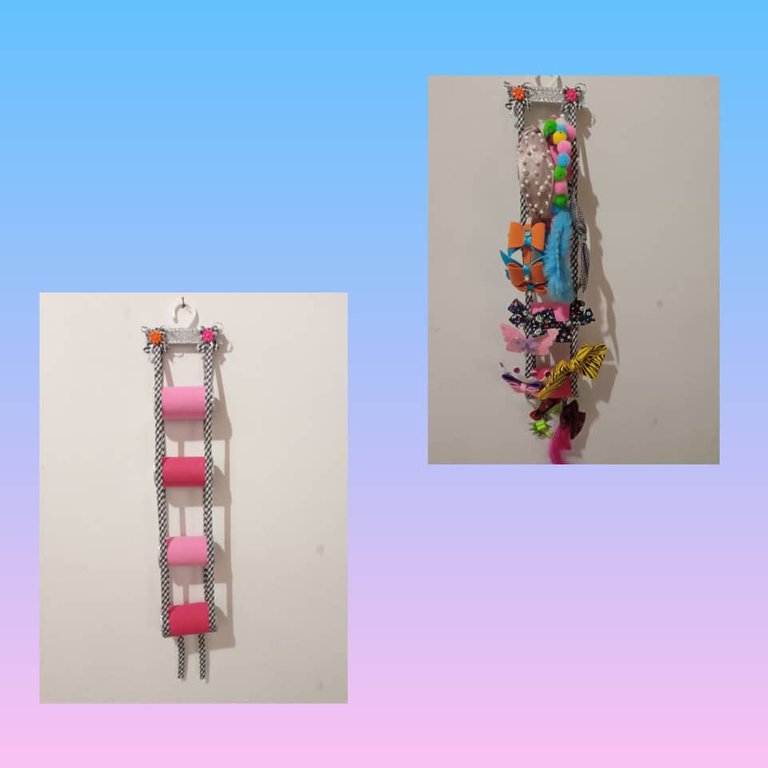
Empecemos a mostrarle los materiales y el paso a paso de este lindo organizador.
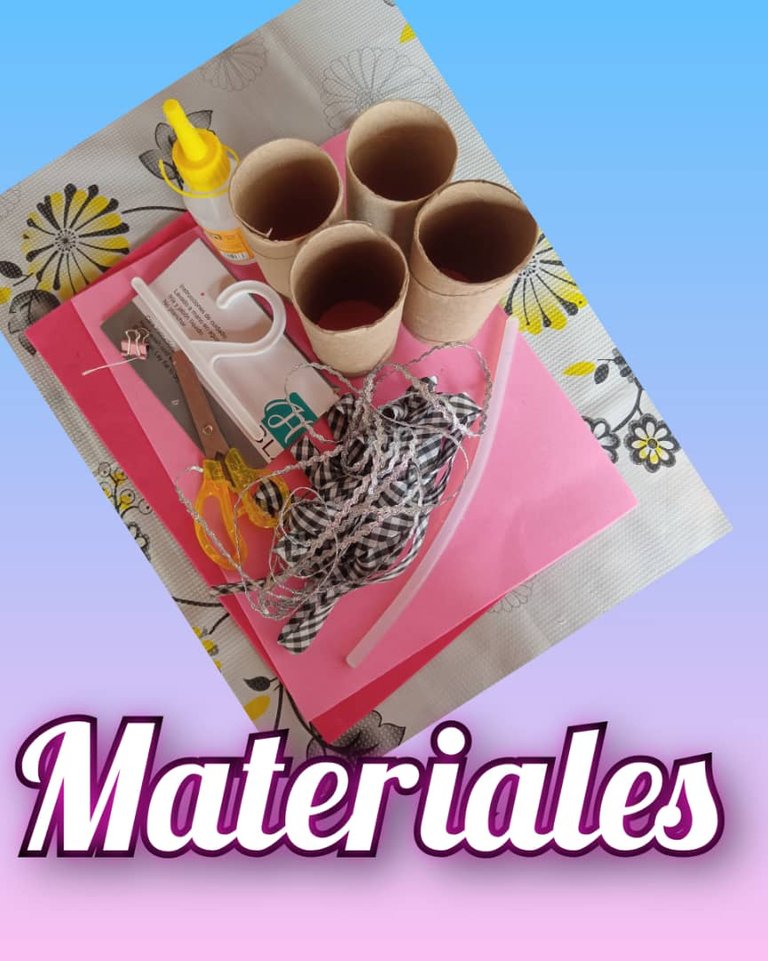
Materiales.
- 4 rollos de papel higiénico.
- 4 metros de cinta de color negro con blanco.
- 2 metros de cinta decorativa plateada.
- Foami de color rosado, fucsia, plateada.
- 1 percha plástica pequeña.
- 1 silicón.
- 1 tijera.
- 1 pedazo de cartón.
Paso.
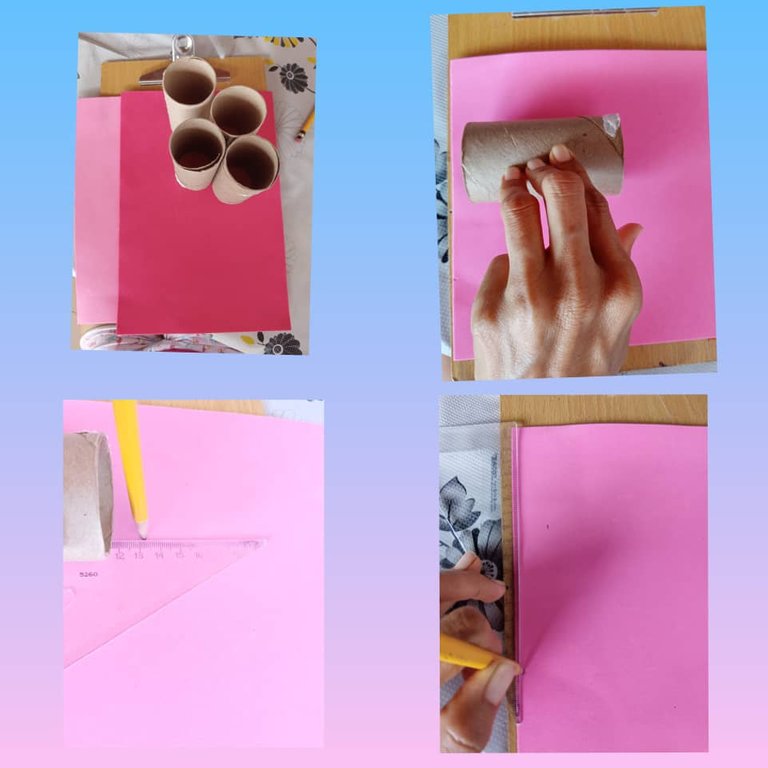
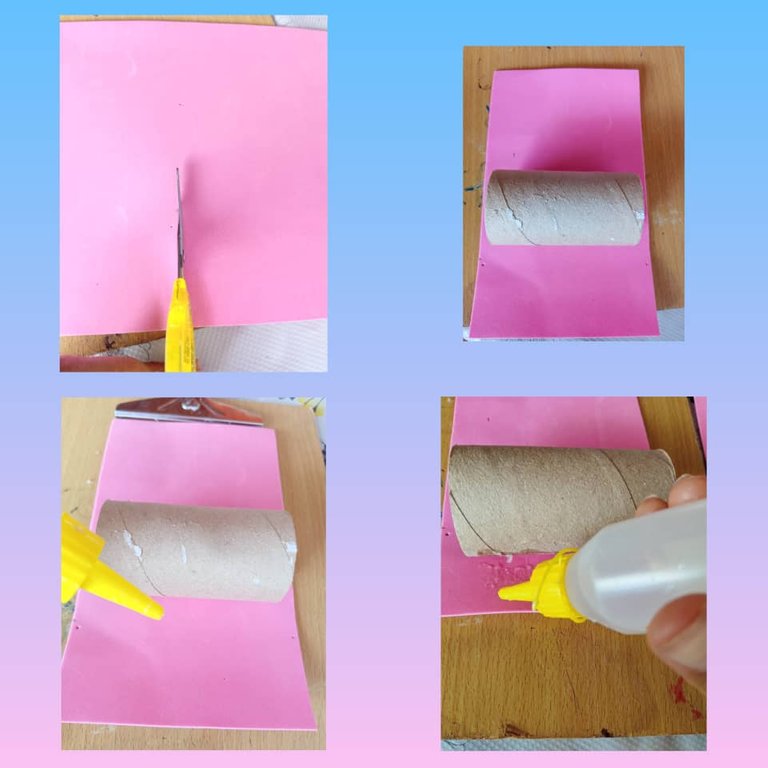
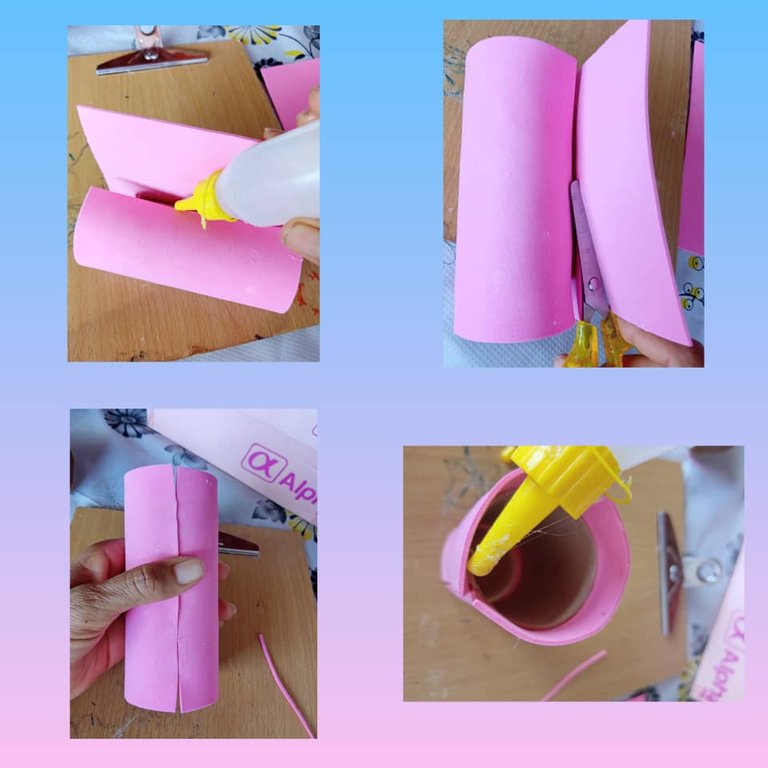
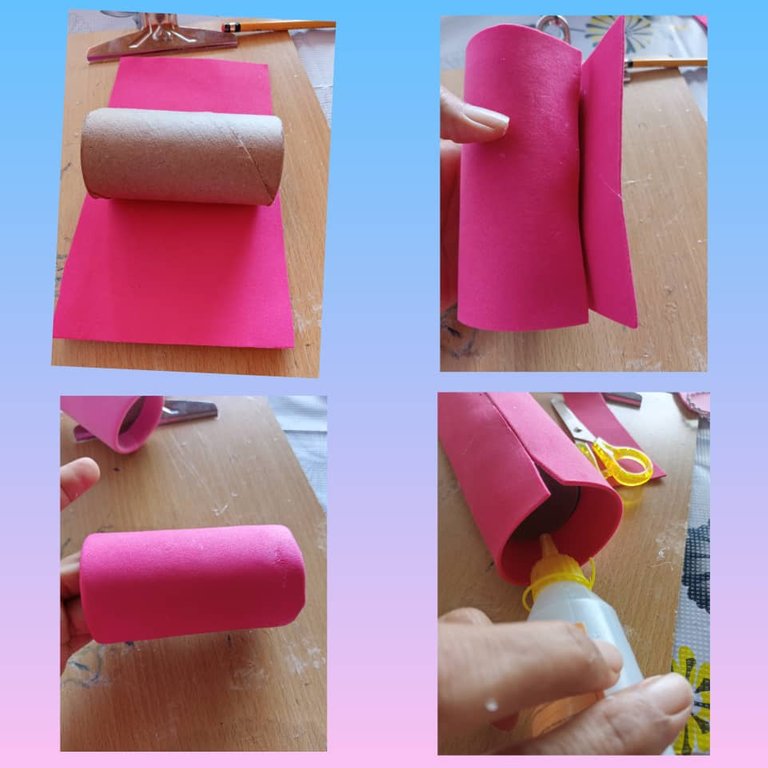
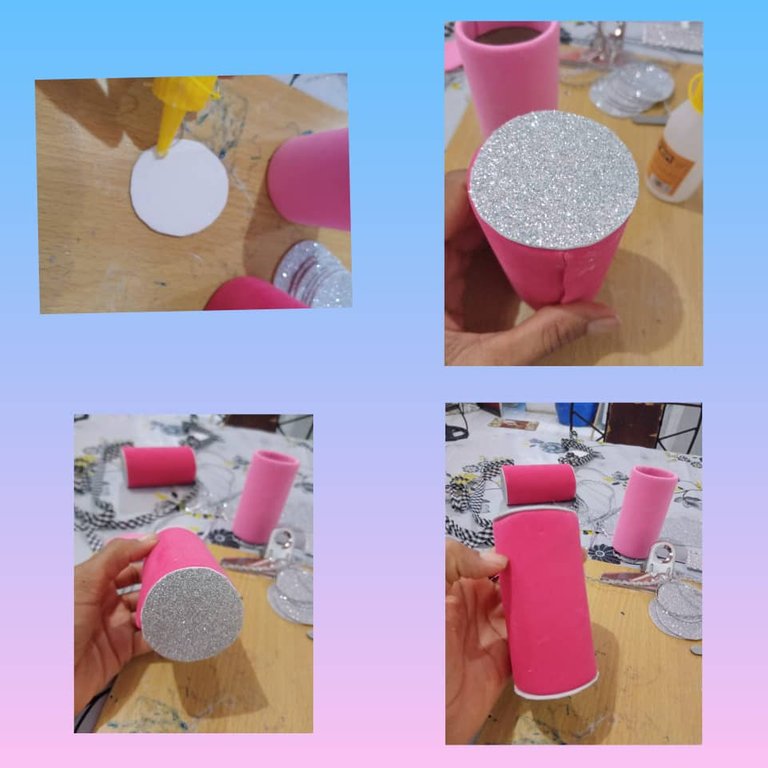
Empezamos forrando los tubos de papel higiénico. Medimos en foami de color rosado medimos 13 de largo por 15 de ancho, recortamos con la tijera. Ponemos el tubo del papel en el medio del foami recordando que dejando 3 centímetros de más a cada lado, le agregamos silicón vamos envolviendo para que se valla pegando el tubo completo le recortamos lo sobrante, metemos las punta de ambos lado para dentro del tubo le añado silicón tengo mi primer tubo de papel listo.
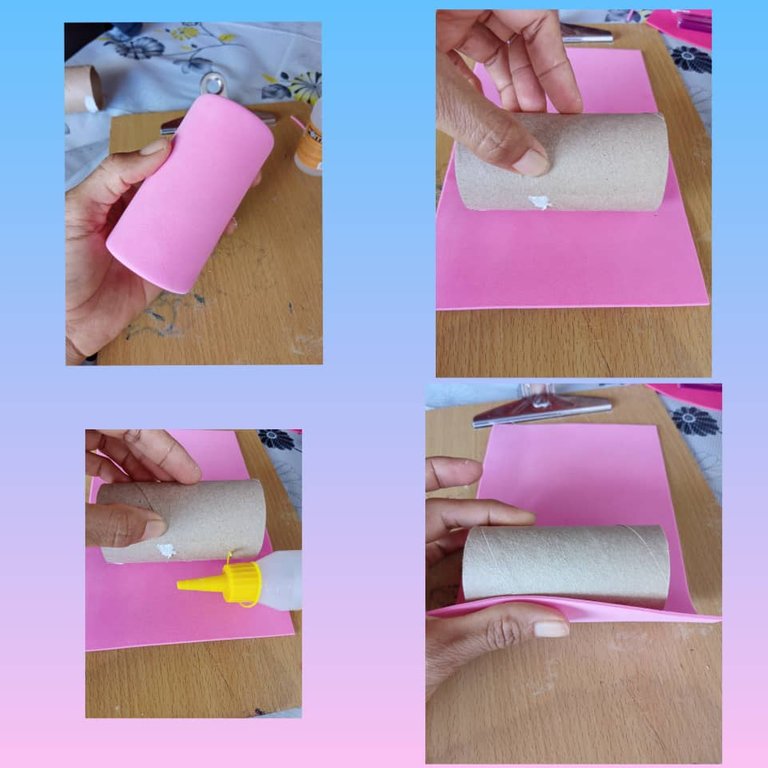
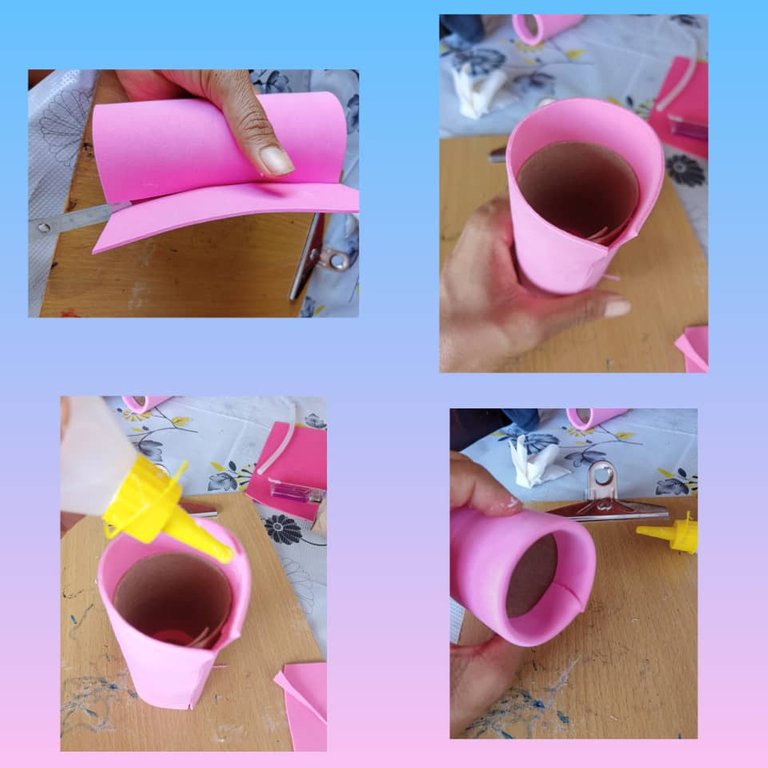
Ahora forramos el segundo tubo de color rosado hacemos lo mismo que el primero medimos después, recortamos el foami colocamos el tubo en el medio del foami le añado silicón, vamos envolviendo hasta forrar el tubo le recorto el sobrante, metemos las puntas de los lados hacia dentro del tubo lo pegamos, tengo mi segundo tubo de papel forrado. Vea como va quedando.
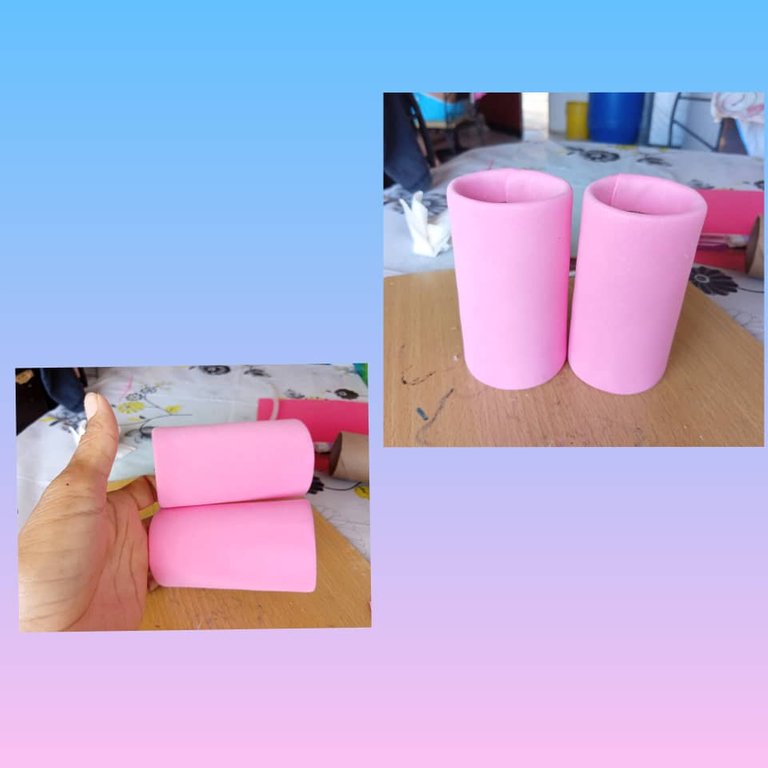
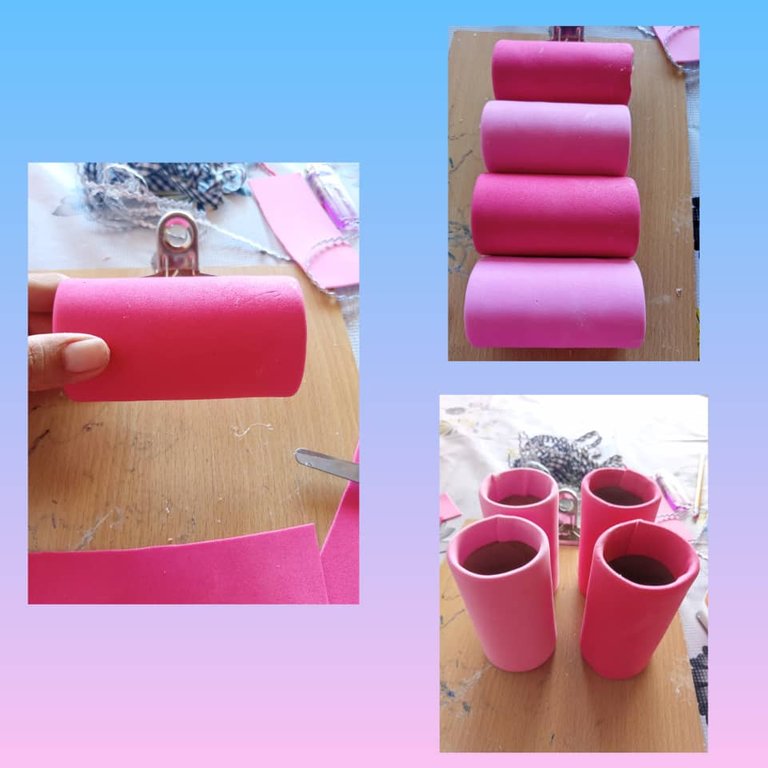
- Hacemos lo mismo con los demás tubos que vamos a utilizar este caso utilice 4 tubo, eso va depender del largo que usted quiera el organizador.
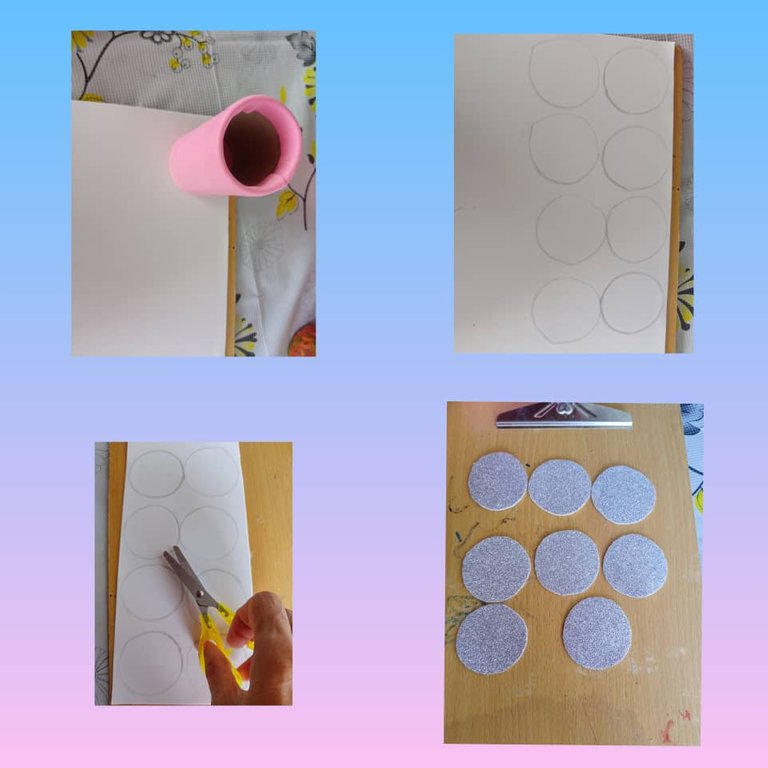
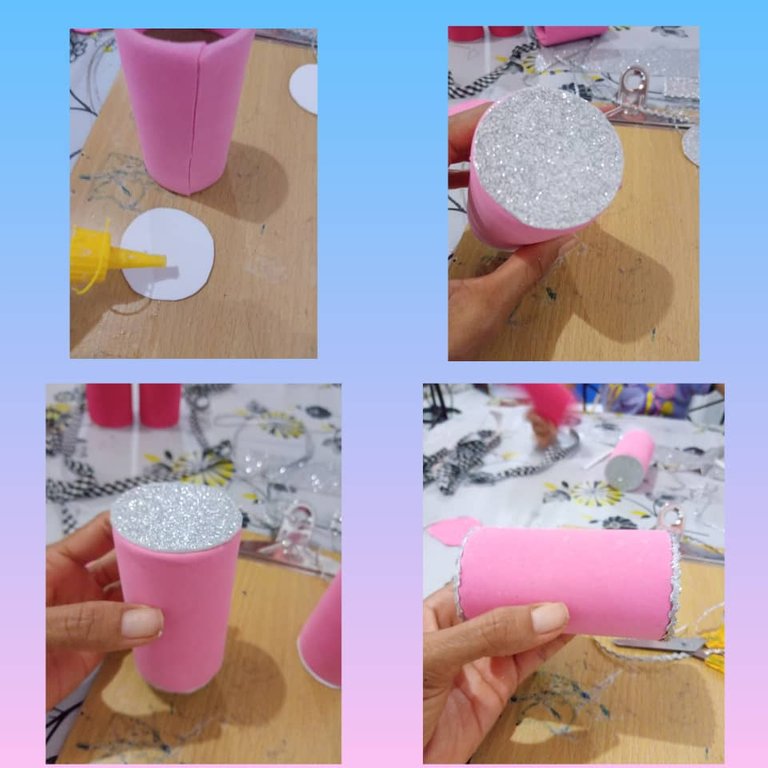
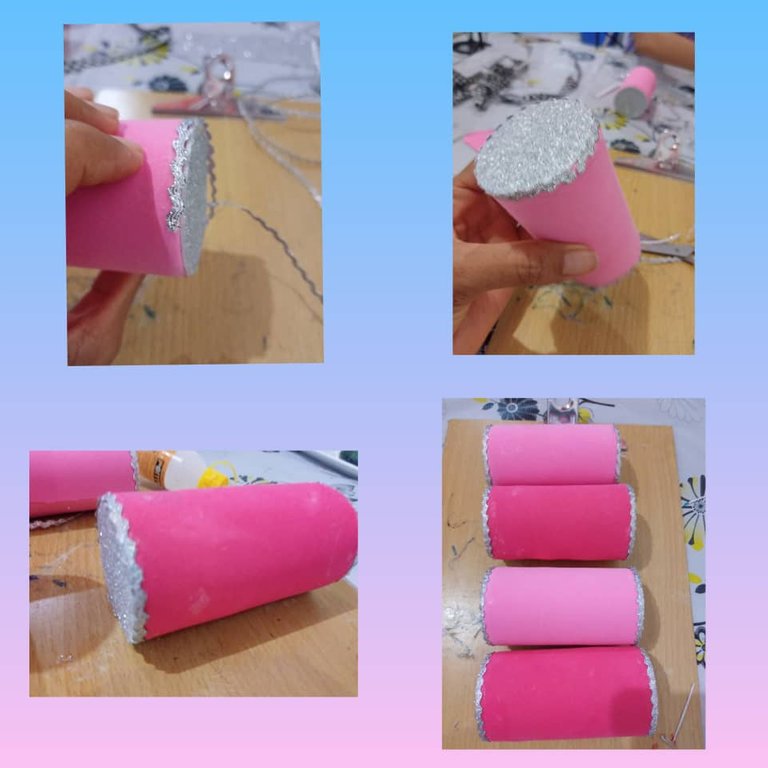
- Ahora hacemos unos círculos como la horma del tubo del papel higiénico lo marcamos en el foami plateado 8 círculos, lo recortamos lo pegamos con silicón a los lado del tubo lo decoramos por la orilla del circulo con la cinta decorativa plateada. Vea como quedaron muy lindo y tenemos los tubos listos para empezar hacer el organizador.
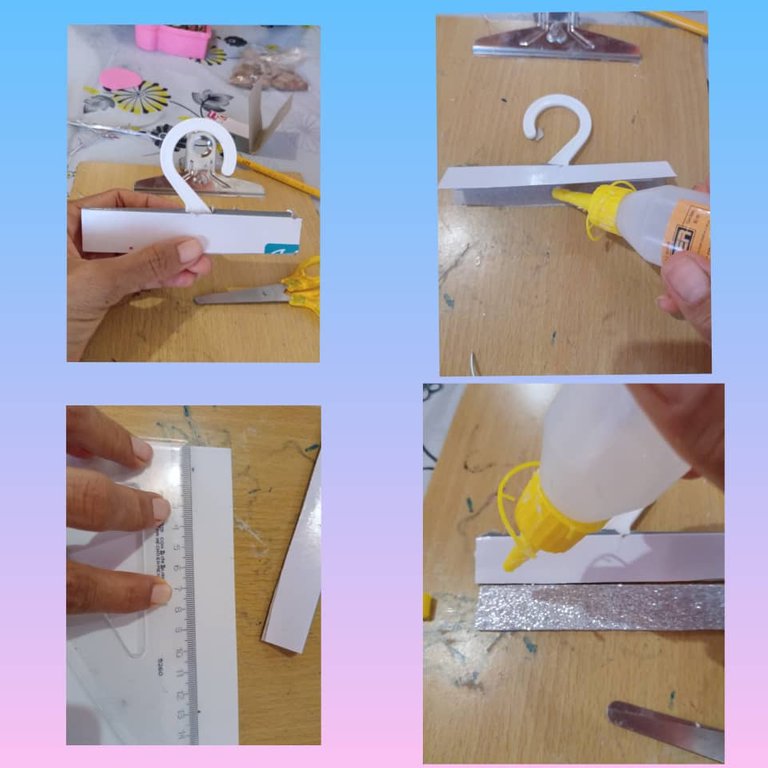
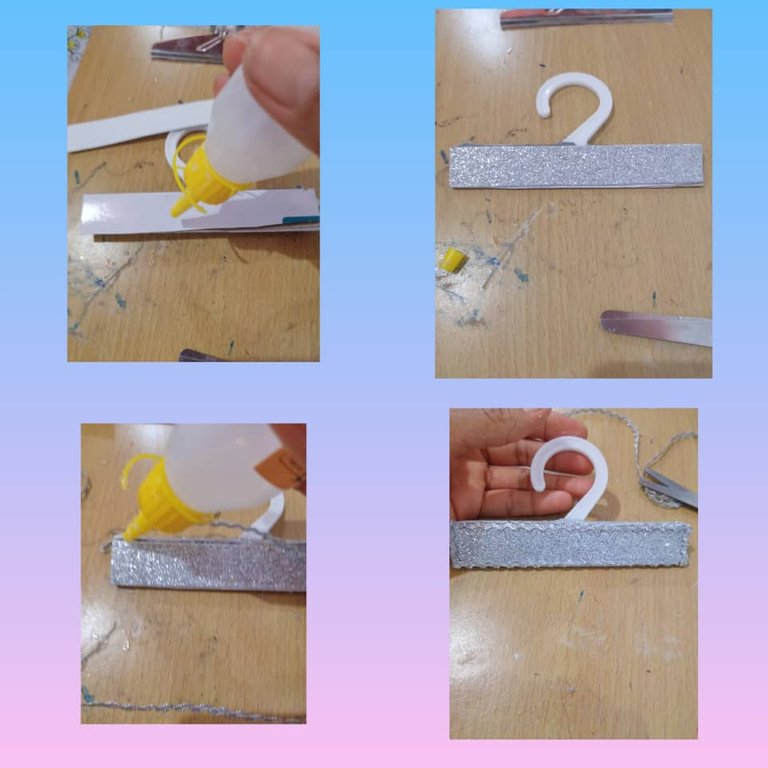
- Para poder hacer el organizador primero vamos a preparar la percha de plástico tiene que medir la misma distancia de los tubos de papel higiénico, luego la rellenamos cortamos un pedazo de cartón metemos la percha por el medio del cartón pegamos ambas cara, después recortamos dos pedazo de foami de 14 centímetro la pegamos con silicón en ambas cara la decoramos con cinta decorativa de color plateada. vea como me quedo mi percha
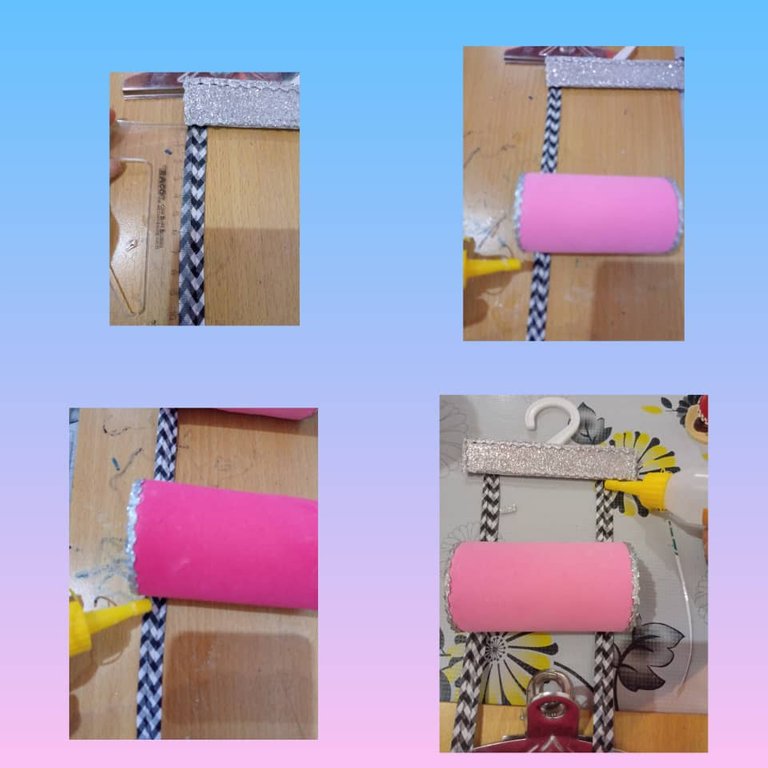
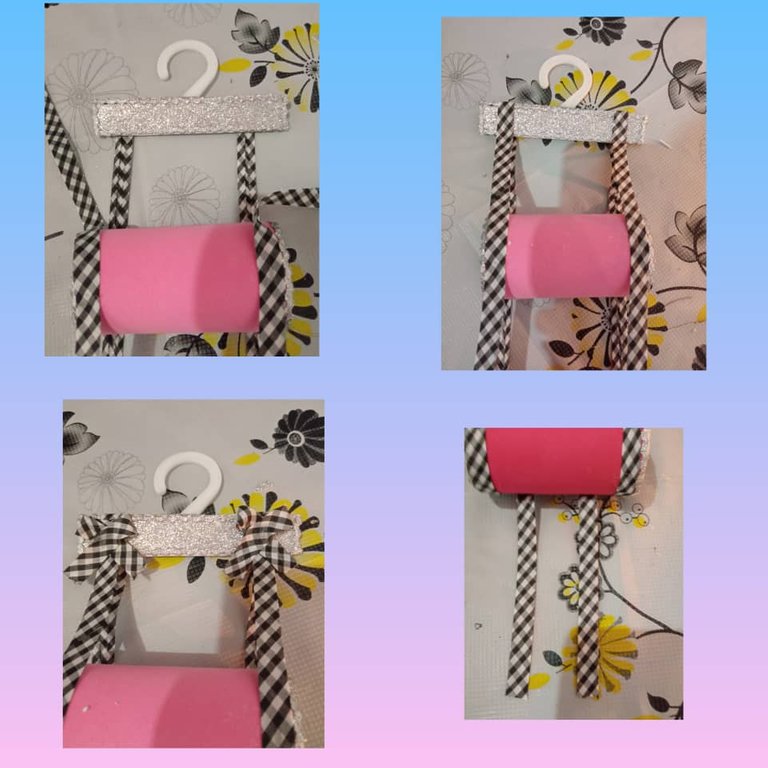
Ahora no toca unir todas las piezas para formar el organizador vertical, con la cinta de color negra y blanca, la vamos a pegar en la parte de atrás de la percha plástica.
Después pegamos a cada uno de los tubos dejando un espacio entre cada uno de ellos, este caso deje 10 centímetro de separación empecé por el tubo de color rosado, luego le sigue el fucsia, cada color entre lazado hasta pegar los 4 tubos vamos midiendo la percha junto con el tubo para que quede la cinta bien nivelada.
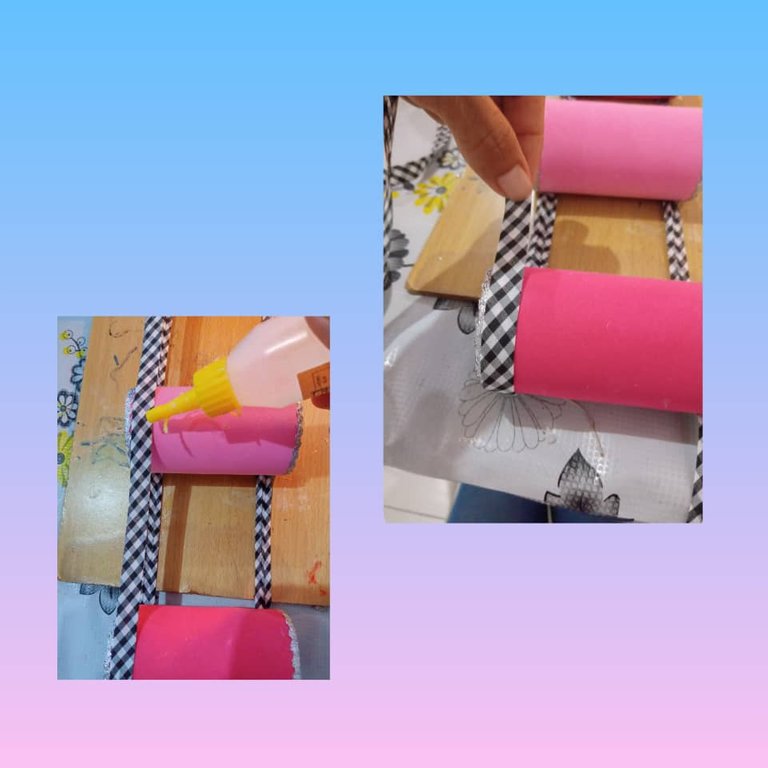
Luego doblamos la cinta hacia arriba vamos pegando la cinta en cada tubo vamos estirando la cinta hasta que llegue la parte de a delante de la percha la pegamos y la cinta que no sobro la recortamos y la pegamos en la parte de abajo del ultimo tubo.
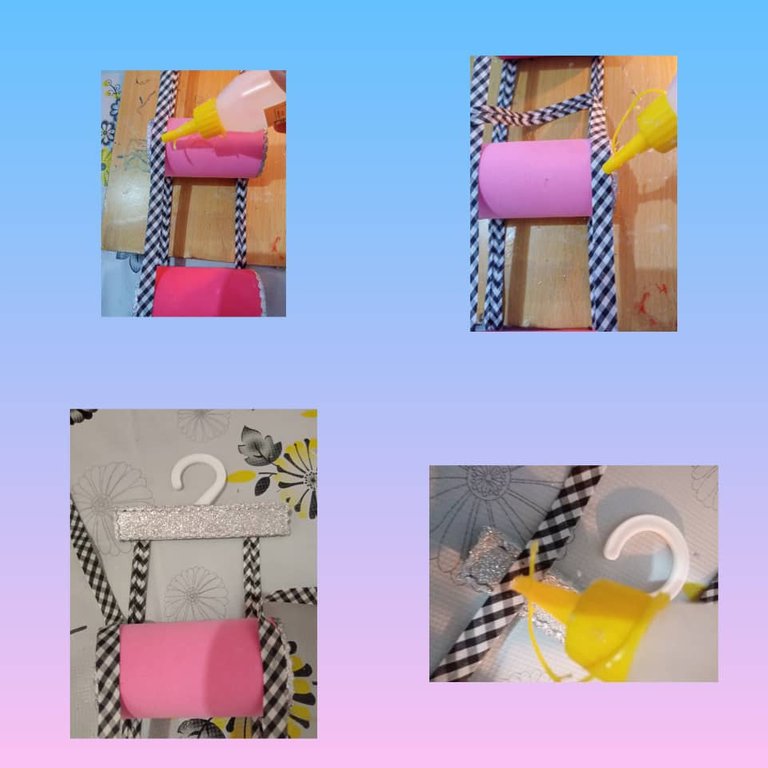
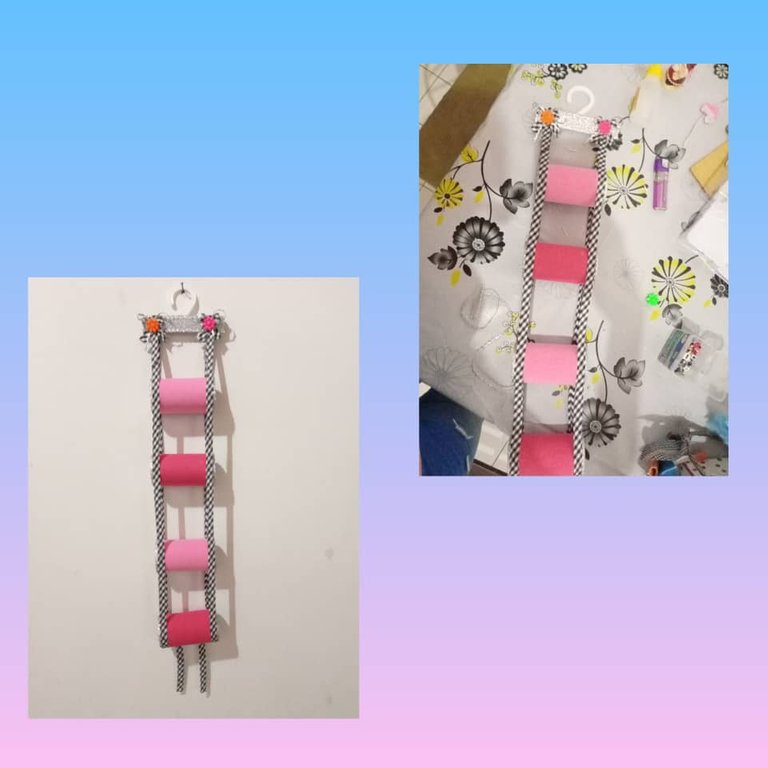
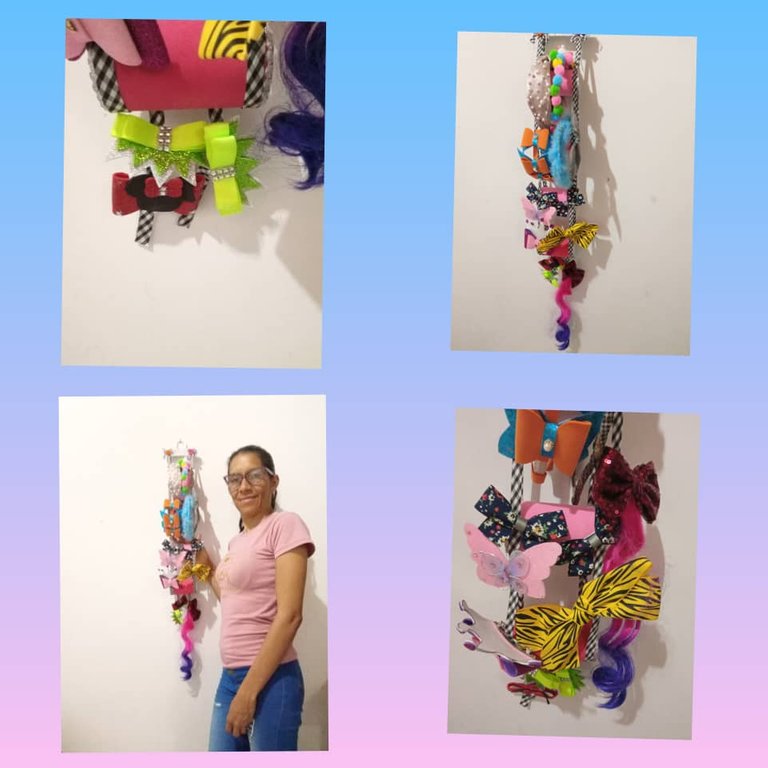
- Por ultimo tengo listo mi bello organizador vertical multiuso lo decore con unos lindo lazos en la esquina de la percha para que sea vea más lindo. Este organizador puede cumplir varias funciones, puede guardar accesorios del cabello, como, diadema, ganchitos, cintas, lazos, perfecto para la más pequeña de la casa.
Tenga un feliz días y bendecidos para todos muchas gracias por leer mi post.

Las fotos son mías, tomadas con teléfono alcatel , editadas con incollage y traducidas con Deepl.
Mi versión ingles.
¡Bienvenido a mi blog!

Hello to all my people of this community, @hive Diy, this tutorial I show you a super cute easy idea that you can do with cardboard roll of toilet paper, this is a multipurpose vertical organizer, to make this organizer was used toilet paper roll, foami pink, fuchsia and silver color, black ribbon with white and silver color decorative lace ribbon a small plastic hanger. This type of recycling and recreational ideas are easy to make, useful, perfect for organizing our home, to decorate, sell or give away, are ideal for the girls of the house to organize their clip, headband, also serves to place the straps or scarf are simple ideas of organization without spending much for your home.

Let's start showing you the materials and step by step of this cute organizer.
Materials.
- 4 rolls of toilet paper.
- 4 meters of black with white ribbon.
- 2 meters of silver decorative ribbon.
- Pink, fuchsia, silver foami.
- 1 small plastic hanger.
- 1 silicone.
- 1 scissors.
- 1 piece of cardboard.

Step.
We start by lining the toilet paper tubes. We measure in pink foami we measure 13 long by 15 wide, cut out with the scissors. We put the paper tube in the middle of the foami remembering that leaving 3 centimeters more on each side, we add silicone we are wrapping so that the whole tube is sticking valla cut the excess, we put the tip of both sides into the tube I add silicone I have my first tube of paper ready.
Now we cover the second tube of pink color we do the same as the first one we measure after, we cut the foami we place the tube in the middle of the foami I add silicone, we are wrapping until we cover the tube I cut the excess, we put the tips of the sides inside of the tube we glue it, I have my second paper tube lined. See how it is coming out.


- We do the same with the other tubes we are going to use this case use 4 tube, that is going to depend on how long you want the organizer.


- Now we make some circles like the last of the toilet paper tube, we mark 8 circles on the silver foami, we cut them out, we glue them with silicone on the sides of the tube and we decorate the edge of the circle with the silver decorative tape. See how cute they are and we have the tubes ready to start making the organizer.


- In order to make the organizer first we will prepare the plastic hanger has to measure the same distance of the toilet paper tubes, then fill it cut a piece of cardboard put the hanger through the middle of the cardboard glue both sides, then cut two pieces of foami 14 centimeter glue it with silicone on both sides decorate it with decorative tape silver color. see how I got my hanger


Now it's not time to put all the pieces together to form the vertical organizer, with the black and white colored tape, we're going to glue it to the back of the plastic hanger.
Then we glue each of the tubes leaving a space between each of them, in this case I left 10 centimeters of separation, I started with the pink tube, then follows the fuchsia, each color between each loop until we glue the 4 tubes, we measure the hanger along with the tube so that the tape is well leveled.
Then we fold the tape upwards we are sticking the tape on each tube we are stretching the tape until it reaches the part of the front of the hanger we glue it and the tape that is not left over we cut it and glue it on the bottom of the last tube.


- Finally I have ready my beautiful multipurpose vertical organizer I decorated it with some nice bows in the corner of the hanger to make it look prettier. This organizer can serve several functions, you can store hair accessories, such as, headband, clips, ribbons, bows, perfect for the smallest of the house.


Have a happy day and blessed to all thank you very much for reading my post.

The photos are mine, taken with alcatel phone , edited with incollage and translated with Deepl.
Estos organizadores son sumamente útiles ahorran mucho espacio sin dejar de ser agradables a la vista. Gracias por compartir
gracias a ti por comentar, si amiga son muy multiusos. Saludos