DIY: Valentine's Day Surprise Box❣️✨ [ESP-ENG]
Verán, Febrero es uno de mis meses favoritos, en especial porque se celebra mi cumpleaños, asi como también el mes del amor y la amistad, el carnaval (en su mayoria) asi que es un mes bastante alegre🩷🌷
Siempre he dicho y demostrado que uno de mis lenguajes del amor es dar obsequios (y no necesariamente necesito que sea un dia especial para sorprender a quienes amo) asi que si, este lenguaje del amor me caracteriza mucho y como ya estamos próximos a este gran dia de San Valentín, he decidido hacer una linda cajita sorpresa, con algunos mensajitos, dulces y que ademas sirve para dar junto con un detalle adicional como reloj, cadena u otra cosa pequeña ✨
Sin más, aquí te muestro su elaboración y deseo que les guste🩷
Hi Friends! I hope you are feeling great, around here, we are✨.
You see, February is one of my favorite months, especially because it celebrates my birthday, as well as the month of love and friendship, carnival (mostly) so it's a pretty joyful month🩷🌷.
I have always said and demonstrated that one of my love languages is giving gifts (and I don't necessarily need it to be a special day to surprise those I love) so yes, this love language characterizes me a lot and as we are already close to this great Valentine's Day, I decided to make a nice little surprise box, with some messages, sweets and that also serves to give along with an additional detail as a watch, chain or something else small ✨.Without further ado, here I show you how to make it and I hope you like it🩷.


Materiales✨
- Cartulina negra doble faz
- Cartulina roja
- Cartulina blanca
- Cinta roja
- Silicón liquido
- Marcador negro
- Pintura al frio blanca
Materials✨
- Double-sided black cardboard
- Red cardboard
- White cardboard
- Red tape
- Liquid silicone
- Black marker
- White cold paint

Paso a Paso | Step by Step✨
✨ Por el reverso de la cartulina doble faz, traze un cuadro con medidas de 30cm×30cm. Luego lo dividí en 9 cuadros de 10cm cada uno, eliminando los 4 de las esquinas y me ayude con la punta de una tijera y una regla para marcar muy bien las lineas y realizar el doblez.
✨ On the back of the double-sided cardboard, I traced a square measuring 30cm×30cm. Then I divided it into 9 squares of 10cm each, eliminating the 4 corners and helped me with the tip of a scissors and a ruler to mark very well the lines and make the fold.

✨ Tomé uno de los cuadros que había retirado anteriormente y lo pegué justo en el centro. Seguidamente en cartulina roja recorte 4 cuadros de 10cm×10cm cada uno y pegué en los pliegues de la cajita, quedando tal como se aprecia en el collage.
✨ I took one of the pictures I had previously removed and glued it right in the center. Then I cut 4 squares of 10cm×10cm each out of red cardboard and glued them in the folds of the box, as shown in the collage.

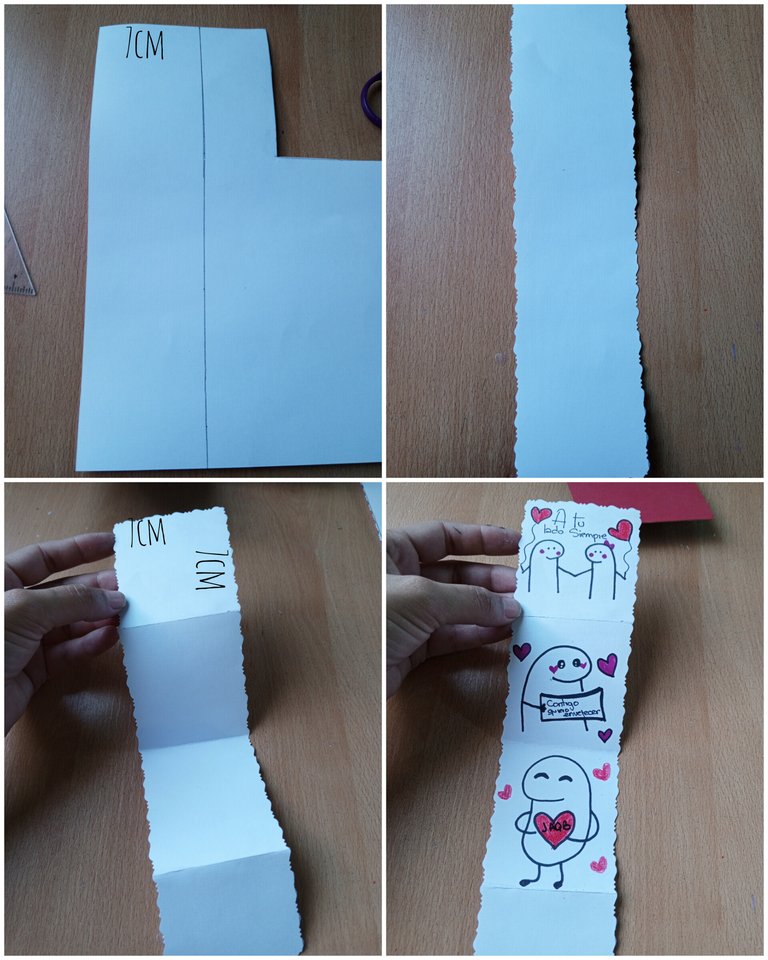
✨ En cartulina blanca medi un rectángulo o tira de 7cm de ancho por lo largo de la hoja de cartulina que seria un aproximado de 24cm, luego recorté todas sus orillas con una tijera de formas, y procedi a hacer 3 dobles de unos 7cm aproximadamente, sobrando uno mas pequeño.
✨ Luego con un marcador en cada cuadro realicé dibujos de deformito con algunos mensajes.
✨ In white cardboard I measured a rectangle or strip of 7cm wide along the length of the sheet of cardboard that would be approximately 24cm, then I cut all its edges with a scissors, and proceeded to make 3 doubles of about 7cm approximately, leaving a smaller one.
✨ Then with a marker on each square I made deformed drawings with some messages.

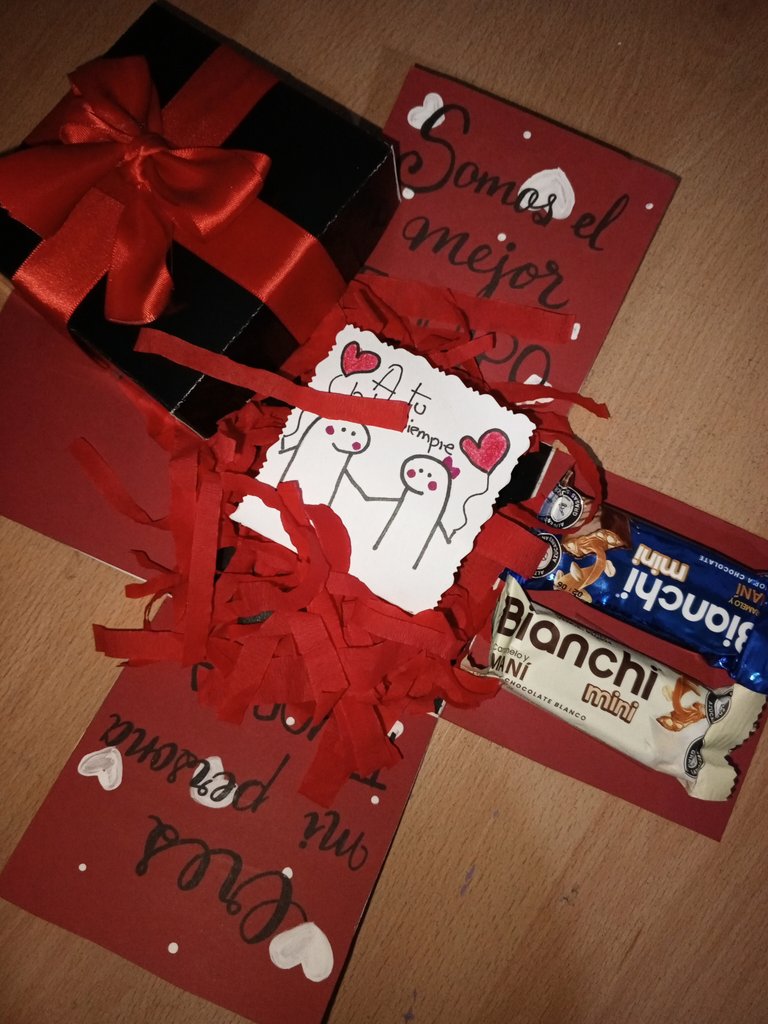
✨ En dos de las piezas rojas le realice corazones y puntos con pintura al frío blanca, luego escribí sobre ella algunos otros mensajes y en el centro pegue los mensajes con los deformitos.
📌 En las otras dos partes rojas, podemos pegar con cinta adhesiva algunos dulces.
✨ On two of the red pieces I made hearts and dots with white cold paint, then I wrote on it some other messages and in the center I glued the messages with the little deformities.
📌 On the other two red parts, we can tape some candies.

✨ Para la tapa de esta cajita sorpresa, medi un cuadro de 10,5cm×10,5cm y con pestañas a cada lado de 3cm cada una. Luego realicé los dobleces y pegué. Justo en el centro utilice otro cuadro de cartulina negro.
✨ For the lid of this little surprise box, I made a 10,5cm×10,5cm square with tabs on each side of 3cm each, then I made the folds and glued. Then I made the folds and glued. Right in the center I used another black cardboard square.

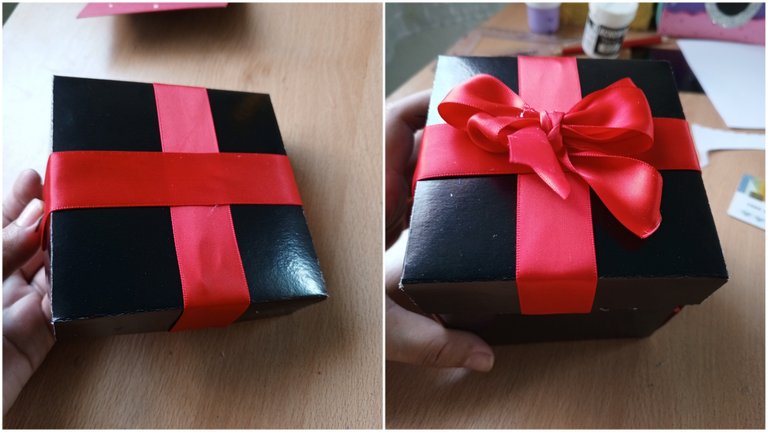
✨ Para decorar la tapa utilicé cinta roja, colocándola tipo regalo y decorando en el centro, con un lazo hecho de la misma cinta, ¡Culminando asi este hermoso detalle!
To decorate the lid I used red ribbon, placing it as a gift and decorating it in the center with a bow made of the same ribbon, thus completing this beautiful detail.


Resultado | Result✨
Realmente siempre he sido fan de estos detalles tanto de obsequiarlos como recibirlos, además que es una forma bonita de hacer sentir especial a quien tanto queremos💗
I've always been a fan of these details, both to give and to receive them, and it's a nice way to make the one we love feel special💗


📷Ediciones | Editing in Canva and Picstar
✨Traducciones | Translations in Deepl
Esta demasiado linda esta idea amiga, me gusta muchísimo también la combinación de colores y que tiene tantos detalles lindos dentro.
Me encanta
Gracias amiga, me hace feliz saber que te ha gustado y si una paleta de colores creo que muy al estilo San Valentín 🤭❣️
Que bonita idea, con Flork que tanto me gusta y esos dulces jeje una idea muy creativa para sorprender a nuestr@ mejor amig@ o a esa personita especial el 14 de febrero 😍 linda por dentro y por fuera.
Ok... Amo tu letra 🤭 Me encanta este tipo de cajitas, sencillas por fuera y llenitas de detalles por dentro !!
Es perfecta para dar un hermoso detalle este 14F a un amorcito 🤭
Te quiero amiga hermosa!
Me encanta, quedó hermosa y es una idea bastante sencilla de hacer pero muy bonita ☺️
!DIY
You can query your personal balance by
!DIYSTATSQue belleza de cajita ami 😍 Amé los dibujitos. Sin duda es un excelente detalle para obsequiar ❤️
This post has been curated by @mikezillo on behalf of @ecency curation team.
Keep up the great work!
Yay! 🤗
Your content has been boosted with Ecency Points, by @alizmarpaola.
Use Ecency daily to boost your growth on platform!
Bella y muy original, me encanto.
Ayyy que belleza, me encantó🥰🥰🥰
Gracias amiga, me alegra mucho que te haya gustado✨❣️
https://twitter.com/hivediy47901/status/1755321237830504910
Vota por HIVEDIY como Witness en el siguiente Link:
https://vote.hive.uno/@hivediy
Amiga te quedó ESPECTACULAR, me encantaron los colores, el mensaje y el toque con los chocolates, demasiado bello 😍😍
¡¡¡Buen trabajo!!! Gracias por publicar tu excelente contenido en Hive Diy.
Tu comunidad artesana ahora es testigo
