DIY: A letter to Santa🎅🏻✨ [ESP-ENG]
Hace aproximadamente 3 años, se ha vuelto costumbre o tradición tal vez, el hecho de realizar un bonito diseño para Lionella, de carta para Santa Claus. Según yo, cada año superando al anterior y lo mejor es ver la emoción de mi bebé al saber que ya puede escribir su carta y más ahora que ya sabe escribir un poco más 💗
Está vez decidi hacer un Santa Claus, saliendo de una chimenea (creo que es bastante habitual ver estas decoraciones en navidad) así que sin más, aquí te muestro el proceso de esta creación 🎅🏻🎄
Hello friends! How nice to be once again in this creative community, I hope you are great and that your day has been the best!
About 3 years ago, it has become custom or tradition perhaps, the fact of making a nice design for Lionella, letter to Santa Claus. According to me, each year is better than the last and the best thing is to see the excitement of my baby to know that she can write her letter and now that she can write a little more 💗.This time I decided to make a Santa Claus, coming out of a chimney (I think it is quite common to see these decorations at Christmas) so without further ado, here I show you the process of this creation 🎅🏻🎄
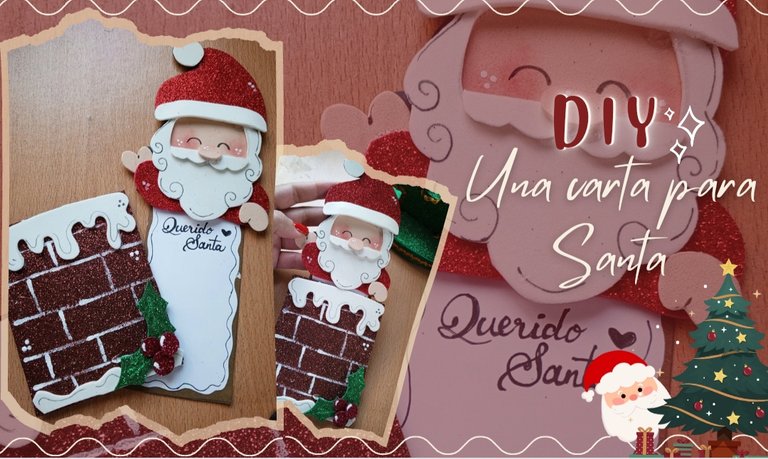

Materiales:🎅🏻
- Foami escarchado (rojo, marrón, verde)
- Foami liso (color piel y blanco)
- Cartulina marrón
- Cartulina blanca (retazo)
- Pintura al frío color blanco
- Silicón Líquido
- Marcador negro punta fina
Materials:🎅🏻
- Frosted Foami (red, brown, green)
- Smooth Foami (skin color and white)
- Brown cardboard
- White cardboard (scrap)
- Cold paint white color
- Liquid Silicone
- Black fine tip marker

Paso a Paso | Step by Step 🎅🏻
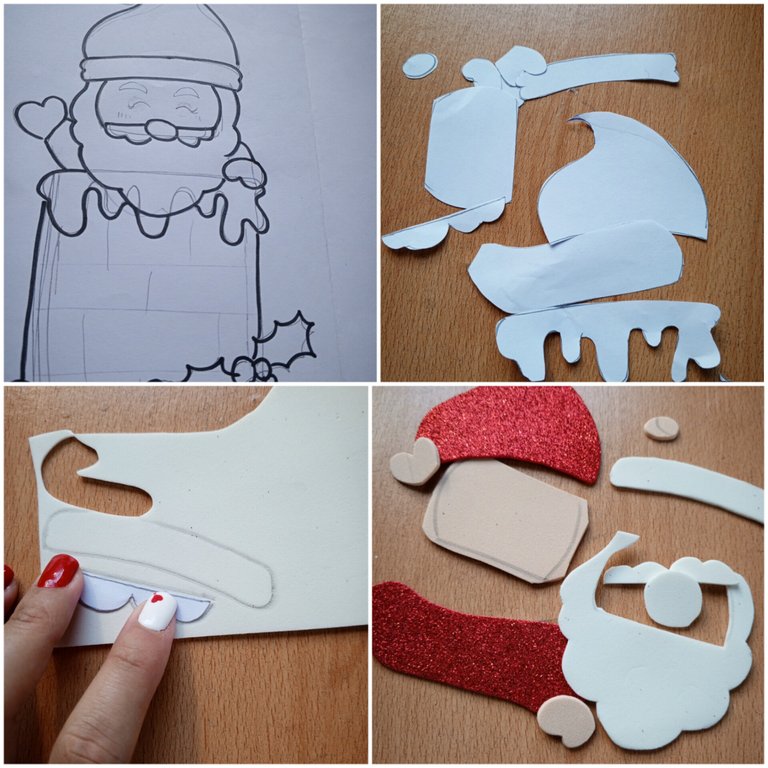
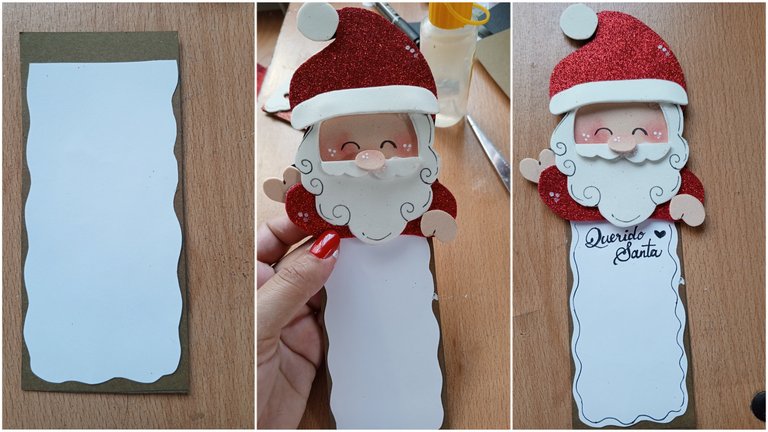
✨ En una hoja blanca realicé el dibujo o boceto de lo que quería, para luego dividir en patrones los cuales plasme en el foami correspondiente a cada color y recorte (Santa claus: gorro y parte de los brazos en rojo escarchado, detalles del gorro en blanco al igual que la barba y bigotes, el rostro, manos y nariz en color piel)
✨ On a white sheet of paper I made a drawing or sketch of what I wanted, and then divided it into patterns, which I then cut out in the foami corresponding to each color and cut out (Santa Claus: hat and part of the arms in frosted red, details of the hat in white as well as the beard and whiskers, the face, hands and nose in skin color).
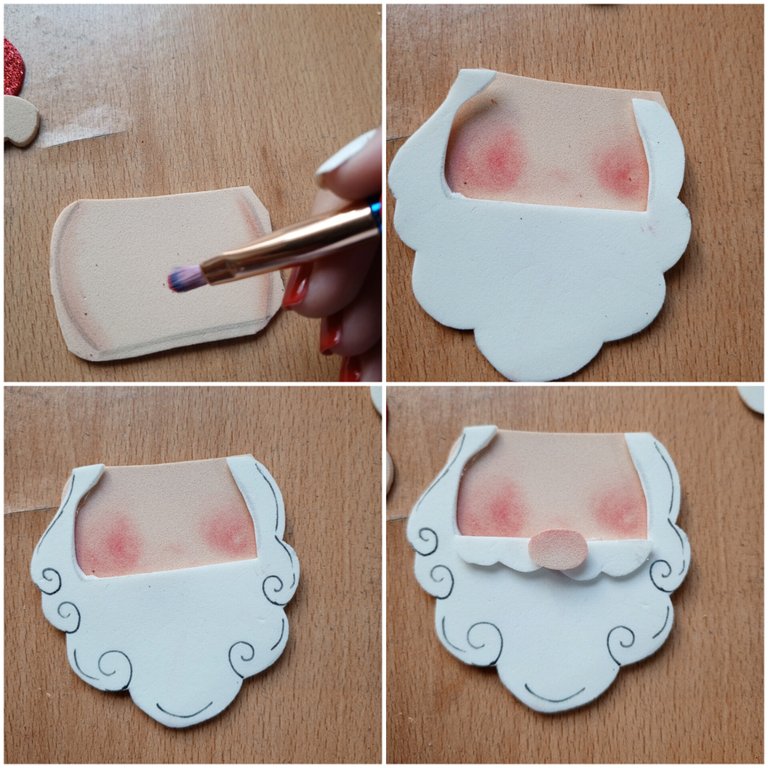
✨ Para comenzar con el santa, primero utilice un rubor viejo para darle un poco de color al rostro e hice las mejillas, luego pegue la barba a la cual le agregue algunos detalles con marcador negro punta fina, seguidamente pegue el bigote y la nariz.
✨ To start with the santa, first I used an old blush to give a little color to the face and made the cheeks, then I glued the beard to which I added some details with black fine tip marker, then I glued the mustache and nose.
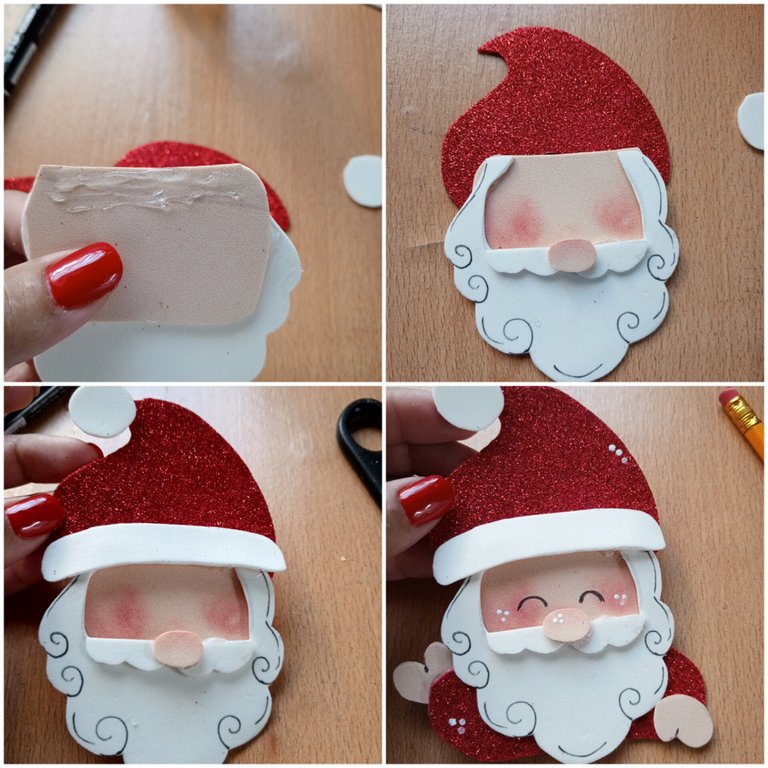
✨ Pegué el rostro sobre el gorro, y sobre este sus detalles (franja y borla), para luego nuevamente con el marcador negro punta fina realizar los ojos. Tambien pegué la parte de los brazos y las manitos.
✨ Utilicé pintura al frio color blanca y con ayuda de un puntero di algunos detalles con puntos al Santa.
✨ I glued the face on the hat, and on it the details (fringe and tassel), and then again with the black fine tip marker I made the eyes. I also glued the part of the arms and the little hands.
✨ I used white cold paint and with the help of a pointer I gave some details with dots to the Santa.
✨ Luego medí un rectángulo de cartulina marrón de 14cm×6cm y uno en cartulina blanca un poco más pequeño, al cual le hice un borde con formas ovaladas y pegue sobre el rectángulo marrón, dejando un poco de espacio en la parte superior donde pagaría al Santa.
✨ Decoré el rectángulo con un pequeño borde y escribiendo ¡Querido Santa!
✨ I then measured a rectangle of brown cardstock 14cm×6cm and one in white cardstock a little smaller, which I made a border with oval shapes and glued over the brown rectangle, leaving a little space at the top where I would pay the Santa.
✨ I decorated the rectangle with a small border and writing Dear Santa!.
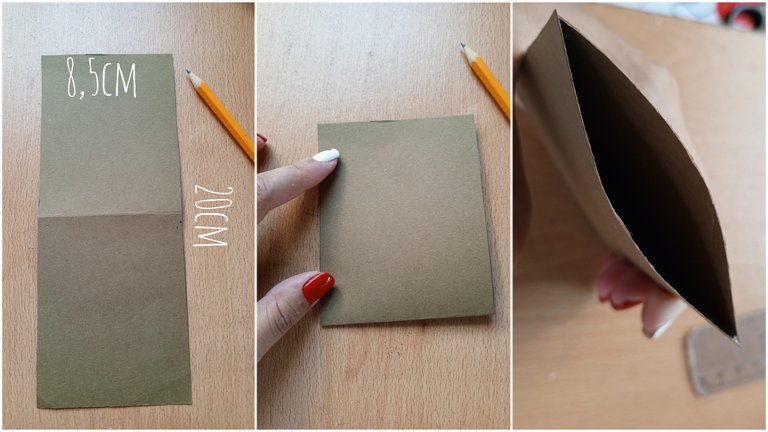
✨ Para la Chimenea: Medi también en cartulina marrón un rectángulo de 8,5cm×20cm y procedí a doblar a la mitad, para pegar solo sus lados laterales (quedando una especie de sobre).
✨ For the Chimney: I also measured on brown cardboard a rectangle of 8.5cm×20cm and proceeded to fold in half, to glue only its lateral sides (leaving a kind of envelope).
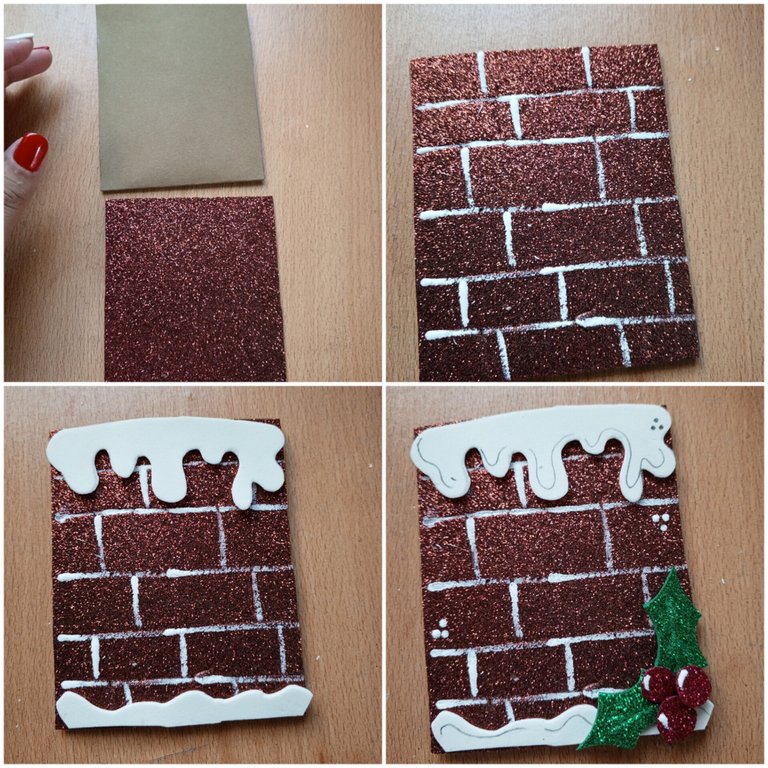
✨ Corté un cuadro de foami marrón escarchado (de la misma medida del mini sobre) al cual le hice divisiones tipo ladrillos utilizando pintura al frio blanca.
✨ En foami blanco recorte unas formas (para ser la nieve) y pegué una superior y una inferior e hice detalles con el marcador negro. Adicional realice una planta de cerezas navideñas con foami verde y rojo y pegue en la parte inferior.
✨ I cut a square of frosted brown foami (the same size as the mini envelope) to which I made brick-like divisions using white cold paint.
✨ In white foami I cut out some shapes (to be the snow) and glued a top and a bottom one and made details with the black marker. Additionally I made a Christmas cherry plant with green and red foami and glued it on the bottom.
✨ Y listo, de esta forma tendremos un diseño diferente y bonito para una carta a Santa Claus!!
✨ And ready, this way we will have a different and nice design for a letter to Santa!!!
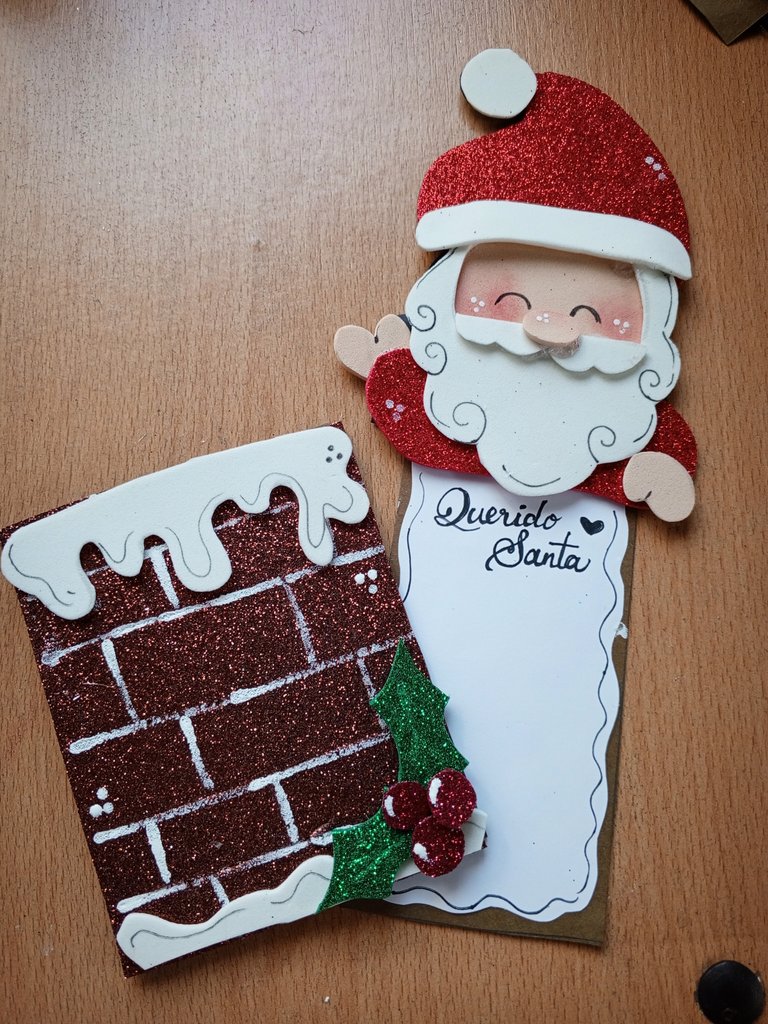

Resultado | Result🎅🏻
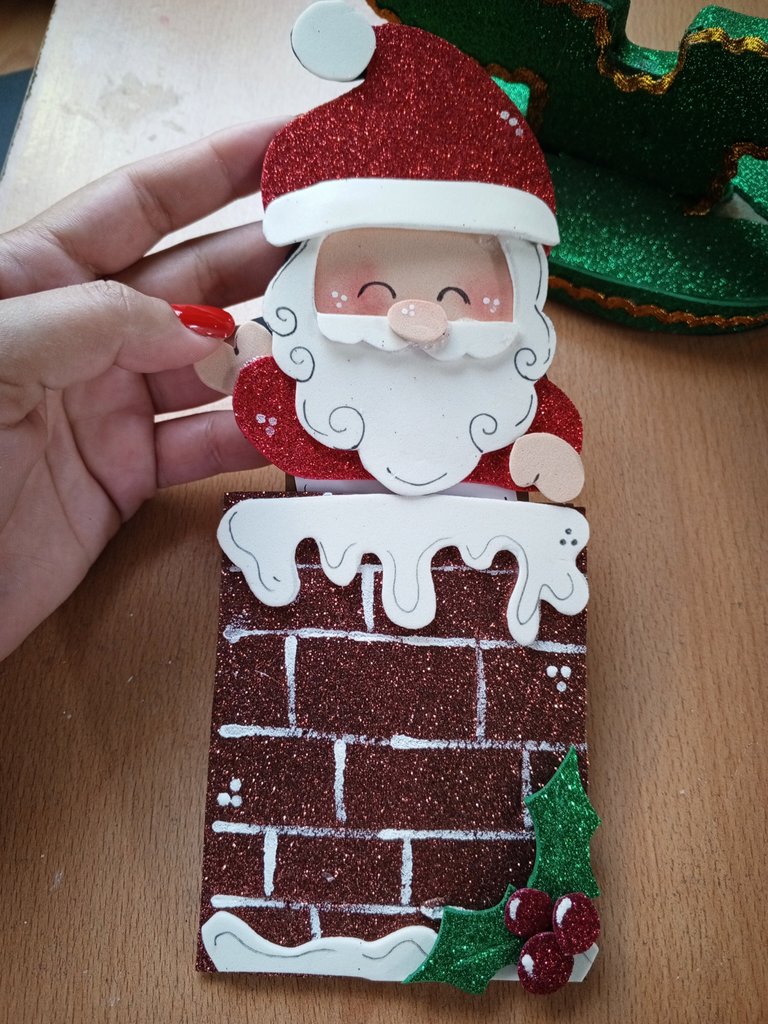
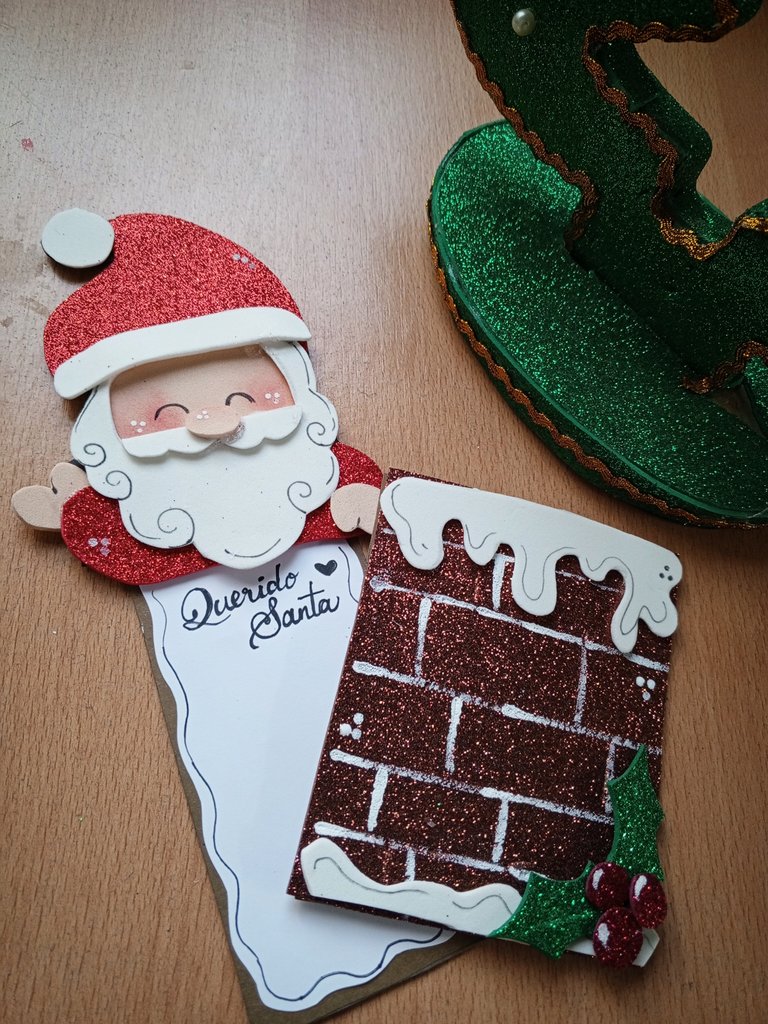
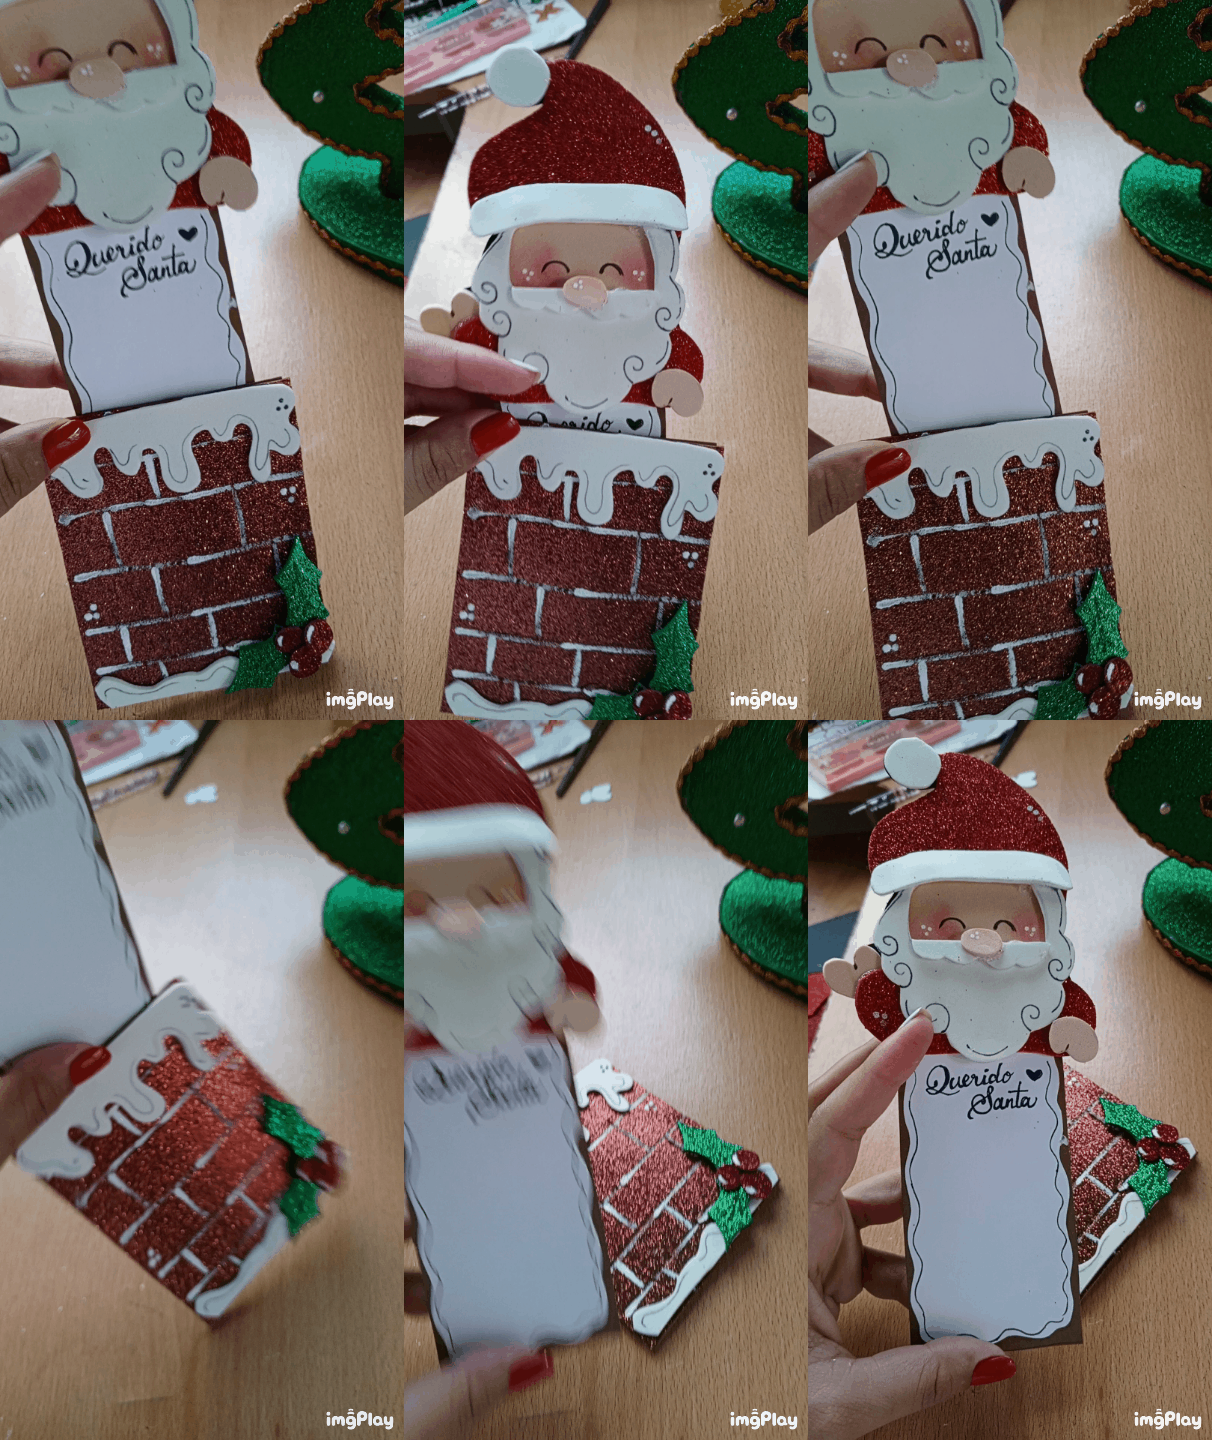

Espero este post haya sido de su agrado amigos, sin más me despido ¡Nos vemos pronto, con una nueva manualidad🥰🥰!
I hope this post has been to your liking friends, without further ado I say goodbye See you soon, with a new craft🥰🥰!
📷Ediciones | Editing in Canva and Picstar
✨Traducciones | Translations in Deepl
Pero qué hermosa manera de hacer una carta a Santa 😍 me encantó!
Ya sabes para hacerle a la preciosa Olí🥰
Una idea super linda para entregar esa carta. No se me había ocurrido que podía hacerse de esa manera, trataré de hacer algo similar para que Fabrizzio entregue la suya, aunque no prometo nada.
Me muestras, se que a Fabri le encantará la idea y bueno cualquier cosa que necesites me avisas amiga!
Lionella está más que feliz con su carta, aunque me dijo que escribirá esa y aparte hará una ella solita porque también tiene una idea en su mente🤭😅
Waoooo q preciosura, te doy un 10.👏👏 Me encantó.
Gracias muñeca, me alegra que te haya gustado
✨✨
Que Santa tan tierno!
Gracias bella..🥰
Qué belleza amiga,me encanta!!
Demasiado tierno, demasiado bello y tantos detalles hermosos. Gracias por compartir
Aims gracias amiga, bella tu con esos comentarios 🥰🥰
Que hermosa tarjeta para santa amiga, de verdad que te quedó muy bella, la amé por completo, debo hacer una tambien, vamos a ver que se me ocurre 🥰
Espero te quede preciosa amiga bella❤️❤️ me cuentas!
Te quedó demasiado bello Aliz, me encanta lo cuchi que se ve ese papa noel 😍
Aims, gracias mi Vanelinda🥰
Este santa está hermoso, que bello te quedó te felicito buen trabajo
Gracias amiga!
Después dices que yo hago cositas bellas y mira tú!!! Que hermosura amiga y muy original, nunca había visto una tarjetita así.
Cómo siempre, tienes una letra hermosa Ami. 💗
Jajajaja bueno tu me contagias entonces 🤭🤭
Gracias amiga bella, tu siempre con comentarios tan preciosos!🥰🥰
Bellísima idea, me encanto para mí niño también. Gracias por compartir.
Espero le encante a tu hijo! Saludos amiga
Que bello está, me gustaron los cachetes tan cuchi que tiene
Jaja gracias Miri preciosa, anímate a hacer la cartita para Santa, me cuentas que tal❤️