Look en tonos marrón con trazos neón✨ // Look in brown tones with neon strokes✨
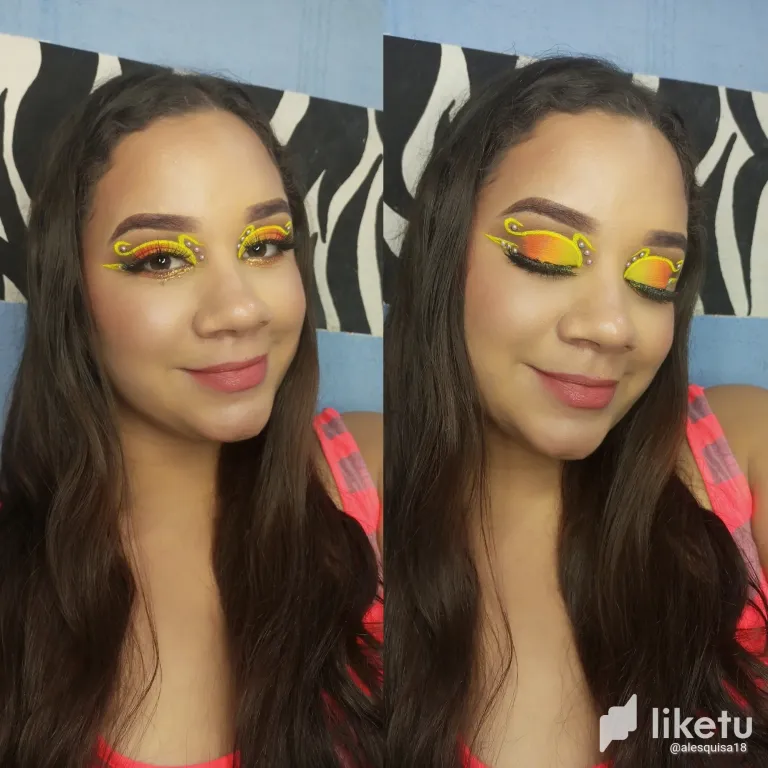
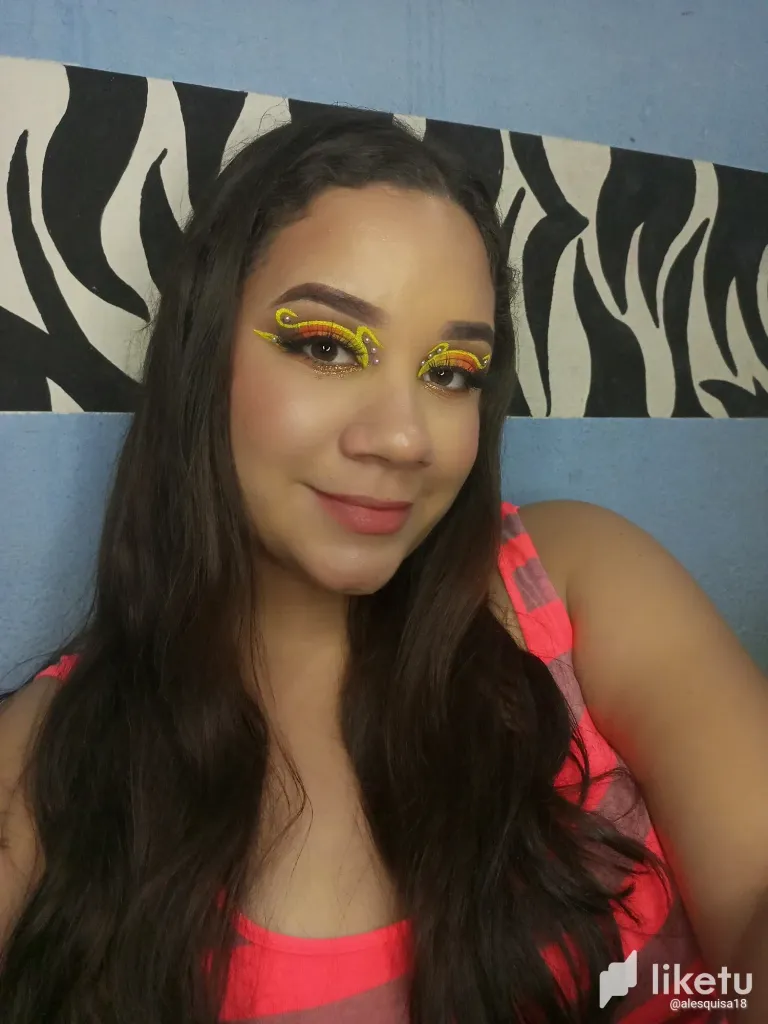
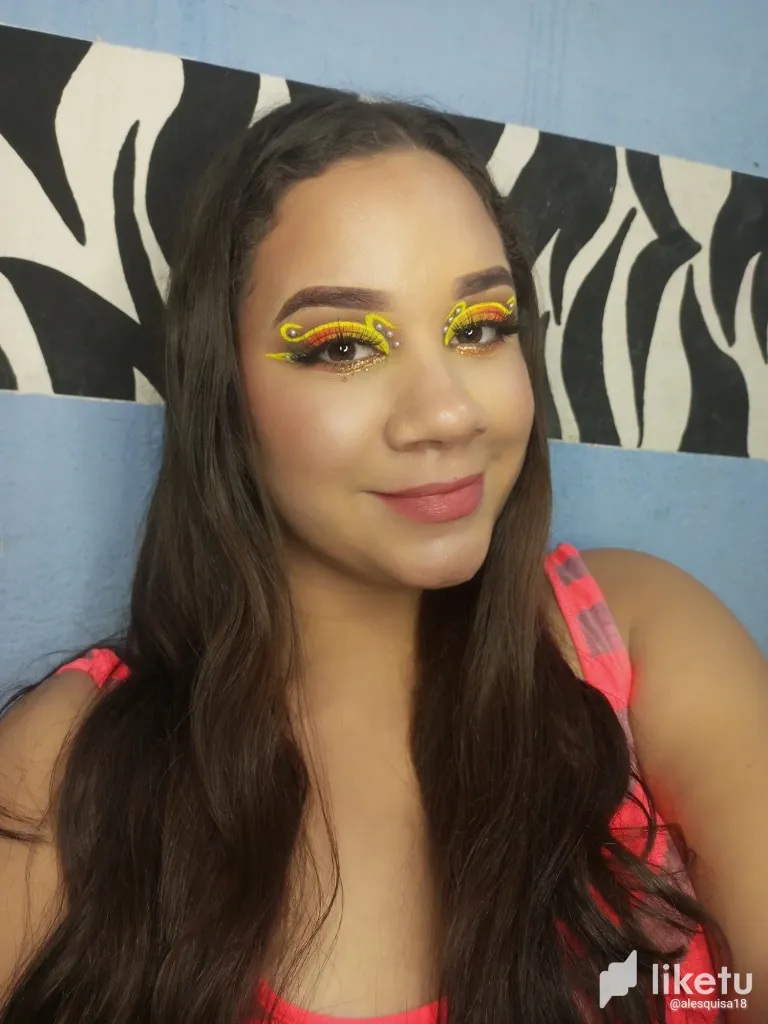
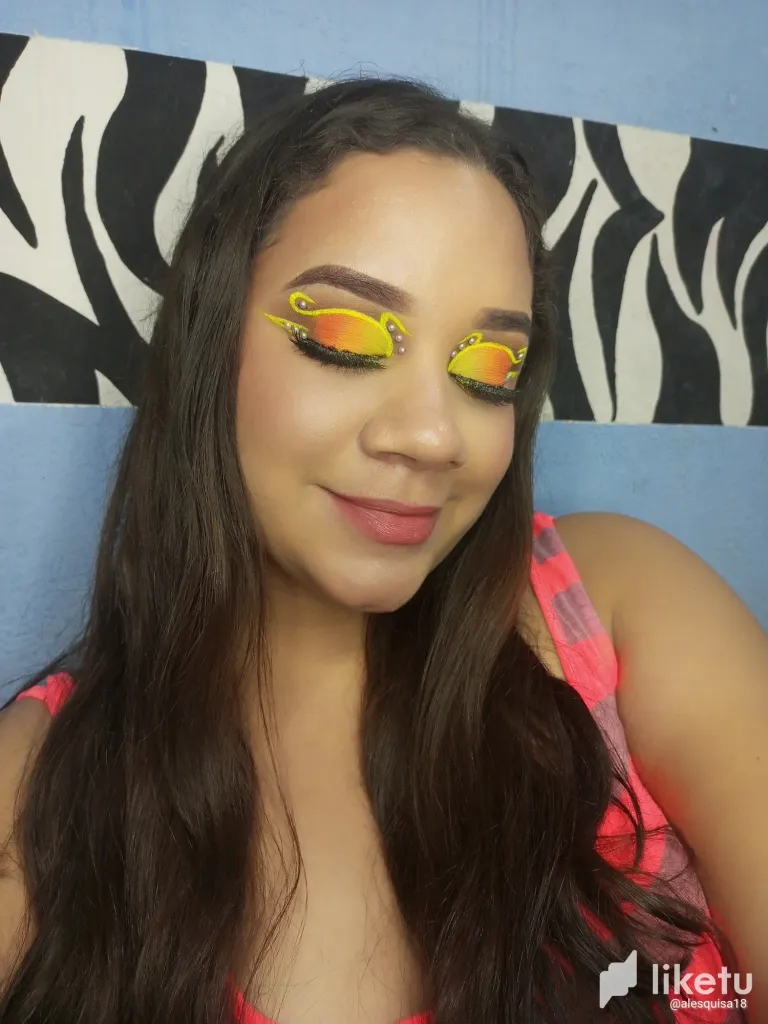
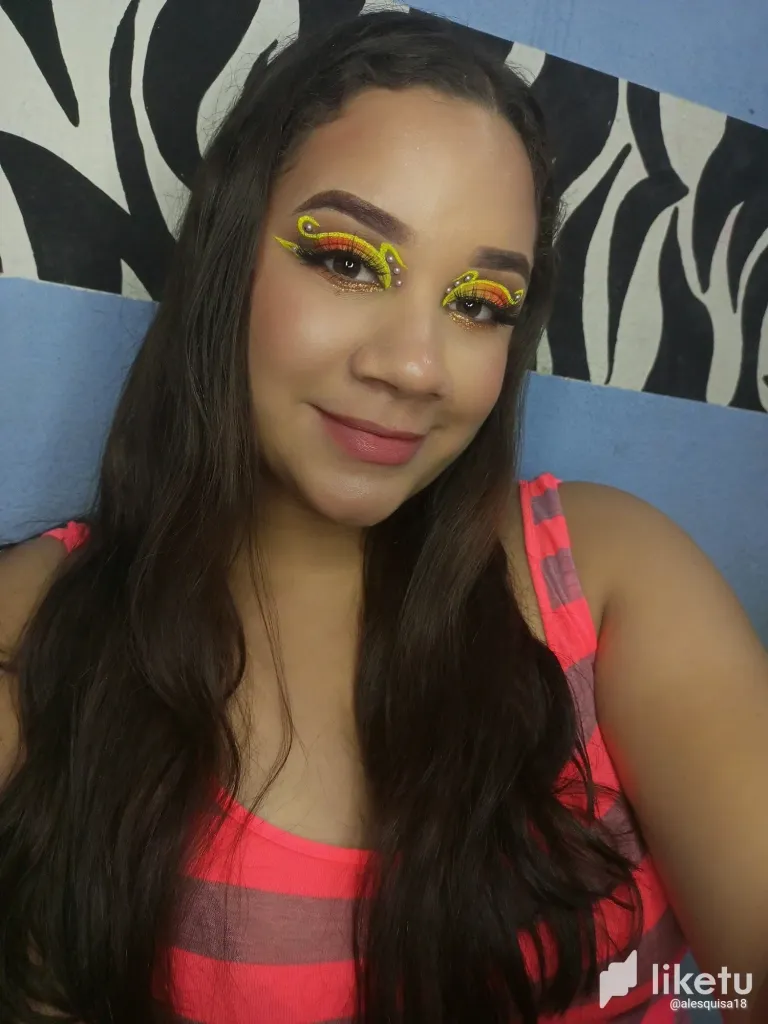
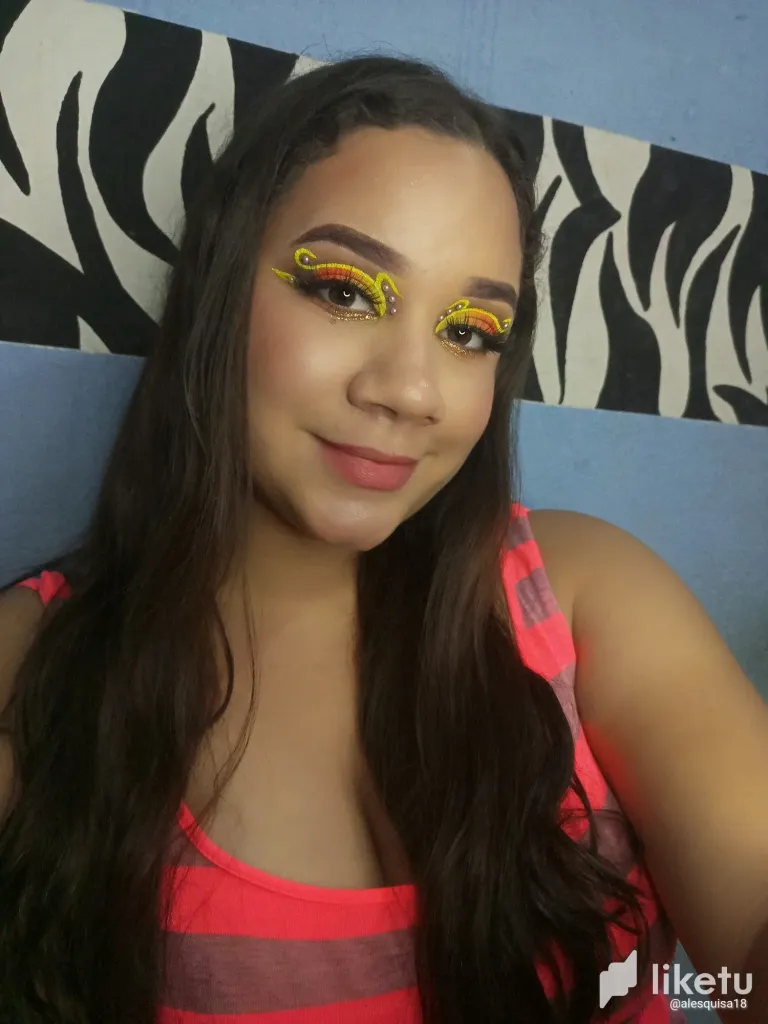
Hola holaaa, bella gente de Hive🥰. Espero hayan pasado un excelente día. Hoy vengo acá para compartirles un maquillaje diferente a los que he estado haciendo últimamente por el mes del amor. Es un tutorial sencillo y muy bien explicado paso a paso por sí gustan regresarlo. Comencemos!✨
Hello hellooo, beautiful people of Hive🥰. I hope you had a great day. Today I come here to share with you a different makeup to the ones I've been doing lately for the month of love. It's a simple tutorial and very well explained step by step in case you like to come back. Let's get started!✨.
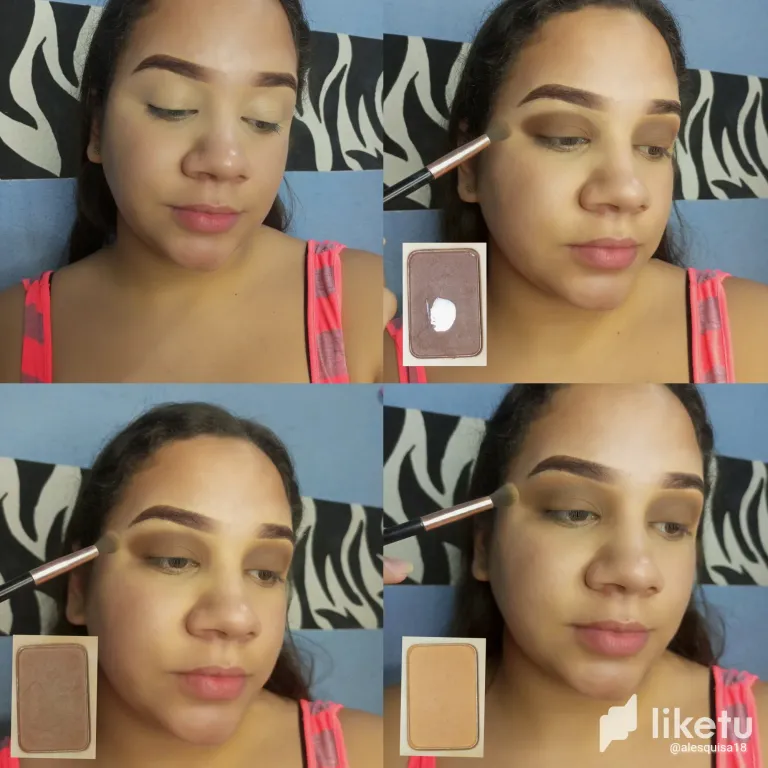
✨Paso 1 // Step 1✨
Primero me aplico corrector en todo mi párpado y lo difumino muy bien. Luego, la primer sombra que me aplico es una marrón oscuro. Para difuminar los bordes de esta, usé una sombra marrón más claro. Por último para repetir el mismo paso anterior, usé una sombra marrón mucho más claro con ayuda de una brocha para difuminar.
First I apply concealer all over my eyelid and blend it very well. Then, the first shadow I apply is a dark brown. To blend the edges of this, I used a lighter brown shadow. Lastly, to repeat the same step above, I used a much lighter brown shadow with the help of a blending brush.
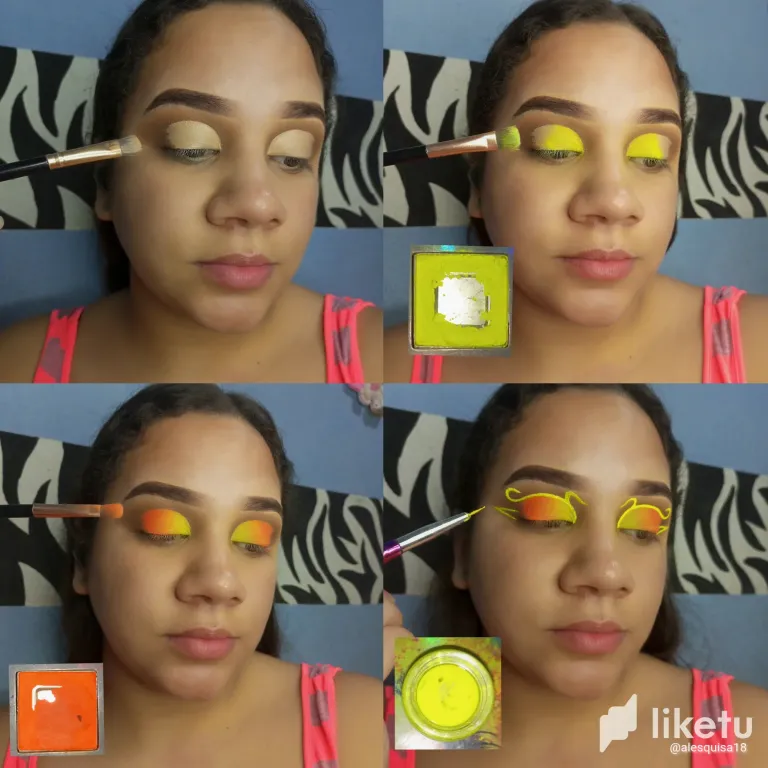
✨Paso 2 // Step 2✨
Con el corrector y una brocha tipo lengua de gato, me realizo un semi cut crease y en él aplico primero una sombra amarilla neón y luego una naranja neón. Después, con un pincel punta fina y delineador en crema color amarillo neón, me realizo varios trazos y la silueta de un delineado vacío para poner mini perlas dentro de él en el próximo paso.
With the concealer and a cat tongue brush, I do a semi cut crease and apply first a neon yellow shadow and then a neon orange. Then, with a fine tip brush and neon yellow cream eyeliner, I make several strokes and the silhouette of an empty eyeliner to put mini pearls inside it in the next step.
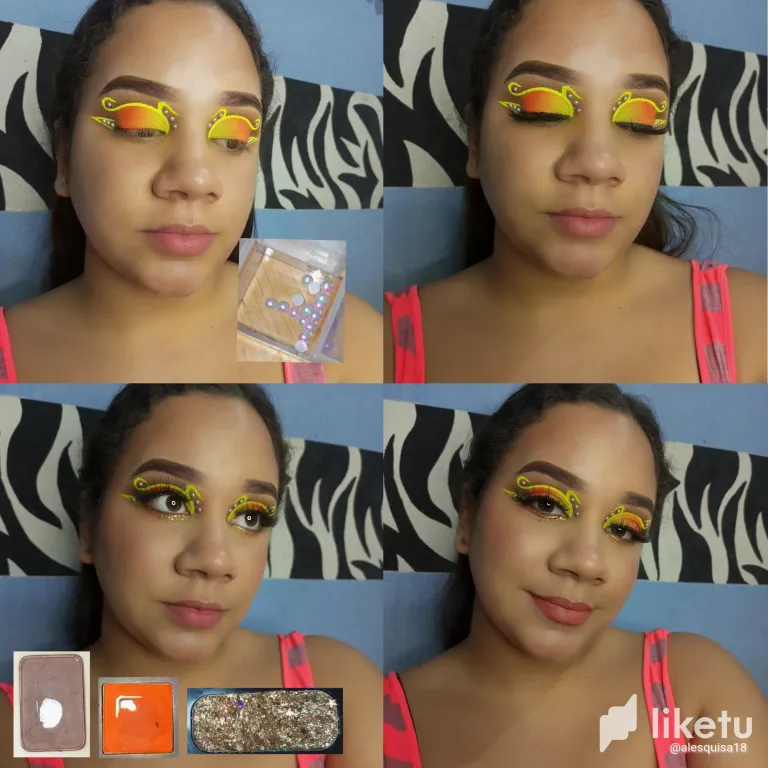
✨Paso 3 // Step 3✨
Dentro de los trazos me coloco las mini perlas que les mencioné anteriormente. Me aplico pestañas postizas para luego colocar las sombras en el párpado inferior, ahí me realizo un pequeño degradado de las sombras marrón oscuro y la naranja neón. Al inicio de este también me coloco brillantina dorada. En los labios sólo me apliqué labial tono nude.
Inside the strokes I apply the mini pearls that I mentioned before. I apply false eyelashes and then I place the shadows on the lower eyelid, there I make a small gradient of dark brown and neon orange shadows. At the beginning of this I also apply gold glitter. On the lips I only applied nude lipstick.
Y listo!, así quedó de bonito el look de hoy. A pesar de que se me fue la luz cuando estaba casi terminando😅, valió la pena esperar a que regresara para venir a mostrarles las foros del resultado final🥰. Espero les haya gustado, muchas gracias por ver, nos vemos en otro próximo makeup post💗.
And that's it, that's how pretty today's look was. Even though the power went out when I was almost finished😅, it was worth waiting for me to come back to show you the final result🥰. I hope you liked it, thanks so much for watching, see you in another next makeup post💗.
- El texto es completamente de mi autoría
- The text is entirely by me
- Traducción realizada con DeepL Traslate
- Translation using DeepL Traslate
- App's de edición: PicsArt
- App's edition: PicsArt
- Cámara: Tecno Pova 2
- Camera: Tecno Pova 2
- Las fotos tienen la iluminación de mi aro de luz led
- The photos are the illumination of my led light ring
- Traducción realizada con DeepL Traslate
- Translation using DeepL Traslate
- App's de edición: PicsArt
- App's edition: PicsArt
- Cámara: Tecno Pova 2
- Camera: Tecno Pova 2
- Las fotos tienen la iluminación de mi aro de luz led
- The photos are the illumination of my led light ring
- App's de edición: PicsArt
- App's edition: PicsArt
- Cámara: Tecno Pova 2
- Camera: Tecno Pova 2
- Las fotos tienen la iluminación de mi aro de luz led
- The photos are the illumination of my led light ring
- Cámara: Tecno Pova 2
- Camera: Tecno Pova 2
- Las fotos tienen la iluminación de mi aro de luz led
- The photos are the illumination of my led light ring
- Las fotos tienen la iluminación de mi aro de luz led
- The photos are the illumination of my led light ring
For the best experience view this post on Liketu
0
0
0.000
!LOL
Posted using Hive Images
lolztoken.com
Beause they make up everything.
Credit: reddit
@alesquisa18, I sent you an $LOLZ on behalf of hivephoto
(8/10)
Delegate Hive Tokens to Farm $LOLZ and earn 110% Rewards. Learn more.