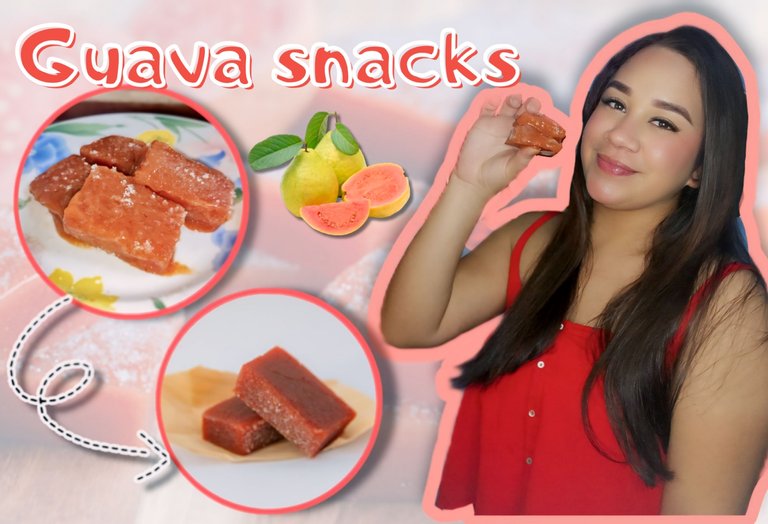
Exquisito bocadillo de guayaba🤩 // Exquisite guava snack🤩
Hola, queridos amigos de Hive y apasionados de la cocina❤️. El día de hoy les traigo una receta súper sencilla y rápida para preparar deliciosos bocadillos de guayaba, uno de los manjares más amados por cualquier persona. Este postre artesanal es originalmente colombiano, siendo uno de los primeros postres elaborados por tradición, para luego exportarse a muchos países incluyendo nuestra Venezuela. En mi caso, este dulce es uno de mis favoritos y no veía la hora de aprender a prepararlo para traerles la receta. He visto por ahí que normalmente se prueba con queso, también me animé a probarlo de esa manera y lo hace todavía más delicioso, la mezcla de sabor dulce y salado le dan el toque perfecto a la hora de degustar. Sin más que decir, por acá les dejo el modo de preparación🤗.
Hello, dear friends of Hive and lovers of kitchen❤️. Today I bring you a super simple and quick recipe to prepare delicious guava snacks, one of the most loved delicacies by anyone. This artisan dessert is originally Colombian, being one of the first desserts made by tradition, and then exported to many countries including our Venezuela. In my case, this sweet is one of my favorites and I couldn't wait to learn how to prepare it and bring you the recipe. I have seen out there that it is usually tasted with cheese, I also decided to try it that way and it makes it even more delicious, the mixture of sweet and salty flavor gives it the perfect touch when it comes to taste. Without further ado, here is how to prepare it🤗.
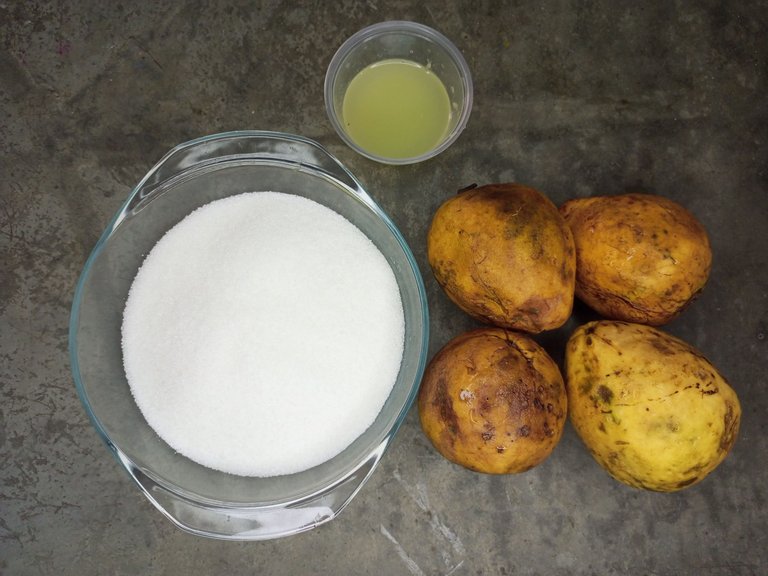
👩🏻🍳Los ingredientes a utilizar son:👩🏻🍳
👩🏻🍳The ingredients to be used are:👩🏻🍳
• 4 guayabas maduras (Previamente lavadas).
• 500 gm de azúcar.
• Zumo de 1 limón grande.
• 4 ripe guavas (previously washed).
• 500 gm of sugar.
• Juice of 1 large lemon.
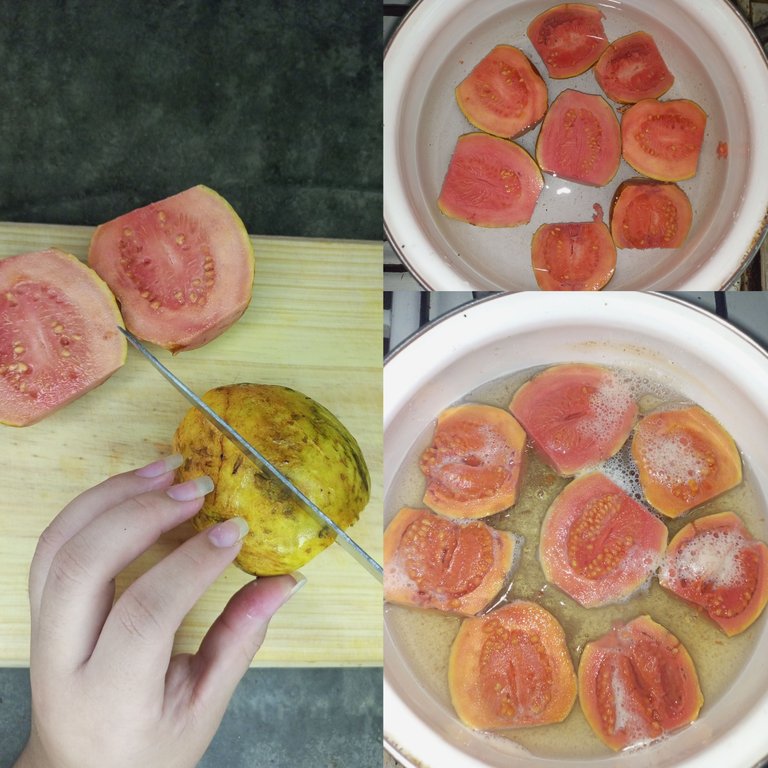
Comienzo cortando las guayabas por la mitad para luego añadirlas a una olla con medio litro de agua, esto con el fin de sancocharlas y poder hacer la mezcla para los bocadillos. Ya hervidas se deben haber agrandado bastante, soltando poco a poco trozos pequeños de la misma fruta o las semillas.
I start by cutting the guavas in half and then add them to a pot with half a liter of water, this in order to parboil them and make the mixture for the snacks. Once boiled, they should have become quite large, releasing little by little small pieces of the fruit itself or the seeds.
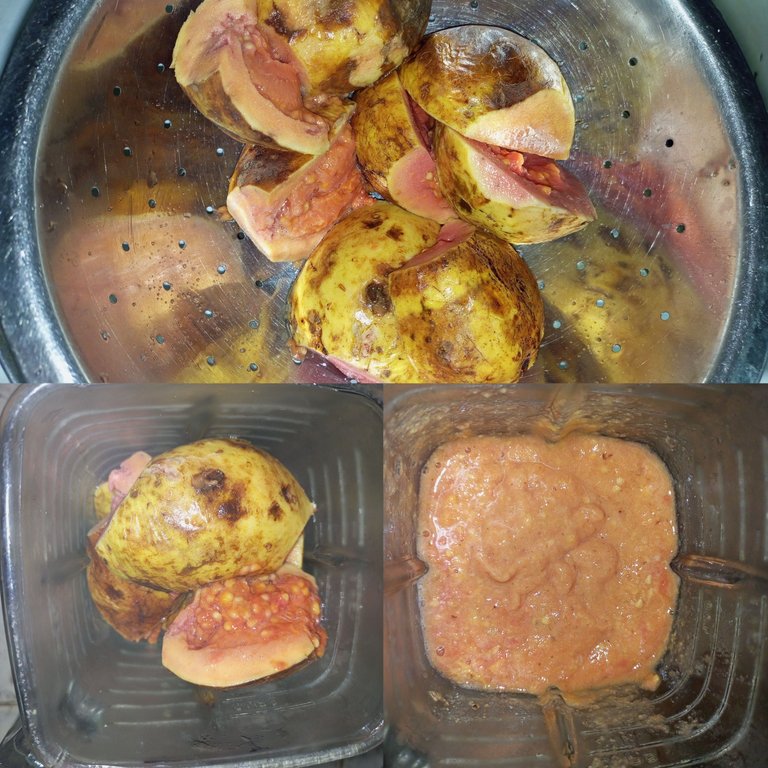
Las añado a un colador para sacar el agua y después las coloco sin agua en la licuadora para obtener un zumo bastante espeso. Sí prefieres agregarle un poco de agua para no hacer tan difícil el proceso del colado, puedes hacerlo. Siempre y cuando quede la mezcla espesa y no líquida.
I add them to a strainer to remove the water and then place them without water in the blender to obtain a fairly thick juice. If you prefer to add a little water to make the straining process less difficult, you can do so. As long as the mixture is thick and not liquid.
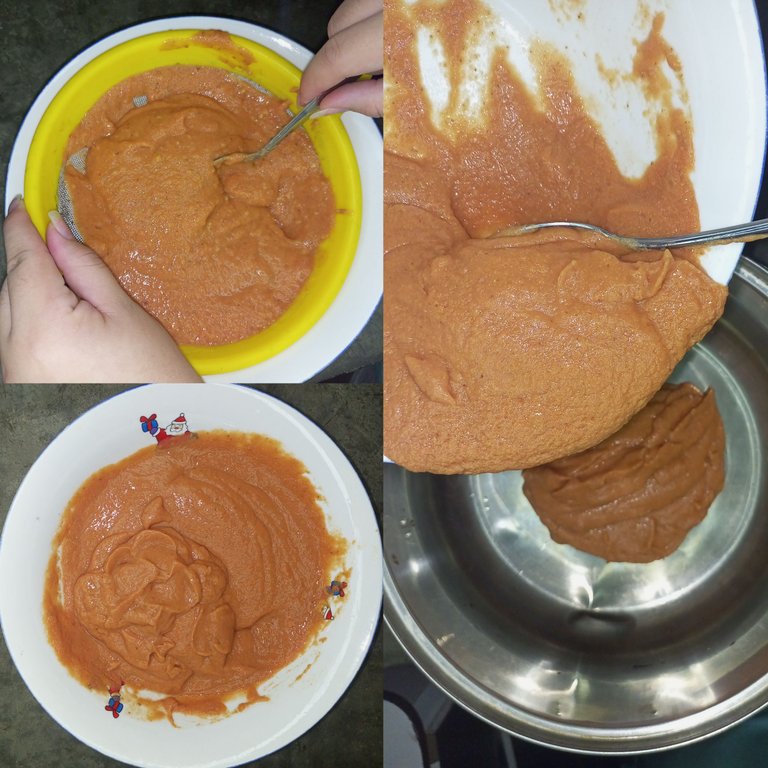
Coloco la mezcla desde la licuadora al colador poco a poco para ir colando la guayaba, esto lo hago para eliminar las semillas y los grumos. Este proceso tarda un tiempo determinado ya que las partículas de la fruta son bastante gruesas y eso hará que incrementamos una fuerza considerable a la hora de realizar este proceso, así que hay que tener paciencia!. Posteriormente, al tener toda la mezcla colada y lista para ponerla al fuego, la paso a una olla.
I place the mixture from the blender into the strainer little by little to strain the guava, I do this to eliminate the seeds and lumps. This process takes a certain amount of time because the fruit particles are quite thick and that will make us increase a considerable force when carrying out this process, so you have to be patient! Later, when I have all the mixture strained and ready to put it to the fire, I pass it to a pot.
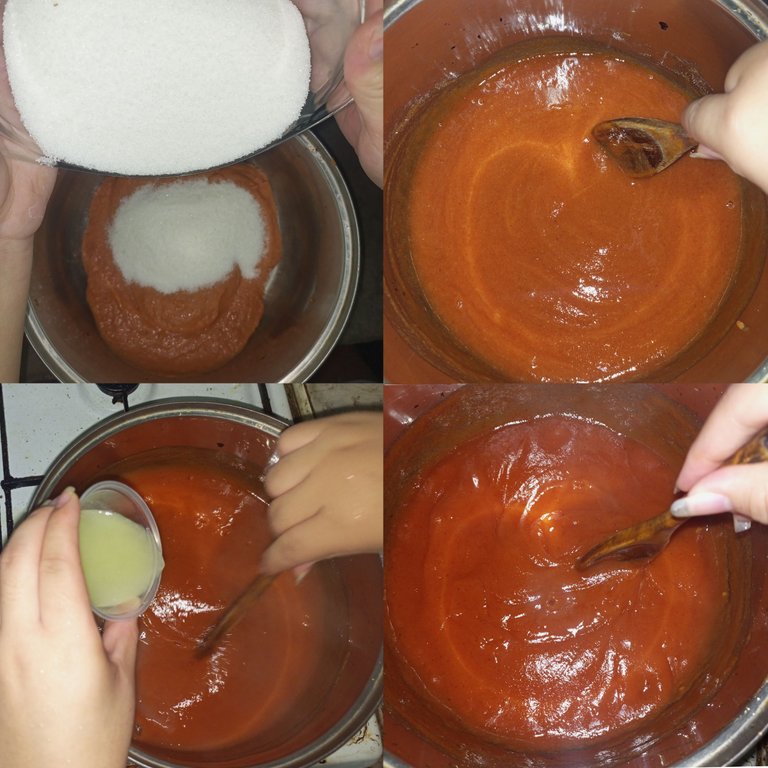
Luego de agregar la mezcla a una olla, le añado los 500 gm de azúcar y la coloco en la cocina para empezar a menear la mezcla e irla cocinando a fuego medio. Pasados 2 minutos y sin dejar de menear, le agregamos el zumo del limón que es el que le empezará a dar la consistencia rato después. Seguimos revolviendo durante 20 minutos hasta que la mezcla adopte una consistencia espesa de un color rojizo bastante oscuro, tal cual a la salsa de tomate. Ya lista nuestra mezcla, retiramos de la cocina para dejar reposar por unos 10 minutos y luego pasarla a un molde o recipiente.
After adding the mixture to a pot, I add the 500 gm of sugar and place it on the stove to start stirring the mixture and cook it over medium heat. After 2 minutes and without stopping stirring, we add the lemon juice, which is what will give it the consistency a while later. We continue stirring for 20 minutes until the mixture adopts a thick consistency of a rather dark reddish color, just like tomato sauce. Once our mixture is ready, we remove it from the stove to let it rest for about 10 minutes and then transfer it to a mold or container.
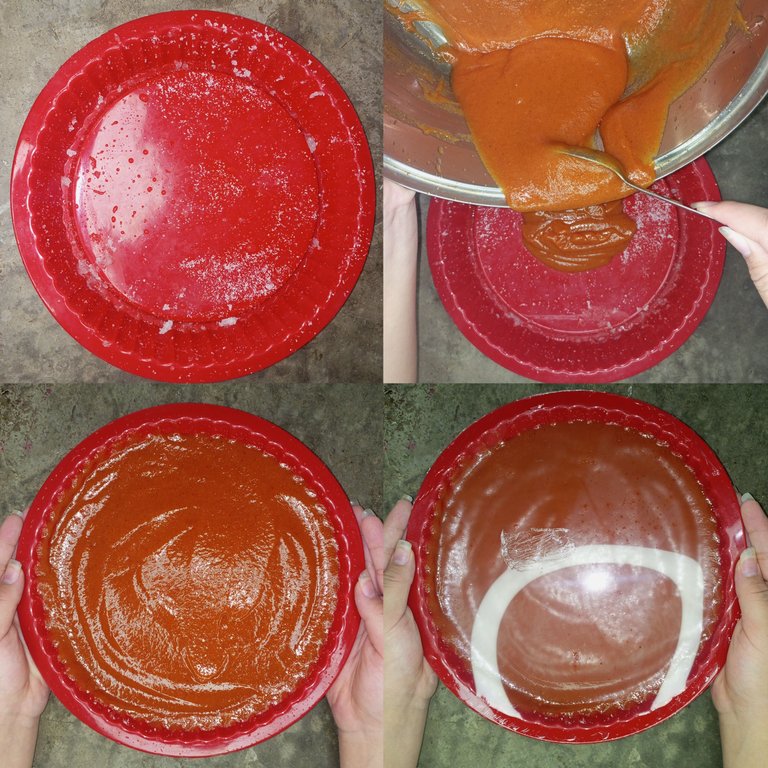
Yo utilicé un molde de silicona resistente al calor. Cómo idea opcional, primero lo humedecí un poco para agregarle poca azúcar. Después, agregué la mezcla en el molde y lo tapé con papel film o papel transparente para llevarlo a refrigerar por 12 horas.
I used a heat-resistant silicone mold. As an optional idea, I first moistened it a little to add a little sugar. Then, I added the mixture in the mold and covered it with plastic wrap or transparent paper to refrigerate it for 12 hours.
Pasadas las horas en el refrigerador, procedí a desmoldar para empezar a cortar los trozos y empezar a colocarles un poco de azúcar a su alrededor.
After a few hours in the refrigerator, I proceeded to unmold to start cutting the pieces and put some sugar around them.
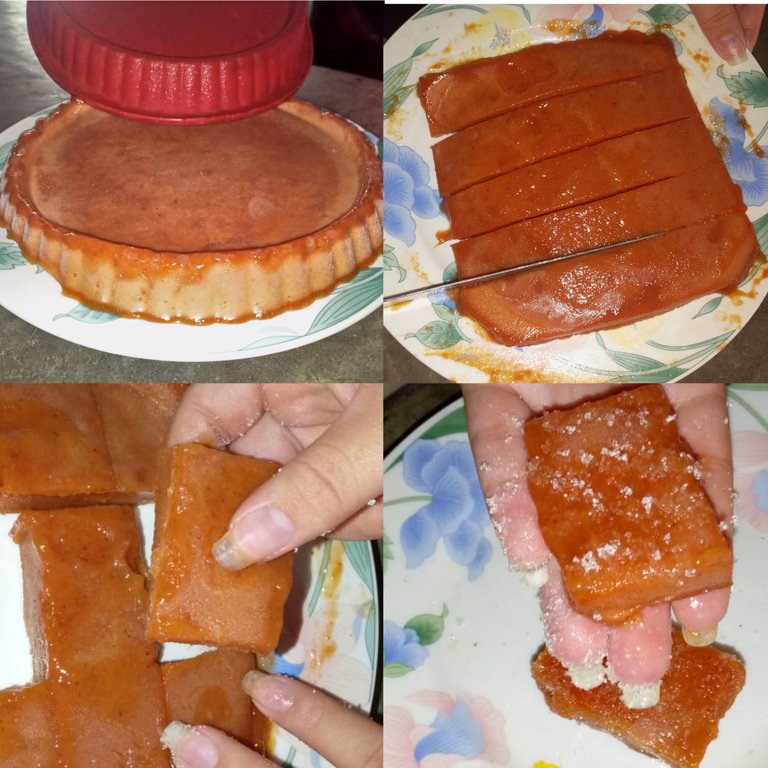
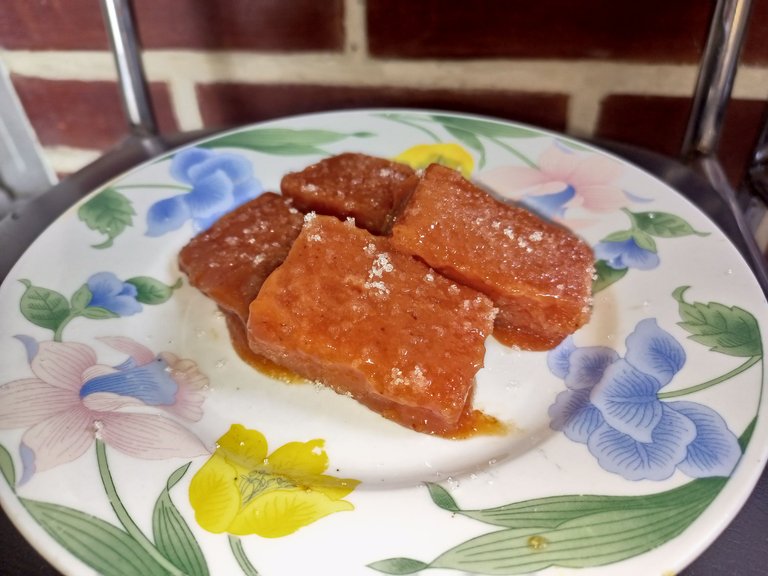
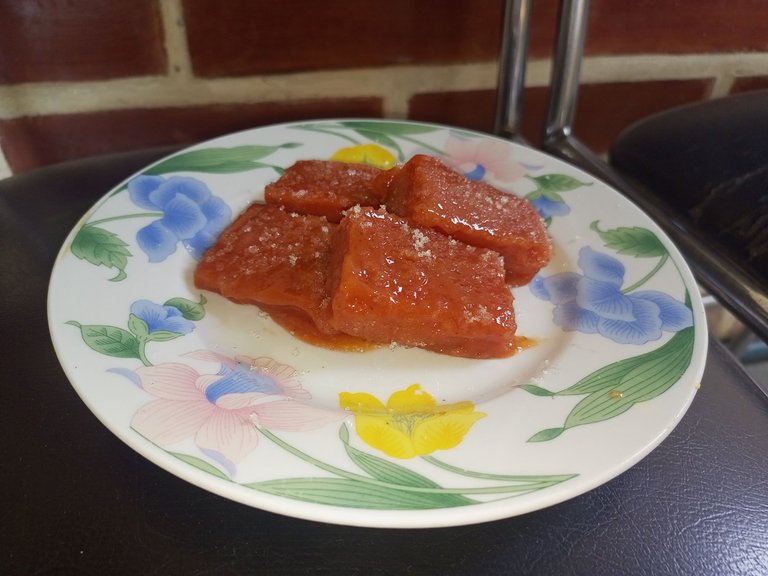
Y así me han quedado!, el sabor estaba realmente exquisito y la textura muy suave y blanda, ideal para el paladar. Quizá agregándole gelatina sin sabor a la mezcla antes de ponerla en el molde, hubiese quedado más compactada como los típicos bocadillos artesanales. Igualmente, me entretuve mucho realizando este delicioso manjar, aprendiendo a prepararlo para merendar cuando sea🤗. Espero les haya gustado, muchas gracias por visualizar. Nos vemos luego💗.
The flavor was really exquisite and the texture was very smooth and soft, ideal for the palate. Perhaps adding unflavored gelatin to the mixture before putting it in the mold would have made it more compact like the typical homemade snacks. Anyway, I had a lot of fun making this delicious treat, learning how to prepare it for snacking whenever🤗. I hope you liked it, thank you very much for watching. See you later💗.
📝 El texto es completamente de mi autoría
📝 The text is entirely by me
🖱️ Traducción realizada con DeepL Traslate
🖱️ Translation using DeepL Traslate
📱 App's de edición: GirdArt
📱 App's edition: GirdArt
📸 Cámara: Tecno Pova 2
📸 Camera: Tecno Pova 2
💡Las fotos tienen la iluminación de mi aro de luz led
💡 The photos are the illumination of my led light ring
👩🏻🍳The ingredients to be used are:👩🏻🍳
• 4 guayabas maduras (Previamente lavadas).
• 500 gm de azúcar.
• Zumo de 1 limón grande.
• 4 ripe guavas (previously washed).
• 500 gm of sugar.
• Juice of 1 large lemon.

Comienzo cortando las guayabas por la mitad para luego añadirlas a una olla con medio litro de agua, esto con el fin de sancocharlas y poder hacer la mezcla para los bocadillos. Ya hervidas se deben haber agrandado bastante, soltando poco a poco trozos pequeños de la misma fruta o las semillas.
I start by cutting the guavas in half and then add them to a pot with half a liter of water, this in order to parboil them and make the mixture for the snacks. Once boiled, they should have become quite large, releasing little by little small pieces of the fruit itself or the seeds.

Las añado a un colador para sacar el agua y después las coloco sin agua en la licuadora para obtener un zumo bastante espeso. Sí prefieres agregarle un poco de agua para no hacer tan difícil el proceso del colado, puedes hacerlo. Siempre y cuando quede la mezcla espesa y no líquida.
I add them to a strainer to remove the water and then place them without water in the blender to obtain a fairly thick juice. If you prefer to add a little water to make the straining process less difficult, you can do so. As long as the mixture is thick and not liquid.

Coloco la mezcla desde la licuadora al colador poco a poco para ir colando la guayaba, esto lo hago para eliminar las semillas y los grumos. Este proceso tarda un tiempo determinado ya que las partículas de la fruta son bastante gruesas y eso hará que incrementamos una fuerza considerable a la hora de realizar este proceso, así que hay que tener paciencia!. Posteriormente, al tener toda la mezcla colada y lista para ponerla al fuego, la paso a una olla.
I place the mixture from the blender into the strainer little by little to strain the guava, I do this to eliminate the seeds and lumps. This process takes a certain amount of time because the fruit particles are quite thick and that will make us increase a considerable force when carrying out this process, so you have to be patient! Later, when I have all the mixture strained and ready to put it to the fire, I pass it to a pot.

Luego de agregar la mezcla a una olla, le añado los 500 gm de azúcar y la coloco en la cocina para empezar a menear la mezcla e irla cocinando a fuego medio. Pasados 2 minutos y sin dejar de menear, le agregamos el zumo del limón que es el que le empezará a dar la consistencia rato después. Seguimos revolviendo durante 20 minutos hasta que la mezcla adopte una consistencia espesa de un color rojizo bastante oscuro, tal cual a la salsa de tomate. Ya lista nuestra mezcla, retiramos de la cocina para dejar reposar por unos 10 minutos y luego pasarla a un molde o recipiente.
After adding the mixture to a pot, I add the 500 gm of sugar and place it on the stove to start stirring the mixture and cook it over medium heat. After 2 minutes and without stopping stirring, we add the lemon juice, which is what will give it the consistency a while later. We continue stirring for 20 minutes until the mixture adopts a thick consistency of a rather dark reddish color, just like tomato sauce. Once our mixture is ready, we remove it from the stove to let it rest for about 10 minutes and then transfer it to a mold or container.

Yo utilicé un molde de silicona resistente al calor. Cómo idea opcional, primero lo humedecí un poco para agregarle poca azúcar. Después, agregué la mezcla en el molde y lo tapé con papel film o papel transparente para llevarlo a refrigerar por 12 horas.
I used a heat-resistant silicone mold. As an optional idea, I first moistened it a little to add a little sugar. Then, I added the mixture in the mold and covered it with plastic wrap or transparent paper to refrigerate it for 12 hours.

Pasadas las horas en el refrigerador, procedí a desmoldar para empezar a cortar los trozos y empezar a colocarles un poco de azúcar a su alrededor.
After a few hours in the refrigerator, I proceeded to unmold to start cutting the pieces and put some sugar around them.

Y así me han quedado!, el sabor estaba realmente exquisito y la textura muy suave y blanda, ideal para el paladar. Quizá agregándole gelatina sin sabor a la mezcla antes de ponerla en el molde, hubiese quedado más compactada como los típicos bocadillos artesanales. Igualmente, me entretuve mucho realizando este delicioso manjar, aprendiendo a prepararlo para merendar cuando sea🤗. Espero les haya gustado, muchas gracias por visualizar. Nos vemos luego💗.
The flavor was really exquisite and the texture was very smooth and soft, ideal for the palate. Perhaps adding unflavored gelatin to the mixture before putting it in the mold would have made it more compact like the typical homemade snacks. Anyway, I had a lot of fun making this delicious treat, learning how to prepare it for snacking whenever🤗. I hope you liked it, thank you very much for watching. See you later💗.


📝 El texto es completamente de mi autoría
📝 The text is entirely by me
🖱️ Traducción realizada con DeepL Traslate
🖱️ Translation using DeepL Traslate
📱 App's de edición: GirdArt
📱 App's edition: GirdArt
📸 Cámara: Tecno Pova 2
📸 Camera: Tecno Pova 2
💡Las fotos tienen la iluminación de mi aro de luz led
💡 The photos are the illumination of my led light ring
🖱️ Traducción realizada con DeepL Traslate
🖱️ Translation using DeepL Traslate
📱 App's de edición: GirdArt
📱 App's edition: GirdArt
📸 Cámara: Tecno Pova 2
📸 Camera: Tecno Pova 2
💡Las fotos tienen la iluminación de mi aro de luz led
💡 The photos are the illumination of my led light ring
📱 App's de edición: GirdArt
📱 App's edition: GirdArt
📸 Cámara: Tecno Pova 2
📸 Camera: Tecno Pova 2
💡Las fotos tienen la iluminación de mi aro de luz led
💡 The photos are the illumination of my led light ring
📸 Cámara: Tecno Pova 2
📸 Camera: Tecno Pova 2
💡Las fotos tienen la iluminación de mi aro de luz led
💡 The photos are the illumination of my led light ring
💡Las fotos tienen la iluminación de mi aro de luz led
💡 The photos are the illumination of my led light ring
0
0
0.000
La verdad es que están deli, deli!!
Un postre delicioso y exquisito siendo la primera vez preparándolo!🤩