Manejo y Uso Correcto de la Desmalezadora // Handling and Correct Use of the Weed Cutter
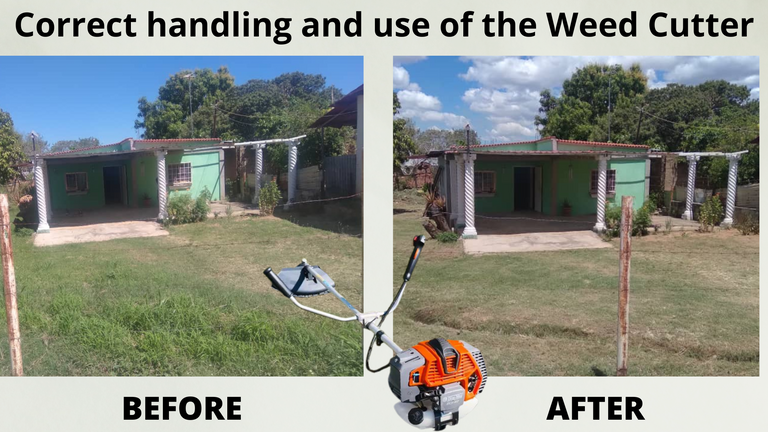
Hello friends of hive and Diyhub community, it is a pleasure to greet you and share with you all the process of weeding the front of my humble home, as there is a lot of evil and we must be pruning it constantly, and thus avoid hiding stinky animals🦂🕷 and give a nice view to our main entrance.
It is very important to mow the lawn and give a good view to your garden, when it comes to bring visitors to your home, that will speak very well of you.
Without further ado, the tools we used in this cleaning process were the following:
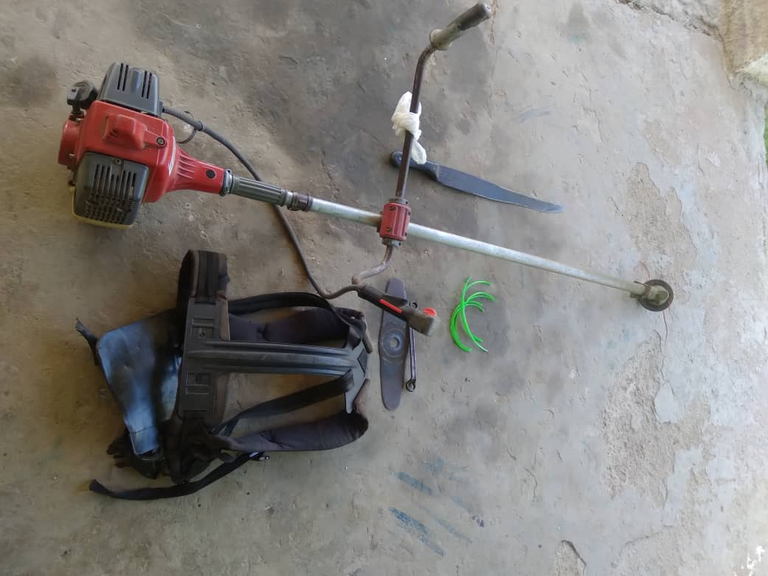
👷♂️ WEED TRIMMER OR BRUSH CUTTER EFCO9530
👷♂️HILO HEXAGONAL CUTTER
👷♂️1 WEED CUTTER VEST OR HARNESS
👷♂️1 MACHETE
👷♂️ 1 BLADE
👷♂️2ltr 2-STROKE GASOLINE AND OIL
It was a very easy and quick process that I will share with you in just 3 steps.
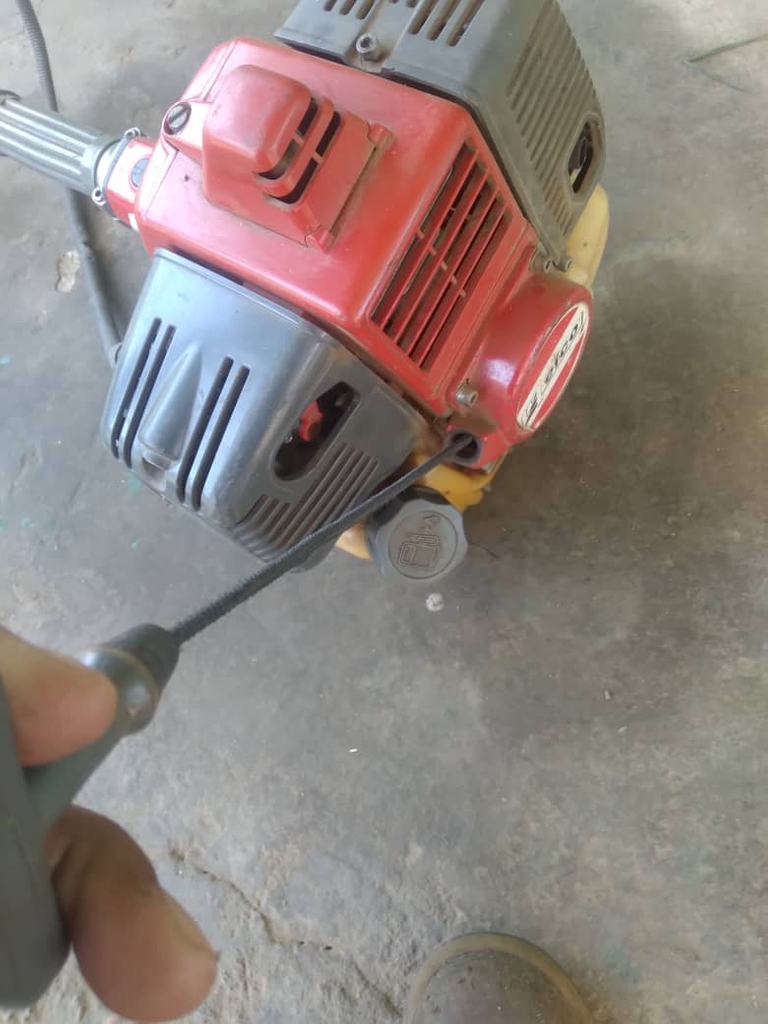
Step 1
The first thing we did was to pump the weed whacker to get the fuel into the carburetor.

Then we lowered the red lever to give it a better understanding and to start it faster.

Then we pull the lever so that our brushcutter or weed trimmer starts, it is worth mentioning that we had already mixed our gasoline with the 2-stroke oil.
Step 2
After putting our hexagonal thread we place ourselves in front of the weed and accelerate the weed trimmer until it starts cutting, it is important to accelerate not too much or too little to make our brush cutter work well and make us a good cut.

The way to work with this weed cutter is very easy, you only have to make firm movements from right to left and left to right.

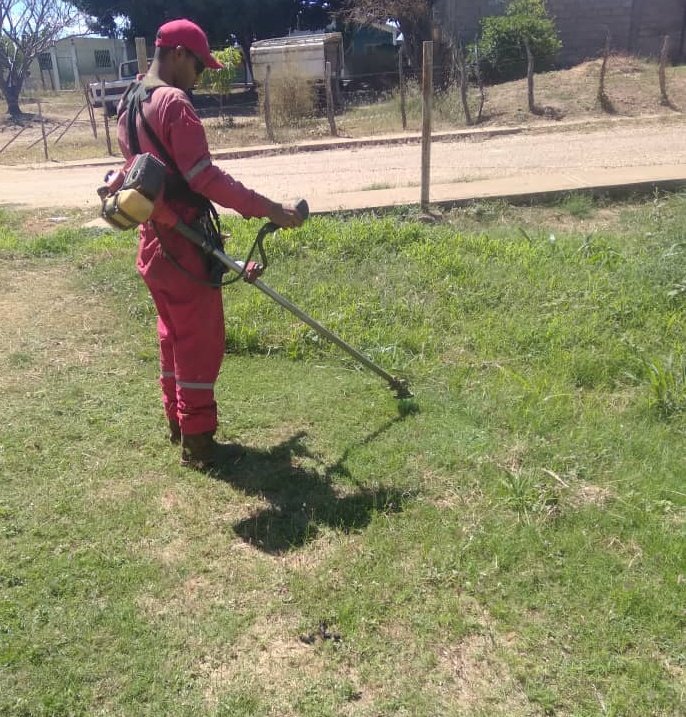
This will flatten the area as we cut the brush from right to left continuously moving forward as we clear the area.
Step 3
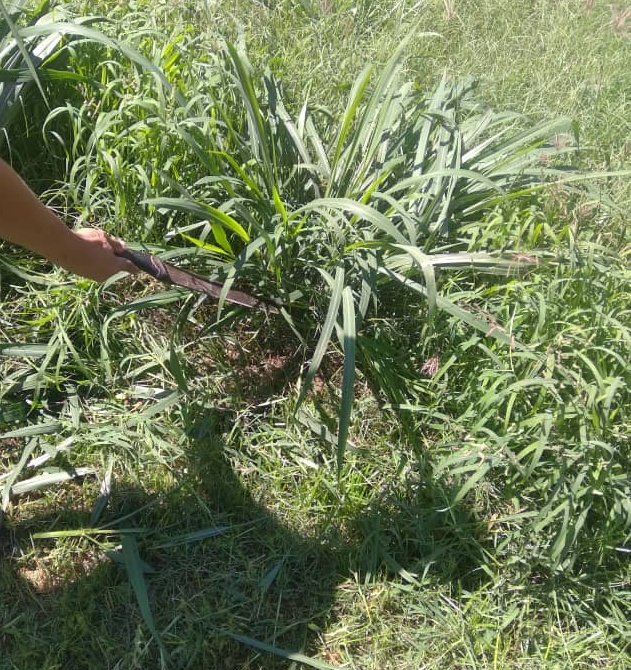
The last thing we did was to cut with the machete the biggest reeds so as not to force the brush cutter and to work more comfortably.
It was a very fast process in 30 minutes and everything was already tornadoed, it is very easy to work with this type of tools.
TIPS
Now I will share with you 2 techniques to cut grass or weeds.
1) The best cutting technique is to make a movement from right to left.
The main advantage of this technique is that the cuttings fall over the cutting area. This is also the fastest way to cut the lawn without much effort.
2)If your lawn is very tall, you have grass or hard weeds, it is best to make a cut with a movement in two different directions.
The first movement should be to the right, this will allow you to cut the top of the grass growth.

The second movement should be in the opposite direction, i.e. to the left, this will cut the rest and ensure that you do not leave any uncut areas.
Safety measures
It is very important to use safety measures to work with a weed cutter and avoid any type of accident.
Use the appropriate protective equipment for the task, any element of facial protection is good, glasses or goggles will help protect your eyes from the small fragments that fly out at the time of cutting.
Use ear protection as the machine makes a lot of noise and can disturb your concentration.
Wear high safety boots, as you can step on any sharp object and cut yourself.
Wear panties, long pants or a sweater to protect yourself from flying debris when you are mowing the lawn.
It was a pleasure for me to have shared the process of weeding my garden, I hope you liked it and that my recommendations when working with a weed cutter or brush cutter will be of great help to you.
BEFORE
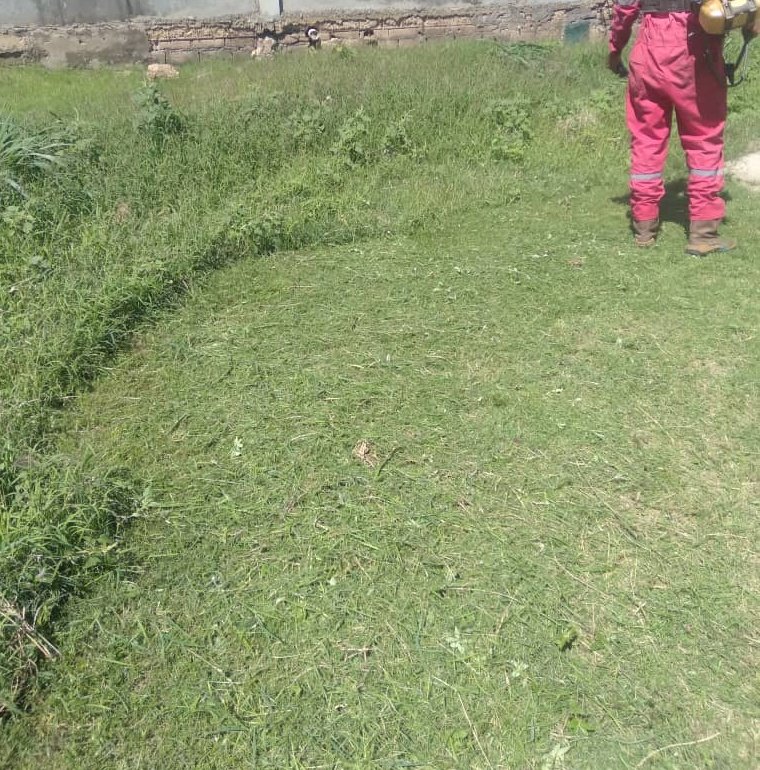
AFTER

God bless you!
SUCCESS AND BLESSINGS
The photos were taken from my Samsung A01 phone.
Translator used:Deelp
The photos were edited using the polish photo editor application and the separators using the canva application.

Hola amigos de hive y comunidad de Diyhub, es un placer saludarles y compartir con todos ustedes el proceso de desmalezamiento del frente de mi humilde hogar,ya que hay mucha malesa y hay que estar podandola constantemente,y asi evitar que se escondan animales ponsoñosos🦂🕷 y darle una bonita vista a nuestra entrada principal.
Es muy importante podar el césped y darle una buena vista a tu jardín,a la hora de traer visitas a tu casa,eso hablara muy bien de ti.
Sin más preámbulos,las herramientas que utilizamos en este proceso de limpieza fueron las siguientes:
👷♂️ DESMALEZADORA O MOTOGUADAÑA MARCA EFCO9530
👷♂️HILO DE CORTE HEXAGONAL
👷♂️1 CHALECO O ARNES PARA DESMALEZADORA
👷♂️1 MACHETE
👷♂️ 1 CUCHILLA
👷♂️2ltr DE GASOLINA Y ACEITE 2 TIEMPOS
Fue un proceso muy facil y rápido que les compartiré solo en 3 pasos..
Paso 1
Lo primero que hicimos fue bombear la desmalezadora para que el combustible llegue al carburador.
Luego bajamos la palanca roja para que tenga mejor comprensión y encienda con más rapidez
Después tiramos de la palanca para que nuestra motoguadaña o desmalezadora encienda,cabe destacar que ya habíamos mezclado nuestra gasolina con el aceite 2 tiempos
Paso 2
Luego de ponerle nuestro hilo hexagonal nos ubicamos frente de la malesa y aceleramos la desmalezadora hasta que valla cortando,es importante acelerar no mucho ni poco para que haga buen funcionamiento nuestra motoguadaña y nos haga un buen corte
El modo de trabajar con esta máquina desmalezadora es muy fácil,solo tienes que hacer movimientos firmes de derecha a izquierda y de izquierda a derecha.
De esta manera se va a ir aplanando la zona a medida que cortamos el monte de derecha a izquierda continuamente moviendonos hacia adelante una vez que se va limpiando el área.
Paso 3
Lo último que hicimos fue cortar con el machete el carrizo más grande para no forzar la motoguadaña y trabajar con más comodidad
Fue un proceso muy rápido en 30 minutos ya estába todo tornado,es muy fácil trabajar con este tipo de herramientas.
TIPS
Ahora les compartire 2 técnicas para cortar césped o la maleza.
1) La mejor técnica de corte es hacer un movimiento de derecha a izquierda.
La principal ventaja de esta técnica es que los esquejes caen sobre el área de corte. Esta también es la forma más rápida de cortar el césped sin mucho esfuerzo.
2) Si tu césped está muy alto, tienes hierba o maleza dura, lo mejor es realizar un corte con un movimiento en dos direcciones diferentes.
El primer movimiento, lo debes hacer hacia la derecha esto te permitirá cortar la parte superior del crecimiento del césped.
El segundo movimiento debe ser contrario, es decir, hacia la izquierda,con ello cortarás el resto y te asegurarás de no dejar superficies sin cortar.
Medidas de seguridad
Es muy importante utilizar las medidas de seguridad para trabajar con desmalezadora y evitar cualquier tipo de accidentes.
Usa el equipo de protección adecuado para la tarea,todo elemento de protección facial es bueno,anteojos o lentes protectores, te ayudarán a proteger los ojos de los pequeños fragmentos que salen disparados al momento del corte.
Utiliza protector auditivo ya que la maquina hace mucho ruido y puede perturbar tu concentración.
Utiliza botas de seguridad altas,ya que puedes pisar cualquier objeto punsante y te puedes cortar.
Utiliza bragas,pantalón largo o suéter para protegerte de los fragmentos que se disparan cuando estas cortando el césped
Fue un placer para mi haber compartido el proceso de desmalezamiento de mi jardín,espero que les haya gustado y les sirva de gran ayuda mis recomendaciones a la hora de trabajar con una maquina desmalezadora o motoguadaña.
ANTES
DESPUÉS
Dios me los bendiga
EXITOS Y BENDICIONES
Las fotos las tomé de mi teléfono Samsung A01.
Traductor utilizado:Deelp
Las fotos las edite mediante la Aplicación editor de fotos polish y los sepadores mediante la aplicación canva .
¡Excelente trabajo! Lástima que no publicaste hace seis meses, caundo me compré mi desmalezadora y andaba perdido... 😁
Muchas gracias,lastima,bueno no dudo que haya aprendido con facilidad a utilizarla.espero que algún consejo le haya servido de ayuda gracias nuevamente
Thank you for sharing this post in the DIYHUB Community!
Your content got selected by our fellow curator sharminmim & you just received a little thank you upvote from us for your great work! Your post will be featured in one of our recurring compilations which are aiming to offer you a stage to widen your audience within the DIY scene of Hive. Stay creative & HIVE ON!
Please vote for our hive witness <3
Que buen tutorial.
has brindado e l paso apaso y muy buenas recomendaciones. 10/10
Dios te bendiga siempre por toda tu capacidad. 💓
Amen amen,ati por apoyarme siempre 🤗
Muchas gracias Éxitos y bendiciones para ti😘🤗
Congratulations @afrofat1! You have completed the following achievement on the Hive blockchain And have been rewarded with New badge(s)
Your next target is to reach 100 upvotes.
Your next target is to reach 800 upvotes.
Your next payout target is 50 HP.
The unit is Hive Power equivalent because post and comment rewards can be split into HP and HBD
You can view your badges on your board and compare yourself to others in the Ranking
If you no longer want to receive notifications, reply to this comment with the word
STOPTo support your work, I also upvoted your post!
Check out our last posts:
Support the HiveBuzz project. Vote for our proposal!
This is an elaborate lecture and it will help people that deal with this instrument a lot.... I personally do handle them but not always Though
Thanks for sharing
Yes, that's right! I hope it can be instructive, thank you very much for your support! Regards
You're welcome
A good description of the correct process on how to strim, and the translation was clear. A few additional things...
Thanks for the post. 👍
Thanks for sharing more tips, I will take them into account when it comes to desblozar👍🏻.
Very Nice 👍
Keep up the good work 👍
Thank you very much for the apoyo👍🏻
You are highly welcome 😁😁
Nice work friend you have truly done well, and I hope you aren't stressed too much to get this done?
Thanks my friend, I don't get stressed easily, thanks for the support
You are welcome buddy
It is very neat and looks beautiful with a yard that has grass that is always tidied up.
Thank you very much friend👍🏻